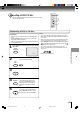
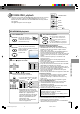
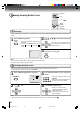
Recording a DVD/CD disc 2 You can record disc material in DVD, Audio CD, etc. onto a Video tape with this DVD/VCR. 1 4 3 5 Duplicating a DVD or CD disc Preparation: • Turn ON the TV and select the corresponding video input. • Press VCR DVD selector to select the VCR mode. (The VCR indicator will light.) • Load a cassette tape with the erase prevention tab intact. • Load a DVD/CD disc. 1 Press SP/SLP to select the desired tape speed SP or SLP.
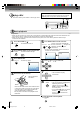
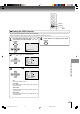
Basic playback (DVD) Playing a disc This section shows you the basics on how to play a disc. CAUTION Keep your fingers well clear of the disc tray as it is closing. Neglecting to do so may cause serious personal injury. 4 1 DVD VCD CD Display window 2 3, 5 STOP PLAY Basic playback Preparations: • When you want to view a disc, turn on the TV and select the corresponding video input connected to the DVD/VCR. This may include S-video or component video inputs which are exclusive to DVD playback.
To obtain a higher quality picture VCR DVD OPEN/CLOSE 1 PLAY Occasionally, some picture noise not usually visible during a normal broadcast may appear on the TV screen while playing a DVD video disc because the high resolution pictures on these discs include a lot of information. While the amount of noise depends on the TV you use with this DVD/VCR, you should generally reduce the sharpness adjustment on your TV when viewing DVD video discs.
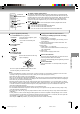
Basic playback (DVD) Playing a disc (continued) You can play discs at various speeds. REW SKIP / PLAY FWD PAUSE/STILL SLOW DVD VCD CD Playing in fast reverse or fast forward directions Press REW or FWD during playback. FWD REW REW: Fast reverse playback FWD: Fast forward playback Each time you press the REW or FWD button, the playback speed changes. DVD VCD To resume normal playback Press PLAY.
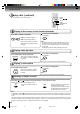
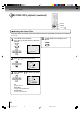
Advanced playback (DVD) MP3/WMA/JPEG playback OPEN/CLOSE 0–9 This player can play back the MP3/WMA/JPEG-data which has been recorded on CD-R or CD-RW. To produce the MP3/WMA/JPEG-data, you need a Windows-PC with CD-ROM drive and a MP3/WMA/JPEG-encoding Software (not supplied). The Apple-HFS-System cannot be played. PLAY STOP ENTER ▲/▼/ MP3/WMA playback CD 1 Press OPEN/CLOSE. OPEN/CLOSE 2 5 The disc tray will open. Place a disc on which MP3 or WMA files have been recorded onto the tray.
Advanced playback (DVD) MP3/WMA/JPEG playback (continued) OPEN/CLOSE 0–9 You can select your desired JPEG file on the file menu and picture menu. The selected JPEG file is automatically adjusted to the TV screen. (When the aspect ratio of the JPEG file is different to your TV screen, the black bar will appear at the top and bottom, or the both sides of the TV screen. SKIP / PLAY STOP TOP MENU MENU ENTER ▲/▼/ / JPEG CD playback 1 Press OPEN/CLOSE. 5 The disc tray will open.
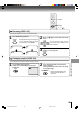
SETUP ENTER ▲/▼/ / Setting the JPEG Interval 1 Press SETUP in the stop mode. Press select “Picture”, then press ENTER. VCR MENU SETUP or to 4 Basic playback (DVD) You can continuously play back all JPEG files automatically. After the setting below, start playing the disc on which JPEG files have been recorded. To make SETUP screen disappear, press SETUP.
Advanced playback (DVD) MP3/WMA/JPEG playback (continued) SETUP ENTER ▲/▼/ / Setting the Select Files When playing back a CD containing a mixture of MP3, WMA and JPEG files, only MP3/WMA or JPEG files can be displayed on the file menu. 1 Press SETUP in the stop mode. Press or to select “Picture”, then press ENTER. VCR MENU SETUP 4 To make SETUP screen disappear, press SETUP.
ANGLE ZOOM ▲/▼/ / Zooming (JPEG CD) 1 Press ZOOM during playback. CM SKIP ZOOM Enlarged JPEG images are displayed. You can make the images even larger by repeatedly pressing ZOOM. 2 Press frame. / / / Basic playback (DVD) This unit will allow you to zoom in on the JPEG image. to view a different part of the SET + CH + CH – ENTER SET – You may move the frame from the centre position to UP, DOWN, LEFT or RIGHT direction.
Advanced playback (DVD) DISPLAY Zooming/Locating desired scene 0–9 ▲/▼/ / JUMP ZOOM ENTER CANCEL DVD VCD Zooming This unit will allow you to zoom in on the frame image. You can then make selections by switching the position of the frame. 1 Press ZOOM during playback. CM SKIP ZOOM The centre part of the image will be zoomed in. Each press of ZOOM will change the ZOOM 1 (x 1.3), 2 (x 1.5) and 3 (x 2.0).
Marking desired scenes The unit stores the points that you want to watch again up to 3 points. You can resume playback from each scene. ▲/▼ MARKER ENTER CANCEL DVD VCD Marking the scenes Press MARKER during playback. 2 Select the blank Marker using or . Then press ENTER at the desired scene. MARKER Marker 1 Marker 2 Marker 3 /Enter/Cancel/Marker • Repeat this procedure to set the other 2 scenes. Returning to the scenes 1 Press MARKER during playback or stop mode.
Advanced playback (DVD) Repeat playback/A-B Repeat playback PLAY MODE A-B RPT PLAY ENTER ▼/ DVD VCD CD 1 2 Repeat playback of Title, Chapter and Track Press PLAY MODE during playback or stop mode. SP/SLP PLAY MODE DVD VCD CD / A-B Repeat playback A-B repeat playback allows you to repeat material between two selected points. 1 Press A-B RPT during playback. A-B RPT The start point is selected. A DVD Press / or ENTER once or twice to select “Chapter” or “Title”.
Program playback/Random playback (CD) 0–9 You can arrange the order of tracks on the disc. PLAY MODE PLAY ▲/▼/ / ENTER CANCEL VCD CD Press PLAY MODE in the stop mode. SP/SLP PLAY MODE Play Mode : Off Repeat : Off /Enter/Play Mode 4 Press / or / to select “Program Playback” and press ENTER. CH – 2 SET + CH – SET – Press / or / to select the programming position. Use Numbered buttons (0–9) to input the Track numbers.
Advanced playback (DVD) Changing angles/Title selection/DVD menu ANGLE PLAY TOP MENU MENU ENTER ▲/▼/ / Changing angles When playing back a disc recorded with multi-angle facility, you can change the angle that you are viewing the scene from. 1 Press ANGLE during playback. The current angle will appear. COUNTER RESET ANGLE 2 Press ANGLE repeatedly until the desired angle is selected.
Function setup (DVD) Changing soundtrack language/ Setting surround sound AUDIO / Changing soundtrack language DVD VCD You can select the language when you play a multilingual disc. 1 Press AUDIO during playback. AUDIO SELECT The current soundtrack language will AUDIO appear. Audio type changes as follows each time you press AUDIO. LR Spatializer Off 2/8 Fra Dolby Digital Spatializer Off 2 In case of Video CD playback Press AUDIO repeatedly until the desired language is selected.
Function setup (DVD) Setting subtitles/Karaoke playback SUBTITLE AUDIO ▲/▼/ / Turning the subtitles on and off When playing back a disc recorded with subtitles, you can turn the subtitles on or off. Press SUBTITLE during playback until “Off” appears. ATR SUBTITLE Off Note: Depending on the DVD, you may not be able to turn the subtitles on even if they are recorded on it. Depending on the DVD, you may not be able to turn the subtitles off.
E.B.L. (Enhanced Black Level) To select the black level of playback pictures, set your preference and monitor’s ability. SETUP RETURN ENTER ▲/▼/ / Setting E.B.L. 1 Press SETUP in the stop mode or No Disc. or to select “Picture”. Press VCR MENU SETUP Language Picture Sound Parental Other 4 To make SETUP screen disappear, press SETUP or RETURN while the SETUP screen is being displayed. VCR MENU SETUP SET + CH – RETURN CH + /Enter/Setup/Return ENTER SET – 2 Press or ENTER, then press “E.B.L.”.
Function setup (DVD) Setting the aspect ratio of TV screen You can select the aspect ratio for your TV. The following pages describe the setup/operation in DVD mode. SETUP RETURN ENTER ▲/▼/ / Setting the aspect ratio of TV screen 1 Press SETUP in the stop mode or No Disc. or to select “Picture”. Press VCR MENU SETUP Language Picture Sound Parental Other SET + CH – CH + /Enter/Setup/Return ENTER SET – 2 Press or ENTER, then press “Tv Screen”. SET + CH – Off E.B.L.
DISPLAY Setting on screen display/Status display of disc SETUP RETURN ENTER ▲/▼/ / Setting on screen display On screen display can be switched on or off when you press the buttons. 1 Press SETUP in the stop mode or No Disc. or to select “Picture”. Press VCR MENU SETUP 3 / Press or ENTER to select “On” or “Off”. SET + Language Picture Sound Parental Other Language Picture Sound Parental Other CH – Off E.B.L.
Function setup (DVD) Dynamic Range Control DRC (Dynamic Range Control) enables you to control the dynamic range so as to achieve a suitable sound for your equipment. SETUP RETURN ENTER ▲/▼/ / Dynamic Range Control 1 4 Press SETUP in the stop mode. or to select “Sound”. Press VCR MENU SETUP To make SETUP screen disappear, press SETUP or RETURN while the SETUP screen is being displayed.
Parental control setting OPEN/CLOSE 0–9 Some discs are specified not suitable for children. Such discs can be limited not to play back with the unit. ▲/▼/ / SETUP RETURN ENTER CANCEL Parental control setting Press SETUP in the stop mode or No Disc. Press or to select “Parental”. Then press or ENTER. 1 VCR MENU SETUP Language Picture Sound Parental Other Password Parental Press ENTER to store the password.
Function setup (DVD) To change the parental level OPEN/CLOSE 0–9 SETUP RETURN ENTER ▲/▼/ / To change the parental level 1 Press SETUP in the stop mode or No Disc. or to select “Parental”. Press or ENTER. Then press 5 Press or to select “Password”, then press number buttons (0–9) to enter the password.
Temporary disabling of rating level by DVD disc OPEN/CLOSE 0–9 Depending on the DVD disc, the disc may try to temporarily cancel the rating level that you have set. It is up to you to decide whether to cancel the rating level or not. PLAY ▲/▼ RETURN ENTER Temporary disabling of rating level by DVD disc 1 Load a DVD disc and press PLAY or OPEN/ CLOSE on the unit (see page 42). 4 Enter the password with number buttons (0–9). Then press ENTER.
Function setup (DVD) Setting OSD language The setup language can be selected. SETUP RETURN ENTER ▲/▼/ / DVD VCD CD 1 Setting OSD language Press SETUP in the stop mode or NO DISC. or Press to select “Other”. VCR MENU SETUP 4 To make SETUP screen disappear, press SETUP or RETURN while the SETUP screen is being displayed. Language Picture Sound Parental Other VCR MENU SETUP SET + CH – RETURN /Enter/Setup/Return CH + ENTER SET – 2 Press or ENTER to select “OSD Language”.
Setting language You can select the language of “Menu”, “Subtitle” and “Audio” if their languages are recorded onto the disc more than one language. SETUP RETURN ENTER ▲/▼/ / Setting language 1 Press SETUP in the stop mode or No Disc. or to select “Language”. Press VCR MENU SETUP Language Picture Sound Parental Other 4 To make SETUP screen disappear, press SETUP or RETURN while the SETUP screen is being displayed.
Function setup (DVD) VCR DVD Selecting PROGRESSIVE scan The progressive scan capability provides the highest resolution pictures with less flicker and line structure. If you are using the Component video jacks, but are connecting the DVD/VCR to a standard (analog) television, set PROGRESSIVE to Off. If you are using the Component video jacks for connection to a TV or monitor that is compatible with a progressive scan signal, set PROGRESSIVE to On.
Others Language code list Enter the appropriate code number for the initial settings “Menu”, “Subtitle” and/or “Audio” (see page 65).
Others Troubleshooting Check the following guide for the possible cause of a problem before contacting service. SYMPTOMS POSSIBLE SOLUTIONS PAGE DVD/VCR DVD/VCR does not operate. • Make sure the power cord is plugged in. • Try another AC outlet. • Power is off, check fuse or circuit breaker. • Unplug unit, then plug it back in. • Select the DVD or VCR mode before operating. 5 – – 5 30,42 14~17 22 No picture. • Antenna connection is not correct or antenna cable is disconnected.
Specifications General Power supply Power consumption Weight Dimensions Tuner Antenna input/output RF channel output Color system Video head Audio track Hi-Fi frequency response Hi-Fi dynamic range F.FWD/REW time at 25˚C (77˚F) Applicable disc Frequency range S/N ratio Harmonic distortion Wow and flutter Operating conditions AC 120 V 60 Hz Operation: 18 W, Stand by: 2 W 7.7 lbs (3.5 kg) Width: 16-15/16 inches (430 mm) Height: 3-7/8 inches (99 mm) Depth: 8-13/16 inches (224.5 mm) 181 channel freq.
Others Limited warranty 70 J2D81001A (E)p68-BACK.
Others 71 J2D81001A (E)p68-BACK.
*J2D81001A* 04/06 K J2D81001A (E)p68-BACK.