DRAFT DVD Recorder &VCR DVR-RT501-S DVR-RT401-S DVR-RT301-S Register Your Product at www.pioneerelectronics.com (for U.S.) www.pioneerelectronics.
CAUTION RISK OF ELECTRIC SHOCK DO NOT OPEN The lightning flash with arrowhead, within an equilateral triangle, is intended to alert the user to the presence of uninsulated "dangerous voltage" within the product's enclosure that may be of sufficient magnitude to constitute a risk of electric shock to persons. CAUTION: TO PREVENT THE RISK OF ELECTRIC SHOCK, DO NOT REMOVE COVER (OR BACK). NO USER-SERVICEABLE PARTS INSIDE. REFER SERVICING TO QUALIFIED SERVICE PERSONNEL.
IMPORTANT SAFETY INSTRUCTIONS READ INSTRUCTIONS — All the safety and operating instructions should be read before the product is operated. RETAIN INSTRUCTIONS — The safety and operating instructions should be retained for future reference. HEED WARNINGS — All warnings on the product and in the operating instructions should be adhered to. FOLLOW INSTRUCTIONS — All operating and use instructions should be followed. CLEANING — The product should be cleaned only with a polishing cloth or a soft dry cloth.
DANGER VISIBLE AND INVISIBLE LASER RADIATION WHEN OPEN. AVOID DIRECT EXPOSURE TO BEAM. This product incorporates copyright protection technology that is protected by method claims of certain U.S. patents and other intellectual property rights owned by Macrovision Corporation and other rights owners. Use of this copyright protection technology must be authorized by Macrovision Corporation, and is intended for home and other limited viewing uses only unless otherwise authorized by Macrovision Corporation.
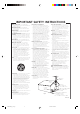
We Want You Listening For A Lifetime Selecting fine audio equipment such as the unit you’ve just purchased is only the start of your musical enjoyment. Now it’s time to consider how you can maximize the fun and excitement your equipment offers. This manufacturer and the Electronic Industries Association’s Consumer Electronics Group want you to get the most out of your equipment by playing it at a safe level.
Contents 01 Before you start Features .............................................................................8 Discs which can be played back ..................................... 9 Discs on which video can be recorded ........................ 10 Recording format ........................................................... 10 Disc playback in other players ...................................... 11 02 Controls and displays Front panel ....................................................................
Playing back a selected track ....................................... 42 Random playback .......................................................... 43 Repeat playback of selected track ................................ 43 Repeat playback of all tracks ........................................ 43 Playing back programs .................................................. 43 Playing back track by specifying the time ................... 43 MP3/WMA*/JPEG playback ..........................................
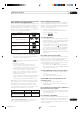
Before you start 01 Chapter 1 Before you start Recording function Features Not only can you playback and record video tapes, but you can also playback DVD discs or make recordings using DVD-RW, DVD-R discs with this unit. In addition, you can enjoy editing the programs you record. Playback function • A realistic, powerful, Movie Theater sound DVD-Video When connected to Dolby Digital and DTS compliant devices, you can enjoy realistic, powerful surround sound.
Before you start 01 Region management information Discs which can be played back In this unit, use only discs that meet the standard, such as those bearing the below logo marks on the disc label surface. If you use a non-standard disc, we cannot guarantee playback. Even if such a disc can be played back, we cannot guarantee the image or sound quality. The DVD logo is a registered trademark. Logo mark Media type Example: 1 DVD-Video Operating DVD-Video DVD-RW Ver.1.0 Ver.1.1 Ver.1.2 Ver.1.
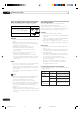
01 Before you start Discs on which video can be recorded Recording format To record video with this unit, use the discs below: This unit has two modes for formatting discs for recording: VR mode and Video mode. When a blank, new disc is loaded into this unit, the automatic format function starts to format the disc. (For the disc format setting in this step, see page 27.) Media type Logo mark DVD-RW Ver.1.0 Ver.1.1 Ver.1.2 Ver.1.1CPRM support VR mode DVD-R Ver.2.0 (Ver.2.
Before you start 01 Title/Chapter/Track A DVD-Video has large partitions called “Titles”, and smaller partitions within them called “Chapters”. A music CD has other partitions called “Tracks”. A number is allotted to each partition and these numbers are called “title numbers”, “chapter numbers” or “track numbers”. CHAPTER 1 CHAPTER 2 TITLE 2 CHAPTER 1 A disc recorded in this unit can be finalized. The disc can be played back in other players that can playback DVD-RW and DVD-R.
02 Controls and displays Chapter 2 Controls and displays Front panel PLAY button STOP button Cassette Loading Slot VCR EJECT button STANDBY/ON button REW (Rewind) button IR Remote senser FF (Fast Forward) button Disc tray VCR/DVD button DVD indicator OPEN/CLOSE button VCR indicator DVD/VCR common AUDIO (L/R)/VIDEO IN (LINE 2) jacks Display window CHANNEL –/+ buttons DVD S-VIDEO IN (LINE 2) jack DUBBING button REC button Rear panel RF OUT jack DVD COMPONENT OUT jacks DVD COAXIAL DIGITAL AUD
Controls and displays 02 Display window 2 4 P 1 No. Display 1 3 Description Lights during video tape playback. Video tape is temporarily stopped. Lights during video tape recording. P Progressive scanning mode. Timer recording display. XP/SP/LP/EP 4 DVD recording modes. XP, SP, LP or EP is selected in turn by pressing the REC MODE/SPEED repeatedly. SP/EP 2 VCR recording modes. SP or EP is selected in turn by pressing the REC MODE/SPEED repeatedly. 2 CD Appears when a CD is inserted.
02 Controls and displays Remote control 8 VCR Plus+ (page 58) Display the VCR Plus+ program screen. 9 RETURN (page 23, 45) Closes the menu window. 10 CANCEL Cancels input data in the setting mode (page 25); deletes the timer recording program (page 59, 61). 11 TITLE MENU/TOP MENU (page 34, 39, 42, 64) Selects titles of a DVD disc. 12 CH +/– (page 54) Use to select TV channels. / (page 23, 33, 37, 60) Up/down cursor buttons 13 TRK +/– (page 50) Use to adjust the VCR manual playback tracking.
Controls and displays Putting the batteries in the remote control 1 Open the battery compartment cover on the back of the remote control. 02 • The / / / are also used to navigate onscreen menu system. • You can directly access specific channels using numeric keys. • Each press of DVD/VCR, switches the screen between the DVD screen (DVD mode) and the VCR screen (VCR mode).
03 Connecting up Chapter 3 Connecting up Important • Before making or changing any rear panel connections, make sure that all components are switched off and unplugged from the wall outlet. Antenna connection If you are using an antenna system, follow these instructions. If you are a Cable TV subscriber, skip ahead to page 18 for the proper connections. ANTENNA TO DVD/VCR CONNECTION The DVD/VCR must be connected “between” the antenna and the TV.
Connecting up 03 DVD/VCR TO TV CONNECTION After you have connected the antenna to the DVD/VCR, you must connect the DVD/VCR to the TV. Below are 3 common methods of connecting your DVD/VCR to a TV. Find the type of TV you are using and follow the connection diagram. This DVD/VCR has a single 75 Ω output for connection to a TV. If your TV has separate UHF and VHF antenna inputs (numbers 2 and 3 below), use a splitter to connect the DVD/VCR to the TV for UHF and VHF reception.
03 Connecting up Cable TV connections Many cable companies offer services permitting reception of extra channels including pay or subscription channels. This DVD/VCR has an extended tuning range and can be tuned to most cable channels without using a cable company supplied converter box, except for those channels which are intentionally scrambled. If you subscribe to a special channel which is scrambled, you must have a descrambler box for proper reception.
Connecting up 03 Important • Make sure the TV/CABLE menu option is set to the “CABLE” mode. This DVD/VCR cannot receive scrambled programs since it does not contain a descrambler. In order to receive scrambled programs, your existing descrambler must be used. Descrambler boxes are available from cable companies. Consult your local Cable TV company for more information concerning connection to their descrambler equipment. There are many ways to connect your DVD/VCR to a cable system.
03 Connecting up Connections with the TV or audio component The exact arrangement you use to interconnect various video and audio components to the DVD/VCR is dependent on the model and features of each component. Check the Owner’s Manual provided with each component for the location of video and audio inputs and outputs. Connect to a TV with Audio/Video output You can enjoy playback by connecting the unit to a TV.
Connecting up 03 Connect to a stereo amplifier with audio output You can enjoy high quality audio by connecting the audio output to your amplifier. Connect the audio output jacks to any line-level inputs (such as AUX, DVD, CD, etc.) of an audio amplifier.
04 Getting started Chapter 4 Getting started Auto clock setting Preparation: You must connect the antenna or cable before connecting the AC cord to the power source. Wait 30 minutes with the power turned off, after the antenna or cable is connected, for the auto clock feature to activate. After the clock is set automatically, you may have to set the time zone and daylight saving time. (See page 26.) Press STANDBY/ON to turn on the DVD/VCR after the auto clock operation completed.
Getting started 04 5 Select any channel to receive a TV station in your area. The channel number will appear on the screen for about 4 seconds. 1 Press SETUP while the DVD and video tape is stopped. The SETUP MENU screen will appear.
04 Getting started Selectable languages: Setting the language You can choose the language of the menu screen, DVD menu, DVD audio and subtitles. Preparation: • Turn ON the TV and set it to the video input mode. • Select “LANGUAGE” from “SYSTEM SETUP”. For the procedure, see steps 1 to 3 in “Using the SETUP MENU” on page 23.
Getting started 04 Note Setting the parental control • The selected level will apply to operations executed after this. • The unit cannot restrict playback of some discs. • Some discs may not be encoded with specific rating level information though its disc jacket says “adult”. Parental control will not work with those discs. • If you forget the password, you can reset the recorder to its factory settings (see Resetting the recorder on page 89), then set a new password.
Getting started 04 STANDARD TIME (Time zone) Setting the clock The clock is set to the correct time automatically, but it can also be set manually. The clock can be set for daylight saving time and time zone. Preparation: • Turn ON the TV and set it to the video input mode. • Select “CLOCK” from “SYSTEM SETUP”. For the procedure, see steps 1 to 3 in “Using the SETUP MENU” on page 23.
Getting started 04 NEW DISC FORMAT Setting the disc You can format, protect, or finalize a disc. Preparation: • Turn ON the TV and set it to the video input mode. • Select “DISC SETUP” from “SYSTEM SETUP”. For the procedure, see steps 1 to 3 in “Using the SETUP MENU” on page 23. If you insert an unused disc, the disc is automatically formatted. If you use the DVD-RW (Ver.1.1/1.2), you can select the mode to be used for automatic format. Select “NEW DISC FORMAT” and select the mode from the list below.
04 Getting started FINALIZE UNDO FINALIZE To play a DVD disc recorded on this unit you must finalize the disc to insure compatibility with other DVD players. In addition if you are using a DVD-RW disc you must record in Video mode. You can cancel the finalization of a finalized DVD-RW (in VR mode). You cannot cancel the finalization for discs other than above. You can record or edit on a disc whose finalization has been cancelled. Select “UNDO FINALIZE”, and the screen below will appear.
Getting started 04 DIMMER (Brightness of the display window) TV SCREEN You may adjust the brightness or turn off the display on the front panel of the unit. Select “DIMMER” and select the display window status from the list below. You can select the TV screen size to suit the screen image. Select “TV SCREEN” and select screen size from the list below. AUTOMATIC: When the power is on, the display window appears bright. When the power is off, it appears dark.
04 Getting started LINE1 INPUT/LINE2 INPUT This unit comes with an S-Video input jack and Video input jack. When you use an S-Video or Video input jack, you must select the input mode. Select “LINE1 INPUT” (“LINE2 INPUT”) and select the mode from the following list. S-VIDEO (for DVD only) The video signal is input only from the S-Video input jack. Setting the audio This section describes audio settings. Preparation: • Turn ON the TV and set it to the video input mode. • Select “AUDIO” from “AV SETUP”.
Getting started 04 EXTERNAL AUDIO INPUT INITIAL REC TO The audio mode for the audio input jack can be selected, choosing either stereo or monaural. Select “EXTERNAL AUDIO INPUT” and select from the list below. You can select the recording media that is first displayed in the item “REC TO” on the timer recording screen. Select “INITIAL REC TO” and select “DVD” or “VCR”. STEREO: The sound is treated as stereo sound. L CH: The sound is treated as the monaural sound of the left channel.
04 Getting started ADD/DELETE (channels) Setting the channel This DVD/VCR is equipped with a channel memory feature that allows you to skip channels up or down to the next channel set in memory, hence skip over unwanted channels. Before selecting channels, they must be programmed into the DVD/VCR’s memory. In addition to normal VHF and UHF channels, this DVD/ VCR can receive up to 113 Cable TV channels. To use this DVD/VCR with an antenna, set the TV/CABLE menu option to the TV mode.
Playback 05 Chapter 5 Playback playback procedure DVD-Video VR mode Video mode DVD-R CD 3 Press OPEN/CLOSE to close the disc tray. “READING” appears on the screen and some discs start playback automatically. • A menu screen may appear on the TV screen, if the disc has a menu feature. In this case, press , , , or ENTER to operate a menu feature. 4 5 Press PLAY to start playback. Press STOP to end playback. • The DVD/VCR memorizes the stopped point, depending on the disc.
05 Playback Playback by selecting a title VR mode Video mode DVD-R When playing back a recorded disc, you can display the title menu and select the title to be played back. 2 Press or to select the title you want to playback. In case the disc includes more than 10 titles, you can turn to the next or the previous page. Press , then press or to display next/previous page. To return to normal use, press .
Playback 05 Checking media information DVD-Video VR mode Video mode 1 Press DISPLAY. Media information will appear. The number of titles and present title number DVD-R Playback elapsed time present time present channel Playback condition (playback, stop, pause and record) Various information on the loaded disc can be displayed on the TV screen.
05 Playback Fast forward playback Special playback DVD-Video VR mode Video mode DVD-R CD Note • There may be a slight delay between pressing the button and the function activation. • The unit is capable of holding a still video image or On screen display image on your television screen indefinitely. If you leave the still video image or On screen display image displayed on your TV for an extended period of time, you risk permanent damage to your television screen.
Playback 05 Commercial skip / Locating a specific scene DVD-Video VR mode Video mode DVD-R Locating a specific scene Specify the time recorded on the disc, chapter or title to playback. 1 Press PLAY MODE. The play mode screen will appear. TIME SEARCH CHAPTER SEARCH TITLE SEARCH REPEAT 2 Press or to select “TIME SEARCH”, “CHAPTER SEARCH” or “TITLE SEARCH”, and press ENTER. TIME SEARCH: Input the time until the playback is restarted. CHAPTER SEARCH: Select the chapter number to be played back.
05 Playback One touch repeat Repeat playback This feature can be used to repeat the last 10 seconds of viewed material, then playback as normal. DVD-Video VR mode Video mode DVD-R CD Press ONE TOUCH REPEAT during playback. The video returns to a point 10 seconds before and playback resumes. A-B repeat playback A-B repeat playback allows you to repeat material between two selected points. 1 Press REPEAT A-B during playback. The start point is selected. A 2 Press REPEAT A-B again.
Playback 05 Title selection / DVD menu DVD-Video DVD menu Some DVDs allow you to select the disc contents using the menu. When you playback these DVDs, you can select the subtitles language, soundtrack language, etc. using the DVD menu. 1 Press DVD MENU during playback. The DVD menu appears on the screen. • Press DVD MENU again to resume playback at the scene when you pressed DVD MENU. 2 Press / or / to select the desired item. 3 Press ENTER. The menu continues to another screen.
05 Playback Changing angles / Zooming DVD-Video VR mode Video mode DVD-R Changing angles When playing back a disc recorded with multi-angle facility, you can change the angle that you are viewing the scene from. 1 Press ANGLE during playback. The current angle will appear. 2 Press ANGLE repeatedly until the desired angle is selected. Zooming This unit will allow you to zoom in on the frame image. You can then make selections by switching the position of the frame. 1 Press ZOOM during playback.
Playback 05 Changing soundtrack language / Subtitles Changing soundtrack language You can select the language when you play a multilingual disc. 1 Press AUDIO during playback. The current soundtrack language will appear. DVD-Video 2 Press AUDIO repeatedly until the desired language is selected. The on-screen display will disappear after a few seconds. Turning the subtitles On and Off When playing back a disc recorded with subtitles, you can turn the subtitles on or off.
05 Playback The CD Track Info screen Press TITLE MENU/TOP MENU. The TRACK INFO screen will appear. CD This section describes the TRACK INFO screen where music CDs can be played back using the various operations.
Playback 05 Random, repeat and program play CD Repeat playback of selected track 1 Press or to select the track number you want to repeat playback and press . 2 Press or to select “REPEAT TRACK” from the menu list and press ENTER. 3 Press PLAY. The selected track will be played back repeatedly. To cancel repeat track playback, select “REPEAT TRACK” from the menu list again, and press ENTER. Repeat playback of all tracks 1 Press or to select “REPEAT ALL” from the menu list and press ENTER.
05 Playback MP3/WMA/JPEG playback WMA and JPEG files can only be played back with RT501. Using the BROWSER screen 1 Press TITLE MENU. The BROWSER screen will appear. CD BROWSER MP3 and WMA files can be played back. Also, you can display JPEG files on the TV screen and enjoy them as a slide show. Some discs may not play due to the condition of the recording. Toulouse-Lautrec popArt Grammy03_01.mp3 Grammy03_02.mp3 Grammy03_03.mp3 Grammy03_04.mp3 Grammy03_05.mp3 Grammy03_06.mp3 Grammy03_07.
Playback 05 Playing back MP3/WMA files 1 MP3 CD • MP3 files must have the extension letters “.mp3”. • Standard, sampling frequency, and the bit rate: MPEG-1 Audio 32kHz, 44.1kHz, 48kHz 32kbps to 320kbps (constant bit rate or variable bit rate) • The recommended recording setting for high quality sound is 44.1kHz sampling frequency and 128kbps of constant bit rate. Press or to select MP3 or WMA file. • In case the disc includes more than 11 files, you can turn to the next or the previous page.
05 Playback 1 Playing back JPEG files JPEG files can only be played back with RT501. Press or to select JPEG file. • In case the disc includes more than 11 files, you can turn to the next or the previous page. (See page 42.) JPEG CD BROWSER JPEG files must have the extension letters “.jpe”, “.jpeg” or “.jpg”. /popArt Alfred Ia Guigne.jpg Alone.jpg Ambassadeurs-Aristide_Bruant.jp Arlstide Bruant.jpg At_the_Moulin_Rouge.jpg Clown Cha-U-Kao.jpg Dancer Seated.jpg EI Dorado.jpg Galerie 65 Cannes.
Playback 05 2 Progressive scan DVD-Video VR mode Video mode Press PLAY to start playback. DVD-R The unit supports the progressive scanning system as well as the conventional interlaced scanning system. If your TV is equipped with component video input jacks which support the progressive video input, you can enjoy higher picture quality by making the progressive scanning mode active. P • To make the progressive scanning mode inactive, press PROGRESSIVE in the stop mode.
05 Playback Loading and unloading a cassette tape VCR Use only video cassette tapes marked . and • Cassettes marked “VHS” (or “S-VHS”) can be used with this video cassette recorder. However, S-VHS recording is not possible with this model. • This model is equipped with SQPB (S-VHS QUASI PLAYBACK) that makes it possible to playback SVHS recordings with regular VHS resolution. • HQ VHS is compatible with existing VHS equipment. Loading Push the center of the tape until it is automatically inserted.
Playback 05 Cassette tape playback 1 Load a prerecorded tape (When loading a cassette tape without the erase prevention tab, playback will start automatically). VCR 2 To start playback Press PLAY. Playback will start. “ ” will appear on the screen for about 4 seconds. To stop playback Press STOP once. The tape will stop but remain fully loaded and ready to play. “ ” will appear on the screen for about 4 seconds. To rewind the tape or forward it rapidly Press STOP. To rewind the tape: Press REW.
05 Playback Special playback VCR Note • The audio output is muted during SPEED SEARCH, STILL, FRAME ADVANCE and SLOW MOTION. • During picture search mode there will be noise bars which are caused by the system. • The Special Playback will automatically change to playback after approx. 5 minutes to protect the video tape against excessive wear. Repeat playback The entire video tape will be played until its end. The tape will then automatically rewind to the beginning and the playback will be repeated.
Playback 05 ZERO RETURN function / Video index search system Switching the display between clock and counter Press CLOCK/COUNTER. The clock and tape counter alternate with each other in the display. VCR ZERO RETURN function This function makes tape rewinding stop at the counter “00:00:00” position automatically. Video index search system This function enables you to locate the beginning of any recording made on the VCR.
06 Recording Chapter 6 Recording Read this before recording on disc This section explains things you must know to record onto a disc. Read it before attempting to record. Recording modes There are 4 modes for recording on disc. Recording time and quality vary according to mode. Recording Recording time Quality mode Types of disc You can use DVD-RW and DVD-R discs to record video. DVD-RW discs • Ver 1.1/1.2 discs can be formatted for recording in either of the two modes: the VR mode or the Video mode.
Recording 06 Disc remaining time Note VR mode • Recording is possible as long as there is available space on the disc. (Finalized discs can be recorded by cancelling the finalization, see “UNDO FINALIZE” on page 28.) • Erasing unnecessary title frees up available space on the disc. (Titles can be erased from finalized discs by first undoing the finalization. See “UNDO FINALIZE” on page 28.
06 Recording Recording a TV program VR mode Video mode DVD-R VCR You can record programs you watch on TV onto video tapes or DVDs. Preparation: • Turn ON the TV and set it to the video input mode. • Load a recordable DVD or video tape into the unit. • Press DVD/VCR to select the appropriate mode. 1 Press REC MODE/SPEED to select the recording mode. The recording mode will appear on the TV monitor and change every time REC MODE/SPEED is pressed.
Recording 06 4 Press REC. When recording starts, “ ” appears on the screen for about 4 seconds. Note • When recording onto a DVD, it takes some time from when you press REC until recording actually starts. Press REC a little before your preferred starting point. With a video tape, recording starts almost at the same time you press REC. • If the erase prevention tab of video tapes is removed, the tape will eject when REC is pressed for recording.
06 Recording One-touch Timer Recording (OTR) VR mode Video mode DVD-R VCR The One-touch Timer Recording feature provides a simple and convenient way to make a timed recording. Preparation: • Turn ON the TV and set to the video input mode. • Load a recordable DVD or video tape into the unit. • Press DVD/VCR to select the appropriate mode. Example: One-touch Timer Recording for 30 minutes. 1 Press REC MODE/SPEED to select the recording mode. For the recording mode, see the step 1 on page 54.
Recording 06 VCR Plus+® programming system VR mode Video mode DVD-R VCR 2 Press or to select “GUIDE CH SET” and press ENTER. A window appears to set a guide channel number and the corresponding tuner channel number. What is the VCR Plus+ programming system? SETUP MENU VCR Plus+ system is a timer programming system which simplifies timer recording programming.
Recording 06 Setting the timer program using the VCR Plus+ system 4 VCR Plus+ The VCR Plus+ system simplifies timer recording so that you just enter a PlusCode number (which you can find in your TV listings guide) for the program you want to record, tell the recorder whether you want to record it just once or regularly, and then select the DVD or the VCR for recording.
Recording 06 7 Press TIMER REC. The timer indicator “ ” will appear on the display and the unit stands by for recording. • If the program is DVD recording only, the unit will change to VCR mode automatically. (The DVD mode cannot be selected.) • If the program is VCR recording only, the unit will change to DVD mode automatically. (The VCR mode cannot be selected.) • If the programs are DVD and VCR recording, the unit will turn off.
06 Recording 1 Press SETUP. The SETUP MENU screen will appear. ONCE: Recording on the selected “DATE” EVERY SUN: Recording every Sun. EVERY MON: Recording every Mon. SETUP MENU TIMER REC SET EVERY TUE: Recording every Tue. SYSTEM SETUP EVERY WED: Recording every Wed. AV SETUP REC SETUP EVERY THU: Recording every Thu. CH SETUP OTHER EVERY FRI: Recording every Fri. 2 Press or to select “TIMER REC SET” and press ENTER. The TIMER REC SET screen will appear. EVERY SAT: Recording every Sat.
Recording 06 10 Press or to select “REC MODE” and press ENTER. The recording modes for the media selected in “REC TO” item are listed. Select the recording mode and press ENTER. For the recording modes in VCR, see page 48, and for the recording modes in DVD, see page 52. In case timer programs-overlap Do not overlap timer programs as portions of the conflicting programs will be lost. The first recording time has priority over the next recording time as shown in the diagram below.
06 Recording Stereo recording and playback The VHS Hi-Fi audio system permits high fidelity recording of MTS STEREO TV broadcasts. When a MTS STEREO broadcast is received, the word “STEREO” will appear on the screen and the program can be viewed or recorded in stereo. The Hi-Fi STEREO recording procedure is the same as for normal recordings. Note • When using a Cable TV system, stereo TV programs may be transmitted over a mono Cable TV channel.
Editing 07 Chapter 7 Editing Editing the disc This section explains how to edit the recorded contents on DVD-RWs. However, the items that you can edit vary with the recording formats. In VR mode, you can edit various title menus, whereas in Video mode, you can edit only a few items. Title menu When the content is recorded, a title name that includes the date, time, channel number and other information is created automatically.
07 Editing Creating a playlist Editing a playlist VR mode VR mode You can create and edit the playlist based on the original title. 1 Press TITLE MENU. The title menu will appear.
Editing 07 3 Press ENTER. The keyboard screen will appear. Changing a title name VR mode 4 Use the keyboard screen to enter the title name. Family Letters RETURN Exit Numbers Signs 1 < > ( . g h DISPLAY OK 2 # a i j b 4 5 q d e l m n 5 k 7 p 3 c 6 8 r s t u CANCEL f Back DISPLAY OK o 9 v w x y z 0 STOP Space bar Caps Press DISPLAY to return to the title menu.