instruction Manual Orion StarBlast 6 Astro Telescope ® #9964 Customer Support (800) 676-1343 E-mail: support@telescope.com Corporate Offices (831) 763-7000 Providing Exceptional Consumer Optical Products Since 1975 89 Hangar Way, Watsonville, CA 95076 IN 330 Rev.
Congratulations on your purchase of an Orion StarBlast 6 Astro Telescope. Our new StarBlast 6 is easy to use and requires very little assembly. The StarBlast 6 will give you breathtaking views of the Moon, planets, and even deep-sky objects like the Orion Nebula. These instructions will help you set up and use your StarBlast 6 telescope, please read them thoroughly.
the telescope determines the magnifying power. Magnification is discussed in more detail in the Using Your Telescope section. 2 EZ Finder II reflex sight: This is a special “finder” that helps you aim the telescope and locate objects in the sky for viewing. The EZ Finder II generates a red LED “dot” that shows where your telescope is aimed. The use of the EZ Finder II is discussed in the Getting Started section. 12 10mm Sirius Plössl eyepiece: The higher-power eyepiece that comes with the StarBlast 6.
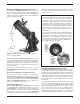
then a flat washer onto each of the socket-head cap screws. Attach one of the two tube rings (5) to the base bracket (18) with a washer-equipped screw using the included hex key (19) (Figure 3). Rotate the base bracket 180° so the remaining attachment hole is accessible. Attach the remaining tube ring to the base bracket with the remaining washerequipped screw using the hex key. Be sure to orient the tube rings so the knurled ring clamps on the rings are on the same side.
Altitude and Azimuth (Aiming the Telescope) The StarBlast 6 altazimuth base (9) permits motion along two axes: altitude (up/down) and azimuth (left/right). See Figure 5. Moving the telescope up/down and left/right is the “natural” way people aim objects, which makes pointing the telescope intuitive and easy. Altitude Azimuth sharp focus until the image starts to blur again, then reverse the rotation of the knob, just to make sure you’ve hit the exact focus point.
skies and a bright setting is used under light-polluted skies or in daylight. Azimuth adjustment knob Power knob Battery casing Altitude adjustment knob new battery under the battery lead with the positive (+) side facing down and replace the battery casing. Figure 7. The EZ Finder II superimposes a tiny red dot on the sky, showing right where the telescope is pointed. Mounting bracket Figure 6. The EZ Finder II reflex sight.
a star is - the brighter a star is, the lower its magnitude will be. A good star to remember for this is Megrez (mag. 3.4), which is the star in the “Big Dipper” connecting the handle to the “dipper” (Figure 8). If you cannot see Megrez, then you have fog, haze, clouds, smog, or other conditions (such as light pollution) which are hindering your viewing. When you observe any astronomical object, you are watching a moving target.
To calculate the magnification of a telescope-eyepiece combination, simply divide the focal length of the telescope by the focal length of the eyepiece.
C. The Planets The planets don’t stay put like the stars, so to find them you should refer to “This Month’s Sky Summary” in the Learning Center section of our website (telescope.com). Venus, Jupiter, and Saturn are the brightest objects in the sky after the Sun and the Moon. Your StarBlast 6 is capable of showing you these planets in some detail. Other planets may be visible but will likely appear star-like.
drawtube Reflection of primary mirror clip Collimating is relatively easy to do and can be done in daylight. To check collimation (mirror alignment), remove the eyepiece and look down the focuser (4). You should see the secondary mirror (17) centered in the drawtube, as well as the reflection of the primary mirror (16) centered in the secondary mirror, and the reflection of the secondary mirror (and your eye) centered in the reflection of the primary mirror, as in Figure 10a.
The tilt of the primary mirror is adjusted with three springloaded collimation thumbscrews on the back end of the optical tube (bottom of the primary mirror cell); these are the wide thumbscrews. The other three thin thumbscrews lock the mirror’s position in place; these thin thumbscrews must be loosened before any collimation adjustments can be made to the primary mirror. To start, turn the thin thumbscrews that lock the primary mirror in place counterclockwise a few turns each (Figure 13). Figure 11.
Star-Testing the Telescope When it is dark, point the telescope at a bright star and accurately center it in the eyepiece’s field of view. Slowly de-focus the image with the focusing knob. If the telescope is correctly collimated, the expanding disk should be a perfect circle (Figure 15). If the image is unsymmetrical, the scope is out of collimation. The dark shadow cast by the secondary mirror should appear in the very center of the out-of-focus circle, like the hole in a donut.