
Installation Guide
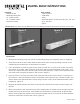

Included:
- Mantel (Shelf)
- Wood Mounting Cleat
- (3) 3” Wall screws
- (2) 1” Mantel screws
- Instruction Sheet
Tools needed:
- Tape measure
- Stud finder
- Level
- Drill with phillips screw-driver bit, plus 1/8” and
3/16” drill bits
- Pencil
Instructions:
1. Remove the mounting cleat from inside of mantel by pulling loose (glued in place for shipping).
2. Select the location for the mantel and then mark the location for the mounting cleat-be sure to
compensate for the thickness of the mantel’s top panel.
3. Use a stud finder to locate (3) studs for the cleat to screw into, as close to the center of the man-
tel location as possible. Mark locations on the cleat and pre-drill through the cleat using a 3/16”
drill bit (it is important to pre-drill through cleat to avoid splitting). Using a level, attach the cleat
to the wall studs using the provided 3“ wall screws. (figure 1)
4. Once the cleat is secure to your wall studs, place the shelf on the cleat so that it is resting in its
final location. Select and mark locations on the back of the mantel for the 1”mantel screws. You
want to make sure that the mantel screws will go into the cleat in areas without the wall screws
interfering. (figure 2)
5. Remove the mantel and pre-drill holes in the top of the mantel for the wall screws using a 1/8”
drill bit.
6. Return the mantel to the cleat and secure it by screwing the (2) mantel screws through your pre-
drilled holes into the wood cleat. Note: Make sure the mantel is pushed firmly up against wall
before securing with the mantel screws-it may be helpful to have a second set of hands hold the
mantel in place while you drive the screws. (figure 2)
figure 1 figure 2
MANTEL SHELF INSTRUCTIONS
figura 1 figura 2
INSTR MTL RUSTIC
Please note: Your mantel may be dierent than the example pictured, but the install instructions are the same.