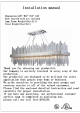
136" W12” H14" L20 SAFETY Warning: MAKE SURE THE ELECTRICITY TO THE WIRES YOU ARE WORKING ON IS SHUT OFF.BY EITHER REMOVING THE FUSE OR TURNING OFF THE CIRCUIT BREAKER. CAUTION = Be lore assembling the lighting [ix tire, please read all instructions carefully ALL frame & crystal components are fragile, please handle with care.
L367 W12” H14” L20 step 1 L36”7 W12” H14” L20 part picture Description Qty | Check list P8 | 96%Metal Bottom plate | 1 A 12"Crystal rod 56 B 12"Crystal rod ¥ C 12"Crystal rod 61 Please use the parts list to ensure you are not missing any parts PARTS LIST part picture Description Qty | Check list ZA = 4" Junction box 1 7B e Mounting bracket 1 ZC 12%Metal coining plate 1 ZD g_ Knurled nut 4 Pl ¥ Plastic 1 P2 % Labile adjustable else 8 Power Cord Steel wire Socket 20 P6 85.
136" Wiki” H14" L20 Step 2 Canopy installation instructions 3 = Hot wire = Neutral wire = Ground wire L36”7 W12” H14” L20 Important . This product must be installed in accordance with the local installation codes by a person familiar with construction and operation of this product and the hazards involved. Black wire from ceiling(junction box) attaches to "L"wire from the fixture. White wire from ceiling((junction box) attaches to "N"wire from the fixture.
02 03 136" W12” H14" L20 Frame Assembly Diagram L36” W12 H14” 120 Step 3 Frame Assembly Instructions Installation: Please read all instructions carefully. Before you proceed to install, make sure that the power supply )% ig turned off and remains off until installation is complete. Please note that each part has been assigned a number. Please proceed in a numerical order. 1. Fix the Mounting bracket (01 to the ceiling. Fix the lamp body(02) to the mounting bracket (01) with knurled nuts(03). 3.
136" Wiki” H14" L20 Step 4 Crystal Dressing Instructions 1. Hang Crystal:A, B, C. ABCBABCBCABCBABCBABCBABCBABC 2 (10 5000 400 400 Ao (0 100 o CoAoCoAoCoAoColoCoAoCoioColoCoAoCoroCoAD B Ot ey COLOMBO industry ACBABCBACBCBABCBABCBABCBACEB L36”7 W12” H14” L20 Crystal Dressing . oy Diagram éi When dressing the chandelier .
L36” W12” H14” L20 Congratulations ! You are now done installing your fixture. Sit back and admire each crystal as it will become the statement piece for your room/house. If you require any additional assistance, please contact us. Thank vou. L36” W12” H14” L20 Cleaning and Maintenance of Chandelier Frame The finish on our chandelier frames and fixture frames is protected by a durable coating of lacquer. To clean, use a clean, soft, dry cloth.
L36” W12” H14" L20 Warranty The finish and frame of your new chandelier or [mixture are warranted for a period of from the date of purchase. Our company will at its option, repair or replace any frame that has a defect in the material or workmanship during the warranty period. All crystals are guaranteed for their original quality during the life of the chandelier. Breakage is not covered by this warranty.