AVIAh Portable Multimedia Player/Recorder User’s Manual Thank you for purchasing the Ovideon AVIAh Portable Multimedia Player/Recorder/TV. Read this manual carefully before using the AVIAh. A good understanding of its features and operation will allow you to achieve optimum performance and enjoyment. Please keep this manual for future reference.
General Features * What is AVIAh? The Ovideon AVIAh Portable Multimedia Player/Recorder/TV features one of the world’s first implementations of OLED (Organic Light Emitting Diode) technology in a portable media recorder/player/TV. The AVIAh is a personal TV receiver (Off Air or Cable) with program recording and playback capability. The Ovideon AVIAh also features a Multi-Media Video Player, MP3 and WMA Music Player, JPEG slide show viewer and audio/video recorder.
TV/Cable Ready Tuner and Recorder Connect the included telescoping antenna or attach a cable line to your AVIAh and tune in your favorite shows or sports programs. You can watch your favorite programs and record them! While you’re at it, you can also rewind and fast forward through them too! Voice Recorder The integrated Voice recorder allows you to record meetings and conversations or just to take notes. It’s a great way to remember your next appointment or to create a to-do and shopping list.
Contents General Features 2~3 What is included in the box? 7 Controls and Connections 8 Important Product Safety Instructions 9~11 Before Using How to turn the power ON/OFF? How do I connect to my computer and how do I download files? Can I format the AVIAh internal Hard Drive? My Portable Media Player is displaying a “There is not enough HDD space” message.
When Watching TV [NTSC System] When Watching TV [PAL System] When Listening to the Radio [Option] When Displaying an Image File Can I change the Background Images of the On Screen Display? When Playing a Moving Picture File When Playing Audio Files Does the Portable Media Player have an Audio Equalizer? Can I create Playlists? When Recording Voice 23~24 25~28 29~30 31~32 33 34~36 37~39 40 41~43 44~45 Contents How to Operate each Mode How to perform System Set Up Picture Adjustment System Setup Setting O
Contents Other Functions Installing Windows 98 SE/ME Driver Upgrading Firmware Installing TransC Software on your PC Using AVIAh TransC * AVIAh TransC Conversion Program 50 51 52 53~58 54 Product Specifications & Features 59 Product Inquiry & Customer Service 60-61 To ask for our service through the Internet Notices FCC Information 6 Trouble Shooting 62 PRODUCT WARRANTY 63 Limited Warranty 64-65
Earphone / Ferrite Core DC Adapter AVIAh Installation CD Power Supply Cord Portable Multimedia Recorder Audio / Video In/Out Cable Indoor Antenna Cable / Ferrite Core VOL CH Carrying Case Battery Detachable Antenna for Outdoor USB Cable User s manual Accessories are subject to change without notice.
AVIAh OLED SCREEN JOG BUTTON Portable Multimedia Recorder BATTERY VOLUME UP/DOWN VOL CH Top/Bottom Side TV ANT EARPHONE ON/OFF HOLD MIC DISP MODE OUT IN AV IN/OUT 8 CHANNEL UP/DOWN Left/Right Side REC Controls and Connections Front/Rear REC DISP USB DC IN MODE USB DC IN 4.
CAUTION! Do not attempt to open and service this product yourself. Doing so may further damage the product. If any service is required, please contact the location of purchase or our website (www.ovideon.com). WARNING! Copying CD, music, video, image files for sales purpose violates the copyright law.
Important Product Safety Instructions 10 The plug should fit into the power outlet completely. When unplugging the power supply cord, be sure to grasp the power supply plug firmly and remove. When using a power strip, do not overload it by connecting too many devices. Do not place the power supply cord near heat sources. Do not touch the power supply cord when your hands are wet. When the power plug pins are contaminated with dirt; wipe them clean before plugging into the outlet.
When thunder or lightening occurs, do not watch TV. When cleaning this unit, wipe with soft clean cloth. Do not use wet cloth, polishing agent, benzene, wax, or alcohol. Only use specified batteries. Do not substitute. Do not put this unit into heating appliances such as a microwave or oven. Do not damage the battery by sharp objects (awl, knife). Do not short circuit the battery contacts. Do not use this unit while driving or walking. (You may cause or be involved in an accident).
Before using How to turn the power ON/OFF? Pull and hold the Sliding Switch to the ON/OFF position for 3 seconds, then release. The green lamp will flicker and the AVIAh will turn on. Green lamp will flicker. After boot up, the home page will appear. To turn the power ON/OFF, pull and hold the Sliding Switch to the ON/OFF position, then release. If using the AC adapter; turn the power ON/OFF using the Sliding ON/OFF Switch AFTER the green lamp turns off.
When connecting this unit to your computer for an extended period of time, check that the battery has a sufficient charge. If the battery is running low please connect the AC adapter immediately to avoid any loss of data. (E.g.) WINDOW XP Connect the AVIAh to your computer with the USB cable. After connecting, the PC recognizes AVIAh as new hardware. The AVIAh will appear as a logical HDD on your PC. After finishing all downloads, execute "Hardware Safe Removal".
Before using Can I format the AVIAh internal Hard Drive? Yes, but it is not necessary to do so. The AVIAh comes ready to use. If you desire to format the HDD then first backup all of the files contained in the "Systems Folder" of the AVIAh before formatting the hard drive (HDD) of this unit. After formatting the HDD, make a "System Folder" on the AVIAh HDD and copy the back up files into the folder. This message will appear on the screen of the AVIAh when connected to the PC via USB.
My battery ran out while I was connected to my PC via the USB cable and now my Portable Media Player will not boot up. What can I do to fix this problem? If you encounter a condition as described above there may be file errors or file access errors on the Portable Media Players Hard Drive. To check and fix any file errors please follow the procedure outlined below. Before using My Portable Media Player is displaying a "There is not enough HDD space" message.
Before using 16 In order to check the file integrity of the Players HDD and to fix any errors from Windows Start Menu go to Start>RUN. In the RUN prompt window type ‘CMD’ and hit the ‘ENTER’ Key. The DOS prompt will open. In the DOS prompt type ‘CHKDSK f: /f’ and press the ENTER key.
Yes, files stored in the hard disk other than video, audio, JPEG, voice recording can be viewed by pressing the " Mode " Button and selecting the " ETC.FILE " Icon. MODE Various types of files can be shown in the Search File windows. Before using Is it possible to see files other than multimedia files in HDD? The jog button to direction is pushed, You can read text file. The AVIAh has the capability of displaying Text (.txt) files.
Before using Can I connect the AVIAh to external A/V equipment? Yes. You may connect other Video and Audio devices such as a TV receiver, DSS, or VCR to the AV IN Connector. MODE Settings for external input are referred to Page 49. (When recording) To record while watching a program, press the REC button. To end the recording session, press the REC button again. The filename will vary for a recorded file depending on the external input signal. 1. A Video signal will be saved as VID_0000.ASF.
To connect cable antenna when viewing this unit. To connect the telescoping antenna when viewing this unit. Lead axial line 75 Wall Connecting Terminal Connect TV Indoor Antenna/Cable and the RF line from the Antenna or Cable (Terminal Lead axial line 75 ). Before using How do I connect the antenna and cable? Watch TV by installing the TV outdoor antenna/telescoping antenna. To connect the indoor antenna/cable with the Core. Open the Core, insert the antenna wire, and close the Core.
Before using Are there any precautions when using the battery? Yes. When using this unit, the current battery charge will be displayed on the screen. If the battery charge is insufficient, the battery indicator will flicker, and the power will automatically turn off in 1 or 2 minutes. The battery recharge process may be checked by looking at the battery indicator. When using this unit, the current battery charge status is displayed.
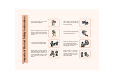
VOL +/- Button MODE Button MODE TV (Option) AV RADIO (Option) SYS.SETUP ETC.FILE VIDEO PLAY AUDIO PLAY SLIDE SHOW VOICE REC will be viewed in sequence. This button adjusts the earphone volume level. VOL - Depending on product options, the number of menu items displayed on the screen may vary. POWER Button DISP Button DISP This button is a sliding type switch for Power ON/OFF. This switch is also used to reset the system.
Before using PLAY/PAUSE Button While in VIDEO PLAY / AUDIO PLAY mode Playback/Pause Function can be selected. While in Menu mode Cursor Key ( ) is used. REW Button While in VIDEO PLAY / AUDIO PLAY mode Rewinding (x2/4/8/16) can be selected. This button is used to select the Menu for various modes. While in SYS.SETUP EXIT Key is used to exit the current menu. While in VIDEO PLAY/AUDIO PLAY/SLIDE SHOW/ VOICE REC mode You can play or preview the selected contents.
If you want to watch TV outdoors, use the telescoping antenna. The AVIAh reception quality will vary according to the proximity of the broadcast station. The further away you are from a broadcast station the weaker your reception will be. For watching TV indoors, connect the antenna/cable to the antenna terminal. MODE - Auto Channel Setup [ NTSC ] This function is to search the receiving signal automatically, and save it into memory. Press the Button. Select the Icon. Select Auto program. Select Area.
How to Operate each Mode 24 - Manual Channel Setup [ NTSC ] This function allows you to delete the channel saved by the Auto program, and allows you to manually select and save the channels. Press the Button. Select the Icon. Select Manual program. Select Area. The antenna for the indoors setting can receive cable broadcast signals, whereas the outdoors setting can only receive public broadcasting signal. While in the Area line item, select indoors or outdoors.
If you want to watch TV outdoors, use the detachable telescoping antenna when there is a strong broadcast signal, and for watching TV indoors, connect the cable signal to the antenna terminal. The cable tuner can receive analog signals; it will not accept digital cable. MODE - Auto Channel Setup [ PAL, SECAM ] This function is to search the receiving signal automatically, and save it into memory. Press the Button. Select the Icon. Select Auto program. Select Area. Channel Search starts.
How to Operate each Mode 1. Use the Jog button ( or 2. Push the Jog button to program number. 1. Use the Jog button ( direction) to select " Storage from ". direction or or direction. Select the beginning direction) to select " System ". direction or direction to change a TV System. 2. Push the Jog button to TV System modes. BG : PAL B/G, SECAM B/G (Asia/New Zealand/Europe/East Europe) I : PAL I/II (U.K./leland/Hong Kong/South Africa) DK : PAL D/K, SECAM D/K (East Europe/China/Africa/Russia) 1.
This function allows you to delete the channel saved by the Auto Program, and select the channels manually and save them. Press the Button. Select the Icon. Select Manual program. While in Area, select ANT1, ANT2, ANT3, ANT4. After saving, select a desired channel by CH +/-. Select Area.
How to Operate each Mode Normally, fine tuning is only necessary if the reception is poor. 1. Use the Jog button ( or direction) to select " Fine ". direction or direction to fine tune for the best 2. Push the Jog button to picture and sound on the Fine pull-down menu. 3. Press the OK button. 1. Use the Jog button ( or direction) to select " Search ". 2. Push the Jog button to direction or the Search pull-down menu. If a station is found the search will stop. direction to commence searching on 3.
If you want to listen to the Radio outdoors, use the detachable telescoping antenna where the reception sensitivity is good. MODE - Auto Channel Setup This setup will search receiving signals automatically and save them to the unit’s memory. Press the Button. Select the Icon. Area can be done in 4 modes. (ANT1, ANT2, ANT3, ANT4) There is a possibility for local set up. Select Auto program. Select Area.
How to Operate each Mode - Manual Channel Setup This method can be used to erase the channel saved by the Auto Program, or catch and save the station manually. Press the Button. Select the Icon. Select Manual program. - If you are listening to the radio after setting the radio channel, a radio menu will be displayed to select a desired channel. Select Area. Adjust settings after selecting a desired mode. Area can be done in 4 modes. (ANT1, ANT2, ANT3, ANT4).
Picture files stored in the AVIAh can be displayed individually or as part of a slide show. MODE - When Viewing Image Files After moving to a desired file, pressing the OK Button will allow you to preview in a small screen in the upper left side. If the OK Button is pressed or the jog button to direction is pushed, the current image file will be displayed in full screen.
How to Operate each Mode - When Viewing an Image File with the Slide Show Function MODE If the OK Button is pressed twice, The Menu will disappear and the slide show function will run. Press the Button. Select the Icon. After selecting the Slide show time, adjust the Display Time. (None, 2, 4, 6, 8, 10, 15, 30 seconds can be selected.
You can download a new image of your choice in .JPG format and use it as the background for the On Screen Display. 1. Save your JPG file of Choice to the SystemFolder of the Portable Media Player. At this time you can save only two .JPG files to the SystemFolder. 2. When you save them, the file names should be wall.jpg and window.jpg. 3. wall.jpg is shown as a background when you push the mode button. It is also the background shown in the main menu. window.
How to Operate each Mode When Playing a Moving Picture File Moving pictures stored in the AVIAH can be viewed. The AVIAH can play many different types of Moving picture files including MPEG4, DIVX, XVID, AVI, ASF and WMV9. MODE - Playing a Moving Picture file After moving to a desired file, pressing the OK Button will allow you to preview the file in a small screen in the upper left side.
direction. - To resume playback: Push the jog button to - To setup playback speed: Push the jog button to direction. or direction. ( x2, x4, x8, x16, x32) When deleting a video file without previewing it first a confirmation warning question appears. If the CH+ Button is pressed, the following warning question appears " Do you want to delete? " If you select " YES ", and press the OK Button, the corresponding file will be erased. Larger files take longer to delete.
How to Operate each Mode - When Pressing the CH+ (*Fn+) Button While Playing a Moving Picture File - When Pressing the CH- (*Fn-) Button While Playing a Moving Picture File The file being played runs once, then stops. Loop Repeat Function is not used. The file being played will be repeated. Pressing CH- Button while a moving picture file is being played will setup the beginning of a Loop Repeat. All the files in the folder will be played repeatedly.
You can enjoy music files stored in the AVIAh. MODE - Playing an Audio File (MP3 or WMA9 files) Push the jog button to the direction. As an audio file is played, information on the selected audio file will appear in the upper part of the screen. To play an audio file, highlight the desired file. How to Operate each Mode When Playing Audio Files Press OK Button. Will be played back while Directory Menu is displayed.
How to Operate each Mode 38 - To pause play: Push the jog button to the - To resume playback: Push the jog button to the direction. direction. When deleting a music file without previewing it first a confirmation warning question appears. If the CH+ Button is pressed, the following warning question appears " Do you want to delete? " If you select " YES ", and press the OK Button, the corresponding file will be erased.
- When Pressing the CH- (*Fn-) Button While Playing an Audio File The file being played runs once, then stops. Loop Repeat Function is not used. The file being played will be repeated. Pressing CH- Button while Audio file is played will setup the beginning of a Loop Repeat. All the files in the folder will be played repeatedly. Files to be played will be selected randomly and played.
How to Operate each Mode Does the Portable Media Player have an Audio Equalizer? 1. This Portable Media Players features an automatic/selectable equalizer that allows you to set the EQ according to the Genre of the music file. In the Automatic mode the EQ is automatically set by the Genre information contained in the ID3 information of the music file. Example: If the Genre of a music file is "Rock" the Player will automatically select the "Rock" EQ. 2.
1. The AVIAh allows you to create playlists in two different ways. A playlist can be created internally on the unit, or by using Windows Media Player. 2. Playlists can be created using mixed file formats. You can create a playlist that incorporates Video, Audio as well as Picture files. A maximum of 500 files can be added to the playlist. 3. What is the procedure for creating a playlist internally on the player? a. Highlight an Audio, Video or Picture file and push the CHANNEL- button. b.
How to Operate each Mode 6. How do I delete files from the playlist? a. Enter the Playlist Mode as described above b. Highlight the file that you would like to delete from the playlist and push the CHANNEL + button. c. A " Do you want to delete?" message will be displayed. Selecting "Yes" will remove the selected file from the playlist. d. Removing a file from the playlist does not delete it from the Hard Drive. 7. How do I save the Playlist? a. After you add the first file to the playlist a PLAYLIST.
How to Operate each Mode 11. Can I make a Playlist by using Windows Media Player? a. You can use Windows Media Player to view and play the playlist that you created on the Portable Media Player. Also, you can create a playlist in Windows Media Player and save it to the portable media player. b. Connect the Portable Media Player to your PC via USB c. From Windows Media Player go to File>Open and select the PLAYLIST.WPL file from the root directory of the Portable Media Player.
How to Operate each Mode When Recording Voice The AVIAh can be used as a voice recorder. MODE While in the Voice Record Mode pressing the REC button will start the voice recording process, automatically create a file and will automatically save the file in the RecordFolder/Audio. After pushing the REC button a "Recording Time" message will appear. Use the Joystick to set the length of your recording.
To stop recording push the REC button again. -While recording if you push the Joystick up you can PAUSE the recording process. Pushing the Joystick up again will resume recording. The filename will be saved as VOICE_0000.REC. If a second etc. recording is made by pressing the REC Button, the file number increases by one. E.g. VOICE_0001.REC, VOICE_0002.REC, ...and so on.
How to perform System Set Up You can customize the AVIAh environment and functionality. MODE Picture Adjustment After selecting the Picture Adjustment Icon, you can adjust the Picture Mode, Contrast, Brightness, Color, Sharpness and Tint (NTSC AV only) to the levels you prefer. - While Playing Contents File in Radio Mode Press the Button. Select the Icon. Repeated pressing of the Button will exit you from the System Set Up Menu. Adjust your settings after selecting a desired mode.
Press the Button. Select the Icon. Repeated pressing of the Button will exit you from the System Set Up Menu. Adjust settings after selecting a desired mode. (When Input Color System is NTSC only Tint appears on the Picture Adjustment menu.) When adjusting images, the quick Image Adjusting Menu will be displayed, so you can view the changes being made to the current image. At this time, if you move the jog button to or direction, other image items can be selected.
How to perform System Set Up System Setup After selecting the System Set Up Icon, you can set-up a specific feature. Press the Button. Adjust settings after selecting a desired mode. OLED Display Output Color System Input Color System Full Screen This function is for turning the OLED Display ON/OFF. After selecting OFF, if the external device (TV, Monitor) is connected to the AV OUT, you can enjoy your image and sound on a bigger display.
After selecting the Set-Up Icon, you can adjust set-up values. Press the Button. Repeatedly pressing the Button will exit you from the System SetUp Menu. Select the Icon. Adjust settings after selecting a desired mode. Language Sets the language displayed on the screen. File format Formats the file to be recorded. - ASF : mode for recording moving picture. - JPG : mode for recording still picture. REC. Mode Selects the Quality of the moving picture recording.
Other Functions Installing Windows 98SE/ME Driver When you connect the AVIAh to a Windows 98SE computer, it recognizes the AVIAh as hardware, and asks for a driver installation. At that point, insert the supplied installation CD into CD-ROM drive. 1. Press the Next button. 2. Press the Next button. 3. Input the path or search for a desired folder directly. 5. Press the FINISH Button. 50 4. Press the Next button.
After copying the firmware file into the System Folder from " www.aviah.com " or " www.ovideon.com ", change the file name to " system.rom ", and proceed as follows. Press the Button. Select the Icon. Connect the PC and this unit with the USB cable, then download the firmware file to the " System Folder ". Select the Firmware Upgrade Mode. Other Functions Upgrading Firmware Press the jog button to the direction. After rebooting the system the firmware updating procedure will be complete.
Other Functions 52 Installing TransC Software on your PC When the moving picture has Codec or a resolution not supported in the AVIAh, you can transcode the file by using the TransC Software located on the Installation CD. Click the TransC icon on the installation CD to begin installation 1. Press the Next button. 2. Press the Next button. 3. Designate where you would like the program to be installed. 6. Press the Finish Button. 5. Program Installation is carried out. 4. Press the Next button.
Other Functions Using AVIAh TransC * AVIAh supports the following Codecs Kinds of File Video Codec Audio Codec G.726 MP3 PCM Resolution WMV9 SP (Simple Profile) WMV9 352*240 MS ISO MPEG-4 G.726 MP3 PCM 720*480 XviD, DIVX 720*480 * When Checking Codecs (Audio/Video) stored in PC 2. Select Sound and Audio Devices. 1. Select Control Panel 3. Select Hardware, and press Video Codec. 4. You can view Video Codec and Audio Codec installed in PC from the list.
Other Functions * If you are not sure about whether the moving picture file is supported in AVIAh You can check compatibility with the Codec Information Check Program. Execute the Codec Information Check Program. - Moving picture with box mark : File supported in AVIAh - Moving picture with X mark : File not supported in AVIAh Although you may have Codec not supported by AVIAh, if you encode it in your PC with the TransC software, it can be played.
Other Functions * When playing moving pictures being not supported in AVIAh When running AVIAh TransC, the following will be displayed in the screen. 1. Select " VCD/MPEG/AVI/WMV/ASF converter ". 2. Select " Open VCD/MPEG/AVI/WMV/ASF/VOB files ". 4. Select " AVI Format ". 3. Open " Moving Pictures not supported in AVIAh ". Continues in the next page.
Other Functions 5. Select " Setup Destination File Format ". 8. Select the " MP3 Codec ", then the Audio Bitrate Mode, Sampling, Audio Mode. (e.g., 128kBit/s, 32,000 Hz, stereo) After selecting, specify in the " Browse " menu the location where you would like to save the file. Continues in the next page. 56 6. Select " Other Video Codec ", and press " Config ". 7. Select the " XviD ".
10. You can view the transformation process on the upper screen. Other Functions 9. After selecting the file(s) to be transcoded push the red Icon Command Button (Ctrl + C). When the Codec installed onto your PC causes a problem, only a portion of the file can be transformed. Please install a stable and well-recognized Codec onto your PC. To change file formats such as RealVideo Converter (rm, rv, rmvb) or Quick Time Converter (mov, qt, mp4), be sure to install RealVideo, Quick Time Codec onto your PC.
Other Functions 58 If the transcoded moving picture quality is not acceptable, click the "Configure" command button after video codec selectionand set the bitrate(kbps) higher than normal and start encoding. This will allow for better quality moving pictures. If the transcoded moving picture quality is not acceptable, set the resolution higher than normal, which will allow for better quality moving pictures.
1 inch Hard Disk 5.0GB Screen (Panel) OLED Color AM 2.2" / 16,700K Colors / Pixel Format : 521*218 Viewing Angle : Free / Response Time : 5ms Slide Show JPEG (irrespective of image size) Moving Picture Playback MP4 MPEG-4 SP@ML Compliant Video Codec ASF( Microsoft ISO MPEG4 ) : Supports up to Max. Resolution 720*480 AVI( DivX,XviD etc) : Supports up to Max. Resolution 720*480 WMV9 : Supports up to Max.
Product Inquiry & Customer Service 60 To ask for our service through the Internet If any problem persists, consult your AVIAh dealer or contact support at www.ovideon.com * Find information on our company, products, and customer and technical support. * Update your AVIAh Firmware. * Consult the product Q&A * Register your AVIAh product online so that our Customer Service Center is able to provide support as efficiently as possible. Notices The following cases will not be covered by In Warranty Service. 1.
This device complies with part 15 of the FCC Rules. Operation is subject to the following two conditions: 1) This device may not cause harmful interference, and 2) this device must accept any interference received, including interference that may cause undesired operation. This equipment has been tested and found to comply with the limits for a Class B digital device, pursuant to part 15 of the Federal Communications Commission rules and regulations.
Trouble Shooting Q : The picture on the display screen stops, turns off or des not work? A : Connect the AC Adaptor to the AVIAh; normal operation should resume. Please recharge the battery. Q : I connected the AVIAh to my computer via the USB but my computer does not recognize it? A : Verify which operating system is on your computer. If you are using Windows 98 (SE) then insert the Windows 98 (SE) CD and install the USB drivers.
PRODUCT WARRANTY Model Product Name Purchase Date Year Month Date Customer Tel. Address Location of Purchase Tel. Address Warranty Period Two year from the date of purchase (OLED: One Year) * When requesting repair, for warranty service please present this warranty with the date of purchase recorded. * During the warranty period we will repair any defect in material occurred under normal conditions free of charge, labor included.
Limited Warranty Ovideon, Inc. (hereinafter referred as Ovideon) hereby warrants all Ovideon products sold by Ovideon or by Ovideon authorized distributors, resellers and retailers to be free from defects in material and workmanship in accordance with the following terms and conditions. Length of Warranty From the date of original purchase this product is warranted for a period of (2) years on parts and labor and (1) year on the OLED panel.
Ovideon will pay for labor and materials during the length of warranty for a period of two (2) years from the original date of purchase. Ovideon will repair the defective product with new or refurbished parts or, at our option, replace the defective product. Ovideon will not pay for the following: 1. Removal or installation of Ovideon products. 2. Cost of Initial set up. 3. Payment of shipping charges.
Note
Note 67