
User Manual

OWC MERCURY ON-THE-GO PRO DEVICE SETUP
6
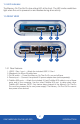
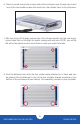
6. There is a small screw hole on each side of the enclosure near the end-cap. Insert
one of the two smaller screws into each hole, then fasten them to the enclosure.
7. Ax two more of the large screws from the included packet into the two empty
screw holes that run through the plastic casing and heat sink. NOTE: you will be
left with a few spare screws; store these in case you need them later.
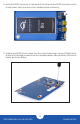
8. Find the adhesive strip with the four rubber pads attached to it. Each pad can
be peeled o and attached to one of the four similarly shaped recesses on the
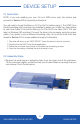
bottom of the enclosure (shown below). The assembly process is now complete.