
User guide


OWC Mercury Rack Pro mini-SAS Chapter 2 - System Setup
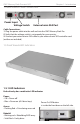
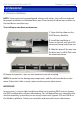
2.1 Drive Installation
NOTE: If you purchased a precongured solution with drives, they will be numbered
for proper installation in individual drive bays. Please match the drive bay numbers to
the hard drives and their trays.
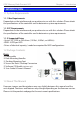
To install your own drive mechanisms:
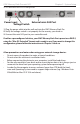
1. Open the front door on the
OWC Mercury Rack Pro.
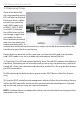
2. Install the hard drive as
shown to the left, with the SATA
connector facing away from you.
3. Slide the drive all the way into
the drive bay. It will t ush with
the aluminum frame.
4. Repeat the previous steps for each hard drive you are installing.
NOTE: Be careful to not damage any components, and do not force the drives into
place. If they don’t slide in easily, make sure there are no obstructions.
IMPORTANT:
In most cases, is not possible to add more drives to an existing RAID array or change
the RAID conguration without reformatting. This will depend on your controller card
and the operating system that you are using. Some cards support OLE and ORLM on
the Windows platform. Check your controller card manual for more information.
2 SYSTEM SETUP