
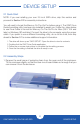
User Manual

OWC MERCURY ON-THE-GO PRO SUPPORT RESOURCES
8
3.1 Formatting
For additional drive formatting options and information, go to:
www.owcdigital.com/format
3.2 Unmounting drives
To properly unmount any connected drives from the computer, you need to follow a
few simple steps.
OS X:
There are several options, including: 1) drag the icon for the disk(s) to the trash can; and 2)
right-click the disk icon on the Desktop, then click “Eject”.
Windows:
Go to the System Tray (located in the lower right corner of the screen). Click the “Eject” icon
(a small green arrow over a hardware image). A message will appear, detailing the devices
that the “Eject” icon controls, i.e., “Safely remove...” Click on this prompt. You will then see
a message that says, “Safe to Remove Hardware.” It is now safe to disconnect the Mercury
On-The-Go Pro from the computer.
3.3 Troubleshooting
Begin the troubleshooting by verifying that both ends of the cables are properly
plugged into the computer and the Mercury On-The-Go Pro. If the drive is still not
working properly, try connecting to another interface such as the USB port and see
if the device works properly. You can also connect the On-The-Go Pro to a dierent
computer. If problems persist, see Section 3.5 to nd out about our online help
resources, or see Section 3.6 for information on contacting OWC technical support.
3.4 About Data Backup
To ensure that the les are protected and to prevent data loss, we strongly suggest
that you keep two copies of the data: one copy on the Mercury On-The-Go Pro and
a second copy on either the internal drive or another storage medium, such as an
optical backup, or on another external storage unit. Any data loss or corruption while
using the Mercury On-The-Go Pro is the sole responsibility of the user, and under no
circumstances may OWC, its parents, partners, and aliates be held liable for loss of
the use of data including compensation of any kind or recovery of the data.
SUPPORT RESOURCES