
Adding Insulation to Your Attic


Installation Instructions
1. Lay temporary flooring (using plank or plywood
pieces) across joists and hang a temporary work
light. To make sure the soffit vents aren’t blocked,
install attic vents or baffles like Owens Corning
raft-R-mate
®
Attic Rafter Vents, which assure
unobstructed airflow from the soffit to the attic.
2. Begin laying faced or unfaced EcoTouch
®
insulation at outer edge of attic and work toward
center. If faced insulation is used, facing should be
toward the living space in contact with drywall.
3. Lay insulation in the joist spaces, lling them
end-to-end. Insulation should be cut to fit snugly
around cross bracing. Insulation should extend far
enough to cover exterior walls but should not block
flow of air from soffit vents. When a second layer
is used, place it perpendicular to the first layer, to
minimize gaps.
4. Insulation must be kept 3" away from recessed
lighting fixtures unless fixtures are marked “I.C.”
(Insulated Ceiling)—designed for direct insulation
contact. Insulation placed over an unrated fixture
may cause the fixture to overheat and perhaps
start a fire. The insulation should always be
installed at least 3" away from any metal chimneys,
gas water heater flues or other heat-producing
devices.
5. Fill the spaces between a masonry chimney and
wood framing with a noncombustible material such
as unfaced EcoTouch
®
insulation, which will not
burn.
NOTE: Do not leave faced insulation exposed.
The facings on kraft-faced insulation will burn and
must be installed in substantial contact with an
approved interior finish as soon as the insulation
has been installed. Facing must be installed in
substantial contact with an approved ceiling,
floor or wall material. Keep open flame and other
heat sources away from facing. See package
for warnings, fire hazard and instructions, or call
1-800-GET-PINK
®
.
Check your local building codes for requirements
in your area.
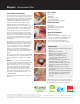
Basic Tools
• Tape measure
• Utility knife
• Straightedge or 2 x 4
(for cutting insulation)
• Lightweight, squeeze-type stapler
Protective Gear
• Work gloves
• Loose-tting, long-sleeved shirt
• OSHA-approved safety glasses
• Disposable dust mask
Special Equipment
• Portable work light
• Boards or sheets of plywood (provide a safe
place to sit or kneel in an unfinished attic and
a surface on which to cut the insulation)
• Pole or rake (for pushing insulation into
out-of-the-way places in attics/flat ceilings)
Project: Uninsulated Attic
Know-How
• Before you begin any insulation project make
sure you:
• Seal any open penetrations
• Gather the necessary tools and wear
protective gear listed above
• Always use a portable work light to
ensure you have enough light in your
work environment
• Leave EcoTouch
®
PINK
®
insulation in its
wrapper until you are ready to use it
• Packaged insulation is highly compressed
and expands greatly when the wrapper is
opened
• Provide a safe place to sit or kneel in an
unfinished attic and a surface on which to cut
the insulation
• Use a pole or rake for pushing insulation into
out-of-the-way places in attics/flat ceilings
• Properly insulate and seal attic access
openings
Owens Corning is fully committed to safety and
believes accidents are preventable. Please join us
by promoting safety where you live and work.
1
Certied by Scientic Certications Systems to have a minimum of 55% recycled glass content.
2
This product has achieved GREENGUARD GOLD Certification and is verified to be formaldehyde free. GREENGUARD Certified products are certified to GREENGUARD standards for low
chemical emissions into indoor air during product usage. For more information, visit ul.com/gg.
THE PINK PANTHER™ & © 1964–2015 Metro-Goldwyn-Mayer Studios Inc. All Rights Reserved. The color PINK is a registered trademark of Owens Corning. © 2015 Owens Corning. All Rights Reserved.