
GPRS 1.1

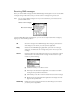
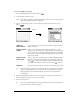
Table Of Contents
- Treo™ 270 Communicator User Guide
- GPRS 1.1, Windows Edition
- Contents
- Introduction to Your Treo™ 270 Communicator
- Entering Data in Your Communicator
- Managing Your Applications
- Applications Overview
- Common Tasks
- Application-Specific Tasks
- PhoneBook
- To change the PhoneBook view, do one of the following:
- Using the Speed Dial view
- Using the Dial Pad view
- Using the Contacts view
- Using the Active Call view
- Forwarding calls
- Other ways to make a call
- Using the Call History list
- Barring Calls
- PhoneBook menus
- Date Book Plus
- Working in Day View
- Scheduling an event
- Rescheduling an event
- Setting an alarm for an event
- Scheduling repeating or continuous events
- Changing the Date Book Plus view
- Working in Week View
- Working in Week View with Text
- Working in Month View
- Working in Year View
- Working in List View
- Spotting event conflicts
- Working with floating events
- Working with To Do items
- Using the Daily Journal
- Using templates
- Date Book Plus menus
- Blazer
- SMS Messaging
- To Do List
- Memo Pad
- CityTime
- Calculator
- Expense
- SIM Book
- SIM Services
- PhoneBook
- Setting Preferences for Your Communicator
- In the Preferences screens, you can do the following:
- Viewing Preferences
- Buttons Preferences
- Buttons 2 Preferences
- Connection Preferences
- Digitizer Preferences
- Formats Preferences
- General Preferences
- Network Preferences
- Selecting a predefined service template
- Connecting to your service
- Creating additional service templates
- Configuring GPRS settings
- Configuring dial-in, ISDN, infrared, and USB/serial settings
- Entering Advanced dial-in, ISDN, infrared, and USB/serial settings
- Deleting a service template
- Network Preferences menu commands
- TCP/IP troubleshooting
- Owner Preferences
- Ringer Preferences
- ShortCuts Preferences
- Advanced HotSync® Operations
- Selecting HotSync setup options
- Customizing HotSync application settings
- IR HotSync operations
- Conducting a wireless HotSync operation
- Conducting a HotSync operation via a network
- Using File Link
- Creating a user profile
- Maintaining Your Communicator
- Troubleshooting Tips
- Creating a Custom Expense Report
- Non-ASCII Characters for Login Scripts
- Advanced Call Forwarding Options
- Other Product Information
- Index

Chapter 6 Page 137
Saving contact information
You can capture contact information from your SMS messages and use it to create a Contacts
entry in PhoneBook. You can capture the sender’s information, or information included in the text
of the message.
To save the sender’s information:
1. From the SMS Messages Inbox, select the message to which you want to respond.
2. Press Space to open the message.
3. Press Menu .
4. Under Edit, select Save to Contacts (/V).
5. Enter the remaining information on the Contact Edit screen.
6. Hold Option and press Return to finish.
To save information in the message body:
1. From the SMS Messages Inbox, select the message to which you want to respond.
2. Press Space to open the message.
3. Press the bottom scroll button to activate the highlight.
4. Press the scroll buttons or roll the rocker switch to scroll to the item you want to save.
5. Press Menu .
6. Under Edit, select Save to Contacts (/V).
7. Enter the remaining information on the Contact Edit screen.
8. Hold Option and press Return to finish.
Creating SMS messages
SMS Messaging enables you to create short text messages and to send them to a mobile phone
number or an e-mail address. If a message exceeds 160 characters, SMS Messaging
automatically divides the text into multiple messages when it sends the message. As you create
a message, the status bar at the top of the screen indicates how many messages will be sent and
the number of characters in each message.
To save time while creating messages, you can insert predefined text from a boilerplate. Some
boilerplates ask you to enter information such as a meeting time or place. Using a boilerplate is
similar to filling in the blanks on a form letter instead of writing a letter from scratch. You can easily
combine the boilerplate text with your own text to personalize your message.
You can create a message at any time, but if you send a message when you are outside a
coverage area, your Treo places the message in the Pending category and sends it automatically
when you return to a coverage area. While a message is in the Pending category, you can edit or
delete it before it is sent. You can send SMS messages while a data session is in progress, but
you cannot send SMS messages while a voice call is in progress.