
GPRS 1.1


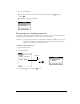


Table Of Contents
- Treo™ 270 Communicator User Guide
- GPRS 1.1, Windows Edition
- Contents
- Introduction to Your Treo™ 270 Communicator
- Entering Data in Your Communicator
- Managing Your Applications
- Applications Overview
- Common Tasks
- Application-Specific Tasks
- PhoneBook
- To change the PhoneBook view, do one of the following:
- Using the Speed Dial view
- Using the Dial Pad view
- Using the Contacts view
- Using the Active Call view
- Forwarding calls
- Other ways to make a call
- Using the Call History list
- Barring Calls
- PhoneBook menus
- Date Book Plus
- Working in Day View
- Scheduling an event
- Rescheduling an event
- Setting an alarm for an event
- Scheduling repeating or continuous events
- Changing the Date Book Plus view
- Working in Week View
- Working in Week View with Text
- Working in Month View
- Working in Year View
- Working in List View
- Spotting event conflicts
- Working with floating events
- Working with To Do items
- Using the Daily Journal
- Using templates
- Date Book Plus menus
- Blazer
- SMS Messaging
- To Do List
- Memo Pad
- CityTime
- Calculator
- Expense
- SIM Book
- SIM Services
- PhoneBook
- Setting Preferences for Your Communicator
- In the Preferences screens, you can do the following:
- Viewing Preferences
- Buttons Preferences
- Buttons 2 Preferences
- Connection Preferences
- Digitizer Preferences
- Formats Preferences
- General Preferences
- Network Preferences
- Selecting a predefined service template
- Connecting to your service
- Creating additional service templates
- Configuring GPRS settings
- Configuring dial-in, ISDN, infrared, and USB/serial settings
- Entering Advanced dial-in, ISDN, infrared, and USB/serial settings
- Deleting a service template
- Network Preferences menu commands
- TCP/IP troubleshooting
- Owner Preferences
- Ringer Preferences
- ShortCuts Preferences
- Advanced HotSync® Operations
- Selecting HotSync setup options
- Customizing HotSync application settings
- IR HotSync operations
- Conducting a wireless HotSync operation
- Conducting a HotSync operation via a network
- Using File Link
- Creating a user profile
- Maintaining Your Communicator
- Troubleshooting Tips
- Creating a Custom Expense Report
- Non-ASCII Characters for Login Scripts
- Advanced Call Forwarding Options
- Other Product Information
- Index

Page 44 Managing Your Applications
6. Select the application(s) that you want to install on your communicator.
7. Click Open.
Note: Review the list of applications you selected in the Install Tool dialog box. If you do not
want to install an application, select it, and then click Remove. (This does not remove
the application from your computer; it simply removes it from the list of applications
to install.)
8. Click Done.
9. Perform a HotSync operation to install the application(s) you selected in step 6. See the
section that begins on page 76 for details.
Tip: You can also install an application by simply double-clicking the application’s icon.
Removing applications
In the event that you run out of memory or decide that you no longer need an application you
installed, you can remove applications from your communicator. You can remove only add-on
applications, patches, and extensions that you install; you cannot remove the applications that
reside in the ROM portion of your communicator.
To remove an add-on application:
1. Press Option and then press Menu to access the Applications Launcher.
2. Press Menu again to open the menus.
3. Under App, select Delete (/D).
4. Tap the application that you want to remove.