
Installation Manual


6
Page
CONTENTS
Page
IMPORTANT! ............................................................... 2
Please Read Before Starting
Check of Density Limit
Precautions for Installation Using New Refrigerant
1. GENERAL ................................................................. 7
1-1. Tools Required for Installation (not supplied)
1-2. Accessories Supplied with Outdoor Unit
1-3. Type of Copper Tube and Insulation Material
1-4. Additional Materials Required for Installation
2. SELECTING THE INSTALLATION SITE ................ 12
2-1. Indoor Unit
3. HOW TO INSTALL THE INDOOR UNIT .................. 13
4-Way Cassette Type
(U1 Type) ................................................................. 13
3-1. Suspending the Indoor Unit
3-2. Preparation for Suspending
3-3. Placing the Unit Inside the Ceiling
3-4. Installing the Drain Piping
3-5. Checking the Drainage
3-6. Before Installing the Ceiling Panel
3-7. Installing the Ceiling Panel
3-8. When Removing the Ceiling Panel for Servicing
3-9. Duct for Fresh Air
Wall Mounted Type (K1 Type) .................................. 21
3-10. Removing the Wall Fixture from the Unit
3-11. Selecting and Making a Hole
3-12. Installing the Rear Panel on the Wall
3-13. Removing the Grille to Install the Indoor Unit
3-14. Preparing the Indoor Side Tubing
3-15. Wiring Instructions
3-16. Wiring Instructions for Inter-Unit Connections
3-17. Shaping the Tubing
3-18. Installing the Drain Hose
Ceiling Type (T1 Type) ............................................. 26
3-19. Suspending the Indoor Unit
3-20. Duct for Fresh Air
3-21. Installing the Drain Piping
Low Silhouette Ducted Type (F1 Type) .................... 30
3-22. Required Minimum Space for Installation and
Service
3-23. Suspending the Indoor Unit
3-24. Installing the Drain Piping
3-25. Checking the Drainage
3-26. Increasing the Fan Speed
3-27. When Installing the Indoor Unit
3-28. Required Minimum Space for Installation and
Service
SUPPLEMENT ON DRAIN PIPING ........................ 36
■
■
■
■
■
4. ELECTRICAL WIRING ............................................ 37
4-1. General Precautions on Wiring
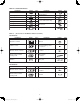
4-2. Recommended Wire Length and Wire Diameter
for Power Supply System
4-3. Wiring System Diagram
4-4. How to Connect Wiring to the Terminal
5. HOW TO INSTALL THE WIRELESS REMOTE
CONTROLLER ........................................................ 40
5-1. Wireless Remote Controller Installation
5-2. Room Temperature Sensor Setting
5-3. Address Switches
5-4. Setting the Model Code
<CZ-RWSU1U>
4-Way Cassette Type (U1 Type). . . . . . . . . . . . . . . . . .42
5-5. Indicator Section Installation
5-6. Operating Controller Installation
Ceiling Type (T1 Type). . . . . . . . . . . . . . . . . . . . . . . . . . 43
5-7. Indicator Section Installation
5-8. Operating Controller Installation
5-9. Electrical Wiring
5-10. Test Run Switch
5-11. Misoperation Alarm Indicators
<CZ-RWSC1U>
5-12. Separate Type Signal Receiving Unit Installation
5-13. Electrical Wiring
5-14. Test Run Switch
5-15. Misoperation Alarm Indicators
5-16. Basic Wiring Diagram
5-17. Wiring System Diagram for Group Control
5-18. Wiring System Diagram for Multiple Remote
Controllers
<CZ-RWSK1U>
5-19. Test Run Procedure
5-20. Check Items Before the Test Run
5-21. Preparing for the Test Run
5-22. Precautions
5-23. When Setting Indoor Unit Control PCB Switch
for
Wall Mounted Indoor Unit
5-24. Diagnosis Table
6. APPENIDX .............................................................. 58
Name of Parts. . . . . . . . . . . . . . . . . . . . . . . . . . . . . . . . . 58
Care and Cleaning. . . . . . . . . . . . . . . . . . . . . . . . . . . . . 59
Troubleshooting. . . . . . . . . . . . . . . . . . . . . . . . . . . . . . . .63
Tips for Energy Saving. . . . . . . . . . . . . . . . . . . . . . . . . .63
■
■
■
■
■
■
Panasonic_PAC-i_IndoorUnit_US-le6 6Panasonic_PAC-i_IndoorUnit_US-le6 6 2011/11/02 15:17:102011/11/02 15:17:10