
Operation Manual


35
Chapter 3 Recording and Playback
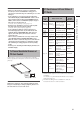
2D LL Recording
You can record the left-lens (L) image on both the L and R
P2 cards.
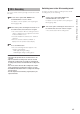
1
Set the menu option REC MODE in the
SYSTEM SETUP screen to 2D LL.
For details on menu operation, refer to [Using the
Menus] (page 106).
2
Turn off the power, following the instructions on
the LCD monitor, then turn it back on again.
• The camera starts in 2D LL recording mode and
“2D LL” is displayed on the upper left of the LCD
monitor/viewfinder screen.
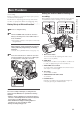
•
Insert two writable P2 cards into the L and R P2
card slots.
•
When the cards are identified, “PAUSE” is
displayed on the operation status display.
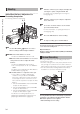
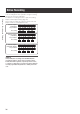
3
Press the REC button.
• One of the following indicators appear on the
operation status display.
•
REC lights during recording.
• PAUSE lights during recording pause.
NOTE
• Shot marks and clip meta data are recorded on the “L” P2
card only.
• Clips recorded in 3D recording mode cannot be checked
when 2D LL recording mode is set. Clips recorded in 2D LL
recording mode cannot be checked when 3D recording mode
is set.
• Use one P2 card for either the 3D recording mode or 2D LL
mode exclusively. Do not mix the two modes on one card.
• The CONV. dial is disabled in 2D LL recording mode although
it can be rotated.
• The L/R outputs are both left-lens (L) signals, but they are
output as 3D video.
Switching over to the 3D recording mode
To switch over from the 2D LL recording mode to the 3D
recording mode, do the following:
1
Set the menu option REC MODE in the
SYSTEM SETUP screen to 3D.
For details on menu operation, refer to [Using the
Menus] (page 106).
2
Turn off the power, following the instructions on
the LCD monitor, then turn it back on again.
• The camera starts in 3D recording mode.