Initial Setup (Connection) DVD/VCR DECK Operating Instructions Model No. AG-VP310 Basic Operation Professional / Industrial Video VCR Operation DVD Operation Connections and Initial Setup Procedures are on pages 12 to 17. For Your Information MULTI FORMAT PLAYBACK *Ability to play back may depend on recording conditions. As an ENERGY STAR ® Partner, Matsushita Electric Corporation of America has determined that this product or product model meets the ENERGY STAR ® guidelines for energy efficiency.
Important Safeguards and Precautions TO REDUCE THE RISK OF ELECTRIC SHOCK, FIRE, INJURY TO PERSONS OR DAMAGE TO THIS PRODUCT, READ AND RETAIN ALL SAFETY AND OPERATING INSTRUCTIONS. HEED ALL WARNINGS IN THE MANUAL AND ON THE PRODUCT. INSTALLATION OUTDOOR ANTENNA INSTALLATION 1 POWER SOURCE CAUTION Operate only from a power source indicated on the unit or in this manual. If necessary, have your Electric Utility Service Company or Video Products Dealer verify the power source in your home.
Safety Precautions/Mesures de sécurité To prevent fire or shock hazard, do not expose this equipment to rain or moisture. To prevent electric shock, match wide blade of plug to wide slot, fully insert. AVERTISSEMENT: Afin de prévenir tout risque d’incendie ou de chocs électriques, ne pas exposer cet appareil à la pluie ou à une humidité excessive. ATTENTION : Pour éviter les chocs électriques, introduire la lame la plus large de la fiche dans la borne correspondante de la prise et pousser jusqu’au fond.
Before Using Congratulations on your purchase of one of the most sophisticated and reliable products on the market today. Used properly, it will bring you years of enjoyment. Please fill in the information below. The serial number is on the tag located on the back of your DECK. • Date of Purchase • Dealer Purchased From • Dealer Address • Dealer Phone No. AG-VP310 • Model No. • Serial No.
Table of Contents Basic Operation For Your Information DVD Operation Disc Operation ............................................................ 36 ~ 41 DVD-RAM Operation (DVD-RAM only) .............................. 42, 43 DVD Operation using On-Screen Displays .............. 44 ~ 48 MP3/JPEG Playback Operation ................................. 49 ~ 51 Settings for DVD Operation ....................................... 52 ~ 55 A/V OPTIMIZER ................................................................
DECK & Cassette Information Prevent Accidental Tape Erasure DVD-RAM discs DVD-RAM discs must meet the following conditions for this unit to be able to play them. Break off the tab to prevent recording. Record Tab Type Screw driver Capacity To record again • Non-cartridge discs • Discs that can be removed from their cartridges (TYPE 2 and 4) • 12 cm (5”) 9.4 GB (double-sided) and 4.7 GB (single-sided) • 8 cm (3”) 2.
Input/Output Terminal: Input Terminal: Output Terminal: Operating Temperature: Operating Humidity: Weight: Dimensions: Discs Played (1) DVD-Video Disc DVD-Audio Disc DVD-RAM Disc (2) Compact Disc (CD-DA) (CD-R/CD-RW, MP3, WMA, JPEG) Digital Audio Output: Pickup: 120 V AC, 60 Hz Power On: Approx. 28 watts, Power Off: Approx. 0.
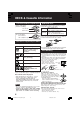
Location of Controls Remote Control Bold: VCR Function / Bold Italic: VCR and DVD Functions Italic: DVD Function / Normal: Others VCR/TV EJECT / OPEN / CLOSE p. 21 pp. 20, 22 TV mode p. 28 POWER CHANNEL / / TRACKING / V-LOCK / 10 pp. 4, 21, 22 NUMBER keys VOLUME + / p. 28 MENU / PLAY LIST ADD/DELETE / CLEAR pp. 19, 39 p. 38, 43 ACTION SELECT pp. 18, 52 SET DVD mode p. 28 VCR mode p. 28 PLAY pp. 20, 22 STOP pp. 20, 22 SKIP+ SKIP- REWIND / SEARCH / SLOW- p. 23 pp.
If the disc cannot be removed... First, unplug DECK. Then, prepare a rigid wire (e.g. an extended paper clip) and, applying moderate force, insert it straight into the hole at the base of the tray. The tray will eject a little. Now, pull the tray all the way out and remove the disc. Bold: VCR Function Italic: DVD Function Bold Italic: VCR and DVD Functions Normal: Others PLAY Initial Setup (Connection) FrontView View DECK Front ofof DECK p. 20 STOP/EJECT Over 2 inches p.
Location of Controls (continued) Bold: VCR Function Italic: DVD Function Bold Italic: VCR and DVD Functions Rear View of DECK AC Power Plug VHF/UHF Antenna Output Terminal p.12 • While plugged into an AC outlet, this DECK consumes 0.85 W of electrical power in off mode. VHF/UHF Antenna Input Terminal p. 12 Component Video Output Connector (Y, PB, PR) (DVD Only) p. 13 Video Output Connector p. 12 • Video Input Connector p. 35 • • Audio Output 1 Connector (L/R) p.
Displays (On Screen & Multi Function) Function & Channel Displays CH 0 8 When a function button is pressed, e.g. PLAY, or you change channels, a 5-second display appears. Initial Setup (Connection) On Screen Displays (VCR) Blank Tape/ No Video Signal Indications Whenever a blank section of a tape comes up in Play mode, or when the selected channel has no broadcast signal with Weak Signal Display Feature (p. 33) set to OFF, the TV screen will turn solid blue.
Connections Basic Connections • If your TV has AUDIO and VIDEO IN terminals, connect them to DECK for higher quality picture and sound. • You can enjoy stereo sound even if your TV is not stereo by connecting a stereo amplifier to DECK. • Connect DECK and TV with an RF Coaxial Cable a (supplied) or an AV Cable b (not supplied) as shown in the figure below.
You Can ■ With a Cable Box (DECK Cable Box TV) DVD/VCR DECK ANT or CATV TV IN 1 OUT IN FROM ANT. IN Cable Box VHF/UHF OUT TO TV IN OUT VHF/ UHF R L ANT or CATV OUT Cable Box IN IN 1 IN FROM ANT. OUT VHF/UHF OUT TO TV 2-Way Splitter Cable Box OUT 1 OUT 2 IN OUT A/B Switch IN 1 IN 2 • view any (including scrambled) channel. • record scrambled channels.
Connections (continued) Audio Connections Ready Checklist Turn down the volume, then turn DECK, as well as other equipment to be connected, off before proceeding with connection. Do not block ventilation holes of any of the equipment and arrange them so that air can circulate freely. Read through the instructions before connecting other equipment. Ensure that you observe the color coding when connecting audio and video cables.
Initial Setup (Connection) ■ Connecting Amplifier (5.1 ch Surround system) [Digital connection] DECK Dolby Digital Decoder Amplifier Speaker or DECK DTS (Digital Theater Systems) Decoder Amplifier Speaker When DVDs recorded in Dolby Digital or DTS are played, Dolby Digital bitstream or DTS bitstream is output from the DECK OPTICAL digital audio output connector. When DECK is connected to a Dolby Digital decoder or DTS decoder, you can enjoy theater-quality audio in your home.
Initial Setup for Basic Connections (Ready to Play) Before doing Initial Setup 1 Turn TV on. 2 See connections a RF Coaxial Cable Connection and b AV Cable Connection on page 12. Set TV to channel 3. Set TV to VIDEO. 3 [DECK ➛ TV] • Go to “Initial Setup (Ready to Play).” (See below.) [Cable Box ➛ DECK ➛ TV], [DSS ➛ DECK ➛ TV] • Turn on Cable Box and set it to your Public Broadcasting Station (PBS) channel in your time zone.
dy to Play) *Important: If a remote control button does not work when pressed, press the VCR button on the remote and try the button again. Settings are made automatically. When complete, this screen appears. EJECT Initial Setup (Connection) 3 If “AUTO CLOCK SET IS INCOMPLETE” appears, manually set clock (below). ACTION SELECT AUTO CLOCK SET SET VCR IS I NCOMPLETE PLEASE SET CLOCK BY PRESSING ACT I ON KEY Manual Clock Set If Auto Clock Set was incomplete.
Reset Language, Channels, Clock, 1 Press ACTION* to display MENU. MENU SET UP VCR SET UP CLOCK SET UP CHANNEL IDIOMA/LANGUE : ENGLISH VCR’S OUTPUT CH:3 • PROGRAM functions are not available when using COMPONENT Video Output and S-VIDEO OUT. Please set TV to either RF INPUT or VIDEO INPUT, and then press PROGRAM. SELECT : SET : SET EXIT : ACTION 2 Language Channels 1) Press to select language item. 1) Press to select “SET UP CHANNEL,” and press SET.
k, VCR’s Output Channel *Important: If a remote control button does not work when pressed, press the VCR button on the remote and try the button again. POWER NUMBER keys CH Time Zone Adjust 1) Press to select “SET CLOCK,” and press SET. 1) Press to select “VCR’S OUTPUT CH.,” and press SET.
Playback/ Record on a Tape Ready Checklist EJECT VCR/TV All connections are made. (pp. 12 ~ 15) TV and DECK are plugged in. TV is on and tuned to CH 3, 4, or VIDEO. Remote is in VCR mode. (Press VCR.) CH / Playback a Tape 1 2 Insert a tape. • DECK power comes on. If Auto VCR/TV (see p. 32) is set to “OFF,” press VCR/TV on the remote for VCR mode. Press PLAY* to play a tape. VCR FF/ DVD PLAY STOP • If tape has no rec. tab (p. 6), auto play begins.
*Important: If a remote control button does not work when pressed, press the VCR button on the remote and try the button again. Record on a Tape This video recorder, equipped with HQ (High Quality) system, is compatible with existing VHS equipment. Only use tapes with the mark. Only tapes tested and inspected for use in 2, 4, 6, and 8 hour machines are recommended. Insert a tape with a record tab (p. 6). 1 • DECK power comes on. If Auto VCR/TV (see p.
Basic DVD Operation Ready Checklist All connections are made. (pp. 12 ~ 15) DECK is plugged in. If DECK is connected to an audio amplifier, turn the stereo system’s power on. 1 2 3 OPEN/ CLOSE Press POWER* on the remote or DECK. Press DVD to select DVD mode. • If a disc is already inserted, go to step 4. (Depending on the disc, playback may start automatically.) Press OPEN/CLOSE, and then place a disc into the disc tray. • Hold disc by its edges only (p.
*Important: If a remote control button does not work when pressed, press the DVD button on the remote and try the button again. ■ Forward/Reverse Scene Search V.S.S. (Virtual Surround Sound) Press FF/SLOW+ or REW/SLOW- during play. Enjoy a surround-like effect if you are Press PLAY to release. • Search speed, slow at first, increases with each additional press of the button up to 5 levels. ■ Forward/Reverse Chapter/Track Skip using two front speakers only.
Timer Recording Ready Checklist All connections are made. (pp. 12 ~ 15) TV and DECK are plugged in. Clock set correctly. (p. 18) Tape has record tab intact. (p. 6) Remote is in VCR mode. (Press VCR.) Sufficient tape remaining for recording time. 1 POWER Press PROG* to display Program. ADD/DLT 2 P DT START 1 -- --:-2 -- --:-3 -- --:-4 -- --:-- STOP --:---:---:---:-- CH SPD -- --- --- --- -- SELECT : SET : SET EXIT : PROG Example SELECT SET VCR • See selection order left.
*Important: If a remote control button does not work when pressed, press the VCR button on the remote and try the button again. Review, Replace or Clear Program Contents: (Recording is not in progress) 1 2 Press PROG to display Program List. P DT START STOP 1 13 2:00p 3:20p 2 14 7:00p 7:30p 3 -- --:-- --:-4 -- --:-- --:-- CH SPD 02 SLP 10 SP -- --- -- Press to select number. CANCEL : ADD/DLT SELECT : SET : SET EXIT : PROG 3 To cancel a Timer Recording in progress...
MTS Broadcast/ VHS Hi-Fi Stereo System Connection Make the Audio/Video Connection as shown on pp. 12 ~ 15. • You can use TV connected to a Stereo amplifier and speakers instead of Stereo TV. Receivable Broadcast Types The following are possible audio broadcast types and onscreen displays. The signal being received is indicated with a “ ” mark while the selected audio mode is indicated with an arrow. To display the broadcast signal being received, ➛ press DISPLAY*.
*Important: If a remote control button does not work when pressed, press the VCR button on the remote and try the button again. Audio Mode for Recording 1 Press AUDIO (SAP/Hi-Fi) to display audio mode. (Display disappears after 5 seconds.) 2 STEREO SAP MONO Press AUDIO (SAP/Hi-Fi) repeatedly to select desired mode. • Refer to “Receivable Broadcast Types” on p. 26. • Arrow indicates selection. 3 Make a recording. See p. 21. VCR Operation Audio Mode for Playback 1 2 3 Start playback. See p. 20.
Multi-Brand Control Feature Multi-Brand Control Setup The Remote Control can be set to control some TVs. 1 2 Find your TV Brand Code Number on the following page. 3 Confirm code entry, Set up for TV control, ➛ hold down TV button, ➛ enter code with NUMBER keys. ➛ press POWER to turn selected unit on or off. • See table below for controllable functions in each mode. Notes • Repeat setup after remote battery replacement. • Remote will not control every TV made by the manufacturer listed.
TV Brand Code Numbers Panasonic ......................................... 01, Quasar .............................................. 01, RCA ......................................................... GE ........................................................... Zenith ...................................................... Magnavox ............................................... Sylvania .................................................. Sharp ................................................. 06, Sony .......
Tape Operation Search System Zero Search For each recording, an invisible index mark is placed on the tape. A program index and information are also included for timer recordings. These marks are used to access or scan recordings. Index Search 1 Press SEARCH* to display SEARCH in Stop or Play mode, and then press NUMBER keys to select recording number. INDEX SEARCH ENTER INDEX NUMBER :1 USING 1- 9 KEYS FORWARD SEARCH :FF REVERSE SEARCH :REW EXIT :SEARCH • To calculate number, see below.
*Important: If a remote control button does not work when pressed, press the VCR button on the remote and try the button again. Tape Select Tape Position Display Select your tape length so the tape position and amount of tape remaining are properly displayed. (See “Tape Position Display” section right.) 1 2 Press ACTION to display MENU. MENU SET UP VCR SET UP CLOCK SET UP CHANNEL IDIOMA/LANGUE : ENGLISH VCR’S OUTPUT CH:3 Press to select “SET UP VCR,” and press SET.
Special VCR Features VCR/TV Selection Selector Feature Feature The VCR/TV selection can be set to auto or manual. 1 2 Press ACTION* to display MENU. MENU SET UP VCR SET UP CLOCK SET UP CHANNEL IDIOMA/LANGUE : ENGLISH VCR’S OUTPUT CH:3 SELECT : SET : SET EXIT : ACTION 3 SET UP VCR REPEAT PLAY REMOTE WARN I NG AUTO SHUT-OFF FRONT DISPLAY AUTO VCR/TV TAPE SELECT SELECT : END : ACT I ON : : : : : : OFF ON OFF ON ON T-120 SET : SET Press to select “SET UP VCR,” and press SET.
*Important: If a remote control button does not work when pressed, press the VCR button on the remote and try the button again. Weak Signal Display Feature When “ON,” picture is displayed regardless of signal strength. 1 2 Press ACTION to display MENU.
Special VCR Features (continued) Remote Warning Feature If Multi-brand feature is used (p. 28), and this feature is set to on, a warning appears whenever an invalid key is pressed in TV mode. 1 2 Press ACTION* to display MENU.
Copying Your Tapes (Dubbing) Connection VCR/ Camcorder (Hi-Fi) OUT OUT VIDEO AUDIO TV DVD/VCR DECK IN 1 VIDEO IN 2 VIDEO L R L AUDIO1 R Front of DECK IN FROM ANT. VHF/ UHF VHF/UHF OUT TO TV L-AUDIO IN2-R (Audio/Video In Terminals on the front of DECK are available) 1 Connect VIDEO OUT terminal on Playing VCR to VIDEO IN terminal on DECK. To monitor the dubbing, also connect TV as shown. 2 Connect “L” and “R” AUDIO OUT terminals on Playing VCR to “L” and “R” AUDIO IN terminals on DECK.
Disc Operation Subtitle Language (DVD only) You can select a different subtitle language (if offered) than the one set at the Settings for DVD Operation. (See p. 52.) 1 Press SUB TITLE* in Play mode to display the subtitle selection on-screen. • Display disappears after 5 seconds. • When no subtitles are offered, “-” will be displayed instead of the language number. 2 Press SUB TITLE, , or NUMBER keys to select a desired language. Te amo Subtitle language being played back (see chart, right).
*Important: if a remote control button does not work when pressed, press the DVD button on the remote and try the button again. When appears on the screen while a button is being operated, it means that the corresponding operation is prohibited by DECK or the disc. Multiple Angle Viewing (DVD only) DVDs may contain scenes shot from multiple camera angles allowing the same scene to be viewed at different angles. You can view these angles, if available, using the ANGLE button.
Disc Operation (continued) Title Menu (DVD only) Some DVDs have more than one title, e.g. movies. If the disc offers a title menu, you can select the desired title number. (Operation may vary according to the disc.) 1 T I TLE MENU Dogs Cas t l es Love r s B i r ds Press TITLE* in Play mode to display the title screen. 2 T I TLE MENU Dogs Cas t l es Love r s B i r ds B i rds of the world Press or NUMBER keys to select a title, and press SET or PLAY to start playing.
*Important: if a remote control button does not work when pressed, press the DVD button on the remote and try the button again. Program Play (CD only) Ready Checklist DECK is in DVD mode, press DVD. CD is inserted. You can program specific tracks and order of play. 1 2 Press ACTION to display DVD MAIN MENU.
Disc Operation (continued) Random Play (CD only) Tracks are played in a random order. 1 2 Ready Checklist DECK is in DVD mode, press DVD. Press ACTION* to display DVD MAIN MENU. DVD MAIN MENU DISC LANGUAGES AUDIO OUTPUT ST I L L MODE : AUTO TV MODE : 4:3 Pan&Scan PROGRESSIVE OUT: OFF PLAY MODE SELECT SET END 3 : : SET : ACTION PLAY MODE PROGRAM PLAY RANDOM PLAY SELECT SET END : : SET : ACTION Press to select “PLAY MODE,” and press SET to display.
*Important: if a remote control button does not work when pressed, press the DVD button on the remote and try the button again. DVD-Audio Operation (DVD-Audio only) This DECK, equipped with a 192 kHz/ 24 bit Audio D/A converter, supports DVD-Audio recorded with high quality sound. The DVD-Audio feature includes “Still Image Skip” and “Bonus Group Playback” functions. (See below.) Please refer to “Basic DVD Operation” on pages 22 and 23.
DVD-RAM Operation (DVD-RAM only) You can enjoy playing your personally recorded/edited DVD-RAM discs on this DECK. Note • This DECK was designed for playback only. DVD-RAM recording is not possible. Play a DVD-RAM 1 Do steps 1 ~ 3 on page 22. 2 Press D.NAVI* or PLAY LIST to display Direct Navigator or Play List menu for easy title or scene selection. • Play begins from the first program title recorded on the DVD-RAM. • See below for “Direct Navigator” or next page for “Play List information”.
*Important: if a remote control button does not work when pressed, press the DVD button on the remote and try the button again. Play List If the DVD-RAM features a Play List, your preselected list of favorite scenes is displayed for easy access. (Operation can vary according to how you edited the DVD-RAM.) 1 2 Press PLAY LIST in Play/Stop mode to display the Play List menu. Press to select a page and press to select a title (Play List No.). Then, press SET or PLAY to start playing.
DVD Operation using On-Screen Displays When DISPLAY is pressed, On-Screen Displays show disc information (title/chapter/track number, elapsed playing time) and DECK information (repeat play, play mode). 1 Ready Checklist DECK is in DVD mode, press DVD. Press DISPLAY* in Play or Stop mode to display “On-Screen Displays.” • Each press of DISPLAY changes the on-screen display as follows. (Refer to pp. 44 ~ 48.) ➡ Selected Disc information (See pp. 45, 46.) ➡ Selected DECK information (See pp. 47, 48.
*Important: if a remote control button does not work when pressed, press the DVD button on the remote and try the button again. Detailed Descriptions of each On-Screen Display ■ Disc information screen (for DVD-Video) 1. TITLE No. Go directly to a preset title number. 1 2 3 4 A C D • Select “TITLE”, and press SET. or NUMBER keys, and press SET. • Change the No. by pressing 2. CHAPTER No. Go directly to a preset chapter number. • Select “CHAPTER”, and press SET. • Change the No.
DVD Operation using On-Screen Displays (continued) ■ Disc information screen (for CD) 1. TRACK No. Go directly to a preset track number. 2 3 1 • Select “TRACK”, and press SET*. • Change the No. by pressing or NUMBER keys, and press SET. 2. Disc currently being played The type of disc currently inserted is displayed. 3. Elapsed playing time ■ Disc information screen (for DVD-RAM) A. Direct Navigation (PROGRAM) or PLAY LIST No. Go directly to a preset title number.
*Important: if a remote control button does not work when pressed, press the DVD button on the remote and try the button again. ■ DECK information screen (for DECK) 1 2 1. Operating mode The current operation is displayed. 2. Repeat Play mode (see p. 48) Repeat play mode can be selected. • Select “REPEAT”, and press SET. • Change the desired mode during play by pressing , and press SET.
DVD Operation using On-Screen Displays (continued) For your reference Repeat Play mode example (see p.
MP3/WMA/JPEG Playback Operation This unit can play MP3/WMA/JPEG format CD-R or CD-RW recorded for personal use on a PC, etc. Some discs may not play due to the condition of the recording. 1 2 Press POWER* on the remote or DECK. Press OPEN/CLOSE, then place an MP3/WMA/JPEG disc into the disc tray. Press OPEN/CLOSE to close. 3 • MP3/WMA/JPEG MENU is displayed. • Playback starts automatically (except JPEG files). • CD directory is displayed.
MP3/WMA/JPEG Playback Operation (continued) JPEG Playback You can play back JPEG images. Displayable Image Size: 32x32~7680x7680 pixels Note • Some JPEG format may not be played back. Do steps 1~3 on page 49. 1 2 Press to select a JPEG file ( ). Press SET or PLAY. Selected JPEG file is displayed. [JPEG Playback Screen] ■ ■ ■ ■ ■ 3 Returned on the MP3/WMA/JPEG MENU ➡ Press STOP. (See p. 49) Next/Previous Search ➡ Press SKIP+ | or SKIP- | . Start Slide-show ➡ Press FF/SLOW+ or REW/SLOW-.
JPEG Zoom (During JPEG Playback.) You can enlarge specific portions of a JPEG picture and select the zoom ratio using the ZOOM button on the remote during JPEG Playback screen. Set Zoom size. Press ZOOM repeatedly to change display as follows. ➡ Press STOP to return the MP3/WMA/JPEG MENU. • You can enlarge the center portion of the image to one of 2 magnifications. ACTION • Operation can be done during Rotation (below). SELECT X 1.
Settings for DVD Operation 1 2 Press ACTION* to display DVD MAIN MENU. DVD MAIN MENU DISC LANGUAGES AUDIO OUTPUT ST I L L MODE : AUTO TV MODE : 4:3 Pan&Scan PROGRESSIVE OUT : OFF Press to select an item, and press SET. Once initial settings are done, they remain in memory (even after power is turned off) until changed. This means DECK will operate under the same conditions (especially DVDs) each time. Ready Checklist DECK is in DVD mode, press DVD.
*Important: If a remote control button does not work when pressed, press the DVD button on the remote and try the button again. Audio Output (DVD only) Select the digital output to be output from the optical digital audio output connector of DECK. 1 2 Press ACTION to display DVD MAIN MENU. DVD MAIN MENU DISC LANGUAGES AUDIO OUTPUT ST I L L MODE : AUTO TV MODE : 4:3 Pan&Scan PROGRESSIVE OUT : OFF SELECT SET END : : SET : ACTION Press to select “AUDIO OUTPUT,” and press SET to display screen.
Settings for DVD Operation (continued) Still Mode (DVD only) Set to reduce jitter in a displayed still picture or a motion picture. 1 2 Press ACTION* to display DVD MAIN MENU. DVD MAIN MENU DISC LANGUAGES AUDIO OUTPUT ST I L L MODE : AUTO TV MODE : 4:3 Pan&Scan PROGRESSIVE OUT : OFF SELECT SET END : : SET : ACTION Press to select “STILL MODE,” and press SET repeatedly for mode. (See below.
*Important: If a remote control button does not work when pressed, press the DVD button on the remote and try the button again. PROGRESSIVE OUT Notes Sets the Component Video Output Connector (p. 10, 13) to output the Progressive scan signal. 1 2 Press ACTION to display DVD MAIN MENU.
Language Code List Enter the appropriate code number for the initial settings “AUDIO”, “SUBTITLE” and/or “MENUS” (see p. 52).
Warning and Instruction Displays These displays will alert you to a missed operation or provide further instructions. OSD Caution PLEASE SET CLOCK BY PRESSING ACTION KEY PLEASE PREPARE FOR TIMER REC If you press REC on the remote control or DECK, and a cassette is inserted with no record tab... If you press PLAY, FF, REW, or REC on the remote control or DECK without a cassette inserted... If you press STOP or POWER during a Timer Recording...
Before Requesting Service Check the following points if you are having trouble with your DECK. Power Solution No power… • Completely insert Power Plug into an AC outlet. • Press POWER button on. • Make sure power source is active. Power turns itself off... • Auto power-off (shutoff) occurs after about 5 min. in DVD mode with no operation, or if there is no broadcast signal in TV or Playback mode. Turn the power back on. (pp. 23, 33) Solution Recording & Playback TV program cannot be recorded...
DVD/ CD Solution Play fails to start even when PLAY is pressed... • This DECK cannot play discs other than DVDs and CDs. • The disc may be dirty and require cleaning. Picture is distorted during rapid advance or rapid reverse... • The picture will be somewhat distorted at times: this is normal. No Forward/Reverse Scene Search play... Audio soundtrack and/or subtitle language is not the one selected at the initial settings... No subtitles...
Index DECK & VCR A ACTION button ................................. 8, 18 Accessories ............................................ 4 ADD/DELETE button (Add or Delete a Channel) ............ 8, 19 Audio Broadcast types (Stereo/SAP/Mono) ............................ 26 Audio Mode (Playback, Recording) .... 27 Auto Operation Functions .................... 31 Auto Shut-Off ........................................ 33 B Batteries ................................................. 4 Blue Light (ON/OFF Feature) .....
DVD A ACTION button ................................. 8, 52 ANGLE button (Multiple Angle Viewing) ......... 8, 37, 51 AUDIO button (Audio Soundtrack Language) ...... 8, 36 Audio Output (For Selecting Audio Output) ............. 53 Auto-Power Off Function ..................... 23 A/V OPTIMIZER .................................... 55 B Bonus Group (For DVD-Audio) ........... 41 C CLEAR button .................................. 8, 39 Component Video Output .............. 10, 13 D Direct Navigator .............
Memo 62 AG-VP310 P36-72 (040510).
For Your Information 63 AG-VP310 P36-72 (040510).
Broadcast & Digital Systems Company Panasonic Broadcast & Television Systems Company Division of Matsushita Electric Corporation of America Executive Office: One Panasonic Way 4E-7, Secaucus, NJ 07094 (201) 348-7000 Eastern Zone: One Panasonic Way 4E-7, Secaucus, NJ 07094 (201) 348-7621 Central Region: 1707 N Randall Road E1-C-1, Elgin, IL 60123 (847) 468-5200 Western Zone: 3330 Cahuenga Blvd W, Los Angeles, CA 90068 (323) 436-3500 Government Marketing Department: 52 West Gude Drive, Rockville, MD 20850 (30