
User Manual

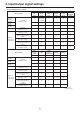
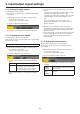

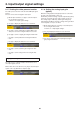
Table Of Contents
- Contents
- Before use
- 1. Basic operations
- 1-1. Background transition
- 1-2. Wipe
- 1-3. Key
- 1-4. PinP (picture in picture)
- 1-5. DSK (downstream key)
- 1-6. Key Link
- 1-7. FTB (Fade to Black)
- 1-8. Internal color signals
- 1-9. Switching the AUX output
- 1-10. Memory
- 1-10-1. Memory registration and recall items
- 1-10-2. Storing the settings in the memory (Store)
- 1-10-3. Recalling the operations stored in the memory (Recall)
- 1-10-4. Memory preview
- 1-10-5. Deleting the operations stored in the memory (Delete)
- 1-10-6. Selecting the buses whose settings are to be registered and or played back
- 1-10-7. Registering the material selection items
- 1-10-8. Setting effect dissolve (shot memory)
- 1-10-9. Editing event memory timelines
- 1-10-10. Registering memories (Register)
- 1-11. Video memories
- 1-12. Memory card
- 1-13. Waveform monitor settings
- 1-14. Setting the status display
- 2. Input/output signal settings
- 2-1. Input signal settings
- 2-1-1. Setting the frame synchronizer
- 2-1-2. Setting the input mode
- 2-1-3. Setting the delay amount
- 2-1-4. Freezing the input signals
- 2-1-5. Setting the material names
- 2-1-6. Setting the up-converter
- 2-1-7. Setting the video process function
- 2-1-8. Setting the analog input gain (option)
- 2-1-9. Setting the analog composite input signals (option)
- 2-1-10. Setting the DVI input signals
- 2-1-11. Displaying the DVI input signal information
- 2-1-12. Adjusting the DVI input signals
- 2-1-13. Automatic adjustment of the black level and white level (analog input signals)
- 2-2. Output signal settings
- 2-3. Setting the sync signals
- 2-4. Adjusting the output signal phase
- 2-5. Setting the multi view display
- 2-6. Setting the ancillary data and embedded audio data
- 2-1. Input signal settings
- 3. System settings
- 4. External interfaces
- 5. Setting menu table
- Appendix (glossary)
- Index
80
2. Input/output signal settings
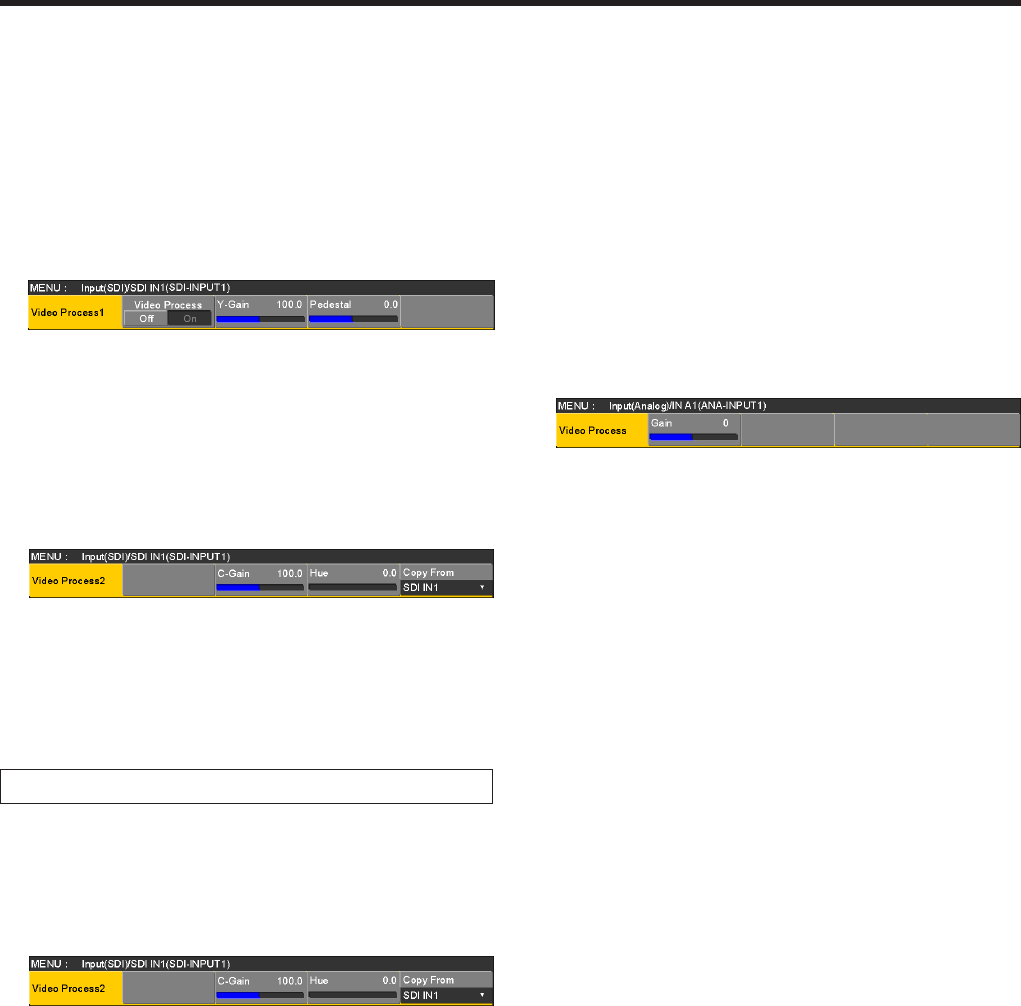
2-1-7. Setting the video process function
The video process function works for all the SDI input signal
images.
The color tones can be changed for each input.
1On the Input sub menu, use [F2] to select the input to
be set using the Select item.
Refer to “2-1. Input signal settings”.
2Use [F1] to display the Video Process1 sub menu.
3Use [F2] to select enable (On) or disable (Off) for the
video process function using the Video Process item.
4Use [F3] to set the Y signal gain using the Y-Gain item.
5Use [F4] to set the pedestal level using the Pedestal
item.
6Use [F1] to display the Video Process2 sub menu.
7Use [F3] to set the saturation gain using the C-Gain
item.
8Use [F4] to set the change in the hue using the Hue
item.
Copying the settings
The video process settings already selected can be set for
other input signals as well.
On the Video Process2 sub menu, use [F5] to select the input
signals of the copy destination, and press [F5].
2-1-8. Setting the analog input gain
(option)
When the analog input board (option) has been connected,
the gain of the input signals can be set.
Alternatively, when the analog composite input board (option)
has been connected, the gain of the Y signals can be set.
The setting range is ±30 steps, and the gain changes by
approximately ±2 dB. The amount of change in the gain when
it is changed by one step is not fixed.
1On the Input sub menu, use [F2] to select the input to
be set using the Select item.
Refer to “2-1. Input signal settings”.
2Use [F1] to display the Video Process sub menu.
3Use [F2] to set the gain of the input signal (Y signal
gain) using the Gain item.