
User Guide
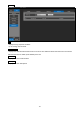

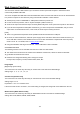
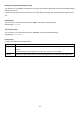
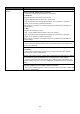

Table Of Contents
- Operating Instructions
- Read this first! (For AW-HE20KP, AW-HE20WP)
- Getting Started
- Characteristics
- Accessories
- Operating Precautions
- Parts and Functions
- Wireless Remote Control (optional accessory)
- Network Settings
- Basic Shooting Operation
- 1. Make sure the subject brightness is in the appropriate level.
- 2. Make sure the unit and all devices are well connected and power on.
- 3. Press one of the [CAMERA 1] to [CAMERA 4] buttons on the wireless remote control to select the unit if using the wireless remote control. Even when using only one unit, it must still be selected from the wireless remote control or controller.
- 4. Select the scene (shooting) mode.
- 5. Start shooting.
- Power on and Power Off the Camera Unit
- Power on the Camera Unit
- Power off the Camera Unit
- 1. Press one of the [CAMERA 1] to [CAMERA 4] buttons on the wireless remote control to select the unit.
- 2. Press the [ON/STANDBY] button on the wireless remote control for 2 seconds.
- The unit enters STANDBY mode.
- 3. The unit’s status display lamp now lights up orange.
- 4. If a multiple number of units are used, repeat steps 1 and 2 as required.
- 5. Set all the power switches of the units and devices connected in the system to OFF.
- Priority Mode
- Selecting the Scene Mode
- Operating the Camera unit
- Control the Picture’s Direction (using the wireless remote control)
- Zoom In/Out Function (using the wireless remote control)
- Switching the Direction or Zoom Speed (using the wireless remote control)
- Control the Picture’s Direction (using the controller)
- Zoom In/Out Function (using the controller)
- Switching the Direction or Zoom Speed (using the controller)
- What to do when Encountering Problems in the Basic Shooting Operations
- Advanced Operations
- Menu Operation
- Operations Table
- When performing the operations using the wireless remote control
- 1. Press the [CAMERA 1], [CAMERA 2], [CAMERA 3] or [CAMERA 4] button to select the unit which is to be operated.
- 2. Press the [MENU] button for 2 seconds.
- 3. Press the [▲] or [▼] button to bring the cursor to the item to be selected.
- 4. Press the [] button.
- 5. Press the [▲] or [▼] button to bring the cursor to the item to be set.
- 6. Press the [] button.
- 7. Press the [▲] or [▼] button to change the setting.
- 8. Press the [] button.
- 9. After the setting has been completed, press the [MENU] button for 2 seconds.
- Menu Items
- Menu Table
- Web Screen Start-up
- Web Live Screen Operation
- Troubleshooting
- Specification
- Index

111
Error Log
No
Displays the log sequence numbers.
Up to 100 logs can be saved.
Operation time
Displays the dates and times when the errors occurred. The dates and times when the errors occurred are
indicated with the hour meter (0h to 99999h) of the unit.
Error code
Displays the event code numbers.
Description
Displays the error descriptions.