
User's Manual


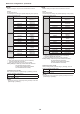


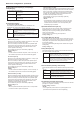
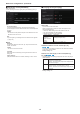
Table Of Contents
- Read this first! (For AW‑UE100WP, AW‑UE100KP)
- Read this first! (For AW‑UE100WPC, AW‑UE100KPC)
- Read this first! (For AW‑UE100WE, AW‑UE100KE, AW‑UE100WED, AW‑UE100KED)
- Read this first! (For AW‑UE100WE, AW‑UE100KE)
- Read this first!
- Before use
- Features
- Accessories
- Optional accessories
- Operating precautions
- Wireless remote control (optional accessory)
- Parts and their functions
- Setting the remote control IDs
- Network settings
- Basic shooting operations
- How to turn the power on and off
- Selecting the units
- Selecting the shooting modes (scene files)
- Shooting
- What to do when encountering problems in the basic shooting operations
- More advanced operations
- Manual shooting
- Preset memories
- White balance adjustment
- Black balance adjustment
- Black level (master pedestal) adjustment
- Genlock adjustment
- Basic setup operations
- Camera menu items
- Setting the camera menu items
- Top Menu screen
- Camera screen
- Brightness 1/2 screen
- Brightness 2/2 screen
- Picture 1/6 screen
- Color TEMP. Setting screen
- Picture 2/6 screen
- Picture 3/6 screen
- Picture 4/6 screen
- Picture 5/6 screen
- Picture 6/6 screen
- Matrix 1/5 screen
- Matrix 2/5 screen
- Matrix 3/5 screen
- Matrix 4/5 screen
- Matrix 5/5 screen
- Lens screen
- System 1/2 screen
- System 2/2 screen
- Output 1/5 screen
- Output 2/5 screen
- Output 3/5 screen
- Output 4/5 screen
- Output 5/5 screen
- UHD Crop 1/2 screen
- UHD Crop 2/2 screen
- Pan/Tilt 1/2 screen
- Pan/Tilt 2/2 screen
- P/T Acceleration screen
- Preset 1/2 screen
- Preset 2/2 screen
- Preset Acceleration screen
- Maintenance screen
- Firmware Version 1/2 screen
- Firmware Version 2/2 screen
- IP Network screen
- Initialize screen
- Hour Meter screen
- HDMI Status screen
- Error Status screen
- Camera menu item table
- Displaying the web screen
- Web screen operations
- Web screen configurations
- Displaying the web screen using a personal computer equipped with a touch panel
- Displaying the web screen using a mobile terminal
- Limiters
- Setting/releasing the limiters
- Safe mode
- Troubleshooting
- Specifications
- Index

4. Collaboration capability [Linkage]
Tracking data output setting button [Tracking Data Output]
The tracking data output setting screen [Tracking Data Output] is
displayed when the button is clicked.
→ “Tracking data output settings screen [Tracking Data Output]”
(→ page 136)
P2 Cast connection setting button [P2 Cast]
P2 Cast connection setting screen [P2 Cast] is displayed when the
button is clicked.
→ “P2 Cast connection setting screen [P2 Cast]” (→ page 138)
5. User management settings [User mng.]
User authentication button [User auth.]
The user authentication screen [User auth.] is displayed when the
button is clicked.
→ “User authentication screen [User auth.]” (→ page 139)
Host authentication button [Host auth.]
The host authentication screen [Host auth.] is displayed when the
button is clicked.
→ “Host authentication screen [Host auth.]” (→ page 140)
6. Network settings [Network]
Network setup button [Network]
The network setup screen [Network] is displayed when the button is
clicked.
→ “Network setup screen [Network]” (→ page 141)
Advanced network setting button [Advanced]
The advanced network setting screen [Advanced] is displayed when
the button is clicked.
→ “Advanced network setting screen [Advanced]” (→ page 144)
7. Maintenance [Maintenance]
System log button [System log]
The system log screen [System log] is displayed when the button is
clicked.
→ “System log screen [System log]” (→ page 154)
Product information button [Product Info.]
The product information screen [Product info.] is displayed when the
button is clicked.
→ “Product information screen [Product info.]” (→ page 155)
Reset settings button [Default reset]
The reset settings screen [Default reset] is displayed when the button
is clicked.
→ “Reset settings screen [Default reset]” (→ page 156)
Back up button [Backup]
The back up screen [Backup] is displayed when the button is clicked.
→ “Back up screen [Backup]” (→ page 157)
8. Power ON button [Power ON]/Standby button [Standby]
[Power ON]
Turn the unit on.
[Standby]
Set the unit to Standby mode.
When you enter Standby mode, the display will automatically switch
to the live screen [Live]. In addition, the [Setup] button in the live
screen [Live] will be disabled, and you cannot operate the web setup
screen [Setup].
9. Main area
The menu screen is displayed.
Setting status screen [Setting status]
Model no.
The model number of the unit is displayed.
Firmware Version
The firmware version of the unit is displayed.
Refer to the product information screen [Product info.] for detailed
version information.
System Frequency
The frame frequency of the unit is displayed.
System Format
The video format of the unit is displayed.
Streaming mode
The streaming mode of the unit is displayed.
102
Web screen configurations (continued)