
User's Manual
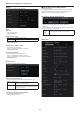
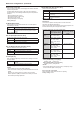
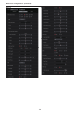
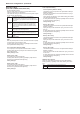
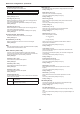
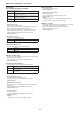
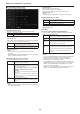
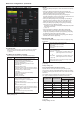
Table Of Contents
- Read this first! (For AW‑UE100WP, AW‑UE100KP)
- Read this first! (For AW‑UE100WPC, AW‑UE100KPC)
- Read this first! (For AW‑UE100WE, AW‑UE100KE, AW‑UE100WED, AW‑UE100KED)
- Read this first! (For AW‑UE100WE, AW‑UE100KE)
- Read this first!
- Before use
- Features
- Accessories
- Optional accessories
- Operating precautions
- Wireless remote control (optional accessory)
- Parts and their functions
- Setting the remote control IDs
- Network settings
- Basic shooting operations
- How to turn the power on and off
- Selecting the units
- Selecting the shooting modes (scene files)
- Shooting
- What to do when encountering problems in the basic shooting operations
- More advanced operations
- Manual shooting
- Preset memories
- White balance adjustment
- Black balance adjustment
- Black level (master pedestal) adjustment
- Genlock adjustment
- Basic setup operations
- Camera menu items
- Setting the camera menu items
- Top Menu screen
- Camera screen
- Brightness 1/2 screen
- Brightness 2/2 screen
- Picture 1/6 screen
- Color TEMP. Setting screen
- Picture 2/6 screen
- Picture 3/6 screen
- Picture 4/6 screen
- Picture 5/6 screen
- Picture 6/6 screen
- Matrix 1/5 screen
- Matrix 2/5 screen
- Matrix 3/5 screen
- Matrix 4/5 screen
- Matrix 5/5 screen
- Lens screen
- System 1/2 screen
- System 2/2 screen
- Output 1/5 screen
- Output 2/5 screen
- Output 3/5 screen
- Output 4/5 screen
- Output 5/5 screen
- UHD Crop 1/2 screen
- UHD Crop 2/2 screen
- Pan/Tilt 1/2 screen
- Pan/Tilt 2/2 screen
- P/T Acceleration screen
- Preset 1/2 screen
- Preset 2/2 screen
- Preset Acceleration screen
- Maintenance screen
- Firmware Version 1/2 screen
- Firmware Version 2/2 screen
- IP Network screen
- Initialize screen
- Hour Meter screen
- HDMI Status screen
- Error Status screen
- Camera menu item table
- Displaying the web screen
- Web screen operations
- Web screen configurations
- Displaying the web screen using a personal computer equipped with a touch panel
- Displaying the web screen using a mobile terminal
- Limiters
- Setting/releasing the limiters
- Safe mode
- Troubleshooting
- Specifications
- Index

Gain
[When [Super Gain] is [Off]: Auto, 0dB to 36dB,
When [Super Gain] is [On]: Auto, 0dB to 42dB]
The image gain is adjusted here.
In locations which are too dark, adjust the gain upward; conversely, in
locations which are too bright, adjust it downward.
When [Auto] is set, the light quantity is adjusted automatically.
The noise increases when the gain is increased.
Factory settings: 0dB
Super Gain [Off, On]
Set the super gain (increased sensitivity) mode.
Off Do not set super gain mode.
On Set super gain mode.
Factory settings: Off
AGC Max Gain [6dB, 12dB, 18dB]
When [Auto] is selected as the [Gain] setting, the maximum gain-up
amount can be set.
Factory settings: 18dB
Frame Mix [Auto, Off, 6dB, 12dB, 18dB, 24dB]
Select for frame addition (gain-up using sensor storage) amount.
When frame addition is performed, it will appear as if the images are
missing some frames.
When [Shutter Mode] is [ELC], you can set only [Auto] or [Off].
This cannot be set when [Shutter Mode] is [Step] or [Synchro].
This cannot be configured when the format is 2160/29.97p,
2160/23.98p, 2160/24p, 2160/25p, 1080/29.97p, 1080/23.98p(59.94i),
1080/23.98p, 1080/24p, 1080/29.97PsF, 1080/23.98PsF, 1080/25p or
1080/25PsF.
Factory settings: Off
<NOTE>
• Under discharge tube illumination, such as fluorescent and mercury-
vapor lights, the brightness may change cyclically, colors may
change, and horizontal stripes may flow up and down the image.
• When [Frame Mix] is set to 6dB, 12dB, 18dB or 24dB, if you set
[Shutter Mode] to [ELC], [Frame Mix] is changed to [Off].
Auto F.Mix Max Gain [0dB, 6dB, 12dB, 18dB]
Sets the maximum amount of frames that can be added when [Frame
Mix] is running in [Auto] mode.
When frame addition is performed in [Auto] mode, it will appear as if
the images are missing some frames.
Factory settings: 18dB
ND Filter [Through, 1/4, 1/16, 1/64]
Set the transmittance of the lens' built-in ND (neutral density) filter.
The filter switches when the setting is fixed.
Through Do not set ND filter.
1/4 Set ND filter transmittance to 1/4.
1/16 Set ND filter transmittance to 1/16.
1/64 Set ND filter transmittance to 1/64.
Factory settings: Through
Day/Night
[Day, Night]
Switch between standard shooting and night-vision shooting (shooting
with infrared light).
Day Standard shooting (day mode)
Night Night-vision shooting (night mode)
Factory settings: Day
<NOTE>
• In night mode, video output will be in black and white. In addition,
the iris will be forcibly opened.
• White balance adjustment is not possible in night mode.
• ND filter switching is not possible in night mode.
• [Pedestal] cannot be performed properly in night mode.
122 123
Web screen configurations (continued)