Removable Full Front MP3 WMA CD Player/Receiver with CD Changer Control CQ-C3400/C3300U Removable Full Front CD Player/Receiver with CD Changer Control CQ-C3200/C3100U (CQ-C3400U) Operating Instructions Manuel d’instructions Manual de instrucciones ≥ Please read these instructions carefully before using this product and save this manual for future use. ≥ Prière de lire ces instructions attentivement avant d’utiliser Ie produit et garder ce manuel pour l’utilisation ultérieure.
Safety Information E N G L I S H Precautions When Driving WARNING: TO REDUCE THE RISK OF FIRE OR ELECTRIC SHOCK, DO NOT EXPOSE THIS PRODUCT TO RAIN OR MOISTURE. Keep the volume level low enough to be aware of road and traffic conditions. TO REDUCE THE RISK OF FIRE OR ELECTRIC SHOCK, AND ANNOYING INTERFERENCE, USE ONLY THE INCLUDED COMPONENTS. Do not expose the product, including the speakers and CDs, to water or excessive moisture. This could cause electrical shorts, fire, or other damage.
E N G L I S H Features Before Reading these Instructions MP3/WMA Playback from CD-R/RW CQ-C3400U CQ-C3300U You can play your MP3/WMA (Windows Media Audio) files as well as regular CDs. With up to 10 to 12 times* the capacity of a conventional CD, a single MP3/WMA-encoded disc can keep you entertained throughout your entire journey. *Depending on bit rate. CD Changer Control You can connect the optional CD changer unit. For details, refer to the operating instructions on the CD changer unit.
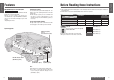
E N G L I S H Preparation Clock Setting Remote Control Unit Subwoofer Lithium battery (included) Back side CQ-C3400U CQ-C3200U Preparation: ≥ Connect the subwoofer (option). (page 56) Subwoofer level setting: ≥ You can change the subwoofer level. (page 34) 2 Position B 3 Battery holder CQ-C3400U Subwoofer low pass filter setting: ≥ You can select the upper limit frequency of the sound from subwoofer. (page 34) The 12-hour system is used for the clock.
E N G L I S H E N G L I S H Contents 1 Safety Information ................................................................................. Page 2 Precautions..................................................................................................... 2 Accessories..................................................................................................... 3 Audio Settings....................................................... 34 Features ...............................................
E N G L I S H E N G L I S H General [S·HDB] [SOURCE] (PWR: Power) 3 Point the remote control unit at the remote control signal sensor. Level meter display pattern [SOURCE] (Power/source) [LEVEL] Mute/Attenuation POWER SOURCE MENU [MUTE] MUTE [VOL "] SEL NUMBER VOL # 1 2 3 RAND SCAN REP 4 5 6 7 8 6 [VOL #] (Volume) ON: OFF: Press [MUTE]. ( lights.) Press [MUTE] again. 4 You can select mute or attenuation. (page 34) No sounds. (default) 9 Decrease the volume by 10 steps.
E N G L I S H E N G L I S H Radio [%] [$] (TUNE) (Stereo) indicator Station Preset [SOURCE] 5 POWER MENU SOURCE SEL NUMBER MUTE [DISP] (Display) [SOURCE] [D·M] (Direct Memory) Preset buttons [1] to [6] (Preset station) [BAND] (APM: Auto Preset Memory) [1] to [6] (Preset station) 6 VOL # 1 2 3 RAND SCAN REP 4 5 6 7 8 9 0 DISP 6 [BAND] (Auto preset memory) BAND Up to 6 stations can be stored in each of the FM1, FM2, FM3 and AM band selections.
E N G L I S H Before Disc Playback CD Player CQ-C3200U/CQ-C3100U cannot play MP3/WMA files. 7 E N G L I S H Do not watch the scroll display while driving. 8 Disc Insert 1 Press [OPEN]. [OPEN] 2 Insert a disc. Display Change Press [DISP] (display). Note: ≥ Do not insert a disc when indicator lights because a disc is already loaded. All available tracks are played in a random sequence. Press [4] (RANDOM). ( lights.) Press [4] (RANDOM) again to cancel.
E N G L I S H MP3/WMA Player E N G L I S H CQ-C3200U/CQ-C3100U cannot play MP3/WMA files. Do not watch the scroll display while driving. 9 10 Fast Forward/Fast Reverse Press and hold [9] (5): Fast forward [:] (6): Fast reverse Release to resume the playback. Pause Press [;/1]. Press [;/1] again to cancel. ID3/WMA Tag Setting Press and hold [3] for more than 2 seconds. When a folder name is displayed: TAG ON: The album title is displayed. TAG OFF: The folder name is displayed.
E N G L I S H MP3/WMA Player (continued) CQ-C3400U CQ-C3300U E N G L I S H CQ-C3200U/CQ-C3100U cannot play MP3/WMA files. Notes on MP3/WMA 11 What is MP3/WMA? MP3 (MPEG audio layer 3) and WMA (Windows Media™ Audio) are the compression formats of digital audio. The former is developed by MPEG (Motion Picture Experts Group), and the latter is developed by Microsoft Corporation. Using these compression formats, you can record the contents of about 10 music CDs on a single CD media.
E N G L I S H E N G L I S H CD Changer Control ( or ) indicator Changer 1 or 2 (This lights only when the dual CD changer selector is connected.
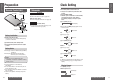
E N G L I S H E N G L I S H Audio Settings 1 Press [VOLUME] (SEL: select). 15 Volume Default:18 Setting range: 0 to 40 Bass/Treble 2 Turn [VOLUME]. [VOLUME "]: Up [VOLUME #]: Down [VOLUME "]: Increased [VOLUME #]: Decreased You can adjust the bass and treble sound.
E N G L I S H E N G L I S H Security Setting 1 Press and hold [VOLUME] (SEL: select) for more than 2 seconds. 17 2 Turn [VOLUME]. 18 (Press ["] or [#] on the remote control unit.) (Press and hold.) 2 sec. Security Function Allows you to activate the anti-theft function when leaving your car. Default: ON ["]: Security function is activated. Note: ≥ Press [DISP] (display) to return to the regular mode.
E N G L I S H Troubleshooting 19 Check and take steps as described in the tables below. Preliminary Steps If You Suspect Something Wrong Immediately switch the power off. Disconnect the power connector and check that there is neither smoke nor heat from the unit before asking for repairs. Never try to repair the unit by yourself because it is dangerous to do so. Caution: ≥ Do not use the unit if it malfunctions or if there is something wrong.
E N G L I S H q CD/MP3/WMA CQ-C3400U CQ-C3300U 21 q CD CQ-C3200U CQ-C3100U E N G L I S H Troubleshooting (continued) Problem No playback or disc ejected Possible cause The disc is inserted upside down. Problem Possible solution Insert a disc correctly. No response to pressing buttons There is a flaw or foreign objects on Remove the foreign objects, or use a the disc. flawless disc. The disc has unplayable formatted data.
E N G L I S H E N G L I S H Troubleshooting (continued) q CD Changer Control 23 Maintenance Display Possible cause Disc is dirty, or is upside down. A disc other than a music CD (CD-DA type) is loaded. Possible solution Check the disc. (The changer automatically switches to the next disc.) 24 Product Servicing Disc has scratches. Check the disc. (The changer automatically switches to the next disc.) No operation by some cause.
E N G L I S H Notes on Discs Notes on CD/CD Media (CD-R, CD-RW, CD-ROM) 25 If you use commercial CDs, they must have either of these labels below. (Only for CQ-C3400U/CQ-C3300U) How to hold the disc ≥ Do not touch the underside of the disc. ≥ Do not scratch the disc. ≥ Do not bend the disc. ≥ When not in use, keep the disc in the case. Label side Do not use irregularly shaped discs.
E N G L I S H E N G L I S H Installation Guide WARNING 27 This installation information is designed for experienced installers and is not intended for non-technical individuals. It does not contain warnings or cautions of potential dangers involved in attempting to install this product. Any attempt to install this product in a motor car by anyone other than a qualified installer could cause damage to the electrical system and could result in serious personal injury or death.
E N G L I S H Installation Guide (continued) 29 The first step in installation is to identify all the car wires you’ll use when hooking up your sound system. As you identify each wire, we suggest that you label it using masking tape and a permanent marker. This will help avoid confusion when making connections later. Identify All Leads Note: ≥ Do not connect the power connector to the stereo unit until you have made all connections.
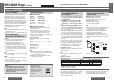
Installation Guide (continued) Remove the Unit Switch off the power of the unit. 1 Remove the removable face plate. (page 45) 7 Trim plate Screwdriver 2 Remove the trim plate 7 with a screwdriver. the lock cancel plates 8 along the 3 1 Insert grooves on both sides of the main unit until “click” is heard. 2 Pull out the unit while pushing the plates further inside. 1 Insert. Insert the tab end in the outer groove. 8 Lock cancel plate “Click” 2 Pull out. 4 Remove the unit pulling with both hands.
52 CQ-C3400/3300/3200/3100U CQ-C3400/3300/3200/3100U 53
E N G L I S H E N G L I S H Electrical Connections (continued) Upgrading the System 1 35 Example combination ≥ CD changer (CX-DP880U, option) CD changer (CX-DP880U, option) RCA cord (R) R (red) CD changer input cord 36 Note: ≥ For wiring, carefully read the operating instructions for the devices connected. RCA cord (L) CD.
E N G L I S H Electrical Connections (continued) Specifications Speaker System Connection 37 General FM Stereo Radio Power supply: Example combination ≥ Stereo power amplifier (option) ≥ Subwoofer (option) (Only for CQ-C3400U/CQ-C3200U) ≥ Front speaker, rear speaker (option) Current consumption: Maximum power output: CQ-C3400U CQ-C3200U Tone adjustment range: Subwoofer cord Speaker impedance: Pre-amp output voltage: Pre-amp output connector (rear) S.
Panasonic Consumer Electronics Company, Division of Matsushita Electric Corporation of America One Panasonic Way, Secaucus, New Jersey 07094 http://www.panasonic.com Panasonic Sales Company. Division of Matsushita Electric of Puerto Rico, Inc. (“PSC”) Ave. 65 de Infanteria, Km. 9.5 San Gabriel Industrial Park, Carolina, Puerto Rico 00985 http://www.panasonic.com YEFM284143 Panasonic Canada Inc. 5770 Ambler Drive, Mississauga, Ontario L4W 2T3 http://www.panasonic.