Model: CQ-C1505W Operating Instructions • Please read these instructions carefully before using this product and keep this manual for future reference.
Safety Information Read the operating instructions for the unit and all other components of your car audio system carefully before using the system. They contain instructions about how to use the system in a safe and effective manner. Panasonic assumes no responsibility for any problems resulting from failure to observe the instructions given in this manual.
Caution Observe the following cautions when using this unit. Keep the sound volume at an appropriate level. Keep the volume level low enough to be aware of road and traffic conditions while driving. This unit is designed for use exclusively in automobiles. Do not operate the unit for a prolonged period with the engine turned off. Operating the audio system for a long period of time with the engine turned off will drain the battery. Do not expose the unit to direct sunlight or excessive heat.
Before Reading These Instructions Panasonic welcomes you to our constantly growing family of electronic products owners. We endeavor to give you the advantages of precise electronic and mechanical engineering, manufactured with carefully selected components, and assembled by people who are proud of the reputation their work has built for our company.
Accessories Instruction kit Installation kit (YEP0FZ5698) Q’ty: 1 Operating Instructions (English: YEFM285920) (Русский: YEFM285921) (中文: YEFM285922) (한국어: YEFM285923) Lock Cancel Plate Q’ty: 1 (YEFX0217263A) Q’ty: 1 Trim Plate Mounting Bolt (5 mm ) Q’ty: 1 set Installation Instructions (YEFM294291) Mounting Collar (YEFC051020) Q’ty: 1 Power Connector (YGAJ021009) Rubber Bushing Q’ty: 1 Remote Control Unit (includes a battery) (EUR7641010) Q’ty: 1 Removable Face Plate Case (YEFA131839A) Q’ty
Specifications General Power supply Current consumption Maximum power output Power output Tone adjustment range Speaker impedance Pre-amp output voltage Pre-amp output impedance Dimensions (W x H x D) Weight Front AUX input Input impedance Allowable external input Connector FM Stereo Radio : DC 12 V (11 V – 16 V DC), test voltage 14.4 V, negative ground : Less than 2.1 A (CD mode; 0.
First Time Power On your car’s ignition switch to the ACC or 1 Set ON position. Battery Installation Preparation Pull the insulation film out from the backside of the remote control gently. Note: Battery Information: Battery Type: Panasonic lithium battery (CR2025) (Included in the remote control) Battery Life: Approximately 6 months under normal use (at room temperature) The 24-hour system is used for the clock. 6 Press [DISP]. ACC ON 2 Press [SOURCE] (PWR: Power). 1 Press [DISP].
Cleaning the Unit Maintenance/Fuse Your product is designed and manufactured to ensure the minimum of maintenance. Use a dry, soft cloth for routine exterior cleaning. Never use benzine, thinner, or other solvents. If the fuse blows out, consult your dealer, or your nearest authorized Panasonic Service Center. Fuse Warning • Use fuses of the same specified rating (15 A). Using substitutes or fuses with higher ratings, or connecting the unit directly without a fuse could cause fire or damage to the unit.
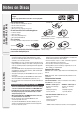
Notes on Discs If you use commercial CDs, they must have either of these labels shown at right. Some copy-protected music CDs are not playable.
Notes on MP3/WMA Note: MP3/WMA encoding and writing software is not supplied with this unit. Points to remember when making MP3/WMA files Common • High bit rate and high sampling frequency are recommended for high quality sounds. • Selecting VBR (Variable Bit Rate) is not recommended because playing time is not displayed properly and sound may be skipped. • The playback sound quality differs depending on the encoding circumstances.
Remote Control Unit Notes: • This instruction manual explains operations for use with the buttons on the main unit. (Different operations excluded) • Aim the remote control at the remote sensor and operate it. [0] to [9] selects a preset station (1 to 6), presets the current station (Hold it down for more than 2 seconds.), inputs the number in direct selection. [#] (NUMBER) executes the direct selection. [RANDOM] [SCAN] [REPEAT] toggles on/off each play mode.
General [SOURCE] (Source) selects a source. [PWR] (Power) toggles power on/off. [VOL] (Volume) [SQ] (Sound Quality) selects a sound type (SQ). Remote Control Sensor [MUTE] toggles mute on/off. Caution • Set the volume level to low enough before the AUX connection is completed. Failure to observe this, the loud noise may come out and damage your speakers and your hearing. Power On/Off Power on: Press [SOURCE] (PWR). Power off: Hold down [SOURCE] (PWR) for more than 1 second.
Radio (AM/FM) [SOURCE] (Source) selects a source. [DISP] (Display) switches the information on the display. [BAND] selects a band in the radio source. [APM] (Auto Preset Memory) executes APM in the radio source. (Hold it down for more than 2 seconds.) [TUNE ] [TUNE ] down/up the frequency. (Hold it down for more than 0.5 seconds and release it for seek tuning.) Preset buttons [1] to [6] selects a preset station in the radio source, and presets the current station.
Band Frequency Preset Number Display change Press [DISP] to change the display. Radio Source Display Radio mode display (Default) lights while receiving an FM stereo signal. Clock display Up to 6 stations can be preset in AM, FM1, FM2, and FM3 respectively. Preset stations can be simply called up by pressing [1] to [6]. Auto Preset Memory (APM) Station Preset With this operation, stations with good receiving conditions can be automatically stored in the preset memory. 1 Select a band.
Audio Settings [VOL] selects a value in the audio menu. (PUSH SEL) (Push to select) selects items in the audio menu. [DISP] (Display) exits from the audio menu. [VOL] (PUSH SEL) to display the audio menu display. 1 Press Note: If no operation takes place for more than 5 seconds in the audio menu (2 seconds in Main volume adjustment), the display returns to the regular mode. Press [VOL] (PUSH SEL) to select a 2 mode to be adjusted. [VOL] clockwise or counterclockwise 3 Turn to adjust.
Player (Disc Player) Disc slot takes a disc in with the printed side facing up. Notes: • The power will be turned on automatically when a disc is loaded. • A disc which has both CD-DA data and MP3/WMA data on it may not be reproduced normally. [] (Eject) ejects the disc. Printed side up [SOURCE] (Source) selects a source. () (Play/Pause) toggles pause/play in the player source. [DISP] (Display) switches the information on the display. [] [] skip to the previous/next track/file in the player mode.
CD-DA mode display Track number Display change Play time Press [DISP] to change the display. Disc Player (CD-DA disc): Player Source Display Lights when the disc is loaded. Play Mode indicators MP3/WMA mode display Folder number File number Disc Player (MP3/WMA disc): Normal Normal Disc title Play time Track title Folder name/ Album* Clock File name/ Title, artist* Clock *ID3/WMA Tag On/Off Hold down [3] for more than 2 seconds. lights when folder random/ Play Mode repeat/scan is on.
Troubleshooting If You Suspect Something Wrong Check and take steps as described below. If the described suggestions do not solve the problem, it is recommended to take the unit to your nearest authorized Panasonic Service Center. The product should be serviced only by qualified personnel. Please refer the checking and the repair to professionals. Panasonic shall not be liable for any accidents arising out of neglect of checking the unit or your own repair after your checking.
Memorandum
Memorandum