OPERATING INSTRUCTIONS Basic Guide Personal Computer Getting Started Introduction...................................................... 2 Description of Parts......................................... 4 First-time Operation......................................... 8 Turning On / Turning Off............................... 14 Useful Information Handling and Maintenance........................... 16 Installing Software........................................ 20 Troubleshooting Troubleshooting (Basic).....
Introduction Thank you for purchasing this Panasonic product. For optimum performance and safety, please read these instructions carefully. In these instructions, the names are referred as follows. indicates Windows 10 Operating System. indicates Windows 7 Operating System. n Terms and illustrations in these instructions CAUTION : Getting Started NOTE : Conditions that may result in minor or moderate injury. Useful and helpful information. Enter : Press [Enter] key.
n Trademarks Microsoft®, Windows®, the Windows logo, and IntelliMouse are registered trademarks of Microsoft Corporation of the United States and/or other countries. Intel, Core and PROSet are either registered trademarks or trademarks of Intel Corporation. SDXC Logo is a trademark of SD-3C, LLC. Getting Started Adobe, the Adobe logo and Adobe Reader are either registered trademarks or trademarks of Adobe Systems Incorporated in the United States and/or other countries.
Description of Parts A B M C D E F Fingerprint Reader Contactless Smartcard Reader G H Getting Started I J K L 4 Camera Reference Manual “Camera” è A: Microphone B: Ambient Light Sensor C: Camera Lens D: Camera Indicator E: LCD Reference Manual “Screen Input Operation” è F: LED Indicator*1 : Caps lock : Numeric Lock (NumLk) : Scroll Lock (ScrLk) : Drive Indicator : SD Memory Card Indicator (Blinking: During access or a password is requ
A B C D Getting Started E F A: Wireless WAN Antenna Connect to a network “Wireless WAN” è B: GPS Antenna Reference Manual “GPS” è C: Display Latch D: Wireless LAN Antenna / Bluetooth Antenna è NOTE l This computer contains a magnet and magnetic products at the locations dashed line circled in the illustration above. Avoid leaving metallic object or magnetic media in contact with these areas.
Description of Parts Right side A Getting Started Rear side B C D E F G H N *8 E I J K L A: Hard Disk Drive (Quick Release Drive) Reference Manual “Hard Disk Drive” è B: Wireless Switch Connect to a network “Disabling/ è Enabling Wireless Communication” C: Headset Jack A headset or headphone can be connected. D: SD Memory Card Slot Keep SD Memory Cards away from infants and small children.
Bottom side A H I Getting Started A B C D E F G A: Back Cover B: Ventilation Hole (Intake) C: Hard Disk Latch Reference Manual “Hard Disk Drive” è D: Expansion Bus Connector Reference Manual “Port replicator” è E: Battery Pack Latch 1 Reference Manual “Battery Power” è F: Battery Indicator Reference Manual “Battery Power” è G: Battery Pack Latch 2 Reference Manual “Battery Power” è H: External Antenna Connector (CH2) I: Extern
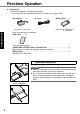
First-time Operation n Preparation A Check and identify the supplied accessories. If you do not find the described accessories, contact your support office. • AC Cord. . . . . . . 1 • AC Adaptor. . . . . 1 Model No: CF-AA5713A Getting Started • Soft Cloth. . . . . 1*1 • Battery Pack . . . 1 Model No: CF-VZSU0PW or CF-VZSU0LW *1 Only for North America • OPERATING INSTRUCTIONS - Read Me First . . . . . . . . . . . . . . . . . . . . . . . . .
2 2 Connect your computer to a power outlet The battery charging starts automatically. CAUTION 3 3 2 Getting Started l Do not disconnect the AC adaptor and do not switch the wireless switch to on until the first-time operation procedure is completed. l When using the computer for the first time, do not connect any peripheral device except the battery pack and AC adaptor. l Handling the AC adaptor Problems such as sudden voltage drops may arise during periods of thunder and lightning.
First-time Operation 4 4 㻮 Getting Started 㻯 Turn on the computer Press and hold the power switch lights. (B) until the power indicator (C) CAUTION l Do not press the power switch repeatedly. l The computer will be forcibly turned off if you press and hold the power switch for four seconds or longer. l Once you turn off the computer, wait for ten seconds or more before you turn on the computer again. l Do not perform the following operation until the drive indicator turns off.
Getting Started l The computer restarts several times. Do not touch the keyboard, touchpad or touchscreen , and wait until the drive indicator has turned off. l After the computer is turned on, the screen remains black or unchanged for a while, but this is not a malfunction. Wait for a moment until the Windows setup screen appears. l During setup of Windows, use the touchpad and clicking to move the pointer and to click an item.
First-time Operation 8 Update the on-screen manual Sign in / A Connect to the internet. Log on to Windows as an administrator. For further information, refer to Connect to a network. B Update the on-screen manual. Double-click the [Panasonic PC Settings Utility] on the desktop screen, and then click [Support] - [Manual] [Launch Manual Selector]. Getting Started Double-click [Manual Selector] on the desktop. Follow the on-screen instructions.
Set [Bluetooth] to [On] (for Bluetooth). Set [GPS\GNSS] to [On] (for GPS). * The displayed items will vary depending on specifications. n About the partition structure You can shrink a part of an existing partition to create unallocated disk space, from which you can create a new partition. In the default setting, you can use a single partition.
Turning On / Turning Off Turning On Press and hold the power switch (è page 4) until the power indicator (è page 4) lights. NOTE Getting Started l Do not press the power switch repeatedly. l The computer will forcibly be turned off if you press and hold the power switch for four seconds or longer. l Once you turn off the computer, wait for ten seconds or more before you turn on the computer again. turns off.
Precautions against Starting Up/Shutting Down l Do not do the following • Connecting or disconnecting the AC adaptor • Pressing the power switch • Touching the keyboard, touchpad, touchscreen or external mouse • Closing the display • Turn on/off the wireless switch NOTE Getting Started l To conserve power, the following power saving methods are set at the time of purchase.
Handling and Maintenance Operation environment l Place the computer on a flat stable surface not subject to shock, vibration, and danger of dropping. Do not place the computer upright or turn it over. If the computer is exposed to an extremely strong impact, it may become damaged.
l Use the pen (optional) only for touching the screen. Using it for any other purpose may damage the pen (optional) and result in scratches on the screen. n When using peripheral devices Follow these instructions and the Reference Manual to avoid any damage to the devices. Carefully read the instruction manuals of the peripheral devices. l Use the peripheral devices conforming to the computer’s specifications. l Connect to the connectors in the correct direction.
Handling and Maintenance To clean areas other than the LCD panel Wipe with a soft dry cloth such as gauze. When using detergent, dip a soft cloth in water-diluted detergent and wring it thoroughly. CAUTION l Do not use benzene, thinner, or rubbing alcohol since it may adversely affect the surface causing discoloration, etc. Do not use commercially-available household cleaners and cosmetics, as they may contain components harmful to the surface.
4. Remove the cover (B) and lift the expansion bus connector (C). C B è 5. Remove the connectors on the built-in bridge battery (F), and then remove the screw (D) and the circuit (E). D E Useful Information F 6. Pull out the built-in bridge battery with the sheet cover. 7. Open the sheet cover (G) and remove the built-in bridge battery (H). And confirm the recycle mark of the built-in battery. G H 8.
Installing Software Installing software will return the computer to the default condition. When you install the software, the hard disk data will be erased. Back up important data to other media or an external hard disk before installation. CAUTION l Do not remove the quick release drive during installation process. l Do not delete the Recovery Partition on the hard disk. The disk space in the partition is not available to store data. To check the Recovery Partition, perform the following methods.
n Disk recovery You can reinstall the OS that was pre-installed at the time of purchase (Windows 10 or Windows 7). If reinstallation using the method described in “Reset this PC” is not successful, follow the steps below. Preparation l Remove all peripherals and SD memory card etc. l Connect the AC adaptor and do not remove it until installation is complete. 1 Start the Setup Utility. (Start) - [Settings] - [Update & security] - [Recovery]. A Click B Click [Restart now] under “Advanced startup”.
Installing Software 10 Click [Recovery ALL Partitions.]. Select whether to format or retain the data on the onboard drive. Click [On board drive: Format] or [On board drive: Remain]. Follow the on-screen instructions. It may take several hours depending on the environment. l Do not interrupt installation, for example by turning off the computer or performing other operation.
14 At the confirmation message, click [YES]. 15 16 When Ending process screen is displayed, click [OK] to turn off the computer. Turn on the computer. 17 18 Perform the “Setup Windows” ( page 10). Start the Setup Utility and change the settings as necessary. Follow the on-screen instructions. It may take several hours depending on the environment. l Do not interrupt installation, for example by turning off the computer or performing other operation.
Installing Software 4 Check the [UEFI Boot] setting of the Setup Utility. 5 6 Set the Recovery Disc into the CD/DVD drive or commercially available optical drive. Press F10 . 7 Press F2 or Del while [Panasonic] boot screen is displayed. 8 [UEFI Boot] should be set to as follows. When the recovery disc for Windows 10 is used : [Enabled] When the recovery disc for Windows 7 is used : [Disabled] At the confirmation message, select [Yes] and press Enter. Computer will restart.
15 16 On the “Finish Recovery Process.” screen, click [Shutdown.]. Turn on the computer. 17 18 Perform the “Setup Windows” ( page 10). Start the Setup Utility and change the settings as necessary. l If the password is requested, enter the Supervisor Password. For Windows 7 9 10 11 Click [Reinstall Windows] and click [Next]. At the License Agreement screen, click [Yes, I agree to the provisions above and wish to continue!] and click [Next]. Click [Next].
Installing Software 16 At the confirmation message, click [YES]. 17 When Ending process screen is displayed, remove the Recovery Disc and CD/DVD drive or commercially available optical drive and then click [OK]. Follow the on-screen instructions. It may take several tens of minutes depending on the environment. l Do not interrupt installation, for example by turning off the computer or pressing Ctrl + Alt + Del .
Troubleshooting (Basic) Follow the instructions below when a problem has occurred. There is also an advanced troubleshooting guide in the “Reference Manual”. For a software problem, refer to the software’s instruction manual. If the problem persists, contact Panasonic Technical Support (è pages 42 - 53). You can also check the computer’s status in the PC Information Viewer (è Reference Manual “Troubleshooting (Advanced)”). n Starting Up Cannot start up. The power indicator or battery indicator is not lit.
Troubleshooting (Basic) n Starting Up You have forgotten the pass- l Supervisor Password or User Password: Contact Panasonic Technical Support (è pages 42 - 53). word. l Administrator password: If you have a password reset disk, you can reset the administrator password. Set the disk and enter any wrong password, then follow the on-screen instructions and set a new password. If you do not have a password reset disk, install (è page 20) and set up Windows, and then set a new password.
n Starting Up l Select [Enabled] in [Password On Resume] in the [Security] menu [Enter Password] does not Reference Manual “Setup Utility”). of the Setup Utility (è appear when resuming from l The Windows password can be used instead of the password set sleep/hibernation. in the Setup Utility. A Add a password. 1. Click (Start) - [Settings] - [Accounts]. 2. Click [Sign-in options], and click [Add] under “Password”. 1. Click (Start) - [Control Panel]. 2.
Troubleshooting (Basic) n Entering Password Even after entering the pass- l The computer may be in ten-key mode. If the NumLk indicator lights, press NumLk to disable the tenword, password input screen key mode, and then input. is displayed again. l The computer may be in Caps Lock mode. lights, press Caps Lock to disIf the Caps Lock indicator able the Caps Lock mode, and then input. n Shutting down Windows does not shut down. l Remove the USB device. l Wait 1 or 2 minutes. It is not a malfunction.
n Display During Simultaneous display, l When using the Extended Desktop, use the same display colors for the external display as those used by the LCD. If you continue one of the screens becomes to experience problems, try changing the display. disordered. l Simultaneous display cannot be used until Windows startup is complete (during Setup Utility, etc.). The external display does not work normally.
Troubleshooting (Basic) n Others No response. l Press Ctrl + Shift +Esc to open Task Manager and close the software application that is not responding. l An input screen (e.g., password input screen at startup) may be hidden behind another window. Press Alt + Tab to check. l Press the power switch for 4 seconds or longer to shut down the computer, and then press the power switch to turn it on. If the application program does not work normally, uninstall and reinstall the program.
LIMITED USE LICENSE AGREEMENT THE SOFTWARE PROGRAM(S) (“PROGRAMS”) FURNISHED WITH THIS PANASONIC PRODUCT (“PRODUCT”) ARE LICENSED ONLY TO THE END-USER (“YOU”), AND MAY BE USED BY YOU ONLY IN ACCORDANCE WITH THE LICENSE TERMS DESCRIBED BELOW. YOUR USE OF THE PROGRAMS SHALL BE CONCLUSIVELY DEEMED TO CONSTITUTE YOUR ACCEPTANCE OF THE TERMS OF THIS LICENSE. Panasonic Corporation has developed or otherwise obtained the Programs and hereby licenses their use to you.
LIMITED USE LICENSE AGREEMENT YOU MAY NOT USE, COPY, MODIFY, ALTER, OR TRANSFER THE PROGRAMS OR ANY COPY THEREOF, IN WHOLE OR IN PART, EXCEPT AS EXPRESSLY PROVIDED IN THE LICENSE. IF YOU TRANSFER POSSESSION OF ANY COPY OF ANY PROGRAM TO ANOTHER PARTY, EXCEPT AS PERMITTED IN PARAGRAPH E ABOVE, YOUR LICENSE IS AUTOMATICALLY TERMINATED. TERM This license is effective only for so long as you own or lease the Product, unless earlier terminated.
Contrat de licence d’usage limité Le(s) logiciel(s) (les “Logiciels”) fournis avec ce produit Panasonic (le “Produit”) sont exclusivement concédés en licence à l’utilisateur ultime (“vous”), et ils ne peuvent être utilisés que conformément aux clauses contractuelles cidessous. En utilisant les logiciels, vous vous engagez de manière définitive à respecter les termes, clauses et conditions des présentes.
Contrat de licence d’usage limité Vous ne pouvez utiliser, copier, modifier, altérer ni céder les Logiciels ni aucune de leurs copies, en tout ou en partie, à l’exception de ce qui est expressément stipulé dans ce contrat. Si vous cédez la possession de toute copie ou de tout Logiciel à une autre partie, à l’exception de ce qui est autorisé au paragraphe E ci-dessus, votre licence est automatiquement résiliée.
Specifications This page provides the specifications for the basic model. The model number is different according to the unit configuration. l To check the model number: Check the bottom of the computer or the box the computer came in at the time of purchase. l To check CPU speed, memory size and the hard disk drive (HDD) size: Run the Setup Utility (è Reference Manual “Setup Utility”) and select [Information] menu.
Specifications n Main Specifications Power Supply AC Adaptor AC adaptor or Battery pack *11 Input: 100 V - 240 V AC, 50 Hz/60 Hz, Output: 15.6 V DC, 7.05 A Li-ion 11.1 V, Typical 4200 mAh / Minimum 4080 mAh (with CF-VZSU0PW) Li-ion 10.8 V, Typical 3220 mAh / Minimum 3050 mAh (with CF-VZSU0LW) Battery Pack Operating Time*12 Approx. 11 hours (with CF-VZSU0PW) Approx. 9 hours (with CF-VZSU0LW) Charging Time*13 Approx. 2.5 hours Approx. 65 W*15 / Approx.
*6 n Wireless LAN Data Transfer Rates IEEE802.11a : 54 Mbps*25 IEEE802.11b : 11 Mbps*25 IEEE802.11g : 54 Mbps*25 IEEE802.11n*26 : HT20 = 150 Mbps HT40 = 300 Mbps IEEE802.11ac : VHT80 : 866.7 Mbps VHT40 : 400 Mbps VHT20 : 173.3 Mbps Standard Supported IEEE802.11a / IEEE802.11b / IEEE802.11g / IEEE802.11n / IEEE802.11ac Transmission Method OFDM system, DS-SS system *7 n Bluetooth Bluetooth Version 4.1/ 4.
Specifications *1 *2 *3 *4 *5 *6 *7 *8 *9 *10 *11 *12 *13 *14 *15 *16 *17 *18 *19 *20 *21 *22 *23 1 MB = 1,048,576 bytes / 1 GB = 1,073,741,824 bytes Memory size of the factory default depends on the model. You can physically expand the memory up to 16 GB, but the total amount of usable memory available will be less depending on the actual system configuration. 1 MB = 1,000,000 bytes / 1 GB = 1,000,000,000 bytes / 1 TB = 1,000,000,000,000 bytes.
The specifications may differ depending on the model. A SIM card (15 mm {0.59”} × 25 {0.98”} mm) must be inserted in the SIM card slot. *29 For information on TPM, refer to the Installation Manual of “Trusted Platform Module (TPM)” by the following procedure. Double-click [Manual Selector] on the desktop, and select “Installation Manual for Trusted Platform Module (TPM)”. The specifications may differ depending on the model.
LIMITED WARRANTY For U.S.A. Panasonic System Communications Company of North America (PSCNA) Computer Products - Worldwide Warranties Section 1: Limited Warranty - Hardware PSCNA, referred hereafter as “Panasonic” will repair the products listed below with new or rebuilt parts, free of charge in a Global Panasonic designated service location for the period specified below from the date of original purchase in the event of a defect in materials or workmanship.
Options and Accessories Warranties The below listed Panasonic brand or supplied options and accessories are covered under this limited warranty for the period specified from the date of purchase or as specifically stated: • • • • • • • • • • • • • AC Adaptor / Power Cord – 3 Years Memory Expansion Card (Panasonic Brand) – 3 Years Car Mount - Docking Station PCB or Vehicle Docking Station – 3 Years Desktop Port Replicator, I-O Box, Docking Cradle (like CF-U1) – 3 Years Antenna Pass-through Cable – 3 Years
LIMITED WARRANTY This limited warranty only covers failures due to defects in materials or workmanship which occur during normal use. If a unit is sent to a Panasonic Authorized Service Center and no hardware failure is found, the customer will be billed for labor to correct a software issue or reimage the hard drive plus shipping and applicable administrative fees at the current rates set by the service provider.
For Canada PANASONIC COMPUTER AND PERIPHERALS LIMITED WARRANTY Coverage – Panasonic Canada Inc. (“PCI”) warrants to you, the first end user customer, this computer product (excluding software media), when purchased from PCI or from a PCI authorized reseller, to be free from defects in materials and workmanship under normal use, subject to the terms set forth below, during the period of warranty coverage specified.
LIMITED WARRANTY SOFTWARE MEDIA LIMITED WARRANTY Coverage – PCI warrants to you, the first end user customer, that the disk(s) or other media on which software program(s) is/are supplied will be free from defects in materials and workmanship under normal use in Canada for a period of sixty (60) days from date of receipt as evidenced by your purchase receipt for your Panasonic Computer product. THIS IS THE ONLY WARRANTY THAT PCI MAKES RESPECTING THE SOFTWARE MEDIA. PCI does not warrant the software.
LIMITED WARRANTY (GARANTIE LIMITÉE) Pour le Canada GARANTIE LIMITÉE – ORDINATEURS ET PÉRIPHÉRIQUES PANASONIC Couverture – Panasonic Canada Inc.
LIMITED WARRANTY GARANTIE LIMITÉE – SUPPORTS DES LOGICIELS Couverture – Panasonic Canada Inc. (« PCI ») garantit à l’acheteur original que la ou les disquettes ou tout autre support sur lequel le ou les programmes sont fournis sont exempts de défauts de pièces et de fabrication dans des conditions normales d’utilisation au Canada, et ce, pour une période de soixante (60) jours suivant la date de réception indiquée sur la preuve d’achat.
For Australia Personal / Notebook Computers - 36 Month Warranty from Date of Purchase 1. Subject to the conditions of this warranty Panasonic or it’s Authorised Service Centre will perform necessary service on the product without charge for parts or labour, if in the opinion of Panasonic, the product is found to be faulty within the warranty period. 2.
LIMITED WARRANTY THIS PRODUCT IS NOT INTENDED FOR USE AS OR AS PART OF NUCLEAR EQUIPMENT/SYSTEMS, AIR TRAFFIC CONTROL EQUIPMENT/SYSTEMS, OR AIRCRAFT COCKPIT EQUIPMENT/SYSTEMS*4. PANASONIC WILL NOT BE RESPONSIBLE FOR ANY LIABILITY RESULTING FROM THE USE OF THIS PRODUCT ARISING OUT OF THE FOREGOING USES. *4 AIRCRAFT COCKPIT EQUIPMENT/SYSTEMS include Class 2 Electrical Flight Bag (EFB) Systems and Class 1 EFB Systems when used during critical phases of flight (e.g.
For Europe Panasonic System Communications Company Europe Panasonic System Communications Company Europe (referred to as “Panasonic”) will repair this product (other than software, which is treated in a different section of this warranty) with new or refurbished parts, from the date of original purchase in the event of a defect in materials or workmanship. This warranty only applies to new Panasonic Toughbooks purchased in the EEA and Switzerland and Turkey.
LIMITED WARRANTY THIS PRODUCT IS NOT INTENDED FOR USE AS, OR AS PART OF, NUCLEAR EQUIPMENT/ SYSTEMS, AIR TRAFFIC CONTROL EQUIPMENT/SYSTEMS, OR AIRCRAFT COCKPIT EQUIPMENT/SYSTEMS. PANASONIC WILL NOT BE RESPONSIBLE FOR ANY LIABILITY RESULTING FROM THE USE OF THIS PRODUCT ARISING OUT OF THE FOREGOING USES. There are no other express warranties except as listed above. We strongly recommend that customers backup their data before sending back their unit to an Authorised Service Provider.
Panasonic and its suppliers makes no warranty, either express, implied or statutory, with respect to software provided with the Product and licensed to Purchaser, its quality, performance, merchantability, or fitness for a particular purpose. Panasonic does not warrant that the functions contained in the software will be uninterrupted or error free.
Panasonic Corporation Osaka, Japan Panasonic System Communications Company of North America Two Riverfront Plaza Newark, NJ 07102 Panasonic Canada Inc. 5770 Ambler Drive, Mississauga, Ontario L4W 2T3 Panasonic Australia Pty.