Cordless Drill & Driver/Cordless Hammer Drill & Driver Perceuse-visseuse sans fil/Perceuse à percussion-visseuse sans fil Destornillador y taladro sin cables/Destornillador y taladro percutor sin cables Operating Instructions Instructions d'utilisation Manual de instrucciones Model No: EY7450/EY7950 IMPORTANT This manual contains safety information. Read manual completely before first using this product and save this manual for future use.
Index/Index/Indice English: Page 3 Français: Page 15 Español: Página 30 FUNCTIONAL DESCRIPTION DESCRIPTION DES FONCTIONS DESCRIPCIÓN FUNCIONAL (A) (K) (B) (C) (L) (D) (M) (O) (N) V (J) (I) (H) (E) (G) (F) (E) (A) Keyless drill chuck (B) Clutch handle (C) Speed selector switch (D) Forward/Reverse lever (E) Alignment marks Mandrin porte-foret sans fil Poignée de l’embrayage Interrupteur de sélection de vitesse Levier d’inversion marche avant-marche arrière Marques d’alignement (P) Mandril si
SAVE THESE INSTRUCTIONS This tool, as a complete unit with a battery pack, satisfies appropriate IP Degrees of Protection based on the IEC regulations. Definition of IP code IP5X: Ingress of dust is not totally prevented, but dust shall not penetrate in a quantity to interfere with satisfactory operation of the tool or to impair safety (In case that the talcum powder under 75 μm intrudes inside the tool).
Personal Safety 1) Stay alert, watch what you are doing and use common sense when operating a power tool. Do not use a power tool while you are tired or under the influence of drugs, alcohol or medication. A moment of inattention while operating power tools may result in personal injury. 2) Use safety equipment. Always wear eye protection. Safety equipment such as dust mask, non-skid safety shoes, hard hat, or hearing protection used for appropriate conditions will reduce personal injuries.
3) Use power tools only with specifically designated battery packs. Use of any other battery packs may create a risk of injury and fire. 4) When battery pack is not in use, keep it away from other metal objects like paper clips, coins, keys, nails, screws, or other small metal objects that can make a connection from one terminal to another. Shorting the battery terminals together may cause burns, or a fire. 5) Under abusive conditions, liquid may be ejected from battery; avoid contact.
7) An extension cord should not be used unless absolutely necessary. Use of improper extension cord could result in a risk of fire and electric shock. If extension cord must be used, make sure: a. that pins on plug of extension cord are the same number, size and shape as those of plug on charger. b. that extension cord is properly wired and in good electrical condition. c. that wire size is large enough for ampere rating of charger as specified below.
16) Do not charge battery pack when the temperature is BELOW 0°C (32°F) or ABOVE 40°C (104°F). This is very important. 17) Do not incinerate the battery pack. It can explode in a fire. 18) Avoid dangerous environment. Do not use charger in damp or wet locations. 19) The charger is designed to operate on standard household electrical power only. Do not attempt to use it on any other voltage! 20) Do not abuse cord. Never carry charger by cord or yank it to disconnect from outlet.
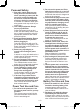
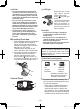
Support handle Place the support handle at your favorite position and tighten the handle securely. Lock collar 2. Removal Turn the lock collar counterclockwise (looking from the front), then remove the bit. Tighten Loosen Always use the support handle to ensure operating safety.
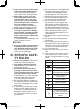
Switch and Forward/Reverse Lever Operation Forward CAUTION: Set the clutch setting at this mark ( ) before actual operation. Reverse I f the clutch handle cannot be set at “drilling” or “hammering” mode after drilling with clutch function, set the clutch handle at position 1 and operate the clutch for a second. Switch lock CAUTION: Speed Selection To prevent damage, do not operate Forward/Reverse lever until the bit comes to a complete stop. Choose a low or high speed to suit the use.
CAUTION: • To prevent excessive temperature increase of the tool surface, do not operate the tool continuously using two or more battery packs. The tool needs cool-off time before switching to another pack. • Do not close up vent holes on the sides of the body during operation. Otherwise, the machine function is adversely affected to cause a failure. • Do NOT strain the tool (motor). This may cause damage to the unit.
• If the overheating protection feature activates, allow the tool to cool thoroughly (at least 30 minutes). The tool is ready for use when the overheat warning lamp goes out. • Avoid using the tool in a way that causes the overheating protection feature to activate repeatedly. • If the tool is operated continuously under high-load conditions or if it is used in hot-temperature conditions (such as during summer), the over-heating protection feature may activate frequently.
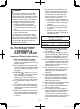
Li-ion Battery Pack NOTE: Your battery pack is not fully charged at the time of purchase. Be sure to charge the battery before use. 4. 5. Battery charger 1. Plug the charger into the AC outlet. 2. Insert the battery pack firmly into the charger. 1. Line up the alignment marks and place the battery onto the dock on the charger. 2. Slide forward in the direction of the arrow. Alignment marks 6. 7. 8. 3. During charging, the charging lamp will be lit.
VII. MAINTENANCE Use only a dry, soft cloth for wiping the unit. Do not use a damp cloth, thinner, benzine, or other volatile solvents for cleaning. In the event that the inside of the tool or battery pack is exposed to water, drain and allow to dry as soon as possible. Carefully remove any dust or iron filings that collect inside the tool. If you experience any problems operating the tool, consult with a repair shop. Use only bits suitable for size of drill's chuck. IX.
BATTERY CHARGER Model EY0L81 Electrical rating See the rating plate on the bottom of the charger. EY9L50 Charging time Usable: 50 min Full: 65 min NOTE: This chart may include models that are not available in your area. Please refer to the latest general catalogue. NOTE: For the dealer name and address, please see the included warranty card.