DVD Player/Receiver DVD-Player/Receiver Lecteur DVD/récepteur Sintoamplificatore/lettore DVD Reproductor de DVD/receptor DVD-ÔÎÂÂ/ÂÒË‚Â Model: CQ-D1703N Operating Instructions Bedienungsanleitung Manuel d’instructions Manuale di istruzioni Manual de Instrucciones àÌÒÚÛ͈Ëfl ÔÓ ˝ÍÒÔÎÛ‡Ú‡ˆËË ® TEXT ¡Please read these instructions carefully before using this product and keep this manual for future reference.
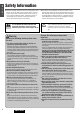
E N G L I S H 1 Safety Information ■ Read the operating instructions for the unit and all other components of your car audio system carefully before using the system. They contain instructions about how to use the system in a safe and effective manner. Panasonic assumes no responsibility for any problems resulting from failure to observe the instructions given in this manual. This pictograph intends to alert you to the presence of important operating instructions and Warning installation instructions.
Caution ❑ Use the designated parts and tools for installation. Use the supplied or designated parts and appropriate tools to install the product. The use of parts other than those supplied or designated may result in internal damage to the unit. Faulty installation may lead to an accident, a malfunction or fire. Observe the following cautions when using this unit. ❑ Keep the sound volume at an appropriate level. Keep the volume level low enough to be aware of road and traffic conditions while driving.
E N G L I S H Safety Information (continued) Laser Product 3 Label Indications and Their Locations CLASS 1 LASER PRODUCT CAUTION LASER RADIATION WHEN OPEN. DO NOT STARE INTO BEAM. Caution Label CAUTION - LASER RADIATION WHEN OPEN. AVOID EXPOSURE TO BEAM. Caution: This product utilizes a laser. Use of controls or adjustments or performance of procedures other than those specified herein may result in hazardous radiation exposure. Do not take apart this unit or attempt to make any changes yourself.
Panasonic welcomes you to our constantly growing family of electronic products owners. We endeavor to give you the advantages of precise electronic and mechanical engineering, manufactured with carefully selected components, and assembled by people who are proud of the reputation their work has built for our company. We know this product will bring you many hours of enjoyment, and after you discover the quality, value and reliability we have built into it, you too will be proud to be a member of our family.
E N G L I S H Features Discs that can be Played Back (a Page 8) 5 ■ Playback of various moving pictures such as DivX files Connection of the optional monitor (CY-VM7203N) allows users to enjoy DivX files recorded on CD-Rs/RWs and DVD-Rs/RWs as well as DVD videos and video CDs. ■ MP3/DivX playback recorded on CD-Rs/RWs or DVD-Rs/RWs MP3/DivX files recorded on CD-Rs/RWs and DVD-Rs/RWs can be enjoyed. Up to 1200 tracks of MP3/DivX files can be saved on 1 piece of DVD-R/RW.
E N G L I S H System Upgrade ❑ Optional system (Example) This unit can be combined with other components like shown below. For more details, refer to the operating instructions for the connected devices. Preparation: ¡ The TV standard format (NTSC/PAL) setting of this unit (“TV Type” a Page 42) should be the same as the input signal setting (NTSC/PAL) of the monitor to be connected. Otherwise, pictures appear incorrectly.
E N G L I S H 7 Discs that can be Played Back ❒ Disc Type DISC DVD VCD (Video CD) CD CD-R/RW Recordable ¡DivX files recorded on CD-Rs/RWs and DVD-Rs/RWs are playable. Refer to “Notes on MP3/DivX” for further information.
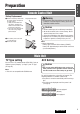
E N G L I S H Preparation Remote Control Unit Battery Replacement q Remove the battery holder with the remote control unit placed on a flat surface. q Stick your thumbnail into the groove, and push the holder in the direction of the arrow at the same time. w Pull it out in the direction of the arrow using a tough pointed object. Tough pointed object 1 8 Warning ¡Keep batteries away from children to avoid the risk of accidents. If an infant ingests a battery, please seek immediate medical attention.
E N G L I S H General (Main Unit) CD Player mode display (a Page 23) [MUTE] (SQ) (Sound Quality) 9 Remote control sensor (a Page 12) [VOLUME] (SQ) indicator []] [[] (Hour/minute adjustment) AUX 1 (AUX 1 in) From line output of external sound/audio device (ex. Silicon-audio player, HDD player, etc.) [SRC/PWR] (Source/power) [DISP] (Display) (CT) Power Mute Set your car's ignition switch to the ACC or ON position. ON : Press [MUTE]. OFF : Press [MUTE] again. ON: Press [SRC/PWR].
Source Clock Setting E N G L I S H Press [SRC/PWR] to change the source. The 24-hour system is used for the clock. 10 1 Radio (a Page 14) Note: ¡ Adjust the clock when “NO CT” appears on the screen. Select the radio AM (LW/MW) mode.
E N G L I S H General (Remote Control Unit) 11 In this manual, the pictographs shown below are used to indicate compatible types of discs and operating units. ❑ General Discs : DVD Video DVD VCD : CD DVD VCD CD MP3 DivX DVD VCD CD MP3 DivX DVD VCD : VCD (Video CD) : CD-Rs/RWs or DVD-Rs/RWs containing MP3 files DVD VCD CD MP3 DivX : CD-Rs/RWs or DVD-Rs/RWs containing DivX files [}] [{] ¡Selects (vertically) or adjusts an operation or item.
E N G L I S H ❑ Discs (DVD/VCD/CD/MP3/DivX) [■] (STOP) DVD VCD CD MP3 DivX ¡Stops playback. [❚❚] (PAUSE) DVD VCD CD MP3 DivX ¡Pause. [❚❚] DVD VCD ¡Frame to Frame Play. [s] [d] DVD VCD CD MP3 DivX ¡Goes to the beginning. ¡Chapter/track/file selection. ¡Fast forward/fast reverse. [d] DVD VCD ¡Slow playback. [B] (PLAY) DVD VCD CD MP3 DivX ¡Playback. POWER SOURCE STOP PAUSE [RET] (RETURN) 12 DVD VCD CD MP3 DivX ¡Return to the previous display. ¡Input the number again. ¡Displays the video CD’s menu.
E N G L I S H 13 Radio [DISP] (Display) (Stereo) indicator []] [[] (TUNE) [BAND] (APM: Auto Preset Memory) [SRC/PWR] (Source) Preset Buttons [1] to [6] (Preset station) q Radio Mode Press [SRC/PWR] to select the radio mode. Band Preset number Frequency w Band Press [BAND]. Note: ¡ For tuning in to only stations whose receiving conditions are good in the seeking mode, set LOCAL to ON. (a Page 36) ¡ For reducing noise when a receiving FM stereo wave is weak, set FM MONO to ON.
E N G L I S H Station Preset 14 1 Up to 6 stations can be stored in each of the FM1, FM2, FM3 and AM (LW/MW) band selections. Note: ¡ New stations overwrite existing saved stations after these procedures. Warning ¡To ensure safety, never attempt to preset stations while you are driving. Auto Preset Memory (APM) Manual Preset Memory With this operation, stations with good receiving conditions can be automatically stored in the preset memory. q Select a band.
E N G L I S H Radio Data System (RDS) RDS Basics 15 Some FM stations are broadcasting added data compatible with RDS. This unit offers convenient functions using such data. RDS service availability varies with areas. Please understand if RDS service is not available in your area, the following service is not available, either. This chapter explains the summary and operation regarding RDS. The following functions are available when receiving RDS stations.
Alternative Frequency (AF) E N G L I S H 16 [DISP] (Display) [TA/AF] (Alternative Frequency) indicator Alternative Frequency (AF) Mode Press and hold [TA] (AF) for more than 2 seconds to select one of the following AF modes. AF ON : AF, Best Station Research and PI seek function are active. AF OFF : When the AF network of an RDS station is not required. : Low level AF operating sensitivity. (Default) : High level AF operating sensitivity. : When the AF network of an RDS station is not required.
E N G L I S H Radio Data System (RDS) (continued) Traffic Announcement (TA) 17 Some RDS FM stations periodically provide traffic information. [VOLUME] indicator [TA/AF] (TA mode/TP (TA) Search) TA ON/OFF (Default: OFF) Press [TA/AF] (TA mode) to switch the TA mode on and off. The following functions are available when the TA mode is active.
E N G L I S H Programme Type (PTY) Reception 18 RDS FM stations provide a programme type identification signal. (Example: news, rock, classical music, etc.) [DISP] (PTY) (PTY Mode) indicator []] [[] (PTY selection) [BAND] (Preset PTY search, PTY selection) Preset Buttons [1] to [6] (PTY Preset) Programme Type (PTY) Mode PTY Preset Press and hold [DISP] (PTY) for more than 2 seconds to switch the PTY display mode on and off.
E N G L I S H Radio Data System (RDS) (continued) Programme Type (PTY) Reception (continued) 19 PTY Preset (Default) Preset No. Programme Type When PTY search is activated, these programme types are receivable.
E N G L I S H Other RDS functions Enhanced Other Network (EON) 20 Emergency Announcement Reception When an emergency announcement is broadcast, the unit is automatically switched to receiving the broadcast even if a source other than radio is selected. During receiving the emergency announcement, “ALARM” appears on the display. indicator When EON data is received, the EON indicator lights and the TA and AF functions are expanded as follows.
E E N N G G L L II S S H H 21 1 Before Disc Playback Caution Disc Insert ¡ Do not insert a disc when indicator lights because a disc is already loaded. ¡ Do not use irregularly shaped discs. ¡ Do not use discs that have a seal or label attached. ¡ Do not insert foreign objects into the disc slot. Note: ¡ Refer to “Discs that can be Played Back”. (a Page 8) ¡ Refer to the section on “Notes on MP3/DivX” (a Page 32) and “Notes on Discs” (a Page 47).
E N G L I S H CD Player [DISP] (Display) indicator [s] / [d] (a / f) (Track selection/fast forward/fast reverse) indicator 22 1 [BAND] (y / 5: Pause/play) [3] (SCROLL) [SRC/PWR] (Source) [4] (RANDOM) [6] (REPEAT) [5] (SCAN) When CD is in the player Pause (y / 5) Press [SRC/PWR] to select the CD player mode and playback starts. Track Play time Press [BAND] (y / 5). Press [BAND] (y / 5) again to cancel. Display Change Press [DISP].
E N G L I S H MP3/DivX Player 23 indicator The optional monitor (CY-VM7203N) is necessary to be connected to see images of DivX files. indicator [DISP] (Display) indicator [s] / [d] (a / f) (File selection/fast forward/fast reverse) [{] / [}] (FOLDER) (Folder selection) [BAND] (y / 5: Pause/play) [3] (SCROLL) [6] (REPEAT) [SRC/PWR] (Source) [4] (RANDOM) Note: ¡ This unit is not compatible with WMA file. ¡ Refer to “Notes on MP3/DivX” (a Page 32).
Random Play Direct Selection All the available files are played in a random sequence. (Only for remote control) Press [4] (RANDOM). lights. Press [4] (RANDOM) again to cancel. Folder Random Play All the files in the current folder are played in a random sequence. Direct Folder Selection E N G L I S H 24 1 Example: Folder number 10 (a Page 33) q Press [GRP] twice. w Press [1] [0]. (Press [RET] to cancel.) e Press [ENTER].
E N G L I S H 25 DVD/VCD Player You can enjoy watching DVDs and VCDs if the optional monitor (CY-VM7203N) is connected. [DISP] (Display) [s] / [d] (a / f) (Chapter selection/fast forward/fast reverse/ slow play) [}]/[{]/[]]/[[] [BAND] (y / 5: Pause/play) [ENTER] [SRC/PWR] (Source) [6] (REPEAT) When a disc is in the player Chapter Selection Press [SRC/PWR] to select the DVD/VCD player mode and playback starts.
Disc Menu Title Menu DVD VCD E N G L I S H DVD VCD You can stop playing the disc temporarily and call up the on-disc menu screen. You can stop playing the disc temporarily and call up the on-disc title menu screen. q Press [MENU] on the remote control during playback. w Press [}]/[{]/[]]/[[] to select an item. e Press [ENTER] to determine the selection. q Press and hold [MENU] (TITLE) on the remote control for more than 2 seconds during playback. w Press [}]/[{]/[]]/[[] to select an item.
E N G L I S H Advanced Operation for Video Discs (DVD/VCD/DivX) 27 [s] / [d] (a / f) (File selection/fast forward/fast reverse) [SRC/PWR] (Source/power) About DivX VOD content DivX Video-on-Demand (VOD) content is encrypted for copyright protection. In order to play DivX VOD content on this unit, you first need to register the unit. Follow the on line instructions for purchasing DivX VOD content to enter the unit’s registration code and register the unit. For more information about DivX VOD, visit www.
E N G L I S H Functions Only by Remote Control Unit 28 DVD VCD CD DVD MP3 VCD DivX Subtitle D.Range Compression You can select a subtitle language if the loaded disc has multi-language subtitles. You can select a range of dynamic range compression. This function is effective for playback of Dolby Digital/Dolby Surround DVD video. The words of an actor hardly audible during playback at a low volume, for example, will become easier to listen to by selecting “MINIMUM”.
E N G L I S H 29 OSD (On-Screen Display) You can see OSDs (On-Screen Display) if the optional monitor (CY-VM7203N) is connected. OSD (On-Screen Display) (Only for remote control unit) You can set up the optional monitor to display or hide the following information: title/artist name for CDs, album/title/artist name for MP3, playtime for VCDs/DivX and title/chapter/playtime for DVDs. Each time you press [OSD], the display changes according to the disc type.
E N G L I S H 30 1 Chapter play time Play Title:02/03 Play Chapter:025/050 Time: 00:05:59 Title:02/03 Chapter:025/050 Time: 02:35:40 Play time POWER SOURCE STOP PAUSE PLAY 3 SEL SRC TRACK / SEARCH RET TITLE MENU 1 2 RETURN R 3VCD (Video CD) Text off Total play time TE 3DVD (DVD Video) Text off EN SUBTITLE AUDIO ANGLE 4 5 6 RANDOM SCAN REPEAT 7 8 9 OSD VOL TRACK GRP MUTE DRC TITLE / CHAPTER 0 CAR AV [OSD] CQ-D1703N 31
E N G L I S H Notes on MP3/DivX What is MP3/DivX? Display Information (on the Main Unit) 31 MP3: MP3 (MPEG Audio Layer-3) is the compression format of Displayed items digital audio. It is developed by MPEG (Motion Picture Experts Group). Using this compression format, you can record the contents of about 10 music CDs on a single CD (This figure refers to data recorded on a 650 MB CD-R or CD-RW at a fixed bit rate of 128 kbps and a sampling frequency of 44.1 kHz).
E N G L I S H Recording Recording MP3/DivX MP3/WMA files onfiles a CD/DVD-media on a CD-media ¡ It is recommended not to use a disc holding two or more different format types of files. ¡ If CD-DA files are on the same disc as MP3 or DivX files, the songs and the movies may not play in the intended order, or some songs or movies may not play at all. ¡ When storing MP3 data and DivX data on the same disc, use different folders for each data.
E N G L I S H Audio Settings Turn [VOLUME]. (Press [VOL }] or [VOL {] on the remote control unit.) 33 Press [VOLUME] (PUSH SEL: select). (Press [SEL] on the remote control unit.) [DISP] (Return to the regular mode) Volume Default: 18 Setting range: 0 to 40 Bass/Treble You can adjust the bass and treble sounds. Default: BAS (bass) 0 dB TRE (treble) 0 dB Setting range: –12 dB to +12 dB (by 2 dB) Press [VOLUME] (PUSH SEL) to open the menu. Press [VOLUME] (PUSH SEL). Press [VOLUME] (PUSH SEL).
Regular mode VOLUME BASS TREBLE REAR LV FADER BALANCE E N G L I S H 34 1 Note: ¡ To return to the regular mode, press [DISP]. ¡ If no operation takes place for more than 5 seconds in audio setting (2 seconds in the volume adjustment), the display returns to the regular mode. ¡ The volume can also be adjusted directly using [VOLUME] on the main unit. (a Page 10) ¡ Balance/Fader is not selectable when P-MODE (private mode a Page 38) is set to ON. (“CAN’T SEL” appears.) Turn [VOLUME].
E N G L I S H Function Settings Turn [VOLUME]. (Press [}] or [{] on the remote control unit.) 35 Press and hold [VOLUME] (PUSH SEL: select) for more than 2 seconds. [DISP] (Return to the regular mode) FM Monaural Reception (FM mode) Noise is significantly decreased when weak signals are received from an FM broadcast station. Default: OFF Press and hold [VOLUME] (PUSH SEL) for more than 2 seconds to open the menu. Local Tuning (Radio mode) Only stations with good reception are detected in seek tuning.
FM MONO (FM Mode) Regular mode FM LOCAL (FM Mode) AM LOCAL (AM Mode) REGION (FM Mode) E N G L I S H 36 1 ACC SET EXT MUTE P-MODE PTY LANG (RDS Mode) Note: ¡ To return to the regular mode, press [DISP]. ¡ If no operation takes place for more than 5 seconds in function setting, the display returns to the regular mode. Turn [VOLUME]. w q q : MONO ON w : MONO OFF (Default) indicator Turn [VOLUME]. w q : LOCAL ON w : LOCAL OFF (Default) q indicator Turn [VOLUME].
E N G L I S H Function Settings (continued) Turn [VOLUME]. (Press [}] or [{] on the remote control unit.) 37 Press [VOLUME] (PUSH SEL: select). [DISP] (Return to the regular mode) Private Mode (P-MODE) Private Mode can be toggled. Default: OFF P-MODE ON: Provides rear seat passengers with images and sounds of Discs. This setting selects Disc Player (CD/MP3/DVD/VCD/DivX) as a source for the rear monitor and decreases the audio output from the rear speakers to zero.
FM MONO (FM Mode) Regular mode FM LOCAL (FM Mode) AM LOCAL (AM Mode) REGION (FM Mode) E N G L I S H 38 ACC SET EXT MUTE P-MODE PTY LANG (RDS Mode) Note: ¡ To return to the regular mode, press [DISP]. ¡ If no operation takes place for more than 5 seconds in function setting, the display returns to the regular mode. Turn [VOLUME]. q w : P-MODE ON (P-MODE) indicator q w : P-MODE OFF Note: ¡ Be sure to select P-MODE OFF when P-MODE is not used.
E N G L I S H User Settings 39 q Display “Setup Menu”. The following information explains the settings only about the disc player and displayed contents on the screen. (Only for Remote Control Unit) Press [MENU]. w Select each setting menu. Press one of the numeric buttons from [1] to [9]. (Example: “1. Menu Language”) 1. Menu Language 2. Subtitle Language 3. Audio Language 4. OSD Language 5. TV Type 6. TV Display 7. On-Screen Messages 8. D. Range Compression 9. DivX Registration 0.
E N G L I S H e Select each item. Press one of the numeric buttons from [1] to [9]. (Example: “1. English”)
E N G L I S H User Settings (continued) 41 q Display “Setup Menu”. The following information explains the settings only about the disc player and displayed contents on the screen. (Only for Remote Control Unit) Press [MENU]. w Select each setting menu. Press one of the numeric buttons from [1] to [9]. (Example: “6. TV Display”) 1. Menu Language 2. Subtitle Language 3. Audio Language 4. OSD Language 5. TV Type 6. TV Display 7. On-Screen Messages 8. D. Range Compression 9.
E N G L I S H e Select each item. Press one of the numeric buttons from [1] to [4]. (Example: “2. Pan & Scan (4:3)”) r 1. NTSC 2. PAL 3. Multi 4. Return 42 Press [0] (Exit). (The setting is completed.) Note: ¡To apply changes to the setting, be sure to press [0] (Exit) at the end. ¡After the user settings have been changed and entered, the player returns to the start of the disc. ¡When the disc has predetermined language or other settings, the user settings are not reflected.
(Only for Remote Control Unit) In “Other” cases (Menu Language, Subtitle Language, Audio Language) (a Page 40) numeric buttons from q Press [0] to [9] to input the 4 digit language code. (See below.) ¡ To input the number again, press [RET] (RETURN). [ENTER] to finalize the w Press selection. ¡ Setting is finished and the display returns to “Setup Menu”.
Definition of Terms Digital audio output connector (Optical) The digital audio output connector (optical) converts electrical signals into optical signals and transfers them to the amplifier. Consequently, it has a number of features including its immunity from electrical interference from external sources and its ability to prevent the generation of noise and its minimal effect on the external environment. Dolby Digital This fully discrete format divides the music signals into 5.
E N G L I S H 45 Anti-Theft System This unit is equipped with a removable face plate. Removing this face plate makes the unit totally inoperable. [ ] (Release) Remove the Face Plate q Switch off the power of the unit. w Press [ ] (Release) to remove the face plate. (The face plate disengages with a click when it is removed.) e Place the face plate into the case and take it with you when you leave the car.
E N G L I S H Fuse If the fuse blows out, consult your dealer, or your nearest authorized Panasonic Service Centre. Warning 46 1 ¡Use fuses of the same specified rating (15 A). Using substitutes or fuses with higher ratings, or connecting the unit directly without a fuse could cause fire or damage to the unit. If the replaced fuse fails, contact your nearest authorized Panasonic Service Centre. Maintenance This unit is designed and manufactured to ensure the minimum of maintenance.
E N G L I S H 47 Installation Warning ❐ This installation information is designed for professional installers with knowledge of automobile electrical safety systems and is not intended for non-technical, do-it-yourself individuals. It does not contain instructions on the electrical installation and avoidance of potential harm to air bag, anti-theft and ABS braking or other systems necessary to install this product.
E N G L I S H Consult a professional for installation. Verify the radio using the antenna and speakers before installation. Mounting Angle side to side : horizontal front to rear : 0 – 30° 53 mm mm 53 0 – 30° 182 mm 182 mm Supplied Hardware No. 48 Mounting Space 4.5 mm mm 4.5 mm––6.0 6 mm Item Diagram Mounting Collar (YEFX0217263A) Mounting Bolt (5 mmø) Q'ty No.
E N G L I S H Wiring Before Wiring 49 ¡ Exclusively operated with 12 V battery with negative (–) ground. ¡ Connect the power lead (red) very last. ¡ Connect the battery lead (yellow) to the positive (+) terminal of the battery or fuse block terminal (BAT). ¡ Apply insulating tape to bare leads. ¡ Secure loosened leads. Speaker Connection Connect as follows ¡ Use ungrounded speakers only.
Connecting the Parking Brake Connection Lead E N G L I S H 50 Caution ¡ For safety, be sure to ask your nearest professional installer to do this connection. Hand brake Foot brake q Attach a Clip Connector u to the end of the parking brake connection lead. Parking brake switch The parking brake switch position varies with the car model. For details on the exact location of the parking brake switch in your car, contact your dealer.
E N G L I S H 51 Wiring (continued) Caution ¡Check the connectors provided on your car (see precaution below) before connecting the system. ¡To prevent damage to the unit, be sure to follow the connection diagram. ¡Strip about 5 mm of the lead ends for connection (only non-ISO connector cords). ¡Do not insert the power connector into the unit until the wiring is completed.
E N G L I S H RCA Cord (Option) 52 VIDEO 1-IN (Yellow) CY-VM7203N (Option) Color LCD Display Optical Digital Output Connector Parking Brake Lead (Blue/yellow stripe) Be sure to wire the parking brake for safety and preventing accidents. External Remote Control Lead (Brown/black stripe) When using non-Panasonic external remote control, refer to the manufacture for their product before connecting.
E N G L I S H Wiring (continued) Another Connection 53 Note: ¡Refer to the operating instructions for the connected devices, in addition.
E N G L I S H Final Installation 54 Lead Connections Connect all wires, making sure that each connection is insulated and secure. Bundle all loose wires and fasten them with tape so they will not fall down later. Now insert the unit into the mounting collar. Congratulations! After making a few final checks, you’re ready to enjoy your new auto stereo system. Final Check 1. Make sure that all wires are properly connected and insulated. 2.
E N G L I S H 55 Troubleshooting If You Suspect Something Wrong Warning Check and take steps as described below. If the described suggestions do not solve the problem, it is recommended to take the unit to your nearest authorized Panasonic Service Centre. The product should be serviced only by qualified personnel. Please refer the checking and the repair to professionals. Panasonic shall not be liable for any accidents arising out of neglect of checking the unit or your own repair after your checking.
E N G L I S H ■ Common (continued) Problem Possible cause a Possible solution The speaker channels are reversed between right and left. The speaker wiring is reversed between right and left. aPerform the speaker wiring in accordance with the wiring diagram. The sound field is not clear in the stereo mode. Central sound is not settled. The plus and minus terminals at right and left channels of speakers are connected reversely. aPerform the speaker wiring in accordance with the wiring diagram.
E N G L I S H Troubleshooting (continued) ■ RDS Problem Possible cause a Possible solution PS does not appear even if an RDS station is tuned in to. (“NO PS” appears.) A PS code cannot be received for the reason of bad receiving conditions, etc. aA PS code appears if it is received. Wait for a while until conditions change. Receiving programs differs from PTY that was already set up. When the station changed between programs, the unit could not receive the PTY code.
E N G L I S H ■ MP3/DivX Problem Possible cause a Possible solution No playback or disc ejected The disc has unplayable formatted data. aRefer to the description about MP3/DivX for playable formats. The CD-Rs/RWs/DVDRs/RWs that are playable on other devices are not playable on this unit. The playability of some CD-Rs/RWs/DVD-Rs/RWs may depend on the combination of media, recording software and recorder to be used even if these CDRs/RWs/DVD-Rs/RWs are playable on other devices such as a PC.
E N G L I S H 59 Troubleshooting (continued) ■ DVD/VCD Problem No playback or disc ejected Sound skipping or noise Sound skipping due to vibration Possible cause a Possible solution There is a flaw or foreign objects on the disc. aRemove the foreign objects, or use a flawless disc. The disc has unplayable formatted data. aRefer to the description about available disc types. There is a flaw or foreign objects on the disc. aRemove the foreign objects, or use a flawless disc.
Error Display Messages E N G L I S H ■ CD/MP3/DivX 60 Display Possible cause a Possible solution The disc is dirty. The disc has scratches. a Eject the disc. (a Page 22) No operation by some cause. a Eject the disc. If the disc is not ejected when you press [u] (eject), unplug the power cord and plug it again. In case the unit is still out of order, consult your dealer. (a Page 22, 52) The disc is upside down. The player for some reason cannot read the file you are trying to play.
E N G L I S H 61 Troubleshooting (continued) Error Display Messages (continued) ■ DVD/VCD Display Possible cause a Possible solution The disc is dirty. The disc has scratches. a Eject the disc. (a Page 22) No operation by some cause. a Eject the disc. If the disc is not ejected when you press [u] (eject), unplug the power cord and plug it again. In case the unit is still out of order, consult your dealer. (a Page 22, 52) The disc is upside down.
Specifications General Power supply : DC 12 V (11 V – 16 V), test voltage 14.4 V, negative ground Current consumption : Less than 2.3 A (CD mode, 0.5 W 4-channels) Maximum power output : 50 W x 4 (at 4 Ω) Power output : 22 W x 4 (DIN 45 324, at 4 Ω) Video Signal system : NTSC/PAL 1.0 Vp-p 75 Ω RCA pin jack Speaker impedance : 4–8Ω Tone adjustment range : Bass: ± 12 dB (at 100 Hz) Treble: ± 12 dB (at 10 kHz) Pre-amp output voltage : 2.5 V (CD mode) Pre-amp output impedance : 200 Ω Audio output voltage : 2.
CQ-D1703N Matsushita Electric Industrial Co., Ltd. Web Site : http://panasonic.