WMA MP3 CD Player/Receiver with 512 Color OEL Display CQ-C9901N WMA MP3 CD Player/Receiver with Full Dot Matrix Display CQ-C9901N/C9701N CQ-C9701N SRC CS (CQ-C9901N) D·M Operating Instructions Bedienungsanleitung Manuel d’instructions d instructions Gebruiksaanwijzing Bruksanvisning Manuale di istruzioni Manual de Instrucciones Brugsvejledning TEXT Matsushita Electric Industrial Co., Ltd. Web Site : http://www.panasonic.co.
Safety Information Warning This pictograph intends to alert you to the presence of important operating instructions and installation instructions. Failure to heed the instructions may result in severe injury or death. ■ This manual uses pictographs to show you how to use the product safely and to alert you to potential dangers resulting from improper connections and operations. The meanings of the pictographs are explained below.
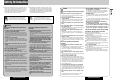
Safety Information Before Reading These Instructions CLASS 1 LASER PRODUCT XXXXXXXXXXXXXXX XXXXXXXXXXXXXXXXX XXXXXXXXXXXXXX XXXXXXXXXXXXXXXX POWER SOURCE MENU OO-OOOOO CAUTION SEL SRC VOL SET BAND LASER RADIATION WHEN OPEN. DO NOT STARE INTO BEAM. English Label Indications and Their Locations MUTE 1 2 3 RANDOM SCAN REPEAT 4 5 7 8 9 0 DISP TUNE 6 TUNE # NUMBER CAR AUDIO Operating Instructions (YEFM285647) Q'ty: 1 CAUTION - LASER RADIATION WHEN OPEN. AVOID EXPOSURE TO BEAM.
Features Contents Sound Control New Features Fully Motorized Front Panel A touch is all it takes to slide the front panel down for access to the disc slot. A three-stage tilt function permits viewing angle to be adjusted to 15, 25 or 35 degrees for optimum display visibility. 256x64 pixel 512-color OEL display (CQ-C9901N only) Multicolored expression can be achieved thanks to OEL display. You can use this unit in your original way in collaboration with the customization function.
Controls Layout Note: This instruction manual explains operations for use with the buttons on the main unit.
Example: CQ-C9901N Preparation Before Initial Use Pull the insulation film out from the backside of remote control gently. Insulation film Battery Replacement Note: If you would like to turn on the power and make the demonstration message appear, hold down [SRC] (PWR: POWER) for 4 sec. or more. (at ACC on setting) Warning ¡Keep batteries and insulation film out of reach of infants. If an infant ingests a battery, please seek immediate medical attention.
General This chapter explains how to turn on or off the power, how to adjust the volume, etc. D·M Power off Hold down [SRC] (PWR: POWER) for 2 sec. or more and release it. Note: The ending screen appears at ACC on setting. You can overwrite the ending screen (moving picture) with new one. (a page 40) You can remove the face plate to prevent it from being stolen. 3 Put the face plate in the case. ] (OPEN). When a disc is already loaded, the disc will automatically be ejected.
The source changes as follows every time [SRC: SOURCE] is pressed. SRC The display changes as follows every time [DISP: DISPLAY] is pressed. Note: You can select a graphic pattern and a still image from originally stored data. (a page 39) You can also use your original images. (Customize the Display a page 40) CS D·M CS SRC At power-on: D·M Mode Radio English General Display OFF All displays disappear in 5 seconds.
Control SRC You can toggle the CS Auto function on and off every time you press [CS: CIRCLE SURROUND AUTOMOTIVE]. Select CS Auto on or off after setting each item. D·M display the audio menu display. Note: If you enable CS Auto, the following functions are automatically disabled: SQ, POSITION, BASS/TREBLE, BALANCE/FADER, SUBWOOFER LEVEL, LPF, HPF, SBC-SW SRC Three-dimensional natural sound field is reproduced with clarity in response to sound.
Radio Sound Control A radio DSP is integrated into this unit. The IF filter allows the radio to adjust the bandwidth automatically to maintain optimum reception. SQ PRESET SELECT Select your favorite type from 6 kinds of SQ Presets. 1 Press [SRC: SOURCE] to select the CS 2 Press [BAND] to select a band. Note: You can also select the SQ preset number by pressing [1] to [6] on the remote control. 3 Press [}] or [{] to select a function to be adjusted. (SET) to adjust.
Radio TA your FM transmitter. (a page 19) 2 Press [MENU] to call up the menu Lights when the D·M mode is activated. Listening to an FM station via an FM transmitter Station Preset (APM: AUTO PRESET MEMORY, P·SET: PRESET) Hold down [TA] (D·M) for 2 sec. or more. Manual station preset 1 2 Hold down [}] or [{] for 2 sec. or Tune in to a station. more. 3 Select a preset number by pressing [}] or [{]. the station by holding down [}] 4 Preset or [{] for 2 sec. or more.
Radio Data System (RDS) in FM Broadcasting Useful functions such as AF, TA, PTY, etc. are available in the RDS (Radio Data System)-ready areas. ¡ The PTY of receiving station appears. ¡ Programs can be searched for by PTY. The following functions are available when the AF mode is active (a page 23). CT (Clock Time) ¡ When receiving conditions become bad, a station with better receiving conditions is automatically tuned in to. ¡ When executing APM, only RDS stations are selected.
Radio Data System (RDS) in FM Broadcasting PTY ON/OFF Pressing [TA] toggles TA on and off. Holding down [DISP] (PTY) for 2 sec. or more toggles PTY mode on and off. Note: This operation is not adjustable by the remote control. SRC Search starts. CS Notes: ¡ To stop searching, press [BAND] (SET). D·M ¡ When there is no corresponding program type station, Programs can be searched for by use of PTY that has been originally preset. The current FM volume becomes the TA volume.
When a disc is already loaded, press [SRC: SOURCE] to select the CD mode. ] (OPEN) to open the face CS lights), the disc D·M 3 Select a desired track. Track selection Random and Repeat play can be set. [7] (TRACK): Next track [6] (TRACK): Preceding track (press twice) Note: Hold down for fast forward/reverse. Pause Note: The power is turned on automatically when inserting a disc at ACC on setting. (a page 38) Press [BAND] (h / 5). Press again to cancel. 4 Press [ ] (OPEN/eject) to eject the disc.
1 Press [ SRC ] (OPEN) to open the face plate. When a disc is already loaded ( will automatically be ejected. lights), the disc Select a desired folder/file. 2 Load a disc with the label-side facing up. 3 Folder selection File selection [7] (TRACK): Next file [6] (TRACK): Preceding file (press twice) Pause Note: The power is turned on automatically when inserting a disc at ACC on setting. (a page 38) Press [BAND] (h / 5). Press again to cancel. 4 Press [ ] (OPEN/eject) to eject the disc.
MP3/WMA Player Recording MP3/WMA files on a CD-media ¡ You are recommended to minimize the chances of making a disc that contains both CD-DA files and MP3/WMA files. ¡ If CD-DA files are on the same disc as MP3 or WMA files, the songs may not play in the intended order, or some songs may not play at all. ¡ When storing MP3 data and WMA data on the same disc, use different folders for each data. ¡ Do not record files other than MP3/WMA files and unnecessary folder on a disc.
Disc Changer (when CDs or MP3 discs are loaded) SRC When a magazine is already loaded ( lights), press [SRC: SOURCE] to select the changer mode. Notes: ¡ Please connect a CD changer or a DVD changer (CX-DH801N) to CH/AUX2. ¡When CX-DP880N or CX-DH801N is connected, a CD-RW disc is playable. CS D·M 2 1 Press [MENU] to display the menu dis- Disc selection play. [}]: Next disc [{]: Preceding disc Folder selection Hold down for 2 sec. or more.
Disc Changer (when DVDs or VCDs are loaded) When a magazine is already loaded ( lights), press [SRC: SOURCE] to select the changer mode. SRC Notes: ¡ Please connect a CD changer or a DVD changer (CX-DH801N) to CH/AUX2. CS ¡ “AUX2” is displayed when connecting a changer that is not compatible with this unit. D·M Repeat play can be set. Chapter/Track selection [7]: Next chapter/track [6]: Preceding chapter/track (press twice) Note: Hold down for fast forward/reverse. Pause Press [BAND] (h / 5).
Audio Setting Adjustment to each speaker and an optional subwoofer (SEL: SELECT) to display the menu display. Balance adjustment the CS Auto mode to on. 1 Set (a page 16) 2 Press [VOLUME] (Setting range: L15 to R15 and Centre, Default: Centre) q : Right enhanced w : Left enhanced (SEL: SELECT) to display the menu display. S.W-TruBass (Sub Woofer TruBass) (Setting range: Lv 1 to Lv 10 and OFF, Default: Lv 4) q : Up w : Down English the CS Auto mode to off.
Function Setting Display Setting Adjustment to display on the DISPLAY menu 1 Press [MENU] to display the menu dis- 1 Press [MENU] to display the menu dis- play. For using the remote control, hold down [MENU] for 2 sec. or more. 2 MUTE KEY Setting [MUTE] buttons’ functions : Volume off (default) : Volume down by 10 steps Press []] or [[] to display the FUNCTION menu. (Setting range: 11types, Default: ALL) For using the remote control, hold down [MENU] for 2 sec. or more.
Customize the Display The download service may be suspended or stopped without advance notice. The download service is not available in some areas. Please visit the site below for further information. Panasonic Web site: (http://www.panasonic.co.jp/global/) 6 Select a file. Example: GRAPHIC PATTERN 1 If there is a disc inside, take out the Notes on IMAGE STUDIO SRC SRC CS D·M 3 Hold down [SEL] for 4 sec. or more to display the menu screen.
Troubleshooting Check and take steps as described below. If the described suggestions do not solve the problem, it is recommended to take the unit to your nearest authorized Panasonic Service Centre. The product should be serviced only by qualified personnel. Please refer checking and repair to professionals. Panasonic shall not be liable for any accidents arising out of neglect of checking the unit or your own repair after your checking.
Troubleshooting Poor reception or noise Problem Possible cause a Possible solution Antenna installation or wiring of antenna cable is faulty. a Check whether the antenna mounting position and its wiring are correct. In addition, check to see whether the antenna ground is securely connected to the chassis. No playback or disc ejected Possible cause a Possible solution The disc is inserted upside down. a Insert a disc correctly. There is a flaw or foreign material on the disc.
The disc has scratches. a Check the disc. CD/MP3/WMA No operation by some cause. a Unplug the power cord and plug it again. In case the unit is still out of order, consult your dealer. The player for some reason cannot read the file you are trying to play. (File recorded in an unsupported file system, compression scheme, data format, file name extension, damaged data, etc.) a Select a file that the player can read. Check the type of data recorded on the disc. Create a new disc if necessary.
General Power Supply Tone Controls (Bass/Treble) Equalizer Center Frequency (SQ) Variable Range of Equalizer Current Consumption Maximum Power Output Power Output Speaker Impedance Pre-amp output voltage Subwoofer output voltage Pre-amp output impedance Subwoofer output impedance External Input Impedance External Input Sensitivity Dimensions (Main Unit) Weight (Main Unit) DC 12 V (11 V – 16 V), Test Voltage 14.4 V, Negative Ground Bass; ±12 dB at 80 Hz, Treble; ±12 dB at 6 kHz 62.
(for non-ISO connector) Vraag een vakman voor de installatie. Apply insulating tape to bare leads. Secure loosened leads. Wenden Sie sich zum Einbau an einen Fachmann. ●Vérifiez l’autoradio avant de procéder au montage. ●Controleer voor de installatie of de radio werkt met de antenne en de luidsprekers. CQ-C9901N Dieses Gerät ist ausschließlich für den Anschluss an Bordnetze mit 12 V Batterie und negativer (–) Klemme an Masse bestimmt.
Wiring/Verdrahtung/Câblage/Bedrading Antenna Antenne Antenne Antenne ✽ 3 1 2 ISO Antenna Adapter (If needed) ISO-Antennenadapter (falls erfor derlich) Adaptateur d'antenne ISO (si nécessaire) ISO antenne-adapter (Indien nodig) Caution To prevent damage to the unit, do not connect the power connector until the whole wiring is completed. Vorsicht Um Beschädigung des Gerätes zu vermeiden, schließen Sie den Versorgungsstecker erst an, nachdem die gesamte Verdrahtung vollständig beendet wurde.