Removable Full Front MP3 WMA CD Player/Receiver with CD Changer Control CQ-HX1083N Removable Full Front CD Player/Receiver with CD Changer Control CQ-HX1003N Operating Instructions (CQ-HX1083N) Bedienungsanleitung Manuel d’instructions Gebruiksaanwijzing Bruksanvisning Manuale di istruzioni Manual de Instrucciones E N G L I S H 2 D E U T S C H 40 F R A N Ç A I S 78 N E D E R L A N D S 116 S V E N S K A 154 I T A L I A N O TEXT Matsushita Electric Industrial Co., Ltd. Web Site: http://www.
E N G L I S H 1 This operating instruction manual applies to the two models below. All illustrations represent model CQ-HX1083N unless otherwise specified. Panasonic welcomes you to their constantly growing family of electronic products owners. We endeavor to give you the advantages of precise electronic and mechanical engineering, manufactured with carefully selected components, and assembled by people who are proud of the reputation their work has built for our company.
E N G L I S H 3 Precautions Before Use/Preparation Volume Level Battery Installation For your driving safety, keep the volume level low enough to be aware of road and traffic conditions. Car Washing ACC Set Check whether there is the ACC position on the ignition switch of your car. To avoid electrical shorts which may cause fire, or other damage, do not expose this product (including the speakers and CDs) to water or excessive moisture.
E N G L I S H 5 Name of Controls Operation by Touch Panel Main Unit and Touch Panel This manual focuses on touch panel on the main unit. For functions not controlled from the main unit, the manual describes how to use the buttons on the remote control. (a page 8) Any area of the panel ¡Turns on the power. E N G L I S H OPEN ¡Opens the front panel. MENU ¡Enters the menu setting mode. ¡Returns to the regular mode during menu setting. ¡Enters the PTY display mode.
E N G L I S H Name of Controls (continued) Getting Started Remote Control Power On On remote control unit: 7 Press Point the remote control unit at the main unit’s sensor. SOURCE PWR SOURCE BAND PWR ¡Switches on/off the power. (a page 9) ¡Selects a source. MENU RET ¡Selects a band. (a page 12) ¡Pauses in CD/MP3/WMA playing. (a page 18, 19) ¡Selects a changer. (a page 22) ¡Returns to the previous display in the menu setting mode.
E N G L I S H Basic Operation E N G L I S H Sound Source Selection Press the SOURCE area to change the source. 9 10 Radio mode (a page 12) CD player mode (a page 18) CD changer control (a page 22) CD is loaded. DISPLAY area Press to change display. ¡PS display ¡Frequency ¡Clock time Volume [VOL}]: up [VOL{]: down MENU ¡Press to enter the menu setting mode. FM(RDS)/AM ¡AF level ¡REG mode ¡TA volume set ¡FM mono reception ¡Local reception PTY ¡PTY language ¡Hold down to enter the PTY display mode.
E N G L I S H Radio - Basics Radio – Preset Memory q Sound Source Selection SOURCE area 11 w Band Up to 6 stations can be stored in each of the FM1, FM2, FM3 and AM (LW/MW) band selections. Preparation: Select a band. (a Previous page) RADIO FM1 CD Player FM2 CD Changer FM3 Auxiliary Menu DISPLAY area Automatically saves stations with good reception in preset memory. ¡The 6 best-receiving stations will be automatically saved in memory under preset numbers 1 to 6.
E N G L I S H 13 Radio - RDS (Radio Data System) Some FM stations are broadcasting added data compatible with RDS. This radio set offers convenient functions using such data. RDS service availability varies with countries or areas. If RDS service is not available in your area, please understand that the following service is not available, either. This chapter explains the summary and operation regarding RDS. The following functions are available when receiving RDS stations.
E N G L I S H 15 Radio - RDS (Radio Data System) (continued) Enhanced Other Network (EON) When EON data is received, the EON indicator lights and the TA and AF functions are expanded as follows. TA: Traffic information from the current and other network stations can be received. AF: The frequency list of preset RDS stations is updated by EON data. EON enables the radio to make fuller use of RDS information.
E N G L I S H 17 CD Player - Basics Cautions: ¡Do not use irregularly shaped discs. ¡Do not use discs that have a seal or label attached. ¡Be sure to close the front panel while CD playback. ¡To avoid damaging the front panel, do not push it down or place objects on it while it is open. ¡Do not pinch your finger or hand in the front panel. Do not insert foreign matter into the disc slot. Disc Insert and Playback Note: Do not insert a disc when DISC indicator lights because a disc is already loaded.
E N G L I S H 19 CD Player – Playing Variation Notes: ¡Press the DIRECTION area ( regular mode. ¡Press the SOURCE (Return) area ( the previous display. ) to return to the CD Player – Remote Control Operation MENU indicator * When the menu is not displayed. MODE indicator MENU SOURCE (Return) area E N G L I S H ) to return to Scan Play Repeat Play Random Play Track/file Track/file Track/file The first 10-seconds part of each track/file plays in sequence. Repeat the current selection.
E N G L I S H 21 CD Changer Control - Basics CD Changer Control – Playing Variation CD changer functions are designed for an optional Panasonic CD changer unit. Connect another CD changer by using an optional dual CD changer selector (CA-CD55EN). ¡CD text is displayed when the unit is connected to a CD changer capable of recognizing CD text (CX-DP9061EN). ¡Not compatible with CD-RW (except when CX-DP880N is connected). Trouble may occur while playing CD-Rs/CD-RWs.
E N G L I S H 23 CD Changer Control – Remote Control Operation * When the menu is not displayed Scan Play Notes on Discs E N G L I S H Notes on CD/CD Media (CD-R, CD-RW, CD-ROM) Repeat Play Random Play Track Track All Discs The first 10-seconds part of each track in all discs plays in sequence. Repeat the current track selection. All the available tracks in all discs play in a random sequence. 24 (Only for remote control) Press 5 to change setting. SCAN Press 6 REPEAT to change setting.
E N G L I S H 25 Notes on Discs (continued) E N G L I S H Notes on MP3/WMA MP3 (MPEG Audio Layer-3) and WMA (Windows MediaTM Audio) are the compression formats of digital audio. The former is developed by MPEG (Motion Picture Experts Group), and the latter is developed by Microsoft Corporation.
E N G L I S H 27 Audio Setting - AUDIO Menu Notes: ¡Press the DIRECTION area ( regular mode. ¡Press the SOURCE (Return) area ( the previous display. ) to return to the MENU indicator AUDIO indicator MENU SOURCE (Return) area ) to return to Default: 0 dB Setting range: –6 to +6 dB (in 2 dB step), mute (– ∞) Sub-Woofer Level q Menu setting mode Press [MENU]. w AUDIO setting DIRECTION area q Press the ARROW area ( select .
E N G L I S H 29 Display Setting - PICTURE Menu Notes: ¡Press the DIRECTION area ( regular mode. ¡Press the SOURCE (Return) area ( the previous display. Function Setting - FUNCTION Menu MENU indicator ) to return to the PICTURE indicator MENU SOURCE (Return) area ) to return to PICTURE q Menu setting mode DIRECTION area or w Press the DIRECTION area ( or w Press the DIRECTION area ( DIRECTION area or ). ). The brightness of just the display area of the front panel changes.
E N G L I S H 31 Front Panel Setting - FACE Menu Anti-Theft System Notes: ¡Press the DIRECTION area ( regular mode. ¡Press the SOURCE (Return) area ( the previous display. This unit is equipped with a removable face plate. Removing this face plate makes the radio totally inoperable. The security indicator will blink.
E N G L I S H Troubleshooting If You Suspect Something Wrong Cautions: ¡Do not use the unit in an irregular condition, for example, without sound, or with smoke or foul smell, which can cause ignition or electric shock. Immediately stop using the unit and call the store where you purchased it. ¡Never try to repair the unit by yourself because it is dangerous to do so. Check and take steps as described below.
E N G L I S H 35 Troubleshooting (continued) Sound Setting Remote Control No sound from left, right, front, or rear speaker Buttons are invalid for operation. Left and right balance, or front and rear balance is inactive on one side. aAdjust balance/fader as appropriate. (a page 28). Cables are not correctly connected. aConnect the cables correctly. Left and right sounds are reversed. The speaker leads are connected in reverse between right and left. aConnect the speaker leads correctly.
E N G L I S H Maintenance Specifications E N G L I S H Before cleaning, turn off the ignition or remove the front panel. General Care of the Unit CD Player Power Supply 37 Cleaning this Unit Caution on Cleaning Use a dry, soft cloth to wipe. Never use solvents such as benzine, thinner as they may mar the surface of the unit.
Consult a professional for installation. ●Verify the radio using the antenna and speakers before installation. Wenden Sie sich zum Einbau an einen Fachmann. Before Wiring/Vor der Verdrahtung Avant le câblage/Voor het aansluiten van de bedrading 1 ●Probieren Sie den Radiobetrieb vor dem Einbau mit Antenne und Lautsprechern aus. Prenez contact avec un spécialiste pour le montage. ●Vérifiez l’autoradio avant de procéder au montage. Exclusively operated with 12-volt battery with negative (–) ground.
Cyan Magenta Yellow Black CQ-DFX1083N Installation Instructions (1) 裏 Wiring/Verdrahtung/Câblage/Bedrading CQ-HX2083N t ISO Antenna Adapter (If needed) t ISO-Antennen-adapter (falls erfor derlich) t Adaptateur d'antenne ISO (si nécessaire) t ISO antenne-adapter (Indien nodig) CD Changer Control Connector The DIN cord of a CD changer (ex. CX-DP9061EN) should be connected. The DIN cord of a dual CD changer selector (ex. CA-CD55EN) should be connected when the selector is incorporated into the system.
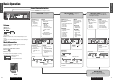
English Operation Guide of CQ-HX1083/HX1003N for details, refer to the operating instructions. The touch panel allows you to operate almost all of the functions of the unit. Each area of the touch panel functions like operation buttons. The following functions are assigned to each area. SOURCE area DISPLAY area ■ Selects a source. ■ Changes the display. MENU AUDIO area ■ Enters the menu setting mode. Refer to the Menu section on the right. ■ Changes to the audio setting mode.