Mobile DVD-Video Player Lecteur DVD-Vidéo mobile Reproductor Movil de DVD-VIDEO CX-D3000U CAR AV Operating Instructions Manuel d’instructions Manual de instrucciones ≥ Please read these instructions carefully before using this product and save this manual for future use. ≥ Prière de lire ces instructions attentivement avant d’utiliser Ie produit et garder ce manuel pour l’utilisation ultérieure.
Safety Information WARNING: E N G L I S H TO REDUCE THE RISK OF FIRE OR ELECTRIC SHOCK, DO NOT EXPOSE THIS PRODUCT TO RAIN OR MOISTURE. TO REDUCE THE RISK OF FIRE OR ELECTRIC SHOCK, AND ANNOYING INTERFERENCE, USE ONLY THE INCLUDED COMPONENTS. WARNING: NOT FOR USE WHERE VIDEO MONITOR IS VISIBLE TO DRIVER TO AVOID RISK OF SERIOUS INJURY OR POSSIBLE VIOLATION OF STATE LAWS. CAUTION: THIS PRODUCT IS A CLASS I LASER PRODUCT.
Panasonic welcomes you to our ever growing family of electronic product owners. We know that this product will bring you many hours of enjoyment. Our reputation is built on precise electronic and mechanical engineering, and our products are manufactured with carefully selected components and assembled by people who take pride in their work. Once you discover the quality, reliability, and value we have built into this product, you too will be proud to be a member of our family.
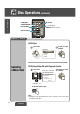
Contents Preparation ❏ Safety Information (2) ❏ Use This Product Safely (4) ❏ Features (4) ❏ Discs that can be Played Back (10) Disc Operations ❏ Accessories (11) ❏ Remote Control (11) E N G L I S H Unit Preparation Page 12 – 21 Inserting/Ejecting a disc, Playback, Stop (12) Selecting a Menu Item (14) Go to Beginning, Fast Forward/Fast Reverse (15) Pause, Slow Playback, Scan Play (16) Random Play, Repeat Play (17) Direct Title/Chapter/Track/Folder/File Selection (18) On-Screen Displays (OSD) (19) DVD
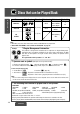
Discs that can be Played Back Disc E N G L I S H Mark (logo) Disc size Video format Audio format Region No. DVD video NTSC LPCM, MPEG 1/MPEG 2, Dolby Digital NTSC LPCM (CD-DA*), MPEG 1 5z (12 cm) Video CD 1 3z (8 cm) CD, CD TEXT 1 All LPCM (CD-DA*), MP3 *CD-DA: A general music CD format. Note: ≥ With MP3s, only those files whose data is written in CD-R/RW can be played back. ≥ About CD-Rs and CD-RWs, refer to “Notes on CD-Rs/RWs” on page 34.
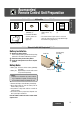
Accessories/ Remote Control Unit Preparation Points to RememberAccessories When Recording an MP3 Disc E N G L I S H POWE R CAR AV ≥ Remote control unit (1) ≥ Lithium battery (CR2025) (1) ≥ Installation hardware (Screws, power connector, etc.) (page 37) ≥ Remote control signal receiver† (1) ≥ Operating instructions 2 (1) (3 m) † The remote control signal receiver is not used when the remote control unit is operated through the monitor unit (page 40, 42). ≥ Warranty card, etc.
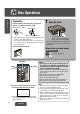
Disc Operations E N G L I S H Preparation Check the monitor connection setting. (page 40–43) 1 Open the cover. Turn the car’s ignition switch ACC or ON. (ACC indicator†1 lights.) ACC indicator†1 ACC ON 3 Remote control signal receiver†2 †1 ACC indicator lights when the remote control signal receiver is connected. (page 40) †2 The remote control signal receiver is not used when the remote control is operated through the monitor unit. (page 40, 42) Turn the monitor switch to ON.
Not all CD media containing MP3 data will play back normally. For details, see “Notes on MP3” (page 32). 2 Insert the disc. 3 Close the cover. E N G L I S H 4 [1;]* [<]*(eject) *These light when a disc is inserted. Label side ≥ The power turns to ON and playback begins ≥ Always close the cover completely automatically. ≥ Before loading a disc, check to make sure that a disc is not already loaded. when using the player.
Disc Operations (continued) E N G L I S H 5 [:][9] (TRACK/SEARCH) [1] (PLAY) RET (RETURN) ["][#][%][$]/ [ENTER] (Push the center.) Numeric buttons DVD Video Video CD CD MP3 DVD Video 1 2 Select Item. (Example) Finalize selection (ENTER). EN R EN DVD Video/Video CD with Playback Control Select Item. (Example: Video CD with playback control) Select your favorite music. 1. Love Supremes 2. Impressions 3. In a sentimental mood Number: 2 Finalize selection (ENTER).
DVD Video Video CD CD MP3 [9]:Next chapter/track/file. [:]: Beginning of the current chapter/track/file. For the previous chapter/track/file, press twice. (Backward) (Forward) Note: ≥ If the selected folder does not contain any MP3 files, the nearest MP3 file in the order of playback will be played. ≥ If the total of files and folders exceeds 254, successful playback may not be performed.
Disc Operations (continued) [;] (PAUSE) E N G L I S H [1] (PLAY) [9] 7 Numeric buttons [4] (RANDOM) [5] (SCAN) [6] (REPEAT) DVD Video Video CD CD MP3 (During playback) Remote control unit To cancel: ≥ The playback pauses. ≥ Each time you press [1;] Pause on this player: Main unit Pause Video CD CD MP3 (During pause) To pause: Slow Playback 1 3 / normal speed. Video CD To resume normal playback: 0.5 sec.
DVD Video Video CD CD MP3 (During playback) Track random All the tracks on the disc play in a random sequence. Track (CD)/ File (MP3) Random File random All the files on the disc play in a random sequence. Random Play (During playback) Folder Random (MP3) DVD Video Video CD All the available files on the current folder play in a random sequence. 8 To cancel: 2 sec. CD 2 sec.
Disc Operations (continued) E N G L I S H [ENTER] (Push the center.) [RET] (RETURN) 9 Numeric buttons [OSD] (On-Screen Displays) DVD Video Video CD [GRP] (group) (TRACK/TITLE/CHAPTER) CD 1 MP3 Select the input mode. (During playback) Each time the button is pressed, DVD video (Regular mode) CD (Regular mode) Track Chapter Title Direct Title/Chapter/ Track/Folder/ File Selection MP3 (Regular mode) File Folder 2 Input the desired number. 3 Finalize selection (ENTER).
DVD Video Video CD CD MP3 Each time you press this button, the display changes according to the disc type. (During playback) DVD video Music CD Regular display Play E N G L I S H 10 CD PLAYER MODE Track: 01/10 Time: 00 : 03 : 37 Regular display Current operation mode (Loading, Eject, Play, Pause, Stop, etc.
Disc Operations (continued) E N G L I S H ["][#][%][$]/ [ENTER] (Push the center.) [MENU] (TITLE) Numeric buttons [1] (SUBTITLE) [2] (AUDIO) [3] (ANGLE) 11 DVD Video Video CD CD 1 MP3 (During playback) (Example) DVD MENU 1. SUBTITLE 2. AUDIO 3. ANGLE DVD Menu 2 Select the item. 3 Finalize the selection (ENTER). or TE R Use this menu during playback to select content, audio, subtitles, etc., from a menu (the DVD menu) that is unique to each disc.
DVD Video Video CD Switching the Subtitle Language* DVD Video Video CD Switching the Audio Language* DVD Video Video CD CD MP3 ≥ The subtitle language is (During playback) switched every time this is pressed for more than 1 second. 1 sec. 12 CD MP3 ≥ The audio language is (During playback) switched every time this is pressed for more than 1 second. 1 sec.
User Settings 1 Display “Main Menu”. (While disc stopped, or no disc.) E N G L I S H 2 Select each setting menu. 13 (Example: “1. Menu Language”) 1. Menu Language 2. Subtitle Language 3. Audio Language 4. TV Aspect 5. TV Mode (4:3) 6. On-Screen Messages 7. Audio Output Level 8. D. Range Compression : English : English : English : 16:9 : Pan&Scan : ON :2 : OFF 1. Menu Language 2. Subtitle Language 3. Audio Language 4. TV Aspect 5. TV Mode (4:3) 6. On-Screen Messages 7.
3 Select each item. 4 Finish the setting. ≥ The setting is completed. (Example: “1. English”)
User Settings (continued) 1 Display “Main Menu”. (While disc stopped, or no disc.) E N G L I S H 2 Select each setting menu. 15 (Example: “7. Audio Output Level”) 1. Menu Language 2. Subtitle Language 3. Audio Language 4. TV Aspect 5. TV Mode (4:3) 6. On-Screen Messages 7. Audio Output Level 8. D. Range Compression : English : English : English : 16:9 : Pan&Scan : ON :2 : OFF 1. Menu Language 2. Subtitle Language 3. Audio Language 4. TV Aspect 5. TV Mode (4:3) 6.
3 Select each item. 4 Finish the setting. ≥ The setting is completed. Note: ≥ To apply changes to settings, be sure to press [0] at the end. ≥ After the user settings have been changed and entered, the player returns to the start of the disc and begins playback. ≥ When the disc has predetermined language or other settings, the user settings are not reflected. (Example: “1. 1”)
Troubleshooting Preliminary Steps E N G L I S H 17 Check and take steps as described in the tables below. If You Suspect Something Wrong Immediately switch the power off. Disconnect the power connector and check that there is neither smoke nor heat from the product before asking for repairs. Never try to repair the product yourself because it is dangerous to do so. Caution: ≥ Do not use the product if it malfunctions or is something wrong.
Troubleshooting Tips E N G L I S H ❐ Common Trouble Cause/Step Car’s engine switch is not on. ➡ Turn your car’s ignition switch to ACC or ON. No power. 18 Cables are not correctly connected. ➡ Connect cables correctly. ➡ Connect the battery cable to the terminal that is always active. ➡ Connect the accessory cable to your car’s ACC source. ➡ Connect the grounding wire to a metal part of the car. Fuse is burnt out.
Troubleshooting (continued) ❐ DVD/Video CD/CD (continued) E N G L I S H 19 Trouble Sound skips, bad sound quality (e.g. caused by noise). Sound skips due to vibration. The disc is not ejected. CD-text is not displayed normally. Cause/Step ≥ Disc is dirty. ≥ Disc has scratches. ➡ Clean the disc, referring to the section on “Notes on Disc”.
❐ DVD/Video CD/CD (continued) Trouble No subtitles appear. Cause/Step Subtitles must be recorded on the disc, or they will not appear. ➡ Refer to the guide provided with your disc. It is difficult to hear small sound. (Dolby digital DVD software only) ➡ Set “D. Range Compression” to “Minimum”. The sound volume level is too low or too high. ➡ Adjust the output level at the menu of “Audio Output Level”. Cannot switch the audio language/subtitle language/angle.
Troubleshooting (continued) ❐ MP3 (continued) E N G L I S H Trouble Cause/Step It takes too long for playback to start. The folders and files recorded on the disc are layered too much. ➡ As checking of files takes longer in this case, do not record any unnecessary folders or files other than MP3 on the disc. Files are not played in the desired order. Files or folders are not recorded in the desired playback order.
What to do if the player does not operate no matter which button you press Reset switch Press this switch with a tough pointed object. ≥ The player returns to the power off, and turn the power on again. E N G L I S H 22 Caution: ≥ Press this switch when any operation buttons do not work. If the player does not become restored even after pressing the switch, contact your nearest Panasonic Servicenter for service. Maintenance Your product is designed and manufactured to ensure a minimum of maintenance.
Notes on MP3 ❐ What is MP3? E N G L I S H 23 MP3 (MPEG audio layer 3) is the compression format of digital audio. It is developed by MPEG (Motion Picture Experts Group). Using this compression format, you can record the contents of about 10 music CDs on a single CD media. (This figures refer to data recorded on a 650 MB CD-R or CD-RW at a fixed bit rate of 128 kbps and a sampling frequency of 44.1 kHz.) Note: ≥ MP3 encoding and writing software are not supplied with this product.
❐ Recording MP3 files on a CD-media ≥ You are recommended to minimize the chances of making a disc that contains both CD-DA files and MP3 files. ≥ If CD-DA files are on the same disc as MP3 files, the songs may not play in the intended order, or some songs may not play at all. ≥ Do not record files other than MP3 files and unnecessary folder on a disc. ≥ The name of MP3 file should be added by rules as shown in the following descriptions and also comply with the rules of each file system.
Notes on Disc E N G L I S H 25 Notes on CD-Rs/RWs Maintenance ≥ You may have trouble playing back some CD-R/RW How to hold the disc ≥ Do not touch the surface of the disc. ≥ Do not scratch the disc. ≥ Do not bend the disc. ≥ When not in use, keep the disc in the case. discs recorded on CD recorders (CD-R/RW drives), either due to their recording characteristics or dirt, fingerprints, scratches, etc. on the disc surface.
Language Code List In “Other” cases (Menu Language, Subtitle Language, Audio Language) (page 22) 2 Finalize the selection (ENTER). E N G L I S H R 1 Input the four digit language code. (See below.) To input the number again: TE 26 EN ≥ Setting is finished and the display returns to “Main Menu”.
Definition of Terms E N G L I S H 27 Digital audio output connector (Optical) The digital audio output connector (optical) converts electrical signals into optical signals and transfers them to the amplifier. Consequently, it has a number of features including its immunity from electrical interference from external sources and its ability to prevent the generation of noise and its minimal effect on the external environment.
Installation Guide WARNING The installation information is designed for experienced installers and is not intended for non-technical individuals. It does not contain warnings or cautions of the potential dangers involved in attempting to install this product. Any attempt to install this product in a motor car by anyone other than a qualified installer could cause damage to the electrical system and could result in serious personal injury or death. ❐ Installation hardware No.
Installation Guide (continued) ❐ Identify all leads E N G L I S H 29 The first step in installation is to identify all the car wires you’ll use when hooking up your sound system. As you identify each wire, we suggest that you label it using masking tape and a permanent marker. This will help avoid confusion when making connections later. Note: ≥ Do not connect the power connector to the product until you have made all connections.
❐ Final installation ❐ How to install the product Lead Connections Connect all wires, making sure that each connection is insulated and secure. Bundle all loose wires and fasten them with tape so they won’t fall down later. The diagram below shows an example in which this product is installed to the floor. Consult a qualified servicing engineer or your dealer for information on installing this product to a different location.
Electrical Connections ❐ Wiring diagram E N G L I S H Accessories used for wiring No.
Caution: ≥ This product is designed to operate with a 12 V DC, negative ground battery system. ≥ To prevent damage to the unit, be sure to follow the connection diagram below. ≥ Remove approximately 1/4z (5 mm) of protective covering from the ends of the leads before connecting. ≥ Do not insert the power connector into the unit until the wiring is completed. ≥ Be sure to insulate any exposed wires from a possible short-circuit from the car chassis.
Electrical Connections (continued) ❐ Upgrading the system E N G L I S H ≥ Power amplifier (CY-M9054 or CY-M7052, option) ≥ CD player/receiver with CD changer control Examples combination ≥ Rear seat monitor (CY-VM5800U, option) ≥ Digital surround processor (CY-AC300, option) (CQ-DF903U, option) ≥ Center speaker (EAB-CF2, option) 33 VIDEO OUT AUDIO OUT REMOTE IN DIGITAL OUT RCA cord (option) CX-D3000U (rear) (Black) 4 Power connector (page 40) L (White) Video (Yellow) R (Red) 7 RCA cord CY-VM5800U D
Note: ≥ For wiring, carefully read the operating instructions for the devices connected. Optical Fiber Cable (CA-LRD60: option) Notes on handling optical fiber cable: ≥ Do not bend the cable sharply. ≥ Do not allow the cable to be damaged by getting it caught in the door, placing a heavy object on it, etc.
Electrical Connections (continued) ❐ Connecting side brake (parking brake) connection lead E N G L I S H 35 Caution: ≥ For safety, be sure to ask your nearest professional installer to do this connection. Side brake (parking brake) The side brake (parking brake) switch position varies with the car model. For details on the exact location of the parking brake switch in your car, contact your dealer. Parking brake switch Foot brake Cords connected to the vehicle.
Specifications Supply voltage: Current consumption: Signal system: Discs played: Audio output level: Audio signal output characteristics: Dimensions (WaHaD): Weight: Digital audio output: Disc DVD Video CD CD MP3 12 V DC (11 V–16 V), test voltage 14.4 V, negative ground Less than 1.7 A NTSC 1.
Panasonic Consumer Electronics Company, Division of Matsushita Electric Corporation of America One Panasonic Way, Secaucus, New Jersey 07094 http://www.panasonic.com Panasonic Sales Company. Division of Matsushita Electric of Puerto Rico, Inc. (“PSC”) Ave. 65 de Infanteria, Km. 9.5 San Gabriel Industrial Park, Carolina, Puerto Rico 00985 http://www.panasonic.com YEFM284068 Panasonic Canada Inc. 5770 Ambler Drive, Mississauga, Ontario L4W 2T3 http://www.panasonic.