
User manual
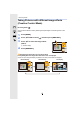
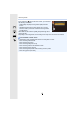

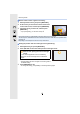
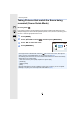
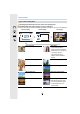
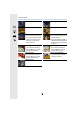

Table Of Contents
- Finding the information you need
- How to use this manual
- Contents
- Contents by Function
- 1. Before Use
- 2. Getting Started/Basic Operations
- 3. Recording Modes
- Taking Pictures using the Automatic Function (Intelligent Auto Mode)
- Taking Pictures with Automatically Adjusted Aperture and Shutter Speed (Programme AE Mode)
- Taking picture by setting the exposure manually (Manual Exposure Mode)
- Taking Pictures with different image effects (Creative Control Mode)
- Taking Pictures that match the Scene being recorded (Scene Guide Mode)
- Take the Outdoors Scene Expressively
- Taking panorama pictures (Panorama Shot Mode)
- 4. Focus, Brightness (Exposure) and Colour tone Settings
- 5. 4K Photo and Drive Settings
- 6. Stabiliser, Zoom and Flash
- 7. Recording Motion Pictures
- 8. Sensor
- 9. Playing Back and Editing Images
- 10. Using Menu Functions
- 11. Using the Wi-Fi function
- 12. Connecting to other equipment
- 13. Others

57
3. Recording Modes
Taking Pictures that match the Scene being
recorded (Scene Guide Mode)
Recording Mode:
If you select a scene to suit the subject and recording conditions with reference to the
example images, the camera will set optimal exposure, colour, and focus, allowing you to
record in a manner appropriate to the scene.
1
Press [MODE].
2
Press 3/4/2/1 to select [ ], and then press [MENU/SET].
3
Press 2/1 to select the scene.
4
Press [MENU/SET].
• To change the Scene Guide Mode, select the [ ] tab on the menu screen, select [Scene
Switch], and then press [MENU/SET]. You can return to step
3 on P57.
• The following items cannot be set in Scene Guide Mode because the camera automatically
adjusts them to the optimal setting.
– Items other than the picture quality adjustment in [Photo Style]
– [Sensitivity]
– [Metering Mode]
– [HDR]
• Although White Balance is fixed to [AWB] for certain types of scenes, you can use [White
Balance] in the [Rec] menu to fine-adjust the White Balance (P75).