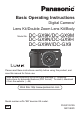
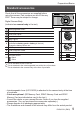
Basic Operating Instructions Digital Camera/ Lens Kit/Double Zoom Lens Kit/Body Model No. DC-GX9K/DC-GX9M DC-GX9N/DC-GX9H DC-GX9W/DC-GX9 Please read these instructions carefully before using this product, and save this manual for future use. More detailed operating instructions are available in “Operating Instructions for advanced features (PDF format)”. To read it, download it from the website. (→94) Web Site: http://www.panasonic.com Model number suffix “EB” denotes UK model.
Dear Customer, We would like to take this opportunity to thank you for purchasing this Panasonic Digital Camera. Please read these Operating Instructions carefully and keep them handy for future reference. Please note that the actual controls and components, menu items, etc. of your Digital Camera may look somewhat different from those shown in the illustrations in these Operating Instructions. Carefully observe copyright laws.
Declaration of Conformity (DoC) Hereby, “Panasonic Corporation” declares that this product is in compliance with the essential requirements and other relevant provisions of Directive 2014/53/EU. Customers can download a copy of the original DoC to our RE products from our DoC server: http://www.ptc.panasonic.
■ About the AC adaptor (supplied) CAUTION! To reduce the risk of fire, electric shock or product damage, • Do not install or place this unit in a bookcase, built-in cabinet or in another confined space. Ensure this unit is well ventilated. • The AC adaptor is in the standby condition when the mains plug is connected. The primary circuit is always “live” as long as the mains plug is connected to an electrical outlet. ■ Cautions for Use • Do not use any other USB connection cables except the supplied one.
• To clean your camera, remove the battery, the DC coupler (DMW-DCC11: optional) or a card, or disconnect the power plug from the outlet, and wipe with a soft, dry cloth. • Do not press the monitor with excessive force. • Do not press the lens with excessive force. • Do not allow camera to come into contact with pesticides or volatile substances (can cause surface damage or coating to peel). • Do not keep rubber or plastic products in contact with the camera for a long period of time.
These symbols indicate separate collection of waste electrical and electronic equipment or waste batteries. More detailed information is contained in “Operating Instructions for advanced features (PDF format)”. How to use this manual Recording mode: • In Recording modes that show icons in black, you can select and execute indicated menus and functions. (Custom Mode) has different functions depending on the recording mode that is registered.
Contents ■ Information for Your Safety ...................... 2 Preparations/Basics ■ ■ ■ ■ ■ ■ ■ ■ Before use.................................................. 8 Standard accessories ............................... 9 Names and Functions of Main Parts ......11 About the Lens ........................................ 14 About the Card ........................................ 15 Quick Start Guide .................................... 16 Attaching the Shoulder Strap ....................
Preparations/Basics Before use ■ Camera handling Keep the camera away from excessive vibration, force, or pressure. ● Avoid using the camera under the following conditions, which may damage the lens, monitor, viewfinder, or camera body. This may also cause the camera to malfunction or prevent recording. • Dropping or hitting the camera against a hard surface • Pushing with excessive force on the lens or monitor The camera is not dust resistant, splash resistant, or waterproof.
Preparations/Basics Standard accessories Check that all the accessories are supplied before using the camera. Part numbers are as of February 2018. These may be subject to change. Digital Camera Body (Indicated as camera body in the text) 1 2 3 4 5 6 7 8 9 10 Interchangeable Lens1 DC-GX9K Lens Cap2 Lens Rear Cap2 Lens Hood Body Cap3 Battery Pack (Indicated as battery pack or battery in the text) Charge the battery before use.
Preparations/Basics DC-GX9M DC-GX9N DC-GX9H DC-GX9W H-FS12060 H-FS1442A H-FS14140 H-FS12032 H-FS35100 VYF3514 VYF3510 VYF3514 SYF0059 SYF0073 VFC4605 VFC4605 VFC4605 VFC4605 SYA0066 VYC1113 VYC1119 SYA0024 VKF4971 VKF4971 VKF4971 1 2 3 4 5 DC-GX9 8 6 5 DMW-BLG10E VKF4971 7 K1HY04YY0106 10 : VKF5259 : SKF0133H 9 SAE0012F VFC5167 • Some digital camera kits may not be commercially available in some regions.
Preparations/Basics Names and Functions of Main Parts ■ Camera body 1 2 11 12 13 14 3 8 4 5 7 9 10 6 15 3 21 22 20 19 18 17 16 26 27 23 24 25 33 34 29 30 31 32 28 35 36 42 41 37 40 39 38 Function buttons [Fn4] to [Fn8] are touch icons. They can be displayed by touching the [ ] tab on the recording screen.
Preparations/Basics 1 2 3 4 5 6 7 8 9 10 11 12 13 14 15 16 17 18 19 20 21 22 23 24 25 26 27 28 29 30 12 Shutter button (→24) Front dial (→25) Shoulder strap eyelet (→16) Exposure compensation dial (→31, 35) Mode dial (→26) Camera [ON/OFF] switch (→20) Motion picture button (→48) Flash (→23) Hot shoe (Hot shoe cover) (→13) Focus distance reference mark Eyecup Viewfinder (→22) Eye sensor (→22) Dioptre adjustment dial (→22) Stereo microphone (→23) Lens release button (→20) Lens lock pin Mount Sensor Lens f
Preparations/Basics ■ Lens H-FS12032 H-FS35100 5 6 1 2 3 4 H-FS12060 6 5 6 H-FS1442A 5 9 6 1 2 73 4 1 2 3 4 5 6 7 8 9 5 1 2 7 3 4 Lens surface Tele Zoom ring Wide Contact point Lens fitting mark (→19) Focus ring (→33) [O.I.S.] switch (→46) Lens mount rubber 1 2 7 3 4 H-FS14140 5 6 1 2 73 4 8 ■ Removing the Hot Shoe Cover The camera comes with a hot shoe cover attached to the hot shoe.
Preparations/Basics About the Lens This unit can use the dedicated lenses compatible with the Micro Four Thirds™ System lens mount specification (Micro Four Thirds mount). You can also use a lens of any of the following standards by attaching a mount adaptor.
Preparations/Basics About the Card The following SD standard-based cards can be used. Type of Card SD Memory Cards SDHC Memory Cards SDXC Memory Cards Capacity Notes 512 MB – 2 GB • This unit is compatible with UHS- UHS Speed Class 3 standard SDHC/SDXC memory cards. 4 GB – 32 GB • Operation of the cards listed on the left has been 48 GB – 128 GB confirmed with Panasonic brand card.
Preparations/Basics Quick Start Guide Attaching the Shoulder Strap We recommend attaching the shoulder strap when using the camera to prevent it from dropping.
Preparations/Basics Inserting the battery and/or SD memory card (optional) Make sure that the camera is turned off. 1 Slide the release lever ( ) to the [OPEN] position and open the card/battery door [OPEN] [LOCK] 2 Insert the battery and card, making sure that their orientation is correct ( ) • Battery: Insert the battery all the way firmly and check that it is locked by lever ( ). • Card: Insert the card all the way firmly until it clicks. Do not touch the terminal.
Preparations/Basics Charging the battery • The battery that can be used with this unit is DMW-BLG10E. • We recommend charging in a location where the ambient temperature is between 10 °C and 30 °C (50 °F to 86 °F). Insert the battery into the camera. Make sure that the camera is turned off. Charging lamp (Red) AC adaptor (supplied) To the electrical outlet USB connection cable (supplied) Computer Getting ready: Turn on the computer.
Preparations/Basics Charging from the power outlet Connect the AC adaptor (supplied) and this camera with the USB connection cable (supplied), and insert the AC adaptor (supplied) into the power outlet. Charging from a computer Connect the computer and this camera with the USB connection cable (supplied). ■ Charging lamp indications (Red) On: Charging in progress Off: Charging complete (After charging stops, disconnect the camera from the electrical outlet or your computer.
Preparations/Basics ■ Detaching the lens Attach the lens cap While pressing on the lens release button ( ), rotate the lens toward the arrow until it stops and then remove • Hold the part around the base of the lens to rotate it. Setting the clock The clock is not set when the camera is shipped. 1 Turn the camera on 2 Press [MENU/SET] 3 Press to select the items (year, month, day, hour, minute), and press to set 4 Press [MENU/SET] 5 When [The clock setting has been completed.
Preparations/Basics Extending/retracting the lens [when the interchangeable lens (H-FS12032/H-FS35100) is attached] ■ How to Extend the Lens Example: H-FS12032 Rotate the zoom ring in the direction of arrow from position ( ) (the lens is retracted) to position ( ) [12 mm to 32 mm (H-FS12032), 35 mm to 100 mm (H-FS35100)] to extend the lens. • When the lens barrel is retracted, images cannot be recorded.
Preparations/Basics [LVF] button (Recording pictures using the viewfinder) 1 Press [LVF] ( ) button [LVF] button Eye Sensor Automatic switching between viewfinder and monitor Viewfinder display Monitor display When [Eye Sensor AF] in the [Custom] ([Focus / Release Shutter]) menu is set to [ON], the camera adjusts the focus automatically as the eye sensor is activated. Even when [Eye Sensor AF] is set and the camera automatically adjusts the focus, a beep will not sound.
Preparations/Basics Holding the camera • Do not block the flash, AF Assist Lamp, microphone, or speaker with your fingers or other objects. AF Assist Lamp Flash Microphone Speaker ■ Adjusting the angle of the monitor ■ Adjusting the angle of the viewfinder • Be careful not to catch your finger, etc. in the monitor or viewfinder. • When adjusting the angle of the monitor and viewfinder, be careful not to apply too much force. Doing so may cause damage or malfunction.
Preparations/Basics Shutter button (Taking pictures) 1 Set mode dial to [ ] • The camera automatically optimises the main settings. 2 Press the shutter button halfway (press lightly) to focus on the subject Aperture value Shutter speed Focus display (Green) (When focus is aligned: illuminated When focus is not aligned: flashing) • If the aperture value and shutter speed are shown in red and flashing, you do not have the appropriate exposure, unless you are using the flash.
Preparations/Basics Basic operations Cursor button Selection of items or setting of values etc., is performed. You can perform the following operations while recording. (Some items or settings cannot be selected depending on the mode or display style the camera is in.) ] (ISO sensitivity) ( ) [ • Set ISO sensitivity (sensitivity to lighting). [ ] (White balance) ( ) • Adjusts to the colour of white which is closest to what is seen by the eye in accordance with the light source.
Preparations/Basics Mode dial (Select the recording mode) 1 Set to the desired recording mode • Rotate the mode dial slowly to select the desired mode. Intelligent Auto Mode (→30) Intelligent Auto Plus Mode (→30, 31) Programme AE Mode Take pictures with automatic shutter speed and aperture value settings. Aperture-Priority AE Mode Determine aperture, then take pictures. Shutter-Priority AE Mode Determine shutter speed, then take pictures.
Preparations/Basics Touch screen (Touch operations) Touch To touch and release the touch screen. Drag To touch and slide your finger across the touch screen. Pinch (spread/pinch) On the touch screen, spread (pinch out) your 2 fingers to zoom in, and pinch (pinch in) your 2 fingers to zoom out. ■ Taking Pictures Using the Touch Function (Touch AF, Touch Shutter, [Touch AE]) Touch [ ] Touch an icon ] (Touch AF): Focuses on the position you •[ touch.
Preparations/Basics Setting the menu 1 Press [MENU/SET] to bring up the menu 2 Switch the menu type Press Press to select a tab such as [ ] • You can also select the menu toggle icons by rotating the front dial.
Preparations/Basics Calling frequently-used menus instantly (Quick Menu) You can easily call some of the menu items and set them during recording. 1 2 3 4 Press [Q.MENU/ ] button 50p Rotate the front dial to select a menu item Rotate the rear dial to select the setting Press [Q.
Recording Taking pictures with automatic settings (Intelligent Auto Mode) This mode is recommended for those who want to point and shoot as the camera optimises settings to match the subject and recording environment. 1 Set mode dial to [ ] • At the time of purchase, the mode is set to Intelligent Auto Plus Mode. 2 Point the camera at the subject • When the camera identifies the optimal scene, the icon for each scene turns blue for 2 seconds and then changes to the normal red indication.
Recording Taking pictures with customised colouring, brightness and blurriness of the background Recording mode: ■ Setting colouring Press to display the setting screen Rotate the rear dial to adjust colour • Press [MENU/SET] to return to the recording screen.
Recording Taking pictures with Auto Focus Recording mode: Set the focusing operation to be performed when the shutter button is pressed halfway. 1 Set the focus mode lever to [AFS/AFF] or [AFC] • It is fixed to [AFS] when Panorama Shot Mode is set. Settings [AFS/AFF] The movement of the subject and the scene (recommended) [AFS] Subject is still (Scenery, anniversary photograph, etc.) (Auto Focus Focus is set automatically when the shutter button is pressed Single) halfway.
Recording Taking pictures with Manual Focus Recording mode: Manual Focus is convenient when you want to lock the focus to take pictures or when it is difficult to adjust focus using Auto Focus. 1 Set the focus mode lever to [MF] 2 Press [ ] button ( ) 3 Press to adjust the focus position, and press [MENU/SET] • To return the focus position to the centre, press [DISP.] button. 4 Adjust the focus The operations used to focus differ depending on the lens.
Recording • Colour is added to the portions of the image that are in focus. (Peaking) • You can check whether the point of focus is to the near side or to the far side. (MF Guide) • MF Assist and MF Guide may not display depending on the lens used. You can, however, display MF Assist by directly operating the camera using the touch screen or a button. MF Assist (Enlarged screen) Peaking MF Guide Operation Touch operation 1 Drag Pinch out / Pinch in Enlarges/reduces the screen in small steps.
Recording Taking pictures with Exposure Compensation Recording mode: Corrects the exposure when there is a backlight or when the subject is too dark or too bright. • In Manual Exposure Mode, you can compensate the exposure only when the ISO sensitivity is set to [AUTO]. 1 Rotate the Exposure Compensation dial to compensate the exposure • You can set the exposure compensation value in the range between –3 EV and +3 EV.
Recording Recording with the 4K Photo function Recording mode: You can take burst pictures of approximately 8 million pixels with a burst rate of 30 fps. You can select and save a frame from the burst file. • To record pictures, use a UHS Speed Class 3 card. • When recording, the angle of view becomes narrower. 1 Press [ 2 Press 3 Press ] button ( [4K Burst] [4K Burst(S/S)] “S/S” is an abbreviation of “Start/Stop”.
Recording 4 Press the shutter button to perform recording • When you press the [Fn1] button while recording, you can add a marker. (Up to 40 markers for each recording.) When selecting and saving pictures from a 4K burst file, you can skip to the positions where you added markers. ([4K Burst(S/S)] only) • Burst pictures are saved as a single 4K burst file in the MP4 format. • When [Auto Review] is enabled, the picture selection screen will be displayed automatically.
Recording ● If the surrounding temperature is high or 4K photos are recorded continuously, ] may be displayed and recording may be stopped halfway through. Wait [ until the camera cools down. ● When [ ] ([4K Pre-Burst]) or [Pre-Burst Recording] is set, the battery drains faster and the camera temperature rises. ] ([4K Pre-Burst]) or [Pre-Burst Recording] only when recording. Select [ ● Recording stops when the continuous recording time exceeds 29 minutes and 59 seconds.
Recording ■ Marker When selecting and saving pictures from a 4K burst file, you can select pictures easily by skipping between marked positions. ■ Skips to the marked positions When [ ] is touched, the marker operation screen appears. You can use to skip to a marked position to select a picture. ] to return to the original operation. Touch [ White marker: This is manually set during recording or playback. Green marker: This is automatically set by the camera during recording.
Recording Adjusting the focus after recording ([Post Focus] / [Focus Stacking]) Recording mode: You can record 4K burst pictures while changing the focus point and then select a focus point after recording. This function is best for non-moving subjects. • To record pictures, use a UHS Speed Class 3 card. • We recommend using a tripod to perform [Focus Stacking].
Recording Select the focus point and save the picture ([Post Focus]) 1 On the playback screen, select the image with the [ ] icon and press 2 Touch the focus point • If there are no pictures with the focus on the selected point, a red frame will be displayed, and pictures cannot be saved. • The edge of the screen cannot be selected. • To enlarge the display, touch [ ]. You can make fine adjustments to the focus by dragging the slide bar during enlarged display.
Recording Select the focus range to combine and create a single picture ([Focus Stacking]) Near Focus Distant 1 Touch [ ] on screen in step 2 of “Select the focus point and save the picture ([Post Focus])” (→41) 2 Choose a stacking method and touch it [Auto Merging] Automatically select photos suitable for stacking and combine them into one picture. • Choose by giving preference to near-focus pictures. • Perform the focus stacking and save the picture.
Recording Selecting a Drive Mode ([Burst] / [Self Timer]) Recording mode: You can switch the operation to be performed when you press the shutter button. 1 Press [ 2 Press ] button ( ) to select the drive mode and press [MENU/SET] [Single] [Burst] When the shutter button is pressed, only one picture is recorded. The pictures are recorded in succession while the shutter button is pressed.
Recording Taking Pictures While Adjusting a Setting Automatically (Bracket Recording) Recording mode: You can take multiple pictures while automatically adjusting a setting by pressing the shutter button. 1 Set the menu → [Rec] → [Bracket] → [Bracket Type] (Exposure Bracket) (Aperture Bracket) (Focus Bracket) (White Balance Bracket) 2 Press Press the shutter button to perform recording while adjusting the exposure. Press the shutter button to perform recording while adjusting the aperture.
Recording Exposure Bracket ■ About [More Settings] (step 2 in (→44)) [Step] Sets the number of pictures to be taken and the exposure compensation range. ] (Takes three pictures with an interval of 1/3 EV) to [ [ (Takes seven pictures with an interval of 1 EV) [Sequence] Sets the order in which pictures are taken. [Single Shot Setting] [ [ ] ]: Takes one picture each time you press the shutter button. ]: Takes all the pictures set to be taken when you press the shutter button once.
Recording Correcting jitter The camera can activate either the In-Lens Image Stabiliser or In-Body Image Stabiliser, or it can activate both of them and reduce jitter even more effectively. (Dual I.S.) For motion picture recording, you can use the 5-Axis Hybrid Image Stabiliser, which makes use of the In-Lens Image Stabiliser, In-Body Image Stabiliser, and Electronic Image Stabiliser. • The image stabilisers to be activated differ depending on your lens.
Recording [Operation Mode] (Normal) Camera shake is corrected for up/down, left/right, and rotational movements. (Panning) Camera shake is corrected for up/down movements. This setting is ideal for panning. ]) [Stabilizer] does not work. ([ • When using a lens with an [O.I.S.] switch, set the switch to [OFF].
Recording Recording Motion Picture/4K Motion Picture Recording mode: You can record full high-definition quality images that comply with the AVCHD standard, as well as motion pictures or 4K motion pictures recorded in MP4. 1 Press the motion picture button to start recording Elapsed recording time Remaining recording time Recording (flashes red) • Recording of motion picture appropriate for each motion picture mode is possible. • Immediately release the motion picture button after pressing it.
Recording ■ Setting the format, picture size and recording frame rate → [Motion Picture] → [Rec Format] [AVCHD] This is a data format suitable for playback on high-definition TVs. [MP4] This data format is suited for playing back motion pictures on a computer and other such devices.
Recording ● [AVCHD] motion pictures: Recording stops when the continuous recording time exceeds 29 minutes and 59 seconds. Files are split into smaller motion picture files for recording when the file size exceeds 4 GB. ● MP4 motion pictures with a [Rec Quality] size of [FHD] or [HD]: Recording stops when the continuous recording time exceeds 29 minutes and 59 seconds. Files are split into smaller motion picture files for recording and playback when the file size exceeds 4 GB.
Recording 1 Set mode dial to [ 2 Set the menu → ] [Creative Video] → [4K Live Cropping] Settings: [40SEC] / [20SEC] / [OFF] 3 Set the crop start frame and press Start [MENU/SET] to set • Set the crop end frame as well. • When making settings for the first time, a crop start frame of size 1920×1080 is displayed. • Move the frame by touching it or using the cursor button. You can adjust the frame size by pinching out/pinching in or rotating the rear dial.
Playback Viewing your pictures 1 Press [ ] (Playback) button 2 Press to select a picture to be displayed • When you press and hold , the pictures are displayed one after another. ■ Ending Playback Press [ ] (Playback) button again or press the shutter button halfway. ● The playback screen appears if the camera is turned on while pressing [ ] (Playback) button. Viewing motion pictures This unit was designed to play motion pictures using the AVCHD and MP4 formats. ]).
Playback Deleting pictures Deleted pictures cannot be recovered. ■ [Delete Single] Press [ Use ] button to delete displayed picture to select [Delete Single] and press [MENU/SET] ■ To delete multiple (up to 100)/To delete all pictures A picture group is handled as 1 picture. (All the pictures in the selected picture group are deleted.
Menu Menu list ● You can display an explanation on the menu by pressing the [DISP.] button while you select a menu item or setting. (→28) Menus to be displayed in each recording mode [Intelligent Auto] [Intelligent Auto Mode] [iHandheld Night Shot] [iHDR] [Creative Video] [Exposure Mode] [4K Live Cropping] [Custom Mode] You can select your preferred custom setting from [Set1], [Set2], and [Set3].
Menu [Rec] [Aspect Ratio] [Flash] [Burst Rate] [Picture Size] [Red-Eye Removal] [4K PHOTO] [Quality] [ISO Auto Upper Limit (Photo)] [Self Timer] [AFS/AFF] [Photo Style] [Filter Settings] [Color Space] [Min. Shtr Speed] [Long Shtr NR] [Shading Comp.] [Time Lapse Shot] [Stop Motion Animation] [Silent Mode] [Shutter Type] [Metering Mode] [Diffraction Compensation] [Highlight Shadow] [Stabilizer] [Bracket] [i.Dynamic] [Ex. Tele Conv.] [HDR] [i.
Menu [Custom] [Exposure] [ISO Increments] [Extended ISO] [Exposure Comp. Reset] [AF/AE Lock] [Pinpoint AF Setting] [AF/AE Lock Hold] [AF Assist Lamp] [Loop Movement Focus Frame] [Shutter AF] [Direct Focus Area] [Half Press Release] [Focus/Release Priority] [Quick AF] [Focus Switching for Vert / Hor] [Focus / Release Shutter] [Eye Sensor AF] [AF Area Display] [AF+MF] [MF Assist] [MF Assist Display] [Operation] [Fn Button Set] [Operation Lock Setting] [Q.MENU] [Video Button] [Dial Set.
Menu [Setup] [Online Manual] [Economy] [Folder / File Settings] [Cust.Set Mem.] [Monitor Display Speed] [No.Reset] [Clock Set] [Monitor Display]/ [Viewfinder] [Reset] [World Time] [Travel Date] [Wi-Fi] [Bluetooth] [Wireless Connection Lamp] [Beep] [Monitor Luminance] [Eye Sensor] [USB Mode] [TV Connection] [Language] [Version Disp.] [Reset Network Settings] [Pixel Refresh] [Sensor Cleaning] [Level Gauge Adjust.
Menu [Aspect Ratio] Recording mode: This allows you to select the aspect ratio of the pictures to suit printing or the playback method. → [Rec] → [Aspect Ratio] [4:3] Aspect ratio of a 4:3 TV [3:2] Aspect ratio of standard film cameras [16:9] Aspect ratio of high-definition TV, etc. [1:1] Aspect ratio of a square image [Picture Size] Recording mode: The higher the numbers of pixels, the finer the detail of the pictures will appear even when they are printed onto large sheets.
Menu [Quality] Recording mode: Set the compression rate used for storing pictures. → [ ] [ ] JPEG [ Gives priority to picture quality and saves pictures in JPEG file format. Saves pictures in JPEG file format using standard picture quality. ] ] [ [ [Rec] → [Quality] ] RAW + JPEG Saves pictures in both RAW and JPEG file format ([ simultaneously. RAW Saves pictures in RAW file format. ] or [ ]) ● A RAW still picture is always recorded at [4:3] (5184×3888).
Menu [Standard] Standard setting. Setting with slightly high contrast and saturation. [Vivid] [Natural] [Monochrome] [L.Monochrome] [L.Monochrome D] [Scenery] [Portrait] [Custom] Setting with slightly low contrast. Setting that creates a picture using monochrome shades of grey only, such as black and white. Setting that creates a monochrome picture using rich shades of grey with deep solid black tones. Setting that creates a dynamic monochrome picture with emphasised highlights and shadows.
Menu [Live View Boost] The screen is displayed bright so that you can check the composition in low-light environment such as at night. → [Custom] → [Monitor / Display] → [Live View Boost] Settings: [ON] / [OFF] / [SET] ● [Live View Boost] is disabled when using [Constant Preview]. [RAW Processing] You can use the camera to develop still pictures that were recorded in RAW format. The created still pictures are saved in JPEG format.
Menu ■ Setting each item When you select an item, the setting screen appears. Touch operation Operation Drag / Description Used to make adjustments Set [WB K Set] Used to display the colour temperature setting screen (Only when [White Balance] is set to ]) [ [Adjust.] Used to display the White Balance fine adjustment screen (Only when [White Balance] is set) [DISP.] [DISP.
Menu [Sequence Composition] Select multiple frames from a 4K burst file to create a sequence composition of a moving subject into one picture. • We recommend using a tripod to take pictures for Sequence Composition. → [Playback] → [Sequence Composition] to select the 4K burst files and press [MENU/SET] 1 Use 2 Select frames to combine Select the frames so that the moving subject will not overlap on the preceding or subsequent frames.
Wi-Fi/Bluetooth What you can do with the Wi-Fi®/Bluetooth® function Operating the camera by connecting it to a smartphone • Operating the shutter button of the camera using a smartphone (remote recording) (→71) • Playing back or saving images stored on the camera, or uploading them on social media sites (→72) • Combining motion pictures recorded with Snap Movie according to your preference on a smartphone Expanding the scope of applications by connecting the camera to a smartphone compatible with Bluetooth
Wi-Fi/Bluetooth ■ Lighting of the WIRELESS connection lamp (Blue) Lit: When the Wi-Fi/Bluetooth function is ON or connected Blinking: When sending picture data • In [Wireless Connection Lamp] in the [Setup] menu, you can set the lamp so that it will not light/flash. ■ [Wi-Fi] button In this Operating Instructions, a function button to which [Wi-Fi] is assigned is referred to as the [Wi-Fi] button. (At the time of purchase, [Wi-Fi] is assigned to [Fn4].
Wi-Fi/Bluetooth Operating the camera by connecting it to a smartphone Installing the smartphone app “Panasonic Image App” • Supported OS Android™: Android 4.2 or later (Android 5.0 or higher is required to use the Bluetooth function) iOS: iOS 9.
Wi-Fi/Bluetooth Connecting the camera to a smartphone compatible with Bluetooth Low Energy You can connect the camera to a smartphone via a Bluetooth connection. • Supported smartphones Android: Android 5.0 or higher equipped with Bluetooth 4.0 or higher (excluding those that do not support Bluetooth low energy) iOS: iOS 9.0 or higher (excluding the iPad 2) First-time connection You need to set up pairing (connection) for the first time only.
Wi-Fi/Bluetooth If you are using an Android device, follow the steps up to here to complete the setup. Proceed to the steps below only if you are using an iOS device. • If [Wi-Fi Password] (→69) is set to [OFF] on the camera, select [Wi-Fi Setup]. (At the time of purchase, [Wi-Fi Password] is set to [OFF]) • If [Wi-Fi Password] is set to [ON] on the camera, you need to install the profile. Install the profile • If the smartphone is locked with a passcode, enter the passcode to unlock the smartphone.
Wi-Fi/Bluetooth Connecting the camera to a smartphone that does not support for Bluetooth Low Energy You can easily establish a Wi-Fi connection on this unit without entering a password on your smartphone. (On the camera) → [Setup] → [Wi-Fi] → [Wi-Fi Function] → [New Connection] → [Remote Shooting & View] • The information required for directly connecting your smartphone to this unit (SSID ( )) is displayed.
Wi-Fi/Bluetooth Closing the Wi-Fi connection 1 Set the camera to Recording Mode • Press the shutter button halfway to return to recording mode.
Wi-Fi/Bluetooth ■ Turning off the camera with the smartphone Select [ Select [ ] OFF] ● When [Remote Wakeup] is set to [ON], the Bluetooth function continues to operate even after the camera is turned off, thus causing the battery to drain.
Wi-Fi/Bluetooth Playing back or saving images stored on the camera, or uploading them on social media sites Wireless connectivity required: Wi-Fi 1 Connect to a smartphone (→66) 2 Operate the smartphone If the camera is already connected to the smartphone via Bluetooth, select ] → [Remote operation]. [ (iOS devices) When you need to change the connected device on the Wi-Fi setup screen, follow the on-screen message to change the setting.
Wi-Fi/Bluetooth 4 Check the send settings on the camera, and select [Set] • To change the send setting, press [DISP.] button. • The camera will enter a mode where it can automatically transfer images ] will be displayed on the recording screen. (If [Auto Transfer] and [ is not displayed on the recording screen, images cannot be transferred automatically. Check the status of the Wi-Fi connections to the smartphone.
Others Downloading software Download and install software to edit and play back images with a PC. ● To download the software, your PC must be connected to the Internet. ● It may take time to download the software in some communication environments. PHOTOfunSTUDIO 10.0 AE (Windows® 10 / 8.1 / 7) You can capture still pictures or motion pictures to your PC, or organise captured pictures by categorising by recording date, model name of the digital camera used to record, etc.
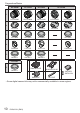
Others List of monitor/viewfinder displays • The following images are examples of when the display screen is set to [ (monitor style) in the monitor.
Others AFS [Quality] (→59) Focus Mode (→32) Focus Bracket (→45) AFL [AF Mode] (→32) [Pull Focus] ([Snap Movie]) [Face Recog.] AF Lock Burst (→43) Name2 Travel elapsed days3 Age in years/months2 Location3 Current date/time3 Travel destination setting3: Exposure meter Focal distance display Step zoom [4K PHOTO] (→36) [Post Focus] (→40) [Self Timer] (→43) Battery indicator [Stabilizer] (→46) Jitter alert [4K Pre-Burst]/ [Pre-Burst Recording] (→37) Focus (Lights green.
Others Colouring (→31) AWBc 98 r20 RXXmXXs [Dial Guide] White Balance White Balance Bracket White Balance Fine Adjustment Colouring Number of recordable pictures Maximum number of pictures that can be taken continuously Available recording time1 Touch tab Touch zoom Touch Shutter (→27) Touch AF (→27) [Touch AE] (→27) [Peaking] Defocus control function (→31) Brightness (exposure) (→31) Type of defocus ([Miniature Effect]) [One Point Color] [Sunshine] Picture effect (Filter) adjustment display Picture ef
Others ■ On-monitor recording information F3.5 1/60 Single (→43) Burst (→43) [4K PHOTO] (→36) [Self Timer] (→43) AFS Focus Mode (→32) AF Mode (→32) [Quality] (→59) [Aspect Ratio] (→58)/ [Picture Size] (→58) Recording mode (→26) F3.
Others Q&A Troubleshooting • Performing [Reset] in the [Setup] menu may resolve the issue. • Further information is provided in the “Operating Instructions for advanced features (PDF format)”. Check it together with the information in this section. When I shake the camera, I hear a rattling sound. • The sound is caused by the In-Body Image Stabiliser. This is not a malfunction. The charging lamp blinks. • Charging is being performed in a place with extremely high or low temperature.
Others Striping or flicker may appear under lighting such as fluorescent lighting and LED lighting fixture. • This is characteristic of MOS sensors which serve as the camera’s pickup sensors. This is not a malfunction. • If you are taking still pictures using the electronic shutter, the striping may be reduced by setting a slower shutter speed.
Others No flash emitted. • The flash becomes unavailable in the following cases. – The flash is closed. – Flash set to [ ] (Forced Flash Off). • Set [Shutter Type] to [AUTO] or [MSHTR]. (→55) • Set [Silent Mode] to [OFF]. (→55) The monitor/viewfinder is turned off although the camera is turned on. • When a hand or an object is close to the eye sensor, the monitor display mode could be switched to viewfinder display mode. (→22) Cannot view pictures. There are no recorded pictures.
Others I am having a problem connecting to my Windows 8 PC. The user name and password are not recognised. • Depending on the OS version, on Windows 8, for example, there are two types of user account (local account/Microsoft account). → Be sure to set the local account and use the user name and password for the local account. The Wi-Fi connection is not recognising my PC. The camera cannot be connected to Mac computer/Windows PC via Wi-Fi connection.
Others Specifications Digital Camera Body (DC-GX9): Information for your safety Power Source DC 8.4 V (8.4 V Power Consumption 3.1 W (When recording with Monitor) [When the Interchangeable lens (H-FS12032) is used] 3.0 W (When recording with Monitor) [When the Interchangeable lens (H-FS35100) is used] 3.1 W (When recording with Monitor) [When the Interchangeable lens (H-FS12060) is used] 3.1 W (When recording with Monitor) [When the Interchangeable lens (H-FS1442A) is used] 3.
Others Focus mode AFS/AFF/AFC/MF Auto focus mode Face/Eye Detection/Tracking/49-area-focusing/Custom Multi/1-area-focusing/Pinpoint-focusing (Touch focus area selection possible) Shutter type Focal-plane shutter Burst recording Burst speed Mechanical shutter 9 pictures/second (High speed, AFS/MF), 6 pictures/second (High speed, AFF/AFC), 6 pictures/second (Middle speed), 2 pictures/second (Low speed) Electronic shutter 9 pictures/second (High speed, AFS/MF), 6 pictures/second (High speed, AFF/AFC), 6
Others Shutter speed Still picture: [T] (Time) (Max. approx. 30 minutes), 60 seconds to 1/4000th of a second (When the mechanical shutter is used), 1 second to 1/16000th of a second (When the electronic shutter is used) [B] (Bulb) recording is available when using [Shutter Remote Control] (via Bluetooth connection).
Others Flash Built-in pop up flash GN 6.0 equivalent (ISO200·m) [GN 4.2 equivalent (ISO100·m)] Flash range: Approx. 0.4 m (1.3 feet) to 4.8 m (16 feet) [When the Interchangeable lens (H-FS12032) is mounted, WIDE, [ISO AUTO] is set] Approx. 0.9 m (3.0 feet) to 4.2 m (14 feet) [When the Interchangeable lens (H-FS35100) is mounted, WIDE, [ISO AUTO] is set] Approx. 1.0 m (3.3 feet) to 3.7 m (12 feet) [When the Interchangeable lens (H-FS12060) is mounted, focal length is 25 mm, [ISO AUTO] is set] Approx. 0.
Others Picture size (Still picture) When the aspect ratio setting is [4:3] 3328×2496 pixels (4K photo), 5184×3888 pixels ([L]), 3712×2784 pixels ([M]), 2624×1968 pixels ([S]) When the aspect ratio setting is [3:2] 3504×2336 pixels (4K photo), 5184×3456 pixels ([L]), 3712×2480 pixels ([M]), 2624×1752 pixels ([S]) When the aspect ratio setting is [16:9] 3840×2160 pixels (4K photo), 5184×2920 pixels ([L]), 3840×2160 pixels ([M]), 1920×1080 pixels ([S]) When the aspect ratio setting is [1:1] 2880×2880 pixels (
Others Dimensions Approx. 124 mm (W) × 72.1 mm (H) × 46.8 mm (D) [4.88″ (W) × 2.83″ (H) × 1.84″ (D)] (excluding the projection part) Mass Approx. 450 /0.99 lb [with the card and battery] Approx. 407 /0.90 lb (camera body) Approx. 517 /1.14 lb [with the Interchangeable lens (H-FS12032), card and battery] Approx. 585 /1.29 lb [with the Interchangeable lens (H-FS35100), card and battery] Approx. 660 /1.46 lb [with the Interchangeable lens (H-FS12060), card and battery] Approx. 560 /1.
Others ■ Wireless transmitter Wireless LAN Compliance standard IEEE 802.11b/g/n (standard wireless LAN protocol) Frequency range used 2412 MHz to 2462 MHz (1 to 11 ch) (central frequency) Encryption method Wi-Fi compliant WPA™/WPA2™ Access method Infrastructure mode Bluetooth function Compliance standard Bluetooth Ver. 4.
Others Interchangeable Lens H-FS12032 “LUMIX G VARIO 12–32 mm/F3.5–5.6 ASPH./ MEGA O.I.S.” H-FS35100 “LUMIX G VARIO 35–100 mm/F4.0–5.6 ASPH./ MEGA O.I.S.” Focal length f=12 mm to 32 mm (35 mm film camera equivalent: 24 mm to 64 mm) f=35 mm to 100 mm (35 mm film camera equivalent: 70 mm to 200 mm) Aperture type 7 diaphragm blades/circular aperture diaphragm 7 diaphragm blades/circular aperture diaphragm Maximum aperture F3.5 (Wide) to F5.6 (Tele) F4.0 (Wide) to F5.
Others Interchangeable Lens H-FS12060 “LUMIX G VARIO 12–60 mm/F3.5–5.6 ASPH./ POWER O.I.S.” H-FS1442A “LUMIX G VARIO 14-42 mm/F3.5-5.6 II ASPH./ MEGA O.I.S.” Focal length f=12 mm to 60 mm (35 mm film camera equivalent: 24 mm to 120 mm) f=14 mm to 42 mm (35 mm film camera equivalent: 28 mm to 84 mm) Aperture type 7 diaphragm blades/circular aperture diaphragm 7 diaphragm blades/circular aperture diaphragm Maximum aperture F3.5 (Wide) to F5.6 (Tele) F3.5 (Wide) to F5.
Others Interchangeable Lens H-FS14140 “LUMIX G VARIO 14–140 mm/F3.5–5.6 ASPH./POWER O.I.S.” Focal length f=14 mm to 140 mm (35 mm film camera equivalent: 28 mm to 280 mm) Aperture type 7 diaphragm blades/circular aperture diaphragm Maximum aperture F3.5 (Wide) to F5.6 (Tele) Minimum aperture value F22 Lens construction 14 elements in 12 groups (3 aspherical lenses, 2 ED lenses) In focus distance (from the focus distance reference line) 0.3 m (0.
Others Digital Camera Accessory System Description Battery pack Battery charger1 AC adaptor2 DC coupler2 LED Video Light Flash Eyecup Hand grip Body Cap Tripod Adaptor3 Mount Adaptor Shoulder Strap Accessory# DMW-BLG10 DMW-BTC12 DMW-AC10 DMW-DCC11 VW-LED1 DMW-FL200L, DMW-FL360L, DMW-FL580L DMW-EC5 DMW-HGR2 DMW-BDC1 DMW-TA1 DMW-MA1, DMW-MA2M, DMW-MA3R DMW-SSTG9 1 Supplied with an AC adaptor and a USB connection cable (for charger).
Others Reading the Operating Instructions (PDF format) More detailed operating instructions are available in “Operating Instructions for advanced features (PDF format)”. To read it, download it from the website. http://panasonic.jp/support/dsc/oi/index.html?model=DC-GX9&dest=EB • Click the desired language. ■ Confirming URLs and QR codes with the camera → [Setup] → [Online Manual] Settings: [URL display] / [QR Code display] • The URL or QR code will be displayed on the camera monitor.
● G MICRO SYSTEM is a lens exchange type digital camera system of LUMIX based on a Micro Four Thirds System standard. ● Micro Four Thirds™ and Micro Four Thirds Logo marks are trademarks or registered trademarks of Olympus Corporation, in Japan, the United States, the European Union and other countries. ● Four Thirds™ and Four Thirds Logo marks are trademarks or registered trademarks of Olympus Corporation, in Japan, the United States, the European Union and other countries.
EU Manufactured by: Panasonic Corporation Kadoma, Osaka, Japan Importer for Europe: Panasonic Marketing Europe GmbH Panasonic Testing Centre Winsbergring 15, 22525 Hamburg, Germany Web Site: http://www.panasonic.