
Advanced Operating Manual


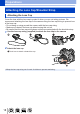


Table Of Contents
- Finding the information you need
- How to use this manual
- Contents
- Contents by Function
- Before Use
- Preparations
- Basics
- Holding the camera
- Basic Operation
- [LVF] button (Recording pictures using the viewfinder)
- Zoom Lever (Use Zoom)
- [Zoom Compose Assist] button (Using the Zoom Compose Assist function)
- Shutter button (Taking pictures)
- Motion picture button (Recording motion pictures)
- Mode dial (Select the recording mode)
- Front Dial/Rear Dial
- Control ring
- Cursor button / [MENU/SET] button (Selecting/setting items)
- [DISP.] button (Switching the display information)
- Touch screen (Touch operations)
- Taking pictures using the touch function
- Setting the menu
- Calling frequently-used menus instantly (Quick Menu)
- Assigning frequently used functions to the buttons (Function buttons)
- Entering Text
- Recording mode
- Taking pictures with automatic settings (Intelligent Auto Mode)
- Taking pictures after automatically setting the aperture value and shutter speed (Program AE Mode)
- Taking pictures by setting the aperture value and shutter speed
- Taking pictures by setting the aperture value (Aperture-Priority AE Mode)
- Taking pictures by setting the shutter speed (Shutter-Priority AE Mode)
- Taking pictures by setting the aperture value and shutter speed (Manual Exposure Mode)
- Checking the effects of the aperture value and shutter speed (Preview Mode)
- Easily set aperture value / shutter speed for suitable exposure (One Push AE)
- Recording panorama pictures (Panorama Shot Mode)
- Taking pictures according to the scene (Scene Guide Mode)
- Taking Pictures with different picture effects (Creative Control Mode)
- Recording motion pictures by setting the aperture/shutter speed/ISO sensitivity (Creative Video Mode)
- Registering your own settings and recording (Custom Mode)
- Focus, Brightness (Exposure) and Color tone Settings
- 4K Photo and Drive Settings
- Selecting a Drive Mode
- Burst function
- Recording with the 4K Photo function and selecting pictures to save
- Adjusting the focus after recording ([Post Focus]/[Focus Stacking])
- Taking pictures with Time Lapse Shot/Stop Motion Animation
- Taking pictures with self-timer
- Taking Pictures While Adjusting a Setting Automatically (Bracket Recording)
- Stabilizer, Zoom and Flash
- Recording motion pictures
- Playing Back and Editing Pictures
- Using Menu Functions
- Wi-Fi/Bluetooth
- What you can do with the Wi-Fi®/Bluetooth® function
- Wi-Fi/Bluetooth Function
- Connecting the camera to a smartphone
- Controlling with a Smartphone
- Turning on/off the camera using a smartphone
- Operating the shutter button of the camera using a smartphone (remote recording)
- Playing back or saving images stored on the camera, or uploading them on social media sites
- Transferring recorded images to a smartphone automatically
- Writing location information of a smartphone on a recorded image
- Synchronizing the camera’s clock with a smartphone
- Combining motion pictures recorded with Snap Movie according to your preference on a smartphone
- Displaying still pictures on a TV
- Sending pictures
- Sending pictures to a smartphone
- Wireless printing
- Sending pictures to AV device
- Sending pictures to a PC
- Using WEB services
- About Wi-Fi connections
- [Wi-Fi Setup]
- Connecting with other devices
- Others

18
Preparations
Attaching the Lens Cap/Shoulder Strap
Attaching the Lens Cap
Cover the lens with the lens cap to protect it when you are not taking pictures. We
recommend attaching the lens cap to the camera using the lens cap string to prevent loss
of the lens cap.
• Do not hang or swing around the camera with the lens cap string.
• Make sure to detach the lens cap when turning this unit on.
• Be careful that the lens cap string does not become entangled with the shoulder strap.
1
Use the lens cap string (supplied) to attach the lens cap to the camera
2
Attach the lens cap
Pinch here to attach or detach the cap.
●
Keep the lens cap string out of reach of children to prevent swallowing.