
Operating Instructions
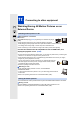
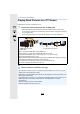
Table Of Contents
- Finding the information you need
- How to use this manual
- Contents
- Contents by Function
- 1. Before Use
- 2. Getting Started/Basic Operations
- Attaching the Shoulder Strap
- Charging the Battery
- Inserting/Removing the Battery
- Inserting/Removing the Card (Optional)
- Card Information
- Attaching/Removing the Lens
- Opening the Monitor
- Setting Date/Time (Clock Set)
- Basic Operations
- Tips for taking good pictures
- Using the Viewfinder
- Shutter button (Taking pictures)
- Motion picture button (Recording motion pictures)
- Mode dial (Selecting a Recording Mode)
- Front Dial/Rear Dial
- Control Dial
- Cursor buttons/[MENU/SET] button
- Joystick
- [DISP.] button (Switching the displayed information)
- Touch screen (Touch operations)
- Taking Pictures Using the Touch Function
- Setting menu items
- Calling frequently-used menus instantly (Quick Menu)
- Assigning frequently used functions to the buttons (function buttons)
- Entering Text
- 3. Recording Modes
- Taking Pictures using the Automatic Function (Intelligent Auto Mode)
- Taking Pictures with Automatically Adjusted Aperture and Shutter Speed (Programme AE Mode)
- Taking Pictures by Specifying the Aperture/ Shutter Speed
- Taking Pictures with different image effects (Creative Control Mode)
- Registering your preferred settings (Custom Mode)
- 4. Focus, Brightness (Exposure) and Colour tone Settings
- 5. 4K Photo and Drive Settings
- Select a Drive Mode
- Taking Pictures using Burst Mode
- Recording 4K Photos
- Selecting pictures from 4K burst file and saving
- Controlling Focus After Recording (Post Focus/ Focus Stacking)
- Taking Pictures with the Self-timer
- Taking Pictures with Time Lapse Shot/Stop Motion Animation
- Taking Pictures While Adjusting a Setting Automatically (Bracket Recording)
- 6. Stabiliser, Zoom and Flash
- 7. Recording Motion Pictures
- Recording Motion Picture
- Setting the format, size and frame rate
- How to set focus when recording a motion picture ([Continuous AF])
- Customising the operation settings of Auto Focus for motion picture recording ([AF Custom Setting(Video)])
- Displaying/setting the sound input level
- Setting the recording method of time code
- Synchronising the time code with an external device
- Recording images with superimposed recording dates ([Time Stamp Rec])
- Displaying colour bars/Outputting a test tone
- Recording with minimum white saturation by compressing overexposed portions (Knee)
- Log recording (V-Log L)
- Recording still pictures while recording motion pictures
- Recording Motion Pictures in Creative Video Mode
- Recording in Slow or Fast Motion ([Variable Frame Rate])
- Moving the focus position smoothly to a registered position ([Focus Transition])
- Recording Motion Pictures that Pan and Zoom While Maintaining a Fixed Camera Position ([4K Live Cropping])
- Recording HDR motion pictures (Hybrid Log Gamma)
- [Creative Video] menu
- Recording Motion Pictures Using a Connected External Device
- Recording Motion Picture
- 8. Playing Back and Editing Images
- 9. Using Menu Functions
- 10. Using the Wi-Fi/Bluetooth function
- What you can do with the Wi-Fi®/Bluetooth® function
- Wi-Fi function/Bluetooth function
- Connecting to a smartphone/tablet
- Controlling with a Smartphone/Tablet
- Turning on/off the camera with a smartphone
- Taking images via a smartphone (remote recording)
- Operating the shutter button with a smartphone via a Bluetooth connection alone
- Playing back/saving images stored on the camera, or uploading them on social media sites
- Transferring recorded images to a smartphone automatically
- Backing up images to a Cloud Storage automatically (Auto Cloud Backup)
- Recording location information to the camera’s images
- Synchronising the camera’s clock with a smartphone
- Saving the camera’s setup information to a smartphone
- Displaying pictures on a TV
- Sending images
- Sending images to a smartphone/tablet
- Printing Wirelessly
- Sending images to AV device
- Sending images to PC
- Using Web services
- About Wi-Fi connections
- [Wi-Fi Setup] Menu
- 11. Connecting to other equipment
- 12. Others
- Firmware Update
- Contents
- Before Use
- Firmware Ver. 1.1
- Addition of new functions
- [L.Monochrome D] has been added to [Photo Style] in the [Rec] menu
- The [Grain Effect] picture quality adjustment has been added to [Photo Style] in the [Rec] menu
- [Focus Ring Lock] has been added to the [Custom] menu
- [WB/ISO/Expo. Button] has been added to the [Custom] menu
- [Dial] has been added to [Operation Lock Setting] in the [Custom] menu
- Improved ease of operation / Other function additions/modifications
- Addition of new functions
- Firmware Ver. 1.3
- Firmware Ver. 1.4
- Additions/changes to the Auto Focus function
- Other function additions/modifications
- [AWBw] has been added to White Balance
- [Highlight Weighted] has been added to [Metering Mode] in the [Rec]/[Motion Picture] menu
- [Exposure Offset Adjust.] has been added to the [Custom] menu
- [0.5SEC] has been added to [Duration Time (photo)] in [Auto Review] in the [Custom] menu
- The AE Lock is now available in the Manual Exposure Mode
- [MODE1] has been added to [Live View Boost] in the [Custom] menu
- Functions that can be assigned to the function buttons have been added
- Firmware Ver. 2.0
- Firmware Ver. 2.2

11. Connecting to other equipment
330
Preparations:
1 Connect this unit to a Panasonic TV compatible with VIERA Link with an HDMI
cable (P329).
2 Turn the camera on and then press [(].
3 Operate with the remote control for the TV.
Turning this unit off:
If you use the remote control for the TV to turn the TV off, this unit is also turned off.
Automatic input switching:
• If you connect with an HDMI cable and then turn this unit on, and then press [(], the input
channel on the TV automatically switches to this unit’s screen. If the TV’s power is in standby
status, it will turn on automatically (if [Set] has been selected for the TV’s [Power on link]
setting).
The recorded pictures can be played back on a TV with an SD Memory Card
slot
• Depending on the TV model, pictures may not be displayed on the full screen.
• The file format of the motion pictures that can be played back differs depending on the TV
model.
• For cards compatible with playback, refer to the operating instructions of the TV.
Using VIERA Link (HDMI)
What is the VIERA Link (HDMI) (HDAVI Control™)?
• This function allows you to use your remote control for the Panasonic TV for easy operations
when this unit has been connected to a VIERA Link compatible device using an HDMI cable
for automatic linked operations.
(Not all operations are possible.)
• VIERA Link is a unique Panasonic function built on an HDMI control function using the
standard HDMI CEC (Consumer Electronics Control) specification.
Linked operations with HDMI CEC compatible devices made by other companies are not
guaranteed. When using devices made by other companies that are compatible with
VIERA Link, refer to the operating instructions for the respective devices.
• This unit supports “VIERA Link Ver.5” function. “VIERA Link Ver.5” is the standard for
Panasonic’s VIERA Link compatible equipment. This standard is compatible with Panasonic’s
conventional VIERA Link equipment.
> [Setup] > [TV Connection] > [VIERA Link] > [ON]
MENU