ページ 2005年2月21日 月曜日 午後2時32分 Getting started ES30VP&PC.book Playback Operating Instructions Thank you for purchasing this product. For optimum performance and safety, please read these instructions carefully. Before connecting, operating or adjusting this product, please read the instructions completely. Please keep this manual for future reference. If you have any questions contact In the U.S.
ES30VP&PC.book 2 ページ 2005年2月21日 月曜日 午後2時32分 Getting started Warning and Important Information CAUTION! THIS PRODUCT UTILIZES A LASER. USE OF CONTROLS OR ADJUSTMENTS OR PERFORMANCE OF PROCEDURES OTHER THAN THOSE SPECIFIED HEREIN MAY RESULT IN HAZARDOUS RADIATION EXPOSURE. DO NOT OPEN COVERS AND DO NOT REPAIR YOURSELF. REFER SERVICING TO QUALIFIED PERSONNEL.
ES30VP&PC.book 3 ページ 2005年2月21日 月曜日 午後2時32分 IMPORTANT SAFETY INSTRUCTIONS Read these operating instructions carefully before using the unit. Follow the safety instructions on the unit and the applicable safety instructions listed below. Keep these operating instructions handy for future reference. (1) (2) (3) (4) (5) (6) (7) Read these instructions. Keep these instructions. Heed all warnings. Follow all instructions. Do not use this apparatus near water. Clean only with dry cloth.
ES30VP&PC.book 4 ページ 2005年2月21日 月曜日 午後2時32分 Getting started Contents Getting started Recording Warning and Important Information ..................................................2 IMPORTANT SAFETY INSTRUCTIONS..........................................3 Precautions for installation................................................................3 About descriptions in these operating instructions ...........................3 Useful features...............................................................
ES30VP&PC.book 5 ページ 2005年2月21日 月曜日 午後2時32分 VHS Playback Inserting a video cassette ...............................................................48 Video cassette information .............................................................48 ≥Video cassettes ........................................................................48 ≥Video cassette care..................................................................48 ≥Maintenance..........................................................................
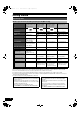
ES30VP&PC.book 6 ページ 2005年2月21日 月曜日 午後2時32分 Getting started Concerning discs ∫ Discs you can use for recording and play [12 cm (5z)/8 cm (3z)] Disc type DVD-RAM ≥4.7 GB/9.4 GB, 12 cm (5z) ≥2.8 GB, 8 cm (3z) DVD-R (DVD-Video format) ≥4.7 GB, 12 cm (5z) ≥1.4 GB, 8 cm (3z) DVD-RW (DVD-Video format) ≥4.7 GB, 12 cm (5z) ≥1.4 GB, 8 cm (3z) rR ≥4.
ES30VP&PC.
ES30VP&PC.book 8 ページ 2005年2月21日 月曜日 午後2時32分 Getting started ∫ Disc handling ∫ Inserting discs ∫ How to hold a disc [1] Press [<, OPEN/CLOSE] on the main unit to open the tray. Do not touch the recorded surface. ≥You can insert a cartridge or non-cartridge disc. [2] Press [<, OPEN/CLOSE] on the main unit to close the tray. ≥If you insert a DVD-RAM with the write-protect tab set to “PROTECT” (l 30), play starts automatically. ∫ Concerning non-cartridge discs Be careful about scratches and dirt.
ES30VP&PC.book 9 ページ 2005年2月21日 月曜日 午後2時32分 Getting started Getting started Using DVD-R, DVD-RW and +R on this unit Restrictions with DVD-R, etc.° ≥16:9 aspect programs are recorded in 4:3 aspect. ≥Either Main or SAP can be recorded for MTS broadcasts. ≥Playing the disc on other DVD players is not possible before finalizing. ° DVD-R, DVD-RW and +R are collectively referred to as “DVD-R, etc.” on this page. Main SAP Hello Hola Record to DVD-R, etc. The selected audio only is recorded. e.g.
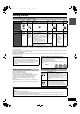
ES30VP&PC.book 10 ページ 2005年2月21日 月曜日 午後2時32分 Getting started Remote control (28) (1) (2) (3) [DVD] ≥Before performing DVD operations, be sure to press the [DVD] button. Also, make sure the DVD indicator lights up on the unit.
ES30VP&PC.book 11 ページ 2005年2月21日 月曜日 午後2時32分 ∫ Batteries and remote control ∫ About batteries R6, AA, UM-3 ≥Insert so the poles (i and j) match those in the remote control. ≥Do not use rechargeable type batteries. ∫ How to use the remote control Aim at the sensor, avoiding obstacles, at a maximum range of 7 m (23 feet) directly in front of the unit. Getting started Getting started Remote control signal sensor Do not: ≥mix old and new batteries. ≥use different types at the same time.
ES30VP&PC.book 12 ページ 2005年2月21日 月曜日 午後2時32分 Getting started ∫ The unit’s display Common to DVD/VHS [A] Main display ≥Current time ≥VHS recording and play counter ≥Scheduled recording start time ≥Miscellaneous messages, etc. [B] Transfer (Dubbing) direction indicator [C] Main display ≥Disc recording and play counter ≥Scheduled recording end time ≥Miscellaneous messages, etc.
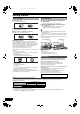
ES30VP&PC.book 13 ページ 2005年2月21日 月曜日 午後2時32分 Getting started Getting started STEP 1 Connection ≥Please read “Precautions For Installation”. (l 3) ≥Before connection, turn off all equipment and read the appropriate operating instructions. ∫ Connecting a TV and VCR indicates included accessories. indicates accessories not included. Use a splitter if you also want to connect the antenna to your VCR.
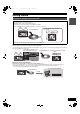
ES30VP&PC.book 14 ページ 2005年2月21日 月曜日 午後2時32分 Getting started ∫ Connecting a cable TV box/satellite receiver ≥You need to subscribe to a cable TV or satellite TV service to enjoy viewing their programming. ≥Consult your service provider regarding appropriate cable TV box or satellite receiver. ≥You can enjoy viewing cable TV or satellite TV programming.
ES30VP&PC.book 15 ページ 2005年2月21日 月曜日 午後2時32分 ∫ Connecting an amplifier or system component ∫ DVD output and DVD/VHS output 1 To enjoy multi-channel surround sound on DVD-Video (digital connection) The unit has DVD/VHS COMMON output terminals and DVD output terminals. DVD/VHS COMMON output DVD only ≥Connect an amplifier with a built-in Dolby Digital or DTS decoder. (l 7) ≥Change the settings in “Digital Audio Output”.
ES30VP&PC.book 16 ページ 2005年2月21日 月曜日 午後2時32分 Getting started STEP 2 Plug-in Auto Tuning Í The unit’s display Each time you press the button: CH 3 (Default setting) (# CH4 (# OFF ^-----------------------------------------------J DVD/VHS POWER TV POWER INPUT SELECT TV/VIDEO OPERATION SELECT VHS [3] Use [3, 4] to select the language and press [ENTER]. [4] Press [ENTER] to start Plug-in Auto Tuning.
ES30VP&PC.book 17 ページ 2005年2月21日 月曜日 午後2時32分 ∫ If Plug-in Auto Tuning fails STEP 3 Channel settings Preparation ≥Press [DVD]. [1] ∫ Guide channel settings for VCR Plusi system While stopped Press [FUNCTIONS]. [2] Select “Other Functions” with [3, 4] and press [ENTER]. FUNCTIONS DVD Cartridge Protection Off Disc Protection Off DVD-RAM Playback DIRECT NAVIGATOR Set these guide channels so you can use VCR Plusi® system for scheduled recording.
ES30VP&PC.book 18 ページ 2005年2月21日 月曜日 午後2時32分 Getting started 1 Preset Channel Captions DVD/VHS POWER TV TV, Í POWER CH INPUT SELECT TV/VIDEO VHS ≥Follow steps 1 to 4 of “Channel captions”. [5] Select “Preset Channel Captions” with [3, 4] and press [ENTER].
ES30VP&PC.book 19 ページ 2005年2月21日 月曜日 午後2時32分 STEP 4 Set up to match your TV and remote control ∫ TV operation Preparation ≥Press [DVD]. ∫ When other Panasonic products respond to this remote control Change the remote control code on the main unit and on the remote control (the two must match) if you place other Panasonic products close together. When changing the remote control code, make sure the two codes are same. Use “1”, the factory set code, under normal circumstances.
ES30VP&PC.book 20 ページ 2005年2月21日 月曜日 午後2時32分 Getting started The unit’s display Each time you press the button: CH 3 (Default setting) (# CH4 (# OFF ^-----------------------------------------------J DVD/VHS POWER TV POWER Í INPUT SELECT TV/VIDEO VOLUME CH OPERATION SELECT VHS DVD DVD TRACKING/V-LOCK CH, W, X Numeric buttons [3] Press [ENTER] to finish this setting.
ES30VP&PC.book 21 ページ 2005年2月21日 月曜日 午後2時32分 DVD Playback Preparation ≥Turn on the TV and select the appropriate video input to suit the connections to the unit. ≥Press [DVD]. Starting play from where you stopped it (Resume Function) [RAM] [-R] [-RW‹V›] [+R] [DVD-A] [DVD-V] [-RW‹VR›] [VCD] [CD] [1] Playing discs During Play Press [∫, STOP]. [1] Press [Í, DVD/VHS POWER] to turn the unit on. [2] Insert a disc. (l 8) [3] Press [1, PLAY]. ≥The disc tray closes and play begins.
ES30VP&PC.book 22 ページ 2005年2月21日 月曜日 午後2時32分 Playback DVD CM Skip DVD/VHS POWER TV POWER INPUT SELECT TV/VIDEO VOLUME CH OPERATION SELECT VHS [RAM] [-R] [-RW‹V›] [+R] [-RW‹VR›] You can skip approximately 1 minute with one press. During play Press [CM SKIP].
ページ 2005年2月21日 月曜日 午後2時32分 Playback DVD Changing audio during play Press [AUDIO] to select the audio type. ≥You can select audio types depend on the recording medium. [RAM] [-RW‹VR›] [VCD] (l 47) Stereo# Mono L# Mono R ^--------------------------------------} DVD-RAM Play e.g.: [RAM] “Stereo” is selected.
ES30VP&PC.
ES30VP&PC.book 25 ページ 2005年2月21日 月曜日 午後2時32分 Recording DVD Recording TV programs ∫ Recording modes and approximate recording times When recording to DVD-R, DVD-RW (DVD-Video format) or +R ≥When recording MTS broadcasts - If you do not connect a cable TV box Select “Main” or “SAP” in “Select MTS” in the SETUP menu (l 44). - If you connect a cable TV box Select “Main” or “SAP” on the cable TV box. ≥The aspect ratio of the recorded image will be 4:3.
ES30VP&PC.book 26 ページ 2005年2月21日 月曜日 午後2時32分 Recording DVD DVD/VHS POWER TV CH, W, X POWER INPUT SELECT TV/VIDEO VOLUME CH TV/VIDEO OPERATION SELECT VHS DVD DVD Flexible Recording mode (FR) [RAM] [-R] [-RW‹V›] [+R] The unit calculates a recording rate that enables the recording to fit in the time you set (within the remaining time on the disc) with the best picture quality.
ページ 2005年2月21日 月曜日 午後2時32分 Recording DVD ∫ TIME SLIP Playing while you are recording Press [TIME SLIP] while recording; play starts from 30 seconds previous to that moment. You can start play from even earlier by specifying an amount of time to skip on the time indicator. [RAM] Preparation ≥Press [DVD]. [1] Hint ≥Sound is not output while fast-forwarding. Play 0 min (1) Press [TIME SLIP]. ∫ Chasing play ≥The PIP screen (images being currently recorded) is displayed.
ES30VP&PC.book 28 ページ 2005年2月21日 月曜日 午後2時32分 Recording DVD Scheduled Recording DVD/VHS POWER TV POWER INPUT SELECT TV/VIDEO You can enter up to 16 programs a month in advance. VOLUME CH OPERATION SELECT VHS DVD DVD TRACKING/V-LOCK Numeric buttons Preparation ≥Release protection (disc l 30, cartridge l 30) [RAM]. ≥Insert a disc (l 8) and confirm there is sufficient empty space for recording on it (l 47). ≥Check that the clock is set to the correct time. ≥Press [DVD].
ページ 2005年2月21日 月曜日 午後2時32分 Recording DVD ∫ Manual programming Check, change or delete programs ≥When connecting a cable TV box or satellite receiver, select the channel on the cable TV box or satellite receiver before scheduled recording starts. [1] Press [SCHEDULE]. ≥Make sure “New Scheduled Recording” is selected. New Scheduled Recording is selected. Preparation ≥Press [DVD]. [1] Press [SCHEDULE].
ES30VP&PC.book 30 ページ 2005年2月21日 月曜日 午後2時32分 Editing DVD 1 Disc Name DVD/VHS POWER TV POWER INPUT SELECT TV/VIDEO VHS CH OPERATION SELECT [RAM] [-R] [-RW‹V›] [+R] ≥Follow steps 1 to 3 of “DISC MANAGEMENT”. VOLUME [4] Select “Disc Name” with [3, 4] and press [ENTER].
ページ 2005年2月21日 月曜日 午後2時32分 Editing DVD 1 Format Disc 1 Finalize [RAM] [-RW‹V›] [-RW‹VR›] ≥Follow steps 1 to 3 of “DISC MANAGEMENT”. Formatting erases all contents (including computer data), and they cannot be restored. Check carefully before proceeding. The contents are erased when you format a disc even if you have set protection. [4] Select “Format disc” with [3, 4] and press [ENTER]. [5] Select “Yes” with [2] and press [ENTER]. Format Disc e.g.
ES30VP&PC.book 32 ページ 2005年2月21日 月曜日 午後2時32分 Editing DVD [2] Use [3, 4, 2, 1] to select the character you want to enter and press [ENTER]. DVD/VHS POWER TV Repeat this step to enter other characters. ≥To erase a character Press [3, 4, 2, 1] to select the character in the name field and press [;, PAUSE]. POWER OPERATION SELECT VHS VOLUME CH INPUT SELECT TV/VIDEO DVD DVD ≥Using the numeric buttons to enter characters e.g., entering the letter “R”.
ES30VP&PC.book 33 ページ 2005年2月21日 月曜日 午後2時32分 Editing DVD Using the Direct Navigator [RAM] [-R] [-RW‹V›] [+R] [-RW‹VR›] Press [DIRECT NAVIGATOR] and the list of titles recorded (Title View) is shown. You can play and edit a desired title. ∫ Editing titles with SUB MENU button Note ≥Once erased, divided or shortened, the title cannot be restored to its original state. Make certain before proceeding. For your reference ≥You cannot edit during recording or transferring (dubbing), etc.
ES30VP&PC.book 34 ページ 2005年2月21日 月曜日 午後2時32分 Editing DVD For your reference Titles will be erased even if they are protected if you format the disc with DISC MANAGEMENT (l 31). DVD/VHS POWER TV POWER VOLUME CH INPUT SELECT TV/VIDEO 11 Shorten Title VCR Plus+ CM SKIP OPERATION DVD SELECT CANCEL/RESET VHS DVD TRACKING/V-LOCK SKIP/INDEX :, 9 SLOW/ REW SEARCH FF You can remove unnecessary parts of the title such as commercials.
ページ 2005年2月21日 月曜日 午後2時32分 Editing DVD 11 Divide Title 11 Erase Chapter [RAM] ≥Follow steps 1 to 3 of “Edit Title”. [RAM] (Multiple editing l 33) ≥Follow steps 1 to 5 of “View Chapters”. You can divide a selected title into two. You must be careful when dividing a title because it cannot be recovered after the procedure. Once erased, the recorded contents are lost and cannot be restored. Make certain before proceeding. [4] Select “Divide Title” with [3, 4] and press [ENTER].
ES30VP&PC.book 36 ページ 2005年2月21日 月曜日 午後2時32分 Editing DVD ∫ Creating playlists DVD/VHS POWER TV [RAM] Preparation ≥Release protection (disc l 30, cartridge l 30) ≥Press [DVD].
ページ 2005年2月21日 月曜日 午後2時32分 Editing DVD ∫ Playing playlists ∫ Using playlist to edit playlists/chapters [RAM] [-RW‹VR›] (Play only) Preparation ≥Create playlists. (l 36) ≥Press [DVD]. [1] [RAM] [-RW‹VR›] (Properties only) Preparation ≥Create playlists. (l 36) ≥Release protection (disc l 30, cartridge l 30). [RAM] ≥Press [DVD]. While stopped Press [FUNCTIONS]. [2] Select “Other Functions” with [3, 4] and press [ENTER]. [3] Select “PLAYLISTS” with [3, 4] and press [ENTER].
ES30VP&PC.book 38 ページ 2005年2月21日 月曜日 午後2時32分 Editing DVD 1 Edit DVD/VHS POWER TV [RAM] POWER INPUT SELECT TV/VIDEO VHS You can perform various kinds of playlist editing. VOLUME CH OPERATION SELECT Preparation ≥Create playlists (l 36). ≥Release protection (disc l 30, cartridge l 30). ≥Press [DVD].
ページ 2005年2月21日 月曜日 午後2時32分 Editing DVD 1 View Chapters 11 Create Chapter [RAM] [-RW‹VR›] (Play only) ≥Follow steps 1 to 4 of “Edit”. [RAM] ≥Follow steps 1 to 7 of “View Chapters”. You can play/edit the chapters in a playlist. [8] Select “Create Chapter” with [3, 4] and press [ENTER]. [9] Press [ENTER] at the point you want to divide. [5] Press [SUB MENU], and select “View Chapters” with [3, 4] and press [ENTER]. [6] Use [3, 4, 2, 1] to select a desired chapter.
ES30VP&PC.book 40 ページ 2005年2月21日 月曜日 午後2時32分 Convenient functions DVD Using DISPLAY menus ∫ Common procedures DVD/VHS POWER TV Preparation ≥Press [DVD]. POWER VOLUME CH INPUT SELECT TV/VIDEO VHS [1] Press [DISPLAY].
ES30VP&PC.book 41 ページ 2005年2月21日 月曜日 午後2時32分 Convenient functions DVD 1 Play menu [RAM] [-R] [-RW‹V›] [+R] [DVD-A] [DVD-V] [-RW‹VR›] [VCD] [CD] Disc Play Video Audio Other Repeat Play Off [RAM] [-R] [-RW‹V›] [+R] [DVD-V] [-RW‹VR›] Title,.Chapter,.Off ^------------------------J [VCD] [CD] (excluding MP3 discs) Track,.All,.Off ^----------------J Repeat play This function works only when the elapsed play time is displayed. Select the item for repeat play.
ES30VP&PC.book 42 ページ 2005年2月21日 月曜日 午後2時32分 Convenient functions DVD Entering a password (Ratings) DVD/VHS POWER TV POWER VOLUME CH INPUT SELECT TV/VIDEO OPERATION SELECT VHS You can limit play of DVDs unsuitable for some audiences (children, for example). Play and changes to the settings are not possible unless you enter a password. DVD DVD Preparation ≥Press [DVD]. TRACKING/V-LOCK Numeric buttons When setting ratings The password screen is shown when you select levels 0 to 7.
ページ 2005年2月21日 月曜日 午後2時32分 Convenient functions Summary of settings This description shows the initial settings for the unit. For details on menu operation. (l 42) ≥Underlined items are the factory default settings. ≥ ≥ indicates settings effective for both DVD and VHS. / indicates settings effective for DVD only. ∫ Channel / Signal Source (RF IN) (l 17) Select to suit the type of antenna you are using.
ES30VP&PC.book 44 ページ 2005年2月21日 月曜日 午後2時32分 Convenient functions ≥ Underlined items are the factory default settings. ∫ Video Still Mode Select the type of picture shown when you pause play. (l 64, “Frame and field”) [Automatic] [Field] [Frame] Field Select if jittering occurs when “Automatic” is selected. Frame Select if you cannot see small text or fine patterns clearly when “Automatic” is selected.
ES30VP&PC.book 45 ページ 2005年2月21日 月曜日 午後2時32分 Convenient functions DVD ∫ TV Screen TV Type (l 19) ≥ Underlined items are the factory default settings. ∫ Display Status Messages Choose the setting to suit your TV and preference. [Aspect 4:3 & 480i] [Aspect 4:3 & 480p] [Aspect 16:9 & 480i] [Aspect 16:9 & 480p] Choose whether to show status messages automatically or not.
ES30VP&PC.book 46 ページ 2005年2月21日 月曜日 午後2時32分 Convenient functions DVD Clock Settings “Clock settings” made here are applied to VHS as well. DVD/VHS POWER TV Preparation ≥Press [DVD].
ページ 2005年2月21日 月曜日 午後2時32分 Convenient functions ∫ Display examples FUNCTIONS window By using the FUNCTIONS window you can access the main functions quickly and easily. Preparation ≥Press [DVD]. [1] DVD While stopped Press [FUNCTIONS]. FUNCTIONS DVD DVD-RAM Playback Cartridge Protection Off Disc Protection Off DIRECT NAVIGATOR Schedule SCHEDULE 2 1 3 Dubbing ENTER VCR Plus+ DUBBING Other Functions ≥Functions displayed depend on the type of disc.
ES30VP&PC.book 48 ページ 2005年2月21日 月曜日 午後2時32分 VHS Playback VHS Inserting a video cassette The surface on which you can see a roll of tape should face up, Insert a video cassette. ≥The unit is automatically turned on. ∫ To eject a video cassette ≥You can eject a video cassette even when the unit is in standby mode. It switches back to standby once it ejects the video cassette. For main unit ≥Press [<, EJECT] on the main unit.
ES30VP&PC.book 49 ページ 2005年2月21日 月曜日 午後2時32分 Playback VHS Playing a video cassette ∫ To pause play Press [;, PAUSE]. (Press again to restart play.) DVD/VHS POWER TV POWER Í INPUT SELECT TV/VIDEO VHS ∫ To stop play VOLUME CH AUDIO OPERATION SELECT VHS CANCEL/RESET SKIP/INDEX DVD TRACKING/V-LOCK VCR Plus+ CM SKIP SLOW/ REW SEARCH FF PLAY ∫ RETURN FUNCTIONS SUB MENU DIRECT NAVIGATOR S SCHEDULE TOP MENU DISPLAY REC Press [∫, STOP].
ES30VP&PC.book 50 ページ 2005年2月21日 月曜日 午後2時32分 Playback VHS DVD/VHS POWER TV CH, W, X POWER INPUT SELECT TV/VIDEO VHS VOLUME CH INPUT SELECT TV/VIDEO OPERATION SELECT VHS DVD DVD TRACKING/V-LOCK Numeric buttons AUDIO CANCEL/RESET TRACKING/ V-LOCK, r, s CH, W, X VCR Plus+ CM SKIP SKIP/INDEX PLAY DIRECT NAVIGATOR FUNCTIONS TOP MENU VHS MENU SUB MENU RETURN Preparation ≥Connect to the COMPONENT VIDEO IN terminals (l 15) ≥Select the TV type (l 19, 45) [1] Press [DVD].
ES30VP&PC.book 51 ページ 2005年2月21日 月曜日 午後2時32分 Recording VHS Recording TV programs ∫ Recording procedures Preparation ≥Select the unit viewing channel (e.g. AV input) on the TV. ≥Check that the clock is set to the correct time. If it has not been set, set it (l 46). ≥Press [VHS]. [1] Insert a video cassette with an intact accidental erasure prevention tab. (l 48) [2] Press [CH, W, X] to select a TV channel. ≥If you keep pressing these buttons, the channels change quickly.
ES30VP&PC.book 52 ページ 2005年2月21日 月曜日 午後2時32分 Recording VHS Scheduled Recording DVD/VHS POWER TV POWER INPUT SELECT TV/VIDEO VHS You can enter up to 16 programs a month in advance. VOLUME CH OPERATION SELECT VHS Preparation ≥Select the unit viewing channel (e.g. AV input) on the TV. ≥Check that the clock is set to the correct time. If it has not been set, set it (l 46). ≥Insert a video cassette with an intact accidental erasure prevention tab. (l 48) ≥Press [VHS].
ES30VP&PC.book 53 ページ 2005年2月21日 月曜日 午後2時32分 Recording VHS ∫ Manual programming Auto SP/EP mode ≥When connecting a cable TV box or satellite receiver, select the channel on the cable TV box or satellite receiver before scheduled recording starts. [1] Press [SCHEDULE]. ≥Make sure “NEW SCHEDULED RECORDING” is selected. NEW SCHEDULED RECORDING is selected.
ES30VP&PC.book 54 ページ 2005年2月21日 月曜日 午後2時32分 Convenient functions VHS Changing the unit’s settings DVD/VHS POWER TV POWER VHS OPERATION SELECT VHS Preparation ≥Select the unit viewing channel on the TV. ≥Press [VHS]. VOLUME CH INPUT SELECT TV/VIDEO DVD TRACKING/V-LOCK AUDIO CANCEL/RESET RESET :, 9 VCR Plus+ CM SKIP SKIP/INDEX ∫ Common procedures [1] AUDIO While stopped Press [VHS MENU].
ES30VP&PC.book 55 ページ 2005年2月21日 月曜日 午後2時32分 Convenient functions Various on-screen display indications VHS Changing audio To see these displays, set the “OSD” item in the “VHS MENU” to “ON”. (l 54) When a stereo and/or SAP broadcast is received, “STEREO” or “SAP” lights to show the type of broadcast. Press [STATUS]. While playing tapes The time and operation details appear on the screen for about 5 seconds. 1 2 3 4 5 Press [AUDIO]. CH 1 STEREO Mono L 0:00.
ES30VP&PC.book 56 ページ 2005年2月21日 月曜日 午後2時32分 DVD/VHS Transferring (Dubbing) DVD VHS Before transferring (dubbing) You can select from a variety of methods to transfer (dub) on the unit. You cannot transfer (dub) titles which have been treated to prevent copying.
ES30VP&PC.book 57 ページ 2005年2月21日 月曜日 午後2時32分 Transferring (Dubbing) DVD VHS Transfer (Dubbing) from VHS Note ≥While One Touch Transfer (Dubbing) is activated, a scheduled recording cannot be started. ≥When the transfer (dubbing) is not started or not executed, the “DUBBING” indicator blinks for about 7 seconds. Check if the unit is properly prepared.
ES30VP&PC.book 58 ページ 2005年2月21日 月曜日 午後2時32分 Transferring (Dubbing) DVD (3)Select recording mode (XP, SP, LP, EP or FR) with [3, 4] and press [ENTER]. ≥About FR mode (l below) (4)Press [2]. (5)Press [4]. [6] Set the time limit. ≥If you are not going to change the recording time, press [4], then skip to step 7. ∫ To change the setting DUBBING Cancel All Dubbing Direction VHS Time Limit Off ≥The confirmation screen appears.
ES30VP&PC.
ES30VP&PC.book 60 ページ 2005年2月21日 月曜日 午後2時32分 Transferring (Dubbing) DVD [6] Register titles and playlists for transfer (dubbing). DVD/VHS POWER TV POWER CH INPUT SELECT TV/VIDEO VHS OPERATION SELECT ≥If you are going to transfer a registered list without making any changes to it, press [4], then skip to step 7.
ページ 2005年2月21日 月曜日 午後2時32分 Transferring (Dubbing) Erase All Add Erase Move Erase All: Erase all items registered on the transfer (dubbing) list. ≥Press [2, 1] to select “Yes” and press [ENTER]. Add: Add new items to the transfer (dubbing) list. ≥Press [3, 4, 2, 1] to select the titles and playlists to be added and press [ENTER]. You can transfer (dub) the contents of a disc being played onto a tape for the set time while playing the disc.
ES30VP&PC.
ES30VP&PC.book 63 ページ 2005年2月21日 月曜日 午後2時32分 Transferring (Dubbing) DVD VHS Recording from an external device When connecting to the IN2 input terminals on the front of the unit ≥You can also connect to the IN1 input terminals on the rear of the unit. POWER EJECT Before connecting any cables, first make sure that the power for the unit and the external device are off. Then, after connecting cables, turn on both.
ES30VP&PC.book 64 ページ 2005年2月21日 月曜日 午後2時32分 Reference DVD VHS Glossary Bitstream MP3 (MPEG Audio Layer 3) This is a signal compressed and converted into digital form. It is converted back to a multi-channel audio signal, e.g., 5.1-channel, by a decoder. An audio compression method that compresses audio to approximately one-tenth of its size without any considerable loss of audio quality. You can play MP3s you have recorded onto CD-R and CD-RW.
ES30VP&PC.book 65 ページ 2005年2月21日 月曜日 Reference 午後2時32分 DVD VHS Frequently asked questions Set up Can the headphones and speakers be directly connected to the unit? Page ≥DVD-Video: You can play DVD-Video multi channel surround by digitally connecting an amplifier equipped with a Dolby Digital and a DTS decoder. ≥DVD-Audio: This unit plays DVD-Audio in 2 channels. You cannot play multi channel surround sound. 15 ≥You cannot directly connect to the unit. Connect through the amplifier etc.
ES30VP&PC.book 66 ページ 2005年2月21日 月曜日 午後2時32分 Reference DVD VHS Error messages ∫ Common On the unit’s display H, F (“” stands for a number.) Page ≥An error has occurred. The number following “H” or “F” depends on the status of the unit. Check the items in the “Error messages” section and the “Troubleshooting guide”. If the service number still does not disappear after the check, follow the Reset procedure described below. Reset procedure: (“The unit is on but cannot be operated.
ES30VP&PC.book 67 ページ 2005年2月21日 月曜日 午後2時32分 Reference DVD VHS Troubleshooting guide Before requesting service, make the following checks. If you are in doubt about some of the check points, or if the remedies indicated in the chart do not solve the problem, refer to the “Customer Services Directory” on page 73 if you reside in the U.S.A., or refer to “Product information” on page 72 if you reside in Canada. In other areas, consult your dealer.
ES30VP&PC.book 68 ページ 2005年2月21日 月曜日 午後2時32分 Reference DVD VHS Operation Page Cannot operate the TV. ≥Change manufacturer code. Some TVs cannot be operated even if you change the code. ≥Press [TV/VIDEO] to change the input mode to “TV”. Cannot operate the DVD. ≥Press [DVD] when operating DVD. Cannot operate the VHS. ≥Press [VHS] when operating VHS. 10 The remote control doesn’t work. ≥The remote control code is wrong. Change to the correct code. ≥The batteries are depleted.
ページ 2005年2月21日 月曜日 午後2時32分 Reference DVD VHS Recording, Scheduled recording, Transfer (dubbing), External input Page ≥When connected to cable TV box or satellite receiver, the VCR Plus_ system does not work. ≥The scheduled recording program is incorrect or different scheduled recording times overlap. Correct the program. ≥The clock is not correct. Set the clock. ≥Correct the guide channels with “VCR Plus_ Ch. Setting” in the SETUP menu.
ES30VP&PC.book 70 ページ 2005年2月21日 月曜日 午後2時32分 Reference DVD VHS ∫ DVD DVD Picture Page Status messages do not appear. ≥Select “Automatic” in “Status Messages” in the SETUP menu. ≥Select “On” in “Blue Background” in the SETUP menu. 45 The 4:3 aspect ratio picture expands left and right. ≥Use the TV to change the aspect. If your TV does not have that function, set “Progressive” in the Video menu to “Off”.
ES30VP&PC.book 71 ページ 2005年2月21日 月曜日 午後2時32分 Reference DVD VHS DVD recording, scheduled recording Page Cannot record. ≥You haven’t inserted a disc or the disc you inserted cannot be recorded on. Insert a disc the 6 unit can record onto. ≥The disc is unformatted. Format the disc. [RAM] [-RW‹V›] 31 ≥The write-protect tab on the cartridge is set to “PROTECT” or the disc is protected with 30 “DISC MANAGEMENT”. ≥Some programs have limitations on the number of times they can be recorded (CPRM).
ES30VP&PC.book 72 ページ 2005年2月21日 月曜日 午後2時32分 Reference Product Service 1. Damage requiring service — The unit should be serviced by qualified service personnel if: (a)The AC power supply cord or AC adaptor has been damaged; or (b)Objects or liquids have gotten into the unit; or (c)The unit has been exposed to rain; or (d)The unit does not operate normally or exhibits a marked change in performance; or (e)The unit has been dropped or the cabinet damaged. 2.
ES30VP&PC.book 73 ページ 2005年2月21日 月曜日 午後2時32分 Reference Limited Warranty (ONLY FOR U.S.A.) Panasonic Consumer Electronics Company, Division of Panasonic Corporation of North America One Panasonic Way Secaucus, New Jersey 07094 Panasonic Puerto Rico, Inc. Ave. 65 de Infantería, Km. 9.
ES30VP&PC.book 74 ページ 2005年2月21日 月曜日 午後2時32分 Reference Limited Warranty (ONLY FOR CANADA) Panasonic Canada Inc. 5770 Ambler Drive, Mississauga, Ontario L4W 2T3 PANASONIC/TECHNICS PRODUCT—LIMITED WARRANTY Panasonic Canada Inc. warrants this product to be free from defects in material and workmanship and agrees to remedy any such defect for a period as stated below from the date of original purchase.
ES30VP&PC.book 75 ページ 2005年2月21日 月曜日 午後2時32分 Reference Specifications AC 120k(1 ±10% ) V, 50/60 Hz ±10% 31 W (Approx. 10 W in Quick start standby mode/Approx. 9 W in power save mode) (Approx. 4 W in Normal standby mode/ Approx.
ES30VP&PC.book 76 ページ 2005年2月21日 月曜日 午後2時32分 Reference Index COMMON Antenna System ............................................................................ 17 Channel adding, deleting .......................................................................... 17 audio (DVD) ................................................................................ 40 Auto Channel Setting .................................................................. 17 captions ..............................................
ES30VP&PC.book 77 ページ 2005年2月21日 月曜日 午後2時32分 Español Cómo empezar ≥Antes de conectar, apague todo equipo y lea las instrucciones correspondientes de funcionamiento. Referencia ≥Las conexiones del equipo descritas sirven en concepto de ejemplo. ≥Los equipos periféricos y los cables opcionales se venden por separado si no está indicado de otro modo. Conexión con un televisor y un VCR indica los accesorios incluidos. indica los accesorios no incluidos.
ES30VP&PC.book 78 ページ 2005年2月21日 月曜日 午後2時32分 Cómo empezar Reproducción Sintonización automática por enchufe Operaciones preliminares ≥Encienda el televisor y seleccione la entrada de vídeo correspondiente para conformar las conexiones a esta unidad. (Por ejemplo: la entrada AV, CH3 o CH4) ≥Si conecta la unidad a una caja del televisor de cable o a un receptor de satélite, sintonice su PBS local para que funcione el ajuste automático del reloj.
ページ 2005年2月21日 月曜日 午後2時32分 Reproducción DVD ∫ Cuando en el televisor aparece la pantalla de un menú ∫ Reproducción directa [VCD] Pulse las teclas numéricas para seleccionar un detalle. por ej.: “5”: [0] )[5] “15”: [1] )[5] [DVD-A] [DVD-V] Pulse [3, 4, 2, 1] para seleccionar un detalle, luego pulse [ENTER]. ≥Algunas veces para seleccionar un detalle puede usar las teclas numéricas.
ES30VP&PC.book 80 ページ 2005年2月21日 月曜日 午後2時32分 Grabación DVD ∫ Indicación del tiempo en que se parará la grabación Grabación de programas televisivos [RAM] [-R] [-RW‹V›] [+R] ≥Puede grabar hasta 99 títulos en un disco (49 títulos [+R]). ≥No es posible grabar emisiones digitales que permiten “Grabación sólo una vez” en discos DVD-R, DVD-RW, iR o DVD-RAM de 8 cm (3q). Utilice un DVD-RAM compatible con CPRM. ≥La grabación tendrá lugar en un espacio abierto en el disco. Los datos no se sobrescribirán.
ES30VP&PC.book 81 ページ 2005年2月21日 月曜日 午後2時32分 Grabación Grabación temporizada Puede introducir hasta 16 programas con un adelanto de un mes. Operaciones preliminares ≥Quite la protección [RAM]. ≥Inserte un disco (l 78) y asegúrese de que haya bastante espacio vacío para grabarle encima. ≥Controle que el reloj esté ajustado a la hora correcta. ≥Pulse [DVD].
ES30VP&PC.book 82 ページ 2005年2月21日 月曜日 午後2時32分 VHS Reproducción VHS ∫ Introducción de un cassette de vídeo ∫ Cassette de vídeo La superficie en la que puede ver el rollo de la cinta tiene que mirar hacia arriba, Inserte un cassette de vídeo. ≥Esta unidad se enciende automáticamente. ∫ Para expulsar el cassette de vídeo ≥Puede expulsar el cassette de vídeo cuando la unidad está en el modo de espera. Ésta vuelve en espera una vez que haya expulsado el cassette de vídeo.
ページ 2005年2月21日 月曜日 午後2時32分 Grabación Grabación de programas televisivos Operaciones preliminares ≥Seleccione el canal que ve la imgen de la unidad (por ejemplo la entrada AV) en el televisor. ≥Controle que el reloj esté ajustado a la hora correcta. Por si no lo estuviese, ajústelo. ≥Pulse [VHS]. [1] Inserte un cassette de vídeo que tenga la lengüeta de protección contra el borrado accidental intacta. (l 82) [2] Pulse [CH, W, X] para seleccionar un canal TV.
ES30VP&PC.book 84 ページ 2005年2月21日 月曜日 午後2時32分 Manufactured under license from Dolby Laboratories. “Dolby” and the double-D symbol are trademarks of Dolby Laboratories. VCR Plus+ and PlusCode are registered trademarks of Gemstar Development Corporation. The VCR Plus+ system is manufactured under license from Gemstar Development Corporation. “DTS” and “DTS 2.0iDigital Out” are trademarks of Digital Theater Systems, Inc. Pats.