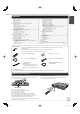
DVD Recorder Model No. DMR-EZ47V DMR-EZ475V IN 2 S VIDEO VIDEO P6 Basic Operations Operating Instructions L /MONO AUDIO R Dear customer Thank you for purchasing this product. For optimum performance and safety, please read these instructions carefully. P55 Connection and Setting Before connecting, operating or adjusting this product, please read the instructions completely. Please keep this manual for future reference.
Precautions CAUTION! Note to CATV system installer: THIS PRODUCT UTILIZES A LASER. USE OF CONTROLS OR ADJUSTMENTS OR PERFORMANCE OF PROCEDURES OTHER THAN THOSE SPECIFIED HEREIN MAY RESULT IN HAZARDOUS RADIATION EXPOSURE. DO NOT OPEN COVERS AND DO NOT REPAIR YOURSELF. REFER SERVICING TO QUALIFIED PERSONNEL.
Read these operating instructions carefully before using the unit. Follow the safety instructions on the unit and the applicable safety instructions listed below. Keep these operating instructions handy for future reference. 1) Read these instructions. 10) Protect the power cord from being walked on or pinched particularly at plugs, convenience receptacles, and the point where 2) Keep these instructions. they exit from the apparatus. 3) Heed all warnings.
Table of Contents, Accessories Getting Started Precautions.........................................................................................................................................................................................2 IMPORTANT SAFETY INSTRUCTIONS ............................................................................................................................................3 Unit Care .....................................................................................
Control Reference Guide ........................................................ 70 Remote Control ............................................................................ 70 FUNCTIONS Window .................................................................. 70 Main Unit ...................................................................................... 71 The Unit’s Display ........................................................................ 71 Media Handling (Disc/Video Cassette/SD Card) .....
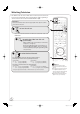
Watching Television This DVD recorder has a tuner which allows it to directly receive and record analog and terrestrial digital channels. High Definition (HD) programming is “down-converted” and recorded in Standard Definition (SD). DVD/VHS Preparation: Turn on the television and select the appropriate video input to suit the connections to this unit. POWER POWER DRIVE SELECT TV/VIDEO CH VOL TRACKING/V-LOCK DVD/VHS POWER to turn the unit on.
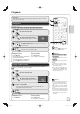
Playback DVD/VHS Playing Discs Refer to “Advanced Disc Playback” (¼ 19–20) for detailed information on playback of discs. [RAM] [-R] [-R]DL] [-RW‹V›] [+R] [+R]DL] [+RW] [DVD-V] [-RW‹VR›] [CD] DVD/VHS POWER DRIVE SELECT to turn the unit on. to select the DVD drive. POWER POWER DRIVE SELECT CH T TV/VIDEO VOL Basic Operations Preparation: Turn on the television and select the appropriate video input to suit the connections to this unit.
Recording Television Programs Refer to “Important Notes for Recording” (¼ 13) and “Advanced Recording” (¼ 14 to 17) for detailed information on recording. [RAM] [-R] [-R]DL] [-RW‹V›] [+R] [+R]DL] [+RW] [VHS] Digital broadcasts cannot be recorded to video tape. Preparation: Turn on the television and select the appropriate video input to suit the connections to this unit. [RAM] If the disc is protected, release protection (¼ 44). [VHS] Ensure accidental erasure tab is intact.
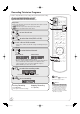
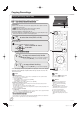
Scheduled Recording Refer to “Advanced Scheduled Recording” (¼ 18) for detailed information on scheduled recording. [RAM] [-R] [-R]DL] [-RW‹V›] [+R] [+R]DL] [+RW] [VHS] Digital broadcasts cannot be recorded to video tape. DRIVE SELECT POWER POWER Remaining Recording Time No Channel TV/VIDEO CH VOL TRACKING/V-LOCK 1 2 3 4 5 6 7 8 9 CANCEL 0 to select the drive (DVD or VHS).
Copying Recordings Copying Recordings (VHS ¼ DVD) Programs are automatically copied onto the disc from the location of playback at the time when the copying of the tape starts. [VHS] ¼ [RAM] [-R] [-R]DL] [-RW‹V›] [+R] [+R]DL] [+RW] Preparation: Turn on the television and select the appropriate video input to suit the connections to this unit. [RAM] If the disc is protected, release protection (¼ 44). Insert a disc with enough space for recording. Select the DVD recording mode (¼ 14).
Copying Recordings (DVD ¼ VHS) All recordings on the disc are automatically copied onto the tape. [RAM] [-R] [-R]DL] [-RW‹V›] [-RW‹VR›] [+R] [+R]DL] [+RW] ¼ [VHS] Finalized discs or DVD-Video cannot be copied on this unit. DRIVE SELECT to select the drive (DVD or VHS). On the main unit COPYING Press and hold for about 3 seconds. −Check if copying starts properly (“COPY” is displayed on this unit’s display). −Copying automatically stops when playback of the disc finishes or the tape reaches its end.
Deleting Recordings Important: Once deleted, contents cannot be recovered. Preparation: Turn on the television and select the appropriate video input to suit the connections to this unit. [RAM] If the disc is protected, release protection (¼ 44). Insert a disc and press [ OPEN/CLOSE] again to close the tray.
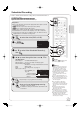
Important Notes for Recording [-R] [-R]DL] [-RW‹V›] [+R] [+R]DL] [+RW] Select the Main or SAP audio before recording. You can change the audio during playback (¼ 20, Changing Audio during Playback). [¼ 50, Multi-channel TV Sound (Analog)] The selected audio only is recorded. Main SAP Hello Hola Main Hello If you record from external equipment Select both “Main” and “SAP” on the external equipment. If you record from external equipment Select “Main” or “SAP” on the external equipment.
Advanced Recording DVD Recording Modes and Durations DVD-RAM Recording Mode 1 Single-sided (4.7 GB) Double-sided (9.4 GB) DVD-R, DVD-RW, +R, +RW (4.7 GB) DVD-R DL3, +R DL3 (8.
When the format confirmation screen is displayed Selecting Audio Channels to record When receiving an analog broadcast Important: Formatting permanently deletes all disc contents (including computer data), regardless of protection status of disc. [-R] [-R]DL] [-RW‹V›] [+R] [+R]DL] [+RW] Select the audio (Main or SAP) in “Multi-channel TV Sound (Analog)” in the Setup menu (¼ 50). [RAM] [RAM] [-RW‹V›] [+RW] AUDIO A The following screen may appear when inserting a new disc, etc. to select the audio.
Advanced Recording Specifying the Recording Time Tips [RAM] [-R] [-R]DL] [-RW‹V›] [+R] [+R]DL] [+RW] [VHS] Digital broadcasts cannot be recorded to video tape. This function allows specifying the length of recording time up to 4 hours. During recording To exit the screen Press [RETURN]. To stop recording partway Press [ STOP]. To show the remaining recording time Press [STATUS] to show the remaining recording time. DVD-RAM REC repeatedly until the desired time is reached.
Playing while you are recording You can play DVD or VHS while recording to the other drive. The recording will not be affected −DVD playback (¼ 7, 19, 20, 29) −VHS playback (¼ 7, 26 to 28) Notes During playing while you are recording, you cannot edit or delete recordings. Closed captions will not appear during simultaneous recording and playback. Notes You cannot play a tape with the DVD PRIORITY output terminals or HDMI AV OUT terminal while recording or making a scheduled recording on a disc (¼ 58).
Advanced Scheduled Recording To cancel a scheduled recording in progress 4a DELETE CANCEL or RESET to delete. –You cannot delete programs that are currently recording. DRIVE SELECT to select the drive. STOP –Confirmation screen appears. 4b ENTER to modify the program. , , , to make changes, then ENTER DVD/VHS POWER –“” lights on the unit’s display. to select “Stop recording”, then ENTER Notes Notes Recording stops and the scheduled recording is deleted.
Advanced Disc Playback Menu Screens on the TV Search [DVD-V] Generally, menu screens that appear on the TV may be navigated as follows: During playback or –There are 5 search speeds. Each press increases the search speed. –Press [ PLAY] to restart normal playback. , , , to select an item, then ENTER You can sometimes use the numbered buttons to select an item. Tips Tips Advanced Features Depending on the disc, search may not be possible.
Advanced Disc Playback Slow-motion Play [RAM] [-R] [-R\DL] [-RW‹V›] [+R] [+R]DL] [+RW] [DVD-V] [-RW‹VR›] While paused or CM Skip [RAM] [-R] [-R\DL] [-RW‹V›] [+R] [+R]DL] [+RW] [-RW‹VR›] Skips 1-minute forward with each press. During playback CM SKIP –There are 5 slow-motion speeds. Each press increases the speed. –Press [ PLAY] to restart normal playback. Create Chapters Notes If continued for approx. 5 minutes, slow-motion play pauses automatically (except [DVD-V]).
Playing Still Pictures (JPEG) [SD] The screen shown below may be displayed when you insert an SD card (¼ 73). Notes Still pictures (JPEG) recorded on DVD-RAM, CD-R/RW or SD Memory Cards can be played on this unit. You can use 8MB to 2GB SD memory cards, 4GB SDHC memory cards (¼ 75). For inserting and removing SD cards (¼ 73). Still pictures cannot be played during recording on the DVD drive or copying. Thumbnails for large JPEG files and images with aspect ratios other than 4:3 may not display.
Playing Still Pictures (JPEG) Selecting Still Pictures in Another Folder [RAM] [SD] This function is only available if multiple folders are recognized.
Zoom While playing a picture SUB MENU To zoom in: Control Panel , to select “Zoom In”, then ENTER Rotate Right Rotate Left Zoom In Advanced Features ENTER Notes To return the picture to its original size Press [, ] to select “Zoom out” in step 2, then press [ENTER]. When zooming in, the still picture may be cut off. “Zoom In” information is not stored. “Zoom In” and “Zoom out” do not work with images that have a resolution larger than 640480 pixels.
Playing MP3s [CD] DRIVE SELECT , to select a group, then to select the DVD drive. ENTER –The track list for the selected group appears. Selected group Menu G 1 T 3 Total 3/111 No. 0 – 9 Track list is shown. Prev. Next No.
Playing DivX [-R] [-R]DL] [CD] , to select a folder, then to select the DVD drive. –The file list for the folder appears. DivX file list is shown. Tree DivX Recordings No. Tips 001/003 Recordings : 020 Previous Next , to select the recording,then To return to the previous screen Press [RETURN]. Regarding DivX VOD content DivX Video-on-Demand (VOD) content is encrypted for copyright protection. In order to play DivX VOD content on this unit, you first need to register the unit.
Advanced Video Cassette Playback Fast-forward/Rewind With the unit stopped FF to fast-forward the tape. Jet Search Allows high speed search of video in forward or reverse direction. During playback to rewind the tape. REW Slow playback FF twice to Jet Search forward. REW twice to Jet Search in reverse. –Press [ PLAY] to restart normal playback. During playback Notes PAUSE Press and hold for about 2 seconds. –Press [ PLAY] to restart normal playback.
The unit automatically records special index signals on a tape every time a recording is started (via [ REC], or a scheduled recording). The index search function makes use of these index signals to help you find the beginning of a desired program quickly and easily. While stopped or during normal play Adjusting the playback picture Manual Tracking The unit usually makes tracking adjustments automatically, but you may need to do it manually if noise appears on a tape recorded on other equipment.
Advanced Video Cassette Playback Changing Audio during Playback AUDIO A repeatedly, to select the audio option. Stereo Mono L Mono R No display (Normal audio track) On-screen Display Indicators The following on-screen indicator will not be displayed when this unit is connected to the TV with the DVD PRIORITY output terminals or HDMI AV OUT terminal. This indicator is only displayed when playing a tape in this unit’s VHS drive.
Playing Playlists [RAM] [-RW‹VR›] You cannot create or edit playlists on this unit. However, you can play a playlist that has been created or edited on other equipment. View Chapters After selecting a playlist (step 5) SUB MENU DRIVE SELECT to select the DVD drive.
Recording from an External Device Recording to DVD Recording from a VCR, etc. Connect cables while the power to both the unit and the external device is off. Front on the unit IN 2 S VIDEO VIDEO [RAM] [-R] [-R]DL] [-RW‹V›] [+R] [+R]DL] [+RW] Perform steps 1−5 left. Start play on the external device. L /MONO AUDIO R REC IN 2 You can get a sharper, clearer picture by connecting with an S Video cable instead of the yellow video cable. S VIDEO VIDEO at the point you want to start recording to the disc.
Recording from a DV Camcorder Connect the cable while the power to both the unit and the external device is off. Front on the unit IN 2 S VIDEO VIDEO to select “Record to DVD” then ENTER to select “Rec.”, then ENTER L /MONO AUDIO R 4-pin DV Cable [RAM] [-R] [-R]DL] [-RW‹V›] [+R] [+R]DL] [+RW] Preparation: Turn on the unit. [RAM] If the disc is protected, release protection (¼ 44).
Linked Operations with the TV (EZ Sync TM “HDAVI Control TM”) You can enjoy linked operations with the TV and receiver by using “HDAVI Control”. What is EZ Sync “HDAVI Control”? EZ Sync “HDAVI Control” is a convenient function that offers linked operations of this unit, and a Panasonic TV (VIERA) or receiver under “HDAVI Control”. You can use this function by connecting the equipment with the HDMI cable. See the operating instructions for connected equipment for operational details.
Easy control only with VIERA Remote Control If you connect this unit to the TV that has “HDAVI Control 2” function with HDMI cable, you can operate both units more conveniently. You can operate this unit using the following buttons on the TV remote control. [, , , ], [OK], [RETURN], [SUB MENU]. Use the remote control for this unit to operate any other buttons (numbered buttons, etc.) that are not listed above. Refer to TV operating instruction for operating the TV.
Entering Text Status Messages When viewing the Name screen. The following messages and displays appear to let you know what operations are being performed and the status of the unit. Recording Name _ Delete Set 1 1 2 3 5 6 7 2 A B C a b c 3 D E F d e f 4 G H I g h i 5 J 4 8 9 / 0 STATUS % $ l & K L j 6 M N O m k n o [ ] @ _ 7 P 8 T Q R S p q r s ( U V t u v { } ) - 9 W X 0 .
Recordings−Editing Tips Tips Recording/Chapter Normally, programs are recorded as a single item consisting of one chapter. Recording Chapter Start End To exit the menu screen Press [DIRECT NAVIGATOR]. To view other pages Press [, , , ] to select “Previous” or “Next”, then press [ENTER]. –You can also press [, ] to view other pages. Multiple editing Select with [, , , ], then press [PAUSE]. (Repeat.) –A checkmark appears. Press [PAUSE] again to cancel.
Recordings−Editing Setup Protection/Cancel Protection Tips Perform steps 1−4 of “Accessing the Recording View” (¼ 35). [RAM] Use to prevent accidental erasure of recordings. , to select “Setup Protection” or “Cancel Protection”, then ENTER to select “Yes”, then The lock symbol appears when the recording is protected. Divide Recording Perform steps 1−4 of “Accessing the Recording View” (¼ 35).
Chapters−Creating, Editing Accessing the Chapter View Chapter Operations [RAM] Allows viewing and editing chapters individually. DRIVE SELECT Create Chapter Perform steps 1−7b of “Accessing the Chapter View” (¼ left). to select the DVD drive. , to select “Create Chapter” then ENTER DIRECT NAVIGATOR Create Chapter DVD-RAM [RAM] When the Album View screen is displayed, press A to switch to the Recordings screen. 08 A Video Play B Picture Create Exit 0:43.
Still Pictures−Editing Accessing the Album/Picture View [RAM] [SD] DRIVE SELECT to select the drive (DVD or SD). Tips To view other pages Press [, , , ] to select “Previous” or “Next”, then press [ENTER]. –You can also press [, ] to view other pages. Multiple editing Select with [, , , ], then press [PAUSE]. (Repeat.) –A checkmark appears. Press [PAUSE] again to cancel. To exit the menu screen Press [DIRECT NAVIGATOR].
Album Name Only when you select “Create Album” , to select “Yes” or “No”, then Perform steps 1−4 of “Accessing the Album/Picture View” (¼ 38). ENTER If “Yes” is selected: You can give a name for the album (¼ 34). If “No” is selected: The recording date of the first picture in the album becomes the album name. , to select “Album Name” then ENTER – You can give a name for the album (¼ 34). Notes Album names entered using this unit may not display on other equipment.
Copying Still Pictures [SD] The screen shown below may be displayed when you insert an SD card. SD Card Operations Multiple editing Select with [, , , ], then press [PAUSE]. (Repeat.) –A checkmark appears. Press [PAUSE] again to cancel. To select another folder While the Album View screen is displayed (Only if there is a multiple number of other folders recognizable) 1. Press [SUB MENU]. 2. Press [, ] to select “Select Root folder”, then press [ENTER]. 3.
Deleting Still Pictures Delete Navigator Notes [RAM] [SD] You cannot delete while recording or copying. Important: Once deleted, contents cannot be recovered. Tips DRIVE SELECT to select the drive (DVD or SD). With the unit stopped FUNCTIONS DVD-RAM Cartridge Protection Off Disc Protection Off Playback Program Delete To return to the previous screen Press [RETURN]. To view other pages Press [, , , ] to select “Previous” or “Next”, then press [ENTER].
Setting DVD On-Screen Menus Accessing the DVD On-Screen Menus [DVD] When playing discs, disc settings can be displayed and changed. Menu options will differ based on disc type and contents. DRIVE SELECT to select the DVD drive. DISPLAY B Disc Menu [RAM] [-R] [-R]DL] [-RW‹V›] [+R] [+R]DL] [+RW] [DVD-V] [-RW‹VR›] and DivX Soundtrack [RAM] [-R] [-R]DL] [-RW‹V›] [+R] [+R]DL] [+RW] [-RW‹VR›] The disc’s audio attributes appear (¼ below, Audio attributes).
Play Menu Audio Menu [RAM] [-R] [-R]DL] [-RW‹V›] [+R] [+R]DL] [+RW] [DVD-V] [-RW‹VR›] [CD] [RAM] [-R] [-R]DL] [-RW‹V›] [+R] [+R]DL] [+RW] [DVD-V] [-RW‹VR›] and DivX Repeat play V. Surround Sound (Dolby Digital with 2.0 or over channels only) This function works only when the elapsed play time is displayed. Select the item for repeat play. Depending on the disc, the items that can be selected will differ. Select “Off” to cancel.
DVD and Card Management Accessing the Management Menus Preparation: [RAM] [SD] Release protection (disc, cartridge, card ¼ right). Insert a disc or card. Naming Discs [RAM] [-R] [-R]DL] [-RW‹V›] [+R] [+R]DL] [+RW] Perform preparation steps 1−4 of “Accessing the Management Menus” (¼ left). , select “Disc Name”, then ENTER DRIVE SELECT to select the drive (DVD or –You can give a name for the disc (¼ 34). SD). Tips With the unit stopped The disc name is displayed in the DVD MANAGEMENT window.
Deleting All Recordings Formatting Discs or Cards Important: Once deleted, contents cannot be recovered. [RAM] Perform preparation steps 1−4 of “Accessing the Management Menus” (¼ 44). , select “Delete All Recordings” then ENTER to select “Yes” then Important: Once formatted, contents cannot be recovered. [RAM[ [-RW‹V›] [+RW] [-RW‹VR›] [SD] Perform preparation steps 1−4 of “Accessing the Management Menus” (¼ 44).
DVD and Card Management Selecting Whether to Show the Top Menu First [-R] [-R]DL] [-RW‹V›] [+R] [+R]DL] [+RW] Before finalizing a disc, select whether the top menu shows after finalizing. Perform preparation steps 1−4 of “Accessing the Management Menus” (¼ 44). , to select “Playback will start with:”, then ENTER , to select desired item, then ENTER DVD’s Top Menu: The Top Menu appears first. First Recording: The disc content is played without displaying the Top Menu.
Create DVD Top Menu [+RW] +RW discs contain no Top Menu Data. Top Menu is a convenient function. We recommend you create the menu before playing a +RW disc on other equipment. Perform preparation steps 1−4 of “Accessing the Management Menus” (¼ 44). , to select “Create DVD Top Menu”, then ENTER to select “Start”, then to select “Start”, then ENTER ENTER –“Create DVD Top Menu” cannot be canceled once started. –“Create DVD Top Menu” takes a few minutes. to complete.
Changing the Unit’s Settings Accessing the Setup menu Summary of Settings All factory default settings are indicated with “Underlined” text. With the unit stopped Channel Signal Source (Antenna / RF IN) Select to suit the type of antenna you are using.
Disc Video Settings for Playback Still Mode (paused video) Press [ENTER] to show the following settings. Select the type of picture shown when you pause play (¼ 94, “Frame and field”). [Automatic] [Field] Select if jittering occurs when “Automatic” is selected. [Frame] Select if you cannot see small text or fine patterns clearly when “Automatic” is selected. Ratings Set a ratings level to limit DVD-Video play. Follow the on-screen instructions.
Changing the Unit’s Settings Audio Display Dynamic Range Compression Status Messages [DVD-V] (Dolby Digital only) Change the dynamic range (¼ 94) for easier listening in low volume. [On] [Off] Choose whether to show status messages automatically or not. [Automatic] [Off] On-screen Language Multi-channel TV Sound (Analog) [-R] [-R]DL] [-RW‹V›] [+R] [+R]DL] [+RW] Select whether to record the main or secondary audio program (SAP) when recording to these discs.
Press [ENTER] to show the following settings. HDMI Video Output [On] [Off] When connecting equipment such as an amplifier with an HDMI cable and connecting TV with a Component Video Cable (Set to “Off” before connecting an amplifier.) HDMI Resolution You can only select items compatible with the connected equipment. This setting normally does not need to be changed. However if you are concerned about output picture quality, it may be improved by changing the setting.
Changing the Unit’s Settings Setting the Parental Rating The V-chip system (¼ right, Notes) used in this unit allows you to limit viewing and recording of certain programs that may contain scenes unsuitable for children. If the unit starts receiving a broadcast with the set rating information, a password screen appears and you will be unable to view or record until you enter the password. You can view or record after entering your password. , to select the limitation.
Parental Rating List U.S. TV Rating (U.S. TV Programs Ratings) TV-NR TV-Y TV-Y7 TV-G TV-PG TV-14 TV-MA [Viewable] [Blocked] [Viewable] [Blocked] [FV Blocked] [Viewable] [Blocked] [Viewable] [Blocked] [--]: Viewable [X]: Blocked D, L, S, V (all selected) Any combination of D, L, S, V [--]: Viewable [X]: Blocked D, L, S, V (all selected) Any combination of D, L, S, V [--]: Viewable [X]: Blocked L, S, V (all selected) Any combination of L, S, V [FV]: Fantasy/Cartoon Violence Not Rated.
Changing the Unit’s Settings Setting the Closed Caption Choose whether to show closed captions. With the unit stopped , to select the item, then ENTER CC1–4: Information related to pictures (Appears at bottom of screen) T1–4: Textual information (Appears over entire screen) Settings for closed captions in digital broadcasts Perform steps 1–7 of “Setting the Closed Caption”. , to select “Other Functions” then ENTER , to select “Setup”, then ENTER , to select “Channel”, then .
Basic Connection Connecting to a Television with Direct Cable or Antenna (No Cable Box or Satellite Receiver) Note: The terminals on the rear of your TV may not appear as shown below. Please read terminal labels carefully to ensure correct connections.
Basic Connection Connecting to a Television and a Cable Box Consult your cable service provider about the appropriate cable box to use. Additional coaxial cable and audio/video (AV) cable are required. Note: The terminals on the rear of your TV and cable box may not appear as shown below. Please read terminal labels carefully to ensure correct connections.
Connecting to a Television and a Satellite Receiver Additional coaxial cable and audio/video (AV) cable are required. Note: The terminals on the rear of your TV and satellite receiver may not appear as shown below. Please read terminal labels carefully to ensure correct connections.
Connection Options for Improved Playback Quality You can enjoy high-quality picture by using the following terminals for connection. Standard Quality Picture Highquality Picture VIDEO IN S VIDEO IN COMPONENT terminal terminal VIDEO IN terminal HDMI AV IN terminal DVD output and DVD/VHS output The unit has DVD/VHS COMMON output terminals and DVD PRIORITY output terminals. You can enjoy higher picture quality when connecting with DVD PRIORITY output terminals or HDMI AV OUT terminal.
Using Component Video Cables for Better Video (Component Video Cables not included) The COMPONENT VIDEO OUT terminals on this unit can be used for either interlace or progressive output (¼ 94) to provide a purer picture than the S VIDEO OUT terminal.
Connection Options for Improved Playback Quality You can enjoy better quality sound by changing the audio cable connection between this unit and your TV on page 55 to 57 as follows. Using an Audio Cable for Better Sound (Audio Cable not included) Use this connection to play sound through speakers connected to an amplifier or system component.
You can enjoy high-quality picture and audio by changing the audio/video (AV) cable connection between this unit and your TV on pages 55 to 57 as follows. Connecting with an HDMI (High Definition Multimedia Interface) Terminal HDMI is the next-generation interface for digital devices. When connected to an HDMI compatible unit, an uncompressed digital audio and video signal is transmitted, enabling you to enjoy high quality digital video and audio with just one cable.
Setting the Channels and Clock Preparation: Turn on the television and select channel 3. These are the first settings you make upon buying the unit. You don’t need to make these settings again. DVD/VHS POWER POWER DRIVE SELECT TV/VIDEO CH VOL TRACKING/V-LOCK DVD/VHS to turn the unit on. TRACKING/V-LOCK to select an RF output channel number 3. When the picture on the TV is poor, switch the TV to channel 4. Also change this unit’s display to “CH 4”.
Manual Clock Setting The types of transmission: , to select “Antenna” or Automatic Clock and Channel Settings “Cable”, then ENTER Please select the wire connected to RF IN. Antenna Perform steps 1–6 on page 62. , to select the item you want to change. Cable Set Clock Manually Month ENTER 1 Day / 1 / Year Hour 2000 SAT 12 ENTER to start automatic channel/ clock setting. Confirm the time, then ENTER –DST (Daylight Saving Time) shows the summertime setting.
Other Settings Setting Channel Captions The captions you select or modify are used as channel names and displayed on the Direct Navigator screen. To select the caption: , to select the caption. –After selecting the “Channel” column with [, ], repeat steps 6–7a to set other channels. With the unit stopped To modify the caption: 1. ENTER , to select “Other Functions”, then ENTER , to select “Channel Settings”, then ENTER , to select channel, then , to select the “Caption” column.
Selecting Television Type Notes This setting allows you to select the type of television connected. With the unit stopped , to select “Other Functions”, then ENTER Aspect 4:3/16:9 4:3 16:9 4:3 standard aspect television 16:9 widescreen television 480p/480i Select “480p” if the television is compatible with progressive output. Select “480i” if the television is not compatible with progressive output or you are unsure about television compatibility.
Other Settings Clock Settings Set Clock Automatically Notes This may take some time, up to a few hours in some cases. If the following message appears Setup With the unit stopped , to select “Other Functions”, then ENTER Channel Setup Disc Video Audio Display TV Screen VHS Set Clock Automatically Setting completed as follows. Finish the setup with this clock time? Note:Selecting“No”will start channel scanning again and renew the clock time.
Adjust Time Zone Adjust the time zone (1 or 1) if it was not set correctly with auto clock setting. You can set this menu only after “Set Clock Automatically” is completed. (¼ 66) With the unit stopped , to select “Other Functions”, then ENTER , to select “Setup”, then ENTER , to select “Setup”, then .
Other Settings Remote Control Codes for the TV Using the Unit’s Remote Control to Operate the TV and the Set Top Box (Cable Box, Satellite Receiver, etc.
Manufacturer Sva Sylvania Symphonic Syntax-Brillian Tatung Thomson Toshiba Ultra Products Viewsonic Westinghouse Yamaha Zenith Code 0587 / 0748 / 0768 / 0865 / 0870 / 0871 / 0872 0020 / 0028 / 0030 / 0054 / 0065 / 0096 / 0171 / 0381 0171 / 0180 1007 / 1144 / 1240 / 1255 / 1257 / 1258 / 1331 0003 / 0049 / 0055 / 0396 / 1756 0209 / 0210 / 0047 0036 / 0060 / 0149 / 0154 / 0156 / 0650 / 0832 / 0845 / 1156 / 1256 / 1265 / 1356 / 1656 / 1704 0391 0857 / 0864 / 0885 / 1755 0885 / 0889 / 0890 / 1282 / 1577 0019 /
Control Reference Guide Remote Control Turn the unit on or off ................................................ (¼ 6) Select drive (DVD, VHS or SD) ........................... (¼ 7, 21) Select channels and recording numbers etc./ Enter numbers........................................................... (¼ 6) Cancel/Reset the tape counter Basic operations for recording and play Skip the specified time/ Jet rewind button (JET REW)............................ (¼ 20, 26) Direct Navigator ..........
Main Unit Remote Control signal sensor Cassette compartment Disc tray OPEN/CLOSE EJECT DRIVE SELECT POWER CH REC COPYING IN 2 S VIDEO VIDEO RESET L /MONO AUDIO R The unit’s display Opening the front panel Press down on the part with your finger. COPYING DVD/VHS drive indicator ................................(¼ 7) Cassette eject button ....................................(¼ 72) Disc tray open/close button ............................
Media Handling (Disc/Video Cassette/SD Card) Inserting Discs OPEN/CLOSE to open the tray. –Insert a disc. Notes When using 8 cm (3) DVD-RAM or 8 cm (3) DVD-R, remove the disc from the cartridge. It is not possible to record or play continuously from one side of a double sided disc to the other. You will need to eject the disc and turn it over. Insert label-up. OPEN/CLOSE to close the tray. Inserting a Video Cassette Insert a cassette (the surface with the roll of tape should face up).
Inserting/Removing the SD Card Opening the front panel Removing the card Inserting the card Press on the center of the card until it clicks into DVD place. Press down. REC VHS VHS RESET DVD DVD RESET COPYING COPYING If you are using a miniSD card, insert it into the miniSD card adaptor that comes with the card. Insert and remove this adaptor from the unit. Closing the front panel Press on the center of the card. Push up. Pull it straight out.
Disc and Card Handling Usable Discs for Recording and Playback Rewritable Finalization Needed1 Recording 16:9 aspect picture2 Recording broadcasts that allow one copy (CPRM) (¼ 13) — [RAM] — — (4:3 aspect) — [-R] before finalization [DVD-V] after finalization — — (4:3 aspect) — [-R]DL] before finalization [DVD-V] after finalization — (4:3 aspect) — [-RW‹V›] before finalization [DVD-V] after finalization +R — — (4:3 aspect) — [+R] before finalization [DVD-V] aft
Play-only Discs Disc type Discs that Cannot be Played Standard symbol Uses DVD-Video High quality movie and music discs [DVD-V] DVD-RW (DVD Video Recording format) DVD-RW video recorded on another DVD recorder You can play programs that allow “One time only recording” if they have been recorded to a CPRM compatible disc. By formatting (¼ 45) the disc, you can record to it in DVD-Video format. It may be necessary to finalize the disc on the equipment used for recording. [-RW‹VR›] 2.6/5.
MP3s, DivXs and Still Pictures (JPEG) MP3 File Information Notes Playable discs [CD] File format MP3 Files must have the extension “.mp3” or “.MP3”.
Troubleshooting Guide If the Antenna Connector Doesn’t Match Use the following connection to suit the antenna lead to the unit’s RF IN terminal, and the 75 coaxial cable to the antenna terminals on your TV or other equipment. Refer to the other equipment’s operating instructions for more information. Type This unit Other equipment (television etc.
Troubleshooting Guide When Other Panasonic Products Respond to this Remote Control Tips Use this function to synchronize the codes for the remote control and the main unit when there are other Panasonic products close to your unit. To return to the previous screen Press [RETURN]. To exit the screen Press [RETURN] several times.
Before requesting service, make the following checks. If you are in doubt about some of the check points, or if the solutions indicated in the chart do not solve the problem, refer to “Customer Services Directory” on page 95. The following does not indicate a problem with the unit: Regular disc rotating sound. Poor reception due to atmospheric conditions. Image disturbance during search. Periodic interruptions to the reception due to satellite broadcasting breaks.
Troubleshooting Guide General Issues Operation Page Cannot operate the TV or Set Top Box with the unit’s remote control. Change the manufacturer code on the remote control. 68 Select TV or Set Top Box mode on the remote control. 68 Cannot operate the DVD. Press [DRIVE SELECT] to select the DVD drive when operating DVDs or CDs. –Make sure the TV is on the correct channel or input mode. 7 Cannot operate the VHS. Press [DRIVE SELECT] to select the VHS drive when operating VHS cassettes.
EZ Sync Check the HDMI cable connection. Check that “HDMI” is displayed on the front display when the power for the main unit is set to “On”. Make sure that “EZ Sync” is set to “On”. Check the “HDAVI Control” settings on the connected device. If the connection for the equipment connected with an HDMI cable was changed, or if there was a power failure or the plug was removed from the household AC outlet, “HDAVI Control” may not work. In this case, perform the following operations. 1.
Troubleshooting Guide Playback Issues Picture (continued) When playing DVD-Video using progressive output, one part of the picture momentarily appears to be doubled up. There is no apparent change in picture quality when making adjustments in the Video menu using the on-screen menus. Playback Issues No sound. Low volume. Distorted sound. Cannot hear the desired audio type. Set “Progressive” in the Video menu to “Off”.
Playback Issues Operation Play fails to start even when [ PLAY] is pressed. Play starts but then stops immediately. Insert the disc correctly with the label facing up. Ensure disc is for the correct DVD-Video region number, and is not defective. The disc is dirty. Page 72 Cover 73 74 to 76 When recording to DVD-RAM using EP (8H) mode, play may not be possible on DVD players that are compatible with DVD-RAM. In this case use EP (6H) mode. 49 You cannot play discs during DV Camcorder recording.
Troubleshooting Guide Playback Issues VHS Picture Page On-screen display indicators do not appear. Select “Automatic” in “Status Messages” in the Setup menu. –Press [STATUS] to show the on-screen display indicators. –The on-screen indicator will not be displayed when this unit is connected to the TV with the DVD PRIORITY output terminals or HDMI AV OUT terminal. The gray background appears during playback. You are playing a blank or poor quality portion of the tape.
Recording Issues DVD Recording/Scheduled Recording/Copying/External Input (continued) Page Recording does not stop even when [ STOP] is pressed. If you start recording immediately after turning on the unit while “Quick Start” is set to “On”, you cannot stop recording for a few seconds. 48 Scheduled recording does not work properly. The scheduled recording program is incorrect or different scheduled recording times overlap. Correct the program. The unit is not on scheduled recording standby.
Troubleshooting Guide Recording Issues VHS Recording Page “ ” flashes when I try to start recording. A video cassette is not inserted. Insert a video cassette with an accidental erasure prevention tab. Cannot record. The accidental erasure prevention tab has been removed. Cover the hole with adhesive tape. 73 Cannot record a TV program. Digital broadcasts cannot be recorded to video tape. − Editing Issues DVD & SD 72, 73 Page The disc is dirty. Wipe with a damp cloth and then wipe dry.
Editing Issues Still Pictures Page Cannot display the Direct Navigator screen. This screen cannot be displayed while recording or copying. − Cannot edit or format a card. Release the card’s protection setting. With some cards, the “Write Protection Off” message sometimes appears on the screen even when protection has been set. 44 The contents of the card cannot be read. The card format is not compatible with the unit. The contents on the card may be damaged.
Frequently Asked Questions Page Setup What equipment is necessary to play multi-channel surround sound? You cannot play back multi-channel sound on this unit without other equipment. You must connect this unit with an HDMI cable or an optical digital audio cable to an amplifier with a built-in Dolby Digital or DTS decoder. Can the headphones and speakers be directly connected to the unit? You cannot directly connect to the unit. Connect through the amplifier, TV, etc.
Page Recording Can I record from a commercially purchased video cassette or DVD? Most commercially sold video cassettes and DVDs are copy protected; therefore, recording is usually not possible. − Can DVD-R, DVD-R DL, DVD-RW (DVD-Video format), +R, +R DL, and +RW recorded on the unit be played on other equipment? You can play these discs on compatible equipment such as DVD players after finalizing the disc on this unit. 46 [+RW] It is not necessary to finalize.
Error Messages On the Unit’s Display H ,F (“ ” stands for a service number.) RC (“ ” stands for a number.) HARD ERR (“HArd” and “Err” are alternately displayed.) Page An error has occurred. The number following “H” or “F” depends on the status of the unit. Check the items below and in the Troubleshooting Guide. If the service number still does not disappear after the check, reset the unit (¼ 78, “To restore the unit if it freezes”).
Page On the TV Authorisation Error. This unit is not authorized to play this recording. You are trying to play the DivX VOD content that was purchased with a different registration code. You cannot play the content on this unit. (DivX) 25 Cannot finish recording completely. The program was copy-protected. − The disc may be full. − There are already 99 recordings ([+R] [+R]DL] [+RW] 49 recordings). − Cannot play. You inserted an incompatible disc (discs recorded in PAL video, etc.).
Product Service 1. Damage requiring service−The unit should be serviced by qualified service personnel if: (a) The AC power supply cord or AC adaptor has been damaged; or (b) Objects or liquids have gotten into the unit; or (c) The unit has been exposed to rain; or (d) The unit does not operate normally or exhibits a marked change in performance; or (e) The unit has been dropped or the cabinet damaged. 2. Servicing−Do not attempt to service the unit beyond that described in these operating instructions.
Specifications AC 120 V, 60 Hz Approx. 30 W Approx. 2.4 W Approx. 14.0 W Recordable discs: DVD-RAM: 2X SPEED (Ver. 2.0) 2−3X SPEED (Ver. 2.1) 2−5X SPEED (Ver. 2.2) DVD-R (SL): 1X SPEED (Ver. 2.0) 1−4X SPEED (Ver. 2.0) 1−8X SPEED (Ver. 2.0) 1−16X SPEED (Ver. 2.1) DVD-R (DL): 2−4X SPEED (Ver. 3.0) 2−8X SPEED (Ver. 3.0) DVD-RW: 1X SPEED (Ver. 1.1) 1−2X SPEED (Ver. 1.1) 2−4X SPEED (Ver. 1.2) 2−6X SPEED (Ver. 1.2) +R (SL): 2.4X SPEED (Ver. 1.0) 2.4−4X SPEED (Ver. 1.1) 2.4−8X SPEED (Ver. 1.2) 2.4−16X SPEED (Ver.
Glossary Bitstream HDMI (High-Definition Multimedia Interface) This is a signal compressed and converted into digital form. It is converted back to a multi-channel audio signal, e.g., 5.1-channel, by a decoder. HDMI is a next-generation digital interface for consumer electronic products. Unlike conventional connections, it transmits uncompressed digital video and audio signals on a single cable. This unit supports high-definition video output (720p, 1080i and 1080p) from HDMI AV OUT terminal.
Limited Warranty Panasonic Consumer Electronics Company, Division of Panasonic Corporation of North America One Panasonic Way Secaucus, New Jersey 07094 Panasonic Puerto Rico, Inc. Ave. 65 de Infantería, Km. 9.5 San Gabriel Industrial Park, Carolina, Puerto Rico 00985 Panasonic DVD Recorder Limited Warranty Limited Warranty Coverage If your product does not work properly because of a defect in materials or workmanship, Panasonic Consumer Electronics Company or Panasonic Puerto Rico, Inc.
Referencia rápida en español (Spanish Quick Reference) Conexión básica Preparación: Encienda la televisión y seleccione el canal 3. Nota: Puede que los terminales en el panel trasero de su TV no sean similares a como se ilustran a continuación. Por favor consulte las etiquetas de los terminales con atención para asegurar conexiones correctas.
TRACKING/V-LOCK , para seleccionar el “Antena” o “Cable”, luego CH ENTER También puede seleccionar canales con los botones numéricos. ENTER para iniciar el ajuste automático de canales/reloj. Confirmar la hora, luego ENTER –HL (horario de verano) muestra el ajuste para el horario de verano. –Huso h. (zona horaria) muestra la diferencia de hora con la hora del Meridiano de Greenwich (GMT). Ajuste automático del reloj Ajuste del reloj automático terminado. 4/4/2007 11:15 AM HL----------Huso h.
Referencia rápida en español (Spanish Quick Reference) Grabación de programas de televisión [RAM] [-R] [-R]DL] [-RW‹V›] [+R] [+R]DL] [+RW] [VHS] Las emisiones digitales no pueden ser grabadas en cintas de video. Preparación: Encienda la televisión y seleccione la entrada de video apropiada a las conexiones de este aparato. [RAM] Si el disco está protegido, libere la protección. [VHS] Asegúrese de que la pestaña contra borradura accidental esté intacta.
Importante: Una vez borrados, los contenidos no podrán recuperarse. Copiar Copiar (VHS ¼ DVD) [VHS] ¼ [RAM] [-R] [-R]DL] [-RW‹V›] [+R] [+R]DL] [+RW] Preparación: Encienda la televisión y seleccione la entrada de video apropiada a las conexiones de este aparato. [RAM] Si el disco está protegido, libere la protección. Inserte un disco con suficiente espacio en blanco disponible. Seleccione el modo de grabación de DVD. Inserte la cinta VHS que contenga el programa a ser copiado.
Index Angle .................................................... 42 Audio attributes............................................ 42 language............................................ 49 receiving, recording ..................... 15, 50 Audio Language Setting ..................... 48 Auto Bilingual Selection ..................... 28 Auto Mode ............................................ 14 Change Thumbnail .............................. 36 Channel adding, deleting .................................