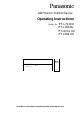
Panasonic LCD Projector! Cömmet'Cial Use Operating Instructions Model No. PT-L711XU PT-L701XU PT=L511 XU PT-L501 XU oco .............. OO' V5 l<9vCeSh.‘e • ff i 1 V'- .. Read Hiese inslructions completely betöre operating this unit.
Dear Panasonic Custom er: This instruction booklet provides all the necessary operating information that you might require. We hope it will help you to get the most performance out of your new product, and that you will be pleased with your Panasonic LCD projector. The serial number of your product may be found on its back. You should note it in the space provided below and retain this booklet in case service is required.
CAUTION: This equipment is equipped with a three-pin grounding-type power plug. Do not remove the grounding pin on the power plug. This plug will only fit a grounding-type power outlet. This is a safety feature. If you are unable to insert the plug into the outlet, contact an electrician. Do not defeat the purpose of the grounding plug. Ic Do not remove WARNING: This equipment has been tested and found to comply with the limits for a Class A digital device, pursuant to Part 15 of the FCC Rules.
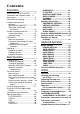
Contents Preparation______________ IMPORTANT SAFETY NOTICE............2 Precautions with regard to safety ....5 Accessories........................................... 8 Precautions on handling........................9 Location and function of each part..........................................11 Adjusting the angle of tilt..................12 Storing the card remote control unit....................................15 Using the remote control unit................ 16 Inserting the battery......................
Precautions w ith regard to safety WARNING If a problem occurs (such as no image or no sound) or if you notice smoke or a strange smell coming from the projector, turn off the power and disconnect the power cord from the wall outlet. • Do not continue to use the projector in such cases, otherwise fire or electric shocks could result. • Check that no more smoke is coming out. and then contact an Authorised Service Center for repairs.
Do not do anything that might damage the power cord or the power cord plug. • Do not damage the power cord, make any modifications to it, place it near any hot objects, bend it excessively, twist it, pull it, place heavy objects on top of it or wrap it into a bundle. • If the power cord is used while damaged, electric shocks, short-circuits or fire may result. • Ask an Authorised Service Center to carry out any repairs to the power cord that might be necessary.
Caution Do not set up the projector in humid or dusty places or in places where the projector may come into contact with smoke or steam. • Using the projector under such conditions may result in fire or electric shocks. When disconnecting the power cord, hold the plug, not the cord. • If the power cord itself is pulled, the cord will become damaged, and fire, short-circuits or serious electric shocks may result. Always disconnect all cables before moving the projector.
Ask an Authorised Service Center to clean inside the projector at least once a year. • If dust is left to build up inside the projector without being cleaned out, it can result in fire or problems with operation. • It is a good idea to clean the inside of the projector before the season for humid weather arrives. Ask your nearest Authorised Service Center to clean the projector when required. Please discuss with the Authorised Service Center regarding cleaning costs.
Precautions on handling Cautions regarding transportation Be sure to attach the lens cover before transporting the projector. The projection lens is extremely susceptible to vibration and shocks. When carrying the projector, use the accessory carrying bag. Cautions regarding setting-up Observe the following at all times when setting up the projector. Avoid setting up in places which are subject to vibration or shocks.
Before carrying out cleaning and maintenance, be sure to disconnect the power cord plug from the wall outlet. Wipe the cabinet with a soft, dry cloth. If the cabinet is particularly dirty, soak the cloth in water with a small amount of neutral detergent in it, squeeze the doth very well, and then wipe the cabinet. After cleaning, wipe the cabinet dry with a dry cloth. If using a chemically-treated cloth, read the instructions supplied with the cloth before use.
Location and function of each part c .9 cc ca Q. 0) ©Stereo speakers d)Air inlet port Do not cover this port. (3)Leg adjuster button (pages 12 and 23) This button is used to unlock the front adjustable leg. Press to adjust the angle of tilt of the projector. ©Focus ring (pages 22 and 23) ® Lens cover CD Projection lens ©Zoom knob (page 23) ©Power input socket (AC IN) (page 22) The accessory power cord is connected here. Do not use any power cord other than the accessory power cord.
® Remote control signal receptor (page 16) (DLamp unit holder (page 43) d)Air outlet You can turn the knob in the center of the air outlet to change the direction of air flow before turning on the power. (D Front adjustable leg (page 23, refer to illustration below) CAUTION The air outlet will be hot during use and immediately after use. • Burns may result if you touch the air outlet while it is hot.
(P C2) (4) (5) (D (6) C o @ (0 re Q. "o°o|05)QokiiiiD oKitote i 0) 5i 1 0SERIAL connector (pages 18, 19 and 32) This connector is used to connect a personal computer to the projector in order to externally control the projector. (RS-232C compatible) ® AUDIO IN L-R (for VIDEO/SVIDEO) jacks (page 18) Only one system is provided, so connect the appropriate connector when using VIDEO or S-VIDEO.
©RGB INPUT indicator (page 24) This indicator shows whether a signal is being input to the RGB input connectors (RGB 1 IN/RGB2 IN). When an input signal is detected, the indicator illunninates. (©LAMP indicator (page 40) This indicator illuminates when it is time to replace the lamp unit. It flashes if a circuit abnormality is detected. (©TEMP indicator (page 40) This indicator illuminates if an abnormally high temperature is detected inside the projector.
projector will be automatically detected and adjusted in order to correct any keystone distortion. ®MENU button (pages 25 and 26) This button is used to display menu screens. When a menu screen is being displayed, it can be used to return to a previous screen or to clear the screen. ® ENTER button (page 26) This button is used to accept and to activate items selected in the on-screen menus.
Using the rem ote control unit Inserting the battery Operating range Insert the lithium battery which is supplied with the remote control unit, making sure that the polarities are correct. If the remote control unit is held so that it is facing directly in front of the front or rear remote control signal receptors, the operating range is within approximately 7 m (23') from the surfaces of the receptors.
Connections c Notes on connections • Read the instruction manual for each system component carefully before connecting it. • Turn off the power supply for all components before making any connections. • If the cables necessary for connecting a component to the system are not included with the component or available as an option, you may need to fashion a cable to suit the component concerned.
Example of connecting with video equipments Computer for Audio system D-sub 15 (male) - BNC5 (female) adapter cable (sold separately) Video deck Laser disc player NOTE: • Only one audio system circuit is available for the AUDIO IN L-R jacks for S-VIDEOA/IDEO signals, so if you wish to change the audio input source, you will need to remove and insert the appropriate plugs.
Example of connecting with computers Computer Computer c _o '•¡3 CD CD Q. 0> Computer for control use (male) Audio system NOTE: • If the MAIN POWER switch for the projector is turned off, it’s better to shut down the computer also. • Refer to the list of compatible signals on page 50 for the types of RGB signals which can be input to the projector by connecting a computer.
Setting-up Projection methods The projector can be set up so that any one of the following four projection methods are used. Select whichever projection method matches the setting up method. (The projection method can be set from the Option menu. Refer to page 37 for details.) DESK/CEILING DESK FRONT CEILING —--'vii A (Factory default setting) FRONT/REAR REAR A A fl-'——j A NOTE: • You will need to purchase the separate ceiling bracket (ET-PK701) when using the ceiling installation method.
Projection distances Screen size (4:3) Projection distance (L) c o Height position (Q m Q. 0> Diagonal length Height (SH) 0.76 m(30") 0.46 m(1 '61 0.61 m(2') 1.15m(3'91 0.05 m(1-13/161 1.01 m(40") 0.61 m(2') 0.81 m(2'81 1.18 m(3'10l 1.51 m(4'111 0.06 m(2-13/321 1.27m(501 0.76 m(2'61 1.02m(3'41 1.49 m(4'10l 1.90 m(6'21 0.08 m(31 1.52 m(60") 0.91 m(3') 1.22 m(4') 1.80 m{5'101 2.29 m(7'61 0.09 m(3-19/321 1.77 m{701 1.07 m(3'61 1.42 m(4'81 2.12 m(6'11l 2.68 m(8'9') 0.
Starting to use Turning on the power ®Remove the lens cover. (D Connect the accessory power cord to a 100 V-240 V AC (50 Hz/60 Hz) power supply. (3) Press the MAIN POWER switch to the “|” side to turn on the power. The POWER button on the projector will illuminate red. You can check whether a signal is being input or not by checking the status of the RGB INPUT indicator. Refer to page 24, (4) Press the POWER button on the projector or remote control unit.
(9) While pressing the adjuster button, adjust the forwardA>ack angle of tilt of the projector. (DWait until the POWER button on the projector illuminates red (until the cooling fan stops). Never turn off the MAIN POWER switch, disconnect the power cord or shut off the mains power supply until the cooling fan stops. (D Press the MAIN POWER switch to the “O” side to turn off the power.
About the RGB INPUT monitor The RGB input monitor can be used to check whether an RGBA^PbPr signal is being input. Refer to the table below for details. Power supply status RGB INPUT monitor status Illuminated Switched off Standby On (projecting) A signal is being input to either the RGB1 IN or RGB2 IN connector. A signal is being input to the connector selected using the input select buttons. No signal is being input to either the RGB1 IN or RGB2 IN connector.
On-screen m enus Menu screens The various settings and adjustments for this projector can be carried out by selecting the operations from on-screen menus. The general arrangement of these menus is shown below. MAIN MENU nENU O k e y s t o n e im U R E li^iiPOS I T I O N W I N D Q W I N D E X S H U T TE R - A U D I O ___ l?VILANGUAfiE H ^OPTION Keystone correction (page 29) PICTURE menu (page 30) When an RGBA^PbPr signal is being input ^ S E L G T ENI£0E N T E R c _o '•¡3 (0 a> Q.
Menu operation guide 0 Press the MENU button. The MAIN MENU screen will be displayed. MENU K E IIEI s I 1^1-1 p O tdi 1 N s w A L 0 S Y C S D H U U D A N P T E L S T I E T I G X C T U T X T o u 0 N E R E X O N w INDOW X 'K E o N T (ENTERlE N T E R ) Press the A or T arrow buttons to select an item. Selected items will be displayed in yellow.
Returning a setting to the factory default If you press the STD (standard) button on the remote control unit, you can return settings to the factory default settings. However, the operation of this function varies depending on which screen is being displayed. • When a menu screen is being displayed P I C T U R E S COLOR ВRIGHT C O N T R A S T S H A R P N E S S U l - В A L W - В A S I G N A L Only the item displayed will be returned to the factory default setting, and the bar scale will appear green.
Using the D.ZOOM (digital zoom ) function This function lets you enlarge a single section of the picture. Furthermore, the spot display mode which is used to select the section which is to be enlarged can also be used when making presentations. 0 Press a D.ZOOM +/- button. The projector will change to spot display mode. ) Use the A, ▼, ◄ and ► buttons to move the spot to the section which you would like to enlarge, and then press the ENTER button.
Correcting keystone distortion Keystone distortion is corrected autonnatically when the projector’s automatic setup function is used, but this correction will not apply if the screen itself is tilted. In such cases, you can correct the keystone distortion manually with the following procedure. ©Select “KEYSTONE” from the MAIN MENU screen, and then press the ENTER button. ©Press the or ^ buttons to correct the keystone distortion. Picture condition Operation c Press the ► button. o to 0> Q. O .
Adjusting the picture Use the A and ▼ buttons on the projector or remote control unit to select an item, and then use the ◄ and ► buttons to change the setting for that item. For items with bar scales, press the ENTER button or the ◄ or ► buttons to display the adjustment screen, and then use the ◄ or ► buttons to make the adjustment.
TV SYSTEM S1 SIGNAL (S-VIDEOA/IDEO only) This setting is only valid for SVIDEOA/IDEO signals and YPbPr signals in NTSC (480i), 480p and PAL (625i) format. I T ^ ^ - S Y S T E n 4 s M N T S C q . " 4 3 ^ l V rr PAL n V n P A L - n n y n P A L - N n V SEC ftTT AUT01 The projector automatically distinguishes between NTSC/NTSC 4.43/PAL/SECAM signals. AUT02 The projector automatically distinguishes between NTSC/PALM/PAL-N signals. This should normally be set to “AUT01” or “AUT02”.
NOTE; • This projector is equipped with an aspect ratio selection function. However, if a mode which does not match the aspect ratio of the input signal is selected, it may affect the quality of viewing of the original picture. Keep this in mind when selecting the aspect ratio.
Adjusting the position DOT CLOCK Use the A and ▼ buttons on the projector or remote control unit to select an item, then press the ENTER button or the ◄ or ► buttons to display the adjustment screen, and then use the ◄ or ► buttons to make the adjustment. (RGB only) Periodic striped pattern interference (noise) may occur when a striped pattern such as the one below is projected. If this happens, use the ◄ and ► buttons to adjust so that any such noise is minimised.
Using the INDEX W INDOW function This function lets you store a picture which is being projected into memory, so that you can display a still picture and a moving picture on the screen. 0 Press the INDEX WINDOW button. You can also select INDEX WINDOW from the MAIN MENU screen and then press the ENTER button, NOTE: • The screen aspect ratio will become 2:3, and the ratio of the height of the picture to its width will become 1.5 times the normal ratio. (2) Use the A and ▼ buttons to set the screen height.
Using the shutter function The shutter function can be used to momentarily turn off the picture and sound from the projector when the projector is not being used for short periods of time, such as during breaks in meetings or when carrying out preparation. The projector uses less power in shutter mode than it does in normal projection mode. (T) Press the SHUTTER button on the remote control unit. You can also select SHUTTER from the MAIN MENU screen and then press the ENTER button.
Option settings AUTO Y PB PR Use the A and T buttons on the projector or remote control unit to select an item, then press the ◄ or ► buttons to change the setting.
BACK COLOR LAMP POWER BACK COL O'W I L A n P P O U Z1 a E~g~ s This setting changes the lamp brightness. When set to “LOW”, the luminance of the lamp is reduced, but the projector uses less power, and the operating noise is also reduced. This can help to extend the lamp’s operating life. If using the projector in small rooms where high luminance is not required, it is recommended that you set the LAMP POWER to "LOW”.
Using the SERIAL connector The serial connector which is on the side connector panel of the projector conforms to the RS-232C interface specification, so that the projector can be controlled by a personal computer which is connected to this connector.
Control commands The commands which the personal computer can use to control the projector are shown in the following table. Command Control Contents Remarks In standby mode, all commands other than the PON command are ignored. • The PON command is ignored during lamp ON control. • If a PON command is received while the cooling fan is operating after the lamp has switched off, the lamp is not turned back on again straight away, in order to protect the lamp.
Indicators There are two indicators on the control panel of the projector which give information about the operating condition of the projector. These indicators illuminate or flash to warn you about problems that have occurred inside the projector, so if you notice that one of the indicators is on, turn off the power and check the table below for the cause of the problem. TEMP indicator Indicator display Illuminated (red) {Lamp unit on) The internal projector temperature is too high.
LAMP indicator Indicator display Illuminated (red) It is nearly time to Problem replace the lamp unit. Flashing (red) An abnormality has been detected in the lamp circuit. Possible cause • Does “REPLACE LAMP” appear on the screen after the projector is turned on? • The power may have been turned on immediately after it was turned off. • There may be an abnormality in the lamp circuit. • Wait for a while until the lamp unit cools down before turning the power back on again.
Cleaning and replacing the air filter If the air filter becomes clogged with dust, the internal temperature of the projector will rise, the TEMP indicator will flash and the projector power will turn off. The air filter should be cleaned every 100 hours of use, depending on the location where the projector is being used. Cleaning procedure 0Turn off the MAIN POWER switch and disconnect the power cord plug from the wall outlet.
Replacing the lam p unit Caution The lamp unit should only be replaced by a qualified technician. The lamp cover will be hot after use. • Bums may result if you touch the lamp cover while it is hot. Notes on replacing the lamp unit • Take extreme care when handling the removed lamp unit, as it contains gas under high pressure and can easily become damaged if it is struck against hard objects or dropped. • The old lamp unit may shatter if it is handled roughly after removal.
Screen display once cumulative usage time exceeds 1800 hours If you continue to use the lamp unit after 1800 hours of total usage time have passed (when LAMP POWER has been set to “STD”), the LAMP indicator will illuminate, even when the projector is in standby mode. The on-screen display shown at right will appear as a reminder to replace the lamp unit 10 minutes before the power is due to turn off automatically.
(Dinstall the lamp unit cover, and then use a Phillips screwdriver to securely tighten the lamp unit cover fixing screws. ©Press the ENTER button to display the OPTION screen, and then use the A and ▼ buttons to select LAMP TIME. OPTION NOTE: • Be sure to install the lamp unit and the lamp unit cover securely. If they are not securely installed, it may cause the protection circuit to operate so that the power cannot be turned on.
Before asking for service Before asking for service, check the following points. Problem Power does not turn on. No picture appears. The picture is fuzzy. COLOR is too light or TINT is poor No sound can be heard. 46 Possible cause • The power cord may not be connected. • The MAIN POWER switch is turned off. • The main power supply is not being supplied to the wall outlet. • TEMP indicator is illuminated or flashing. (Refer to page 40.) • LAMP indicator is illuminated or flashing, {Refer to page 40.
Problem Remote control unit does not operate. The picture does not display correctly. Picture from computer does not appear Possible cause • The battery may be weak. • The battery may not be inserted correctly. (Refer to page 16.) • The remote control signal receptor on the projector may be obstructed. {Refer to page 16.) • The remote control unit may be out of the operation range. {Refer to page 16.) • The correct input signal may not be selected. (Refer to page 22.
Specifications Power supply; Power consumption: 100 V-240 V 50 Hz/60 Hz 240 W (During standby (when fan is stopped): Approx. 5 W-10 W) 2.8 A-1.0 A Amps: LCD panel: 0.9 type (22.
Connectors RGB IN; During YPbPr input: Y: Pb,Pr : During RGB input R.G.B.: G.SYNC: HD/SYNC: Dual-line D-SUB HD 15-pin (female) 1.0V[p-p], 75ii 0.7 V [p-p], 75 Q 0.7 V [p-p], 75 a 1.0 V [p-p], 75 a TTL high impedance, automatic plus/minus polarity compatible VD: TTL high impedance, automatic plus/minus polarity compatible Double-line 0.5 V [rms] M3 jack (Stereo AUDIO IN {for RGB): MINI) VIDEO IN; Single-line, RCA pin jack 1.0 V [p-p], 75 n S-VIDEO IN: Single-line, Mini DIN 4-pin Y 1.0 V [p-p], C 0.
Appendix List of compatible signals Mode Display resolution (dots)*’ NTSC/M-NTSC/PAL-M 768 X 480i PAL/PAL-N/SECAM 768 X 576i 1 920 X 1 080i HDTV 1 280 X 720 720P 640 X 400 VGA400 640 X 400 640 X 480 VGA480 640 X 480 640 X 480 640 X 480 640 X 480 SVGA 800 X 600 800 X 600 800 X 600 800 X 600 800 X 600 800 X 600 832 X 624 MAC 16 XGA 1 024 X 768 1 024 X 768 1 024 X 768 1 024 X 768 1 024 X 768 1 024 X 768i 1 024 X 768 1 024 X 768 1 120 X760 MXGA 1 152x864 1 152 X 864 1 152 X 864 MAC21 1 152X 870 SXGA 1 280 X 1
*1 The “i" appearing after the resolution indicates an interlaced signal. *2 The following symbols are used to indicate picture quality. AA Maximum picture quality can be obtained. A Signals are converted by the image processing circuit before picture is projected B Some loss of data occurs to make projection easier, C Picture cannot be projected. *3 Signals with “OK” in the Resizing column can be set using the RESIZING command in the PICTURE menu. (Refer to page 32.
Tradem ark acknow ledgem ents • VGA and XGA are trademarks of International Business Machines Corporation. • Macintosh is a registered trademark of Apple Computer, Inc. • S-VGA is a registered trademark of the Video Electronics Standards Association. • Windows is a registered trademark of Microsoft Corporation. All other trademarks are the property of the various trademark owners.
NOTES IM PORTANTES CONCERNANT LA SÉCURITÉ AVERTISSEMENT: POUR REDUIRE LES RISQUES DE FEU OU DE CHOC ÉLECTRIQUE, NE PAS EXPOSER CE PRODUIT À L’EAU OU À L’HUMIDITÉ Alimentation: Ce projecteur LCD est conçu pour fonctionner sur secteur de 100 V - 240 V, 50 Hz/60 Hz seulement. ATTENTION: Le cordon d’alimentation secteur fourni avec le projecteur peut être utilisé uniquement pour une alimentation électrique de 125 V, 10 A maximum.
ATTENTION: Cet appareil est équipé d’une fiche de courant à trois broches avec mise à la terre. Ne pas retirer la broche de mise à la masse de la fiche. Ne pas retirer Cette fiche ne pourra être utilisée que dans une prise avec mise à la terre. Ceci est une précaution sécuritaire. S’il est impossible d’insérer la fiche dans la prise, s’adresser à un électricien. Ne pas annuler la protection de la fiche à mise à la terre.
Précautions concernant la sécurité AVERTISSEMENT En cas de problème (pas d’image ou de son), ou si le projecteur dégage de la fumée ou une odeur étrange, éteindre l’appareil et débrancher immédiatement la fiche d’alimentation de la prise de courant. • Ne pas continuer d’utiliser le projecteur dans ces cas, autrement cela peut entraîner un incendie ou des chocs électriques.
Nettoyer la fiche du cordon d’alimentation régulièrement afin d’éviter toute accumulation de poussière. • Si de la poussière s’accumule sur la fiche du cordon d’alimentation, l’humidité peut endommager l’isolant et entraîner un incendie. Débrancher le cordon d’alimentation de la prise de courant et l’essuyer avec un chiffon sec. • Si le projecteur ne sera pas utilisé pendant une période prolongée, débrancher le cordon d’alimentation de la prise de courant.
Ne pas laisser les bornes + et - de la pile entrer en contact avec des objets métalliques tels que des colliers ou des épingles à cheveux. • Cela peut faire que la pile fuit, surchauffe, éclate ou prenne feu. • Garder la pile dans un sachet en plastique et la maintenir éloignée des objets métalliques. Isoler la pile à l’aide de ruban ou autre avant de la mettre au rebut. • Si la pile entre en contact avec des objets métalliques ou d’autres piles, elle peut prendre feu ou éclater.
Ne pas regarder directement dans la lentille pendant que le projecteur fonctionne. • Une lumière intense est émise par la lentille du projecteur. Si l’on regarde directement dans cette lumière, elle risque de causer des blessures et de graves lésions aux yeux. Ne pas placer ses mains ou autres objets près de la sortie d’air. • De l’air chaud sort par l’ouverture de sortie d’air.
Précautions concernant la manipulation Avertissements concernant la manipulation S’assurer d’attacher le capuchon d’objectif avant de transporter le projecteur. La lentille de projection est extrêmement sensible à la vibration et aux chocs. Utiliser la sacoche de transport pour transporter le projecteur. Avertissements concernant rinstallation Toujours observer les points suivants lors de rinstallation du projecteur. Éviter de l’instalier dans ies endroits sujets à des vibrations ou à des chocs.
Avant de faire le nettoyage et l’entretien, s’assurer de débrancher la fiche du cordon d’alimentation de la prise de courant. Essuyer le boîtier avec un tissu doux et sec. Si le boîtier est très sale, imbiber le chiffon dans de l’eau avec un peu de détergent neutre, bien essorer le chiffon, puis essuyer le boîtier. Après le nettoyage, sécher le boîtier à l’aide d’un chiffon sec. Si un chiffon traité chimiquement est utilisé, lire les directives fournies avec le chiffon avant de l’utiliser.
Rem placem ent du bloc de lam pe Attention Le bloc de lampe ne devrait être remplacé que par un technicien qualifié. Le couvercle du bloc de lampe sera chaud après l’utilisation. • On risque de se brûler si le couvercle du bloc de lampe est touché pendant qu’il est chaud. Notes sur le remplacement du bloc de lampe • Faire très attention en manipulant le bloc de lampe retiré, car il contient du gaz sous haute pression et peut facilement s’endommager s’il est cogné contre des objets durs ou s’il tombe.
Affichage à récran lorsque l’utilisation totale dépasse 1800 heures Si l’on continue d’uliliser le bloc de lampe après 1800 heures REMPLACER LAMPE d’utilisation totale (lorsque PUIS LAMPE est réglé à “STD"), l’indicateur LAMP (lampe) s’allumera, même lorsque le projecteur est en mode d’attente. L’affichage à l’écran indiqué à droite apparaîtra pour rappeler de remplacer le bloc de lampe 10 minutes avant que l’alimentation s’éteignent automatiquement.
(DInstaller le couvercle du bloc de lampe, puis utiliser un tournevis Philiips pour resserrer fermement les vis de fixation du couvercle du bloc de lampe. REMARQUE: • S’assurer de bien installer le bloc de lampe et le couvercle du bloc de lampe. S’ils ne sont pas bien installés, cela peut déclencher le circuit de protection et le projecteur ne pourra pas être allumé. (D Insérer la fiche du cordon d'alimentation dans ia prise de courant, puis appuyer sur l’interrupteur d’aiimentation principaie (MAiN POWER).
These Operating Instructions are printed on recycled paper. Panasonic Professional/lndustrial Video Panasonic Broadcast & Television Systems Company Division of Matsushita Electric Corporation of America One Panasonic Way 4E-7 Secaucus, NJ 07094 (201) 392-4443 3330 Cahuenga Bivd West Los Angels. CA 90068 (323) 436-3500 Technical Support: (800) 524-1448 (800) 526-6610 FAX: (201)392-6514 E-Mail: pbtssupport@panasonic.com Panasonic Canada Inc.