
Owner's manual
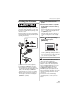

Connecting to other equipment
116
VQT0X92
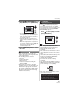
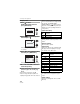
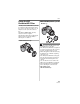
w Single picture
1 Press
to select
[SINGLE PICTURE] and then
press
[MENU/SET].
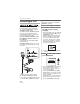
2 Press
/
to select the picture
and then press
.
• The message disappears in about
2 seconds.
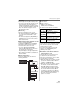
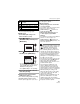
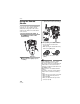
3 Press
to select [PRINT START]
and then press
[MENU/SET].
• Press [MENU/SET] to cancel printing.
4 Disconnect the USB connection
cable after printing.
w Setting date printing, the number of
prints, the paper size and the page
layout
Select and set each item in step
3.
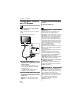
• Items not supported by the printer are
displayed in gray and cannot be selected.
• When you want to print pictures in a paper
size or a layout which is not supported by
the camera, set [PAPER SIZE] or
[PAGE LAYOUT] to [ ] and then set the
paper size or the layout on the printer. (For
details, refer to the operating instructions
of the printer.)
• [PRINT WITH DATE]
• If the printer does not support date
printing, the date cannot be printed on the
picture.
• [NUM. OF PRINTS]
Set the number of prints.
• [PAPER SIZE]
(Paper sizes that can be set with this unit)
The paper sizes are displayed on pages
1/2 and 2/2. Press to select.
_These items cannot be displayed when
the printer does not support the paper
sizes.
•[PAGELAYOUT]
(Layouts for printing that can be set with
this unit)
SELECT SET
DPOF PICTURE
SINGLE PICTURE
PictBridge
MENU
SET
MENU
PLEASE SELECT
THE PICTURE TO PRINT
PictBridge
1/3
100
_
0001
EXIT
SELECT
PRINT
MENU
1秒
OFF
SINGLE PICTURE
NUM. OF PRINTS
1
PRINT WITH DATE
PAPER SIZE
PAGE LAYOUT
SELECTCANCEL EXIT
MENU
PRINT START
SET
MENU
Settings on the printer are
prioritized.
[OFF] Date is not printed.
[ON] Date is printed.
1/2
Settings on the printer are
prioritized.
[L/3.5
SM
5
S
]
89 mm
M
127 mm
[2L/5
SM
7
S
] 127 mmM178 mm
[POSTCARD] 100 mm
M148 mm
[A4] 210 mm
M297 mm
2/2
_
[CARD SIZE]
54 mm
M
85.6 mm
[10
M
15cm] 100 mmM150 mm
[4
SM
6
S
] 101.6 mmM152.4 mm
[8
SM
10
S
] 203.2 mmM254 mm
[LETTER] 216 mm
M279.4 mm