VQT1C27ENG.book 1 ページ 2006年12月28日 木曜日 午前11時53分 Operating Instructions Digital Camera Model No. DMC-FX12 DMC-FX10 PP Before use, please read these instructions completely. Web Site: http://www.panasonic-europe.
VQT1C27ENG.book 2 ページ 2006年12月28日 木曜日 午前11時53分 Before Use Before Use Dear Customer, We would like to take this opportunity to thank you for purchasing this Panasonic Digital Camera. Please read these Operating Instructions carefully and keep them handy for future reference.
VQT1C27ENG.book 3 ページ 2006年12月28日 木曜日 午前11時53分 Before Use Caution for AC mains lead For your safety, please read the following text carefully. This appliance is supplied with a moulded three pin mains plug for your safety and convenience. A 5-ampere fuse is fitted in this plug. Should the fuse need to be replaced please ensure that the replacement fuse has a rating of 5-ampere and that it is approved by ASTA or BSI to BS1362. Check for the ASTA mark Ï or the BSI mark Ì on the body of the fuse.
VQT1C27ENG.book 4 ページ 2006年12月28日 木曜日 午前11時53分 Before Use Information on Disposal for Users of Waste Electrical & Electronic Equipment (private households) This symbol on the products and/or accompanying documents means that used electrical and electronic products should not be mixed with general household waste. For proper treatment, recovery and recycling, please take these products to designated collection points, where they will be accepted on a free of charge basis.
VQT1C27ENG.book 5 ページ 2006年12月28日 木曜日 午前11時53分 Before Use ∫ About the battery charger CAUTION! • DO NOT INSTALL OR PLACE THIS UNIT IN A BOOKCASE, BUILT-IN CABINET OR IN ANOTHER CONFINED SPACE. ENSURE THE UNIT IS WELL VENTILATED. TO PREVENT RISK OF ELECTRIC SHOCK OR FIRE HAZARD DUE TO OVERHEATING, ENSURE THAT CURTAINS AND ANY OTHER MATERIALS DO NOT OBSTRUCT THE VENTILATION VENTS. • DO NOT OBSTRUCT THE UNIT’S VENTILATION OPENINGS WITH NEWSPAPERS, TABLECLOTHS, CURTAINS, AND SIMILAR ITEMS.
VQT1C27ENG.book 6 ページ 2006年12月28日 Contents Before Use Information for Your Safety....................... 2 Preparation Accessories .............................................. 8 Names of the Components ....................... 9 Quick Guide ............................................ 10 Charging the Battery with the Charger ... 11 About the Battery (charging/number of recordable pictures) ............................ 12 Inserting and Removing the Battery/the Card (optional) ............................
VQT1C27ENG.book 7 ページ 2006年12月28日 • [AF ASSIST LAMP] Focusing in low light conditions becomes easier ................................ 63 • [COL.MODE] Setting a colour effect and picture quality for the recorded picture ......... 64 • [CLOCK SET] Set the display order for the date and time............................................ 64 Advanced (Playback) Displaying Multiple Screens (Multi Playback)................................... 65 Displaying Pictures by Recording Date (Calendar Playback)............
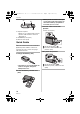
VQT1C27ENG.book 8 ページ 2006年12月28日 木曜日 午前11時53分 Preparation Preparation Accessories Check that all the accessories are included before using the camera.
VQT1C27ENG.
VQT1C27ENG.book 10 ページ 2006年12月28日 木曜日 午前11時53分 Preparation 21 • When you do not use the card, you can record or play back pictures on the built-in memory. (P14) Refer to P14 when you use a card. 22 23 21 Tripod receptacle • When you use a tripod, make sure the tripod is stable when the camera is attached to it. 22 Card/Battery door (P13) 23 Release lever (P13) 3 Turn the camera on to take pictures. • Set the clock.
VQT1C27ENG.book 11 ページ 2006年12月28日 木曜日 午前11時53分 Preparation Charging the Battery with the Charger 3 Detach the battery after charging is completed. The battery is not charged when the camera is shipped. Charge the battery before use. 1 Attach the battery with attention to the direction of the battery. 2 Connect the AC mains lead. • After charging is completed, be sure to disconnect the AC mains lead from the electrical outlet.
VQT1C27ENG.book 12 ページ 2006年12月28日 木曜日 午前11時53分 Preparation About the Battery (charging/number of recordable pictures) ∫ The battery life The number of recordable pictures (By CIPA standard in normal picture mode [ ]) Approx. 350 pictures (Approx. 175 min) Number of (DMC-FX12)/ recordable pictures Approx. 370 pictures (Approx. 185 min) (DMC-FX10) Recording conditions by CIPA standard • Temperature: 23 °C/ Humidity: 50% when LCD monitor is on.¢ • Using a Panasonic SD Memory Card (16 MB).
VQT1C27ENG.book 13 ページ 2006年12月28日 木曜日 午前11時53分 Preparation Inserting and Removing the Battery/ the Card (optional) • Check that this unit is turned off. • Prepare a card. (optional) • You can record or play back pictures on the built-in memory when you are not using a card. (P14) 1 Slide the release lever in the direction of the arrow and open the card/battery door. • Always use genuine Panasonic batteries (CGA-S005E). • If you use other batteries, we cannot guarantee the quality of this product.
VQT1C27ENG.book 14 ページ 2006年12月28日 木曜日 午前11時53分 Preparation About the Built-in Memory/the Card (optional) The built-in memory can be used as a temporary storage device when the card being used becomes full. ∫ Built-in Memory [ ] You can record or play back pictures with the built-in memory. (The built-in memory cannot be used when a card is inserted.) • The built-in memory capacity is about 27 MB. • Picture size is fixed to QVGA (320k240 pixels) when recording motion pictures to the built-in memory.
VQT1C27ENG.book 15 ページ 2006年12月28日 木曜日 午前11時53分 Preparation Setting Date/Time (Clock Set) 3 Press [MENU/SET] to set. ∫ Initial setting The clock is not set so the following screen appears when you turn the camera on. OFF ON PLEASE SET THE CLOCK CLOCK SET MENU A: [MENU/SET] button B: Cursor buttons 1 Press [MENU/SET]. 2 Press 3/4/2/1 to select the date and time. : : CLOCK SET • Turn the camera off after setting the clock.
VQT1C27ENG.book 16 ページ 2006年12月28日 木曜日 午前11時53分 Preparation About the Mode Dial If you turn on this unit and then rotate the mode dial, you can not only switch between recording and playback but also switch to macro mode to take a close-up picture of a subject or to a scene mode that matches your recording purpose. ∫ Switching the mode dial ∫ Basic : Normal picture mode (P22) Use this mode for normal recording. : Simple mode (P24) This mode is recommended for beginners.
VQT1C27ENG.book 17 ページ 2006年12月28日 木曜日 午前11時53分 Preparation Setting the Menu ∫ Displaying the menu screens 1 Press 3/4 to select the menu item. Press [MENU/SET]. 1/ 3 REC e.g.: The first page of the total 3 pages is displayed. W.BALANCE AWB SENSITIVITY AUTO ASPECT RATIO PICT.SIZE 1/3 REC W.BALANCE AWB SENSITIVITY AUTO QUALITY SELECT MENU EXIT ASPECT RATIO PICT.
VQT1C27ENG.book 18 ページ 2006年12月28日 木曜日 午前11時53分 Preparation ∫ Closing the menu screen Press [MENU/SET]. • When the mode dial is set to [ ]/ [ ]/[ ]/[ ]/[ ], you can also close the menu screen by pressing the shutter button halfway. ∫ Switching to the [SETUP] menu 1 Press 2 on a menu screen. 1/ 3 REC W.BALANCE AWB SENSITIVITY AUTO ASPECT RATIO PICT.SIZE QUALITY SELECT EXIT 1/4 CLOCK SET WORLD TIME MONITOR n0 TRAVEL DATE AUTO REVIEW OFF SELECT 1SEC. EXIT MENU 3 Press 1.
VQT1C27ENG.book 19 ページ 2006年12月28日 木曜日 午前11時53分 Preparation • Power save mode is not activated in the following cases. – When using the AC adaptor (DMW-AC5E; optional) – When connecting to a PC or a printer – When recording or playing back motion pictures – During a slide show (P70) [ECONOMY] (Turning off the LCD monitor automatically.) Press [ SET ] to display the [SETUP] menu and select the item to set.
VQT1C27ENG.book 20 ページ 2006年12月28日 木曜日 午前11時53分 Preparation [VOLUME] Press [ SET ] to display the [SETUP] menu and select the item to set. (P17) The volume of speakers can be adjusted in 7 steps from level 6 to 0. • When you connect the camera to a TV, the volume of the TV speakers does not change. MENU [NO.RESET] Press [ SET ] to display the [SETUP] menu and select the item to set. (P17) Reset the file number of the next recording to 0001.
VQT1C27ENG.book 21 ページ 2006年12月28日 木曜日 午前11時53分 Preparation LCD Monitor Display/ Switching the LCD Monitor Display ∫ Screen display in normal picture mode [ ] (Initial settings) 1 2 3 4 5 6 8 9 10 F2.8 1/30 12 11 – When using the card 7 8 13 • The access indication lights red when pictures are being recorded on the built-in memory (or the card).
VQT1C27ENG.book 22 ページ 2006年12月28日 木曜日 午前11時53分 Basic Basic Taking pictures The camera automatically sets the shutter speed and the aperture value according to the brightness of the subject. OFF 2 Aim the AF area at the point you want to focus on. 3 Press the shutter button halfway to focus. ON 1: Shutter button • The status indicator 3 lights for about 1 second when you turn this unit on 2.
VQT1C27ENG.book 23 ページ 2006年12月28日 木曜日 午前11時53分 Basic • You can switch the flash setting to match the recording. (P35) • When you press the shutter button, the LCD monitor may become bright or dark for a moment however the recorded picture will not be affected. • Be careful not to move the camera when you press the shutter button. • Do not cover the flash or the AF assist lamp with your fingers or other objects. • Do not touch the front of the lens.
VQT1C27ENG.book 24 ページ 2006年12月28日 木曜日 午前11時53分 Basic ∫ Direction detection function Pictures recorded with the camera held vertically are played back vertically (rotated). (Only when [ROTATE DISP.] (P71) is set to [ON]) • Pictures may not be displayed vertically if they were taken with the camera aimed up or down. • Motion pictures taken with the camera held vertically are not displayed vertically.
VQT1C27ENG.book 25 ページ 2006年12月28日 木曜日 午前11時53分 Basic ∫ Settings in Simple mode [PICT.MODE] [ENLARGE] [4qk6q/ 10k15cm] Suitable for enlarging the pictures to be printed to 8qk10q size, letter size etc. Suitable for regular size printing. Suitable for attaching pictures to e-mails or adding pictures to websites. [E-MAIL] [AUTO REVIEW] [OFF] The recorded picture does not automatically appear. [ON] The recorded picture automatically appears on the screen for about 1 second.
VQT1C27ENG.book 26 ページ 2006年12月28日 木曜日 午前11時53分 Basic • You cannot use the following functions. – High angle mode – Exposure compensation – [D.ZOOM] – [BURST] – [COL.MODE] • You cannot set the following items. – [TRAVEL DATE] – [WORLD TIME] ∫ The Backlight Compensation Backlight refers to when light comes from the back of a subject. In this case, the subject, such as a person, will become dark so this function compensates the backlight by brightening the whole of the picture. Press 3.
VQT1C27ENG.book 27 ページ 2006年12月28日 木曜日 午前11時53分 Basic ∫ Picture size and maximum zoom magnification (±: Available, —: Not available) ¢ DMC-FX12 Aspect ratio (P60) Picture size (P61) / Maximum zoom magnification (Tele) Extra optical zoom 3k — 3.6k ± 4.5k ± Maximum zoom magnification (Tele) Extra optical zoom 3k — 4.1k ± (7M) (6M) (5.5M) (5M EZ) (3M EZ) (2M EZ) (1M EZ) / (0.3M EZ) / (2.
VQT1C27ENG.book 28 ページ 2006年12月28日 木曜日 午前11時53分 Basic Using the Digital Zoom Further extending the zoom A maximum of 12k zoom can be achieved with the 3k optical zoom and the 4k digital zoom when [D.ZOOM] is set to [ON] in the [REC] mode menu. However, if a picture size that can use extra optical zoom is selected, a maximum of 18k (DMC-FX12)/ 16.5k (DMC-FX10) zoom can be achieved with the 4.5k (DMC-FX12)/4.1k (DMC-FX10) extra optical zoom and the 4k digital zoom.
VQT1C27ENG.book 29 ページ 2006年12月28日 木曜日 午前11時53分 Basic Checking the Recorded Picture (Review) You can check the recorded pictures while still in [REC] mode. 1 Press 4 [REV]. 4X REVIEW4X 1X 8X DELETE • When you change the magnification or the position to be displayed, the zoom position indication A appears for about 1 second. REVIEW1X EXIT 2 Press 3/4/2/1 to move the position. DELETE • The last recorded picture appears for about 10 seconds.
VQT1C27ENG.book 30 ページ 2006年12月28日 木曜日 午前11時53分 Basic Playing back/Deleting Pictures • In review playback in recording mode and in multi playback (P65), the pictures can only be forwarded or rewound one by one. The picture data on the built-in memory is played back or deleted when a card is not inserted. The picture data on the card is played back or deleted when a card is inserted. (P14) Once deleted, pictures cannot be recovered. Check the pictures one by one and delete unwanted pictures.
VQT1C27ENG.book 31 ページ 2006年12月28日 木曜日 午前11時53分 Basic ∫ To delete [MULTI DELETE]/ [ALL DELETE] 1 Press [ 5 Press 3 to select [YES] and then press [MENU/SET] to set. ] twice. (Screen when selecting [MULTI DELETE]) 2 Press 3/4 to select [MULTI DELETE] or [ALL DELETE] and then press [MENU/SET]. MULTI DELETE ALL DELETE MENU SET MENU YES NO SELECT MULTI/ALL DELETE SELECT MULTI DELETE DELETE THE PICTURES YOU MARKED? CANCEL SET • [MULTI DELETE] > step 3. • [ALL DELETE] > step 5.
VQT1C27ENG.book 32 ページ 2006年12月28日 木曜日 午前11時53分 Advanced (Recording pictures) Advanced (Recording pictures) About the LCD Monitor Changing the information displayed F No display (Recording guide line) G No display ¢1 Histogram In playback mode 100_0001 1/3 1ST DAY 9 months 10 days 10:00 1.DEC. 2007 2 DISPLAY/LCD MODE 3 100_0001 1/3 A LCD monitor (LCD) Press [DISPLAY] to change. F2.8 1/30 • When the menu screen appears, the [DISPLAY] button is not activated.
VQT1C27ENG.book 33 ページ 2006年12月28日 木曜日 午前11時53分 Advanced (Recording pictures) ∫ Recording guide line When you align the subject on the horizontal and vertical guide lines or the cross point of these lines, you can take pictures with well-designed composition by viewing the size, the slope and the balance of the subject. Examples of histogram 100_0001 1/3 F2.8 1/200 ISO100 AWB 10:00 1.DEC. 2007 100_0001 1/3 F2.8 1/100 ISO100 AWB 10:00 1.DEC. 2007 100_0001 1/3 F2.8 1/50 ISO100 AWB 10:00 1.
VQT1C27ENG.book 34 ページ 2006年12月28日 木曜日 午前11時53分 Advanced (Recording pictures) Brightening the LCD Monitor (Power LCD/High angle mode) • If the mode dial is set [ ] and [ ], the Power LCD function only can be used. 1 Press [LCD MODE] for 1 second. DISPLAY/LCD MODE 2 Press 3/4 to select a mode. LCD [ ]: The LCD monitor [POWER LCD] becomes brighter and easier to see even when taking pictures outdoors.
VQT1C27ENG.book 35 ページ 2006年12月28日 木曜日 午前11時53分 Advanced (Recording pictures) ∫ Cancelling Power LCD or High angle mode • If you press and hold [LCD MODE] again for 1 second the screen shown in step 2 is displayed. Select [OFF] to cancel Power LCD mode or High angle mode. • High angle mode is also cancelled if you turn the camera off or power save mode is activated. • The brightness of the pictures displayed on the LCD monitor is adjusted when Power LCD mode or High angle mode is activated.
VQT1C27ENG.book 36 ページ 2006年12月28日 木曜日 午前11時53分 Advanced (Recording pictures) : AUTO/Red-eye reduction¢1 The flash is automatically activated when the recording conditions make it necessary. It is activated once before the actual recording to reduce the red-eye phenomenon (eyes of the subject appearing red in the picture) and then activated again for the actual recording. • Use this when you take pictures of people in low lighting conditions.
VQT1C27ENG.book 37 ページ 2006年12月28日 木曜日 午前11時53分 Advanced (Recording pictures) • The flash setting is memorised even if the camera is turned off. However, the scene mode flash setting is reset to the initial setting when the scene mode is changed. ∫ Available flash range by ISO sensitivity ISO sensitivity (P60) [AUTO] Available flash range Wide 30 cm to 5 m Tele 30 cm to 2.8 m [ISO100] Wide 30 cm to 2 m Tele 30 cm to 1.
VQT1C27ENG.book 38 ページ 2006年12月28日 木曜日 午前11時53分 Advanced (Recording pictures) ∫ Shutter speed for each flash setting Flash setting Shutter speed (Sec.) : AUTO : AUTO/ Red-eye reduction : Forced ON : Forced ON/ Red-eye reduction 1/30 to 1/2000 : Slow sync.
VQT1C27ENG.book 39 ページ 2006年12月28日 木曜日 午前11時53分 Advanced (Recording pictures) Taking Pictures with the Self-timer 1 Press 2 [ ]. 2 Press 3/4 to select a mode. SELFTIMER OFF 10 SEC. 2 SEC. SET SELECT • You can also press 2 [ MENU ] to select. 3 Press [MENU/SET]. • You can also press the shutter button halfway to finish. • The menu screen disappears after about 5 seconds. At this time, the selected item is automatically set.
VQT1C27ENG.book 40 ページ 2006年12月28日 木曜日 午前11時53分 Advanced (Recording pictures) Compensating the Exposure 1 Press 3 [ ] until [EXPOSURE] appears, compensate the exposure with 2/1. EXPOSURE Use this function when you cannot achieve appropriate exposure due to the difference in brightness between the subject and the background. Look at the following examples. Under exposed SELECT EXIT MENU • You can compensate from [j2 EV] to [i2 EV] in steps of [1/3 EV].
VQT1C27ENG.book 41 ページ 2006年12月28日 木曜日 午前11時53分 Advanced (Recording pictures) Optical Image Stabilizer pictures while the demonstration screen is displayed.) Press 1 to exit the demonstration screen. JITTER, SUBJ. MOVE DEMO. This mode detects jitter and compensates for it. CANNOT BE DISPLAYED IN REC MODE EXIT 1 Press and hold the optical image stabilizer button A until [STABILIZER] appears. 2 Press 3/4 to select the stabilizer function mode and then press [MENU/SET].
VQT1C27ENG.book 42 ページ 2006年12月28日 木曜日 午前11時53分 Advanced (Recording pictures) Changing the sensitivity according to the movement of the subject being recorded The camera detects the movement of the subject near the centre of the screen and then sets the optimal ISO sensitivity and shutter speed according to the movement and the brightness of the subject. • Jitter is avoided when taking pictures indoors of a moving subject by increasing the ISO sensitivity and making the shutter speed faster. F2.
VQT1C27ENG.book 43 ページ 2006年12月28日 木曜日 午前11時53分 Advanced (Recording pictures) • The focus range becomes the same as macro mode. [5 cm (Wide)/30 cm (Tele) to ¶] • When the flash is activated, the ISO sensitivity is automatically increased to a maximum of [ISO640]. (When the highest ISO sensitivity is set to a setting other than [ISO400].) • Refer to P37 for information about the available flash range . • Digital zoom cannot be used.
VQT1C27ENG.book 44 ページ 2006年12月28日 木曜日 午前11時53分 Advanced (Recording pictures) • The available flash range is about 30 cm to 5.0 m (Wide). (When the ISO sensitivity is set to [AUTO].) • We recommend setting the flash to Forced OFF [ ] when you take pictures at close range. • When you take pictures at close range, the resolution of the periphery of the picture may decrease slightly. This is not a malfunction.
VQT1C27ENG.book 45 ページ 2006年12月28日 木曜日 午前11時53分 Advanced (Recording pictures) • Press [MENU/SET] and then perform steps 1, 2 and 3 to change the scene mode. ∫ About the information • If you press [DISPLAY] when selecting a scene mode in step 2, explanations about each scene mode are displayed. (If you press [DISPLAY] again, the screen returns to the [SCENE MODE] menu.) INFORMATION BABY1 Suitable for taking pictures of your baby. Age can be displayed with pictures if you set the birthday.
VQT1C27ENG.book 46 ページ 2006年12月28日 木曜日 午前11時53分 Advanced (Recording pictures) [SELF PORTRAIT] MENU Press [ SET ] to display the [SCENE MODE] menu and select a scene mode. (P44) Select this to take pictures of yourself. ∫ Technique for Self portrait mode Press the shutter button halfway to focus. The self-timer indicator lights up when you are brought into focus. Making sure you hold the camera still, press the shutter button fully to take the picture.
VQT1C27ENG.book 47 ページ 2006年12月28日 木曜日 午前11時53分 Advanced (Recording pictures) • Keep the subject still for about 1 second after taking the picture. • We recommend rotating the zoom lever to Wide (1k) and being about 1.5 m from the subject when taking a picture. • The focus range is 1.2 m to 5 m. (Refer to P37 for the available flash range to take pictures.) • The shutter may remain closed (max. about 1 sec.) after taking the picture because of signal processing. This is not a malfunction.
VQT1C27ENG.book 48 ページ 2006年12月28日 木曜日 午前11時53分 Advanced (Recording pictures) [CANDLE LIGHT] MENU Press [ SET ] to display the [SCENE MODE] menu and select a scene mode. (P44) This mode allows you to take pictures with a candle-lit atmosphere. ∫ Technique for Candle light mode • If you make the most of the candle light, you can take successful pictures without using the flash. • Since the shutter speed becomes slower, we recommend using a tripod and the self-timer (P39) for taking pictures.
VQT1C27ENG.book 49 ページ 2006年12月28日 木曜日 午前11時53分 Advanced (Recording pictures) [PET] [HIGH SENS.] MENU Press [ SET ] to display the [SCENE MODE] menu and select a scene mode. (P44) Select this when you want to take pictures of a pet such as a dog or a cat. This allows you to set the birthday of your pet. You can display the set age when playing back the pictures and stamp the age on the recorded pictures with [DATE STAMP] (P72).
VQT1C27ENG.book 50 ページ 2006年12月28日 木曜日 午前11時53分 Advanced (Recording pictures) ∫ Technique for Fireworks mode • Since the shutter speed becomes slower, we recommend using a tripod. 2 Take pictures. 15 CANCEL MENU • Press the shutter button fully to display the countdown screen. Do not move the camera after this screen is displayed. When countdown finishes, [PLEASE WAIT...] is displayed for the same length of time as the set shutter speed for signal processing.
VQT1C27ENG.book 51 ページ 2006年12月28日 木曜日 午前11時53分 Advanced (Recording pictures) [SNOW] MENU Press [ SET ] to display the [SCENE MODE] menu and select a scene mode. (P44) This allows you to take pictures that show the snow as white as possible at a ski resort or a snow-covered mountain. ∫ Adjusting the white balance [WB ADJUST.] You can adjust the hue to match the water depth and the weather. 1 Press 3[ ] twice to display [WB ADJUST.]. 2 Press 2/1 to adjust the white balance. WB ADJUST.
VQT1C27ENG.book 52 ページ 2006年12月28日 木曜日 午前11時53分 Advanced (Recording pictures) Motion Picture Mode ∫ Changing the settings for the aspect ratio and the picture quality 1 Press [MENU/SET]. 1 Press the shutter button halfway to focus and then press it fully to start recording. 2 Press 3/4 to select [ASPECT RATIO] and then press 1. 1/ 2 REC W.BALANCE AWB ASPECT RATIO PICT.
VQT1C27ENG.book 53 ページ 2006年12月28日 木曜日 午前11時53分 Advanced (Recording pictures) • You can record smoother motion pictures with “30 fps”. • You can record longer motion pictures with “10 fps” although the picture quality is lower. • The file size with [10fpsQVGA] is small so it is suitable for e-mails. • You can only record motion pictures to the built-in memory when the [ASPECT RATIO] is [ ] and the picture size is [30fpsQVGA] or [10fpsQVGA] (320k240 pixels). 6 Press [MENU/SET] to close the menu.
VQT1C27ENG.book 54 ページ 2006年12月28日 木曜日 午前11時53分 Advanced (Recording pictures) Recording which Day of the Vacation You Take the Picture If you set the departure date of the vacation in advance, the number of days that have passed since the departure date (which day of the vacation it is) is recorded when you take the picture. You can display the the number of days that have passed when playing back the pictures and stamp it on the recorded pictures with [DATE STAMP] (P72).
VQT1C27ENG.book 55 ページ 2006年12月28日 木曜日 午前11時53分 Advanced (Recording pictures) 2/1: Select the desired item. 3/4: Set the year, month and date. • The travel date is cancelled if the current date is after the return date. • If you do not want to set the return date, press [MENU/SET] while the date bar is displayed. 7 Press [MENU/SET] to close the menu. 8 Take a picture. 3 1ST DAY 10:00 2.DEC.
VQT1C27ENG.book 56 ページ 2006年12月28日 木曜日 午前11時53分 Advanced (Recording pictures) Displaying the Time at the Travel Destination (World Time) ∫ Setting the home area [HOME] (Perform steps 1, 2 and 3.) 1 Press 4 to select [HOME] and then press [MENU/SET] to set. WORLD TIME DESTINATION If you set your home area and the travel destination area when travelling abroad etc., the local time at the travel destination area can be displayed on the screen and recorded on the pictures taken.
VQT1C27ENG.book 57 ページ 2006年12月28日 木曜日 午前11時53分 Advanced (Recording pictures) ∫ Finishing setting the home area • If you are setting the home area for the first time, the screen returns to the screen shown in step 1 of “Setting the home area [HOME]”after you press [MENU/ SET] to set your home area. Press 2 to return to the screen shown in step 3 and then press [MENU/SET] to close the menu. • If you are setting the home area for the second time etc.
VQT1C27ENG.book 58 ページ 2006年12月28日 木曜日 午前11時53分 Advanced (Recording pictures) Using the [REC] Mode Menu Increase the variey of pictures you can take by setting the white balance, colour mode etc. The menu items that can be set differ depending on the recording mode. ∫ Setting from the menu screen Press [MENU/SET] to display the [REC] menu and then select the item to set. (P17) Items that can be set (Recording in normal picture mode [ ]) Menu screen Item : [W.
VQT1C27ENG.book 59 ページ 2006年12月28日 木曜日 午前11時53分 Advanced (Recording pictures) [W.BALANCE] 2) Adjusting the hue for a more natural picture 3) 4) 5) 6) 1) 7) MENU Press [ SET ] to display the [REC] mode menu and select the item to set. (P17) This function allows you to reproduce a white colour close to real life in pictures recorded under sunlight, halogen lighting etc. in which the white colour may appear reddish or bluish. Select a setting that matches the recording conditions.
VQT1C27ENG.book 60 ページ 2006年12月28日 木曜日 午前11時53分 Advanced (Recording pictures) ISO sensitivity • When you take a picture with the flash, the white balance may not be properly adjusted if the flash level is insufficient for the subject. • The white balance setting is memorised even if the camera is turned off. However, the white balance setting for a scene mode returns to [AWB] when the scene mode is changed. • You can finely adjust the white balance in [UNDERWATER] in scene mode.
VQT1C27ENG.book 61 ページ 2006年12月28日 木曜日 午前11時53分 Advanced (Recording pictures) Select to take pictures with the same 3:2 aspect ratio as 35 mm film. This is suitable for landscapes etc. where a wide view is preferable. This is also suitable for playing back pictures on a wide-screen TV, high-definition TV etc. • In motion picture mode [ ], you cannot select [ ]. (P52) • The ends of the recorded pictures may be cut at printing.
VQT1C27ENG.book 62 ページ 2006年12月28日 木曜日 午前11時53分 Advanced (Recording pictures) ∫ When the aspect ratio is [ ]. (5.5M) 3072k1728 pixels (DMC-FX12) (4.5M) 2816k1584 pixels (DMC-FX10) (2M EZ) 1920k1080 pixels ∫ Quality Fine (Low compression): This gives priority to picture quality. Picture quality will be high. Standard (High compression): This gives priority to the number of recordable pictures. Standard quality pictures are recorded.
VQT1C27ENG.book 63 ページ 2006年12月28日 木曜日 午前11時53分 Advanced (Recording pictures) may also be bigger than usual when taking pictures in underwater mode. F5.0 1/60 • The camera is focusing on all the AF areas when multiple AF areas (max. 5 areas) light at the same time. The focus position is not predetermined. It is set to a position automatically determined by the camera at the time of focusing. If you want to determine the focus position to take pictures, switch the AF mode to [ ] or [ ].
VQT1C27ENG.book 64 ページ 2006年12月28日 木曜日 午前11時53分 Advanced (Recording pictures) [ON] The AF assist lamp turns on in low light conditions. At this time, the AF assist lamp icon [ ] appears on the screen. The effective range of the AF assist lamp is 1.5 m. [OFF] The AF assist lamp does not turn on. • Be careful about the following when using the AF assist lamp. – Do not look at the AF assist lamp from close up. – Do not cover the AF assist lamp with your fingers or other objects.
VQT1C27ENG.book 65 ページ 2006年12月28日 木曜日 午前11時53分 Advanced (Playback) Advanced (Playback) Displaying Multiple Screens (Multi Playback) • Depending on the recorded picture and the setting, the following icons will appear. –[ 1 Rotate the zoom lever towards [ ] [W] to display multiple screens. (Screen when 9 screens are displayed) 1.DEC .
VQT1C27ENG.book 66 ページ 2006年12月28日 木曜日 午前11時53分 Advanced (Playback) Displaying Pictures by Recording Date (Calendar Playback) You can display pictures by recording date using the calendar playback function. 1 Rotate the zoom lever several times towards [ ] (W) to display the calendar screen. SUN MON TUE WED THU FRI SAT • Rotate the zoom lever towards [ ] [W] to return to the calendar screen. 4 Press 3/4/2/1 to select a picture and then press [MENU/ SET]. • The picture that was selected will appear.
VQT1C27ENG.book 67 ページ 2006年12月28日 木曜日 午前11時53分 Advanced (Playback) ∫ To stop using the playback zoom Rotate the zoom lever towards [ ] [W] or press [MENU/SET]. Using the Playback Zoom ∫ To delete a picture during the playback zoom 1 Press [ ]. 2 Press 3 to select [YES]. 3 Press [MENU/SET]. 1 Rotate the zoom lever towards [ ] [T] to enlarge the picture.
VQT1C27ENG.book 68 ページ 2006年12月28日 木曜日 午前11時53分 Advanced (Playback) Playing Back Motion Pictures Press 2/1 to select a picture with a motion picture icon [ ]/ [ ]/[ ]/[ ]/[ ]/ [ ] and then press 4 to play back. PLAY MOTION PICTURE 1/3 25s 10:00 1.DEC. 2007 A: The motion picture recording time • After playback starts, the elapsed playback time is displayed on the bottom right of the screen. For example, 1 hour 20 minutes and 30 seconds is displayed as [1h20m30s].
VQT1C27ENG.book 69 ページ 2006年12月28日 木曜日 午前11時53分 Advanced (Playback) Using the [PLAY] mode menu Items that can be set Menu screen Item : [SLIDE SHOW] (P70) : [FAVORITE] (P70) You can use various functions in playback mode to rotate pictures, set protection for them etc. 1/3 : [ROTATE DISP.] (P71) : [ROTATE] (P71) : [DATE STAMP] (P72) 1 Press [MENU/SET]. 2 Press 3/4 to select the menu item and then press 1.
VQT1C27ENG.book 70 ページ 2006年12月28日 木曜日 午前11時53分 Advanced (Playback) [SLIDE SHOW] Playing back pictures in order for a fixed duration MENU Press [ SET ] to display the [PLAY] mode menu and select the item to set. (P69) This is recommended when playing back pictures on a TV screen. You can skip unwanted pictures if [FAVORITE] (P70) has been set. • When [FAVORITE] is set to [ON] > step 1. • When [FAVORITE] is set to [OFF] > step 2. 1 Press 3/4 to select [ALL] or [ and then press [MENU/SET].
VQT1C27ENG.book 71 ページ 2006年12月28日 木曜日 午前11時53分 Advanced (Playback) 1 Press 4 to select [ON] and then press [MENU/SET]. 1/3 PLAY SLIDE SHOW FAVORITE OFF OFF ROTATE DISP. ROTATE ON ON CANCEL MENU DATE STAMP SELECT SET SET MENU • You cannot set pictures as favourites if [FAVORITE] is set to [OFF]. Also the favourites icon [ ] will not appear when [FAVORITE] is set to [OFF] even if it was previously set to [ON]. • You cannot select [CANCEL] if none of the pictures have [ ] displayed.
VQT1C27ENG.book 72 ページ 2006年12月28日 木曜日 午前11時53分 Advanced (Playback) ∫ Rotate (The picture is rotated manually.) 1 Press 2/1 to select the picture and then press 4. ROTATE 1/3 SELECT SET EXIT MENU • The [ROTATE] function is disabled when [ROTATE DISP.] is set to [OFF]. • Motion pictures and protected pictures cannot be rotated. 2 Press 3/4 to select the direction to rotate the picture and then press [MENU/SET].
VQT1C27ENG.book 73 ページ 2006年12月28日 木曜日 午前11時53分 Advanced (Playback) ∫ Single setting 1 Press 2/1 to select the picture and then press 4. DATE STAMP 4 Press 3/4 to select [YES] or [NO] and then press [MENU/SET]. (The screen shown appears when you select a picture recorded with a [ ] picture size.) 1/14 DATE STAMP SELECT SET EXIT IT WILL BE STAMPED ON THE PICTURE RESIZED TO .
VQT1C27ENG.book 74 ページ 2006年12月28日 木曜日 午前11時53分 Advanced (Playback) ∫ Multi setting 1 Press 2/1 to select the picture and then press 4 to SET/ CANCEL. DATE STAMP 7 8 9 10 11 12 SELECT SET/CANCEL [SET] CANCEL SET The [DATE STAMP] icon A appears. • Repeat this step. 2 Press [MENU/SET]. • After performing step 2, perform step 2 onwards in “When [SINGLE] is selected”. • We recommend setting date stamp when there is plenty of space on the built-in memory or the card.
VQT1C27ENG.book 75 ページ 2006年12月28日 木曜日 午前11時53分 Advanced (Playback) ∫ Single setting ∫ To cancel all settings 1 Press 2/1 to select the picture to print and then press 3/4 to set the number of prints. 1 Press 3 to select [YES] and then press [MENU/SET]. CANCEL ALL DPOF DPOF SET THIS 1 CANCEL ALL DPOF PRINT SETTINGS? 1/14 YES NO COUNT 1 DATE DISPLAY SELECT EXIT SELECT MENU SET MENU SET MENU • The number of prints icon [ ]A appears. • The number of prints can be set from 0 to 999.
VQT1C27ENG.book 76 ページ 2006年12月28日 木曜日 午前11時53分 Advanced (Playback) ∫ Single setting • DPOF is an abbreviation of “Digital Print Order Format”. This feature allows you to write print information to media and then use the information on a DPOF-compliant system. • DPOF print setting is a convenient function when printing pictures with a printer that supports PictBridge. The date printing setting on the printer may take priority over the date printing setting on the camera.
VQT1C27ENG.book 77 ページ 2006年12月28日 木曜日 午前11時53分 Advanced (Playback) [RESIZE] Making the picture smaller Aspect ratio setting Picture size (DMC-FX12) / / / MENU Press [ SET ] to display the [PLAY] mode menu and select the item to set. (P69) This function is useful if you want to reduce the file size of a picture to attach it to an e-mail or upload it to a website. 1 Press 2/1 to select the picture and then press 4. RESIZE • The message [DELETE ORIGINAL PICTURE?] appears.
VQT1C27ENG.book 78 ページ 2006年12月28日 木曜日 午前11時53分 Advanced (Playback) [TRIMMING] Enlarging a picture and trimming it 5 Press 3/4 to select [YES] or [NO] and then press [MENU/SET]. MENU Press [ SET ] to display the [PLAY] mode menu and select the item to set. (P69) You can enlarge and then clip the important part of the recorded picture. 1 Press 2/1 to select the picture and then press 4. TRIMMING 1/3 SELECT SET EXIT MENU • The following pictures cannot be trimmed.
VQT1C27ENG.book 79 ページ 2006年12月28日 木曜日 午前11時53分 Advanced (Playback) [COPY] Copying the picture data MENU Press [ SET ] to display the [PLAY] mode menu and select the item to set. (P69) You can copy recorded picture data from the built-in memory to a card or vice versa. 1 Press 3/4 to select the copy destination and then press [MENU/SET]. 2/3 PLAY DPOF PRINT PROTECT • If you press [MENU/SET] while copying pictures from the built-in memory to the card, the copying will stop halfway.
VQT1C27ENG.book 80 ページ 2006年12月28日 木曜日 午前11時53分 Advanced (Playback) [FORMAT] Initializing the built-in memory or a card MENU Press [ SET ] to display the [PLAY] mode menu and select the item to set. (P69) Usually, it is not necessary to format the built-in memory and the card. Format them when the message [BUILT-IN MEMORY ERROR] or [MEMORY CARD ERROR] appears. Press 3 to select [YES] and then press [MENU/SET]. (The illustration shows the screen when the built-in memory is formatted.
VQT1C27ENG.book 81 ページ 2006年12月28日 木曜日 午前11時53分 Connecting to other equipment Connecting to other equipment Connecting to a PC You can acquire recorded pictures to a PC by connecting the camera and the PC. The software [LUMIX Simple Viewer] or [PHOTOfunSTUDIO-viewer-] (for Windows® ) in the CD-ROM (supplied) allows you to easily acquire pictures recorded with the camera to a PC, print them and send them by e-mail. If you use “Windows 98/98SE”, install the USB driver and then connect it to the computer.
VQT1C27ENG.book 82 ページ 2006年12月28日 木曜日 午前11時53分 Connecting to other equipment ∫ About motion picture playback on a PC Use the software “QuickTime” (for Windows 2000/XP) in the CD-ROM (supplied) to play back motion pictures recorded on this camera on a PC. • If you use “Windows 98/98SE/Me”, download “QuickTime 6.5.2 for PC” from the following site, and install it. http://www.apple.com/support/quicktime/ • This software is installed as standard on a “Macintosh OS”.
VQT1C27ENG.book 83 ページ 2006年12月28日 木曜日 午前11時53分 Connecting to other equipment • It may not be possible to playback the motion pictures on the built-in memory or a card normally when this unit and the PC are connected. Import the motion picture files to the PC and then play them back. • If battery power is exhausted while the camera and the PC are communicating, the recorded data may be damaged.
VQT1C27ENG.book 84 ページ 2006年12月28日 木曜日 午前11時53分 Connecting to other equipment • It may take time to print some pictures. Use a battery with sufficient battery power (P21) or the AC adaptor (DMW-AC5E; optional) when you connect to a printer. • Turn the camera off before inserting or removing the cable for the AC adaptor (DMW-AC5E; optional). 1 Turn on the camera and the printer. 2 Set the mode dial to [ ]. 3 Connect the camera to a printer via the USB connection cable A (supplied).
VQT1C27ENG.book 85 ページ 2006年12月28日 木曜日 午前11時53分 Connecting to other equipment ∫ Selecting multiple pictures and printing them 1 Press 3. 3 Press 3 to select [PRINT START] and then press [MENU/SET]. MULTI SELECT 2 Press 3/4 to select an item and then press [MENU/SET]. PRINT START PRINT WITH DATE NUM. OF PRINTS PAPER SIZE PAGE LAYOUT PictBridge MULTI SELECT SELECT ALL DPOF PICTURE FAVORITE CANCEL 1秒 OFF MENU SELECT CANCEL SET MENU SET [MULTI SELECT] Multiple pictures are printed at one time.
VQT1C27ENG.book 86 ページ 2006年12月28日 木曜日 午前11時53分 Connecting to other equipment • [NUM. OF PRINTS] Set the number of prints. • You can set up to 999 prints. • [PAPER SIZE] (Paper sizes that can be set with this unit) The paper sizes are displayed on pages 1/2 and 2/2. Press 4 to select. 1/2 Settings on the printer are prioritised. [L/3.
VQT1C27ENG.book 87 ページ 2006年12月28日 木曜日 午前11時53分 Connecting to other equipment appears if you change the mode dial to a mode other than [ ] while the camera and the printer are connected. Set the mode dial to [ ] again and then disconnect the USB connection cable. If this happens during printing, stop printing and then disconnect the USB connection cable. Playing Back Pictures on a TV Screen ∫ Playing back pictures using the AV cable (supplied) • Set the [TV ASPECT].
VQT1C27ENG.book 88 ページ 2006年12月28日 木曜日 午前11時53分 Others Others Screen Display 1 2 3 5 4 In recording (after settings) 14 Burst (P63) : Audio recording (P52) 6 7 15 White balance (P59) 8 13 16 ISO sensitivity (P60) ISOMAX / ISOMAX / ISOMAX : ISO limit (P42) 400 800 1250 8 9 17 Colour mode (P64) 10 F2.
VQT1C27ENG.book 89 ページ 2006年12月28日 木曜日 午前11時53分 Others 1 2 3 4 1 2 3 5 6 16 15 14 7 8 9 13 21 20 19 18 17 16 15 12 11 3 4 1 PLAY MOTION PICTURE 6 7 100 _ 0001 1/3 F2.8 1/30 11 ISO100 AWB 10:00 1.DEC.
VQT1C27ENG.book 90 ページ 2006年12月28日 木曜日 午前11時53分 Others 15 Travel destination setting (P56) 16 Age (P48) 17 Power LCD (P34) 18 Number of days that have passed since the travel date (P54) 19 Motion picture playback (P68) 20 Stamped with date stamp indication (P72) 21 Favourite indication (P70) Cautions for Use ∫ Optimal use of the camera Take care not to drop or knock the unit or put a lot of pressure on it.
VQT1C27ENG.book 91 ページ 2006年12月28日 木曜日 午前11時53分 Others ∫ About the LCD monitor • Do not press the LCD monitor with excessive force. Uneven colours may appear on the LCD monitor and it may malfunction. • If the camera is cold when you turn it on, the picture on the LCD monitor will be slightly darker than usual at first. However, the picture will return to normal brightness when the internal temperature of the camera increases.
VQT1C27ENG.book 92 ページ 2006年12月28日 木曜日 午前11時53分 Others ∫ Charger • If you use the battery charger near a radio, the radio reception may be disturbed. Keep the charger 1 m or more away from radio. • The charger may generate whirring sounds when it is being used. This is not a malfunction. • After use, be sure to disconnect the AC mains lead from the electrical outlet. (A very small amount of current is consumed if it is left connected.) • Keep the terminals of the charger and battery clean.
VQT1C27ENG.book 93 ページ 2006年12月28日 木曜日 午前11時53分 Others [NOT ENOUGH SPACE ON BUILT-IN MEMORY]/[NOT ENOUGH MEMORY ON THE CARD] There is no space left on the built-in memory or the card. • When you copy pictures from the built-in memory to the card (batch copy), the pictures are copied until the capacity of the card becomes full. [SOME PICTURES CANNOT BE COPIED]/[COPY COULD NOT BE COMPLETED] The following pictures cannot be copied.
VQT1C27ENG.book 94 ページ 2006年12月28日 木曜日 午前11時53分 Others [PICTURE IS DISPLAYED FOR 4:3 TV]/ [PICTURE IS DISPLAYED FOR 16:9 TV] • The AV cable is connected to the camera. Press [MENU/SET] if you want to delete this message at once. • Select [TV ASPECT] in the [SETUP] menu if you want to change the TV aspect. (P20) • This message also appears when the USB connection cable is connected to the camera only. In this case, connect the other end of the USB connection cable to a PC or a printer.
VQT1C27ENG.book 95 ページ 2006年12月28日 木曜日 午前11時53分 Others 4: 2 or 3 pictures are taken at one time. • Is [BURST] in the [REC] mode menu set to [ON]? (P63) 5: The subject is not focused properly. • The focus range varies depending on the recording mode. Rotate the mode dial to set the proper mode for the distance to the subject. • Is the subject beyond the focus range of the camera? (P22, 43) • Have you taken a picture with jitter? 6: The recorded picture is blurred.
VQT1C27ENG.book 96 ページ 2006年12月28日 木曜日 午前11時53分 Others 3: The LCD monitor flickers indoors. • The LCD monitor may flicker for a few seconds after turning the camera on indoors under fluorescent light. This is not a malfunction. 4: The LCD monitor is too bright or dark. • Adjust the brightness of the screen. (P19) • Is the power LCD function or high angle mode activated? 5: Black, red, blue and green dots appear on the LCD monitor. • These pixels do not affect the recorded pictures.
VQT1C27ENG.book 97 ページ 2006年12月28日 木曜日 午前11時53分 Others the PC and then write them back to the card, the pictures may be displayed with dates different from the actual recording dates in calendar playback etc. ∫ TV, PC and printer 1: The picture does not appear on the television. • Is the camera connected to the TV correctly? • Set the TV input to external input mode. 2: The display areas on the TV screen and the camera’s LCD monitor are different.
VQT1C27ENG.book 98 ページ 2006年12月28日 木曜日 午前11時53分 Others 4: The AF assist lamp does not turn on. • Is [AF ASSIST LAMP] on the [REC] mode menu set to [ON]? (P63) • Are you taking pictures in dark places? – The AF assist lamp does not turn on in bright places. • The AF assist lamp does not turn on when [SELF PORTRAIT] (P46),[SCENERY] (P46), [NIGHT SCENERY] (P47), [SUNSET] (P49), [FIREWORKS] (P50) or [AERIAL PHOTO] (P51) in scene mode is selected. 5: The camera becomes warm.
VQT1C27ENG.book 99 ページ 2006年12月28日 木曜日 午前11時53分 Others Others Number of Recordable Pictures and Available Recording Time • The number of recordable pictures and the available recording time are an approximation. (These vary depending on the recording conditions and the type of card.) • The number of recordable pictures and the available recording time varies depending on the subjects. • The numbers inside the thick black lines are the number of recordable pictures in simple mode [ ].
VQT1C27ENG.book 100 ページ 2006年12月28日 木曜日 午前11時53分 Others Aspect ratio / (0.3M EZ): (640k480 pixels) Picture size (5M): (2816k1880 pixels) (DMC-FX10) / Quality Built-in Memory 130 210 8 16 MB 68 110 3 32 MB 145 230 8 64 MB 290 480 19 38 (Approx.
VQT1C27ENG.book 101 ページ 2006年12月28日 木曜日 午前11時53分 Others Aspect ratio (2M EZ): (1920k1080 pixels) Picture size Quality Built-in Memory 25 48 16 MB 12 25 32 MB 27 53 64 MB 57 105 128 MB 115 220 256 MB 230 430 512 MB 450 860 1 GB 910 1720 2 GB 1800 3410 4 GB 3540 6700 (Approx. 27 MB) Card ∫ Available recording time (when recording motion pictures) Aspect ratio Picture quality setting Built-in Memory (Approx.
VQT1C27ENG.book 102 ページ 2006年12月28日 木曜日 午前11時53分 Others Specifications Digital Camera: Power Source: Power Consumption: Information for your safety DC 5.1 V 1.5 W (When recording) (DMC-FX12) 1.4 W (When recording) (DMC-FX10) 0.8 W (When playing back) Camera effective pixels: 7,200,000 pixels (DMC-FX12)/6,000,000 pixels (DMC-FX10) Image sensor: 1/2.5q CCD, total pixel number 7,380,000 pixels (DMC-FX12)/ 6,370,000 pixels (DMC-FX10), Primary colour filter Lens: Optical 3.0k zoom, fl5.8 mm to 17.
VQT1C27ENG.book 103 ページ 2006年12月28日 木曜日 午前11時53分 Others Recording media: Picture size Still picture: Motion pictures: Quality: Recording file format Still Picture: Motion pictures: Interface Digital: Analogue video/audio: Terminal [DIGITAL/AV OUT]: [DC IN]: Dimensions: Mass: Built-in Memory (Approx.
VQT1C27ENG.book 104 ページ 2006年12月28日 木曜日 午前11時53分 QuickTime and the QuickTime logo are trademarks or registered trademarks of Apple Computer, Inc., used under license therefrom. B VQT1C27 F1206Hy0 ( 10000 A) C Matsushita Electric Industrial Co., Ltd. Web Site: http://panasonic.