
Operating Instruction

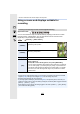


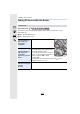


Table Of Contents
- Finding the information you need
- How to use this manual
- Quick Start Guide
- Contents
- 1. Before Use
- 2. Getting Started/Basic Operations
- Attaching the Shoulder Strap
- Charging the Battery
- Inserting and Removing the Card (optional)/ the Battery
- Changing the Lens
- Setting Date/Time (Clock Set)
- Diopter adjustment
- Basic Operations
- Tips for taking good pictures
- Extending/retracting the lens [when the interchangeable lens (H-FS12032/H-FS35100) is attached]
- Shutter button (Taking pictures)
- Motion picture button (Recording motion pictures)
- Mode dial (Selecting a Recording Mode)
- Rear Dial
- Cursor buttons/[MENU/SET] button
- [DISP.] button (Switching the displayed information)
- [LVF] button (Switching the Monitor/Viewfinder)
- Touch screen (Touch operations)
- Taking Pictures Using the Touch Function
- Setting menu items
- Calling frequently-used menus instantly (Quick Menu)
- Assigning frequently used functions to the buttons (function buttons)
- Configuring basic settings of this unit (Setup Menu)
- Entering Text
- 3. Recording Modes
- Taking Pictures using the Automatic Function (Intelligent Auto Mode)
- Taking Pictures with Your Favourite Settings (Programme AE Mode)
- Taking Pictures by Specifying the Aperture/ Shutter Speed
- Taking panorama pictures (Panorama Shot Mode)
- Taking Pictures that match the Scene being recorded (Scene Guide Mode)
- Taking Pictures with different image effects (Creative Control Mode)
- Recording motion pictures with manually set aperture value/shutter speed (Creative Video Mode)
- Registering your preferred settings (Custom Mode)
- 4. Picture Quality and Colour Tone Settings
- 5. Focus and Brightness (Exposure) Settings
- 6. Shutter and Drive Settings
- 7. Functions Customised for Various Subjects and Purposes
- Taking Pictures Automatically at Set Intervals ([Time Lapse Shot])
- Creating Stop Motion Pictures ([Stop Motion Animation])
- Making Multiple Exposures on One Picture ([Multi Exp.])
- Disabling Operational Sounds and the Output of Light at once ([Silent Mode])
- Taking Clear Pictures by Registering Faces ([Face Recog.])
- Recording Profiles of Babies and Pets on Images
- Using screens and displays suitable for recording
- 8. Stabiliser, Zoom and Flash
- 9. Recording Motion Pictures
- 10. Playing Back and Editing Images
- 11. Using the Wi-Fi function
- Wi-Fi function
- What you can do with the Wi-Fi function
- Controlling with a Smartphone/Tablet
- Installing the smartphone/tablet app “ Image App ”
- Connecting to a smartphone/tablet
- Taking images via a smartphone/tablet (remote recording)
- Playing back images in the camera
- Saving images stored in the camera
- Sending images in the camera to an SNS
- Adding location information to images stored in the camera from a smartphone/tablet
- Combining motion pictures recorded with Snap Movie according to your preference on a smartphone/tablet
- Sending images to a smartphone/tablet by controlling the camera
- Displaying pictures on a TV
- Printing Wirelessly
- When sending images to AV device
- When sending images to PC
- Using Web services
- Registering to the “LUMIX CLUB”
- About Connections
- [Wi-Fi Setup] Menu
- 12. Connecting to other equipment
- 13. Others

8. Stabiliser, Zoom and Flash
196
• It is recommended to disable the Optical Image Stabiliser when using a tripod. [ ] is
displayed on the screen at that time.
• We recommend taking pictures with the viewfinder when panning in [ ].
Not available in these cases:
•
[ ] is not available in Panorama Shot Mode.
• The stabiliser function may not be effective in the following cases.
Be careful of camera jitter when you press the shutter button.
– When there is a lot of jitter
– When the zoom magnification is high
– When using the Digital Zoom
– When taking pictures while following a moving subject
– When the shutter speed becomes slower to take pictures indoors or in dark places
• The panning effect in [ ] is more difficult to achieve in the following cases.
– In brightly lit places such as in broad daylight on a summer’s day
– When the shutter speed is faster than 1/100th of a second
– When you move the camera too slowly because the subject is moving slowly (The
background will not become a blur)
– When the camera does not keep up with the subject satisfactorily
Preventing jitter (camera shake)
When the jitter alert [ ] appears, use [Stabilizer], a tripod or the self-timer (P175).
•
Shutter speed will be slower particularly in the following cases. Keep the camera still from the
moment the shutter button is pressed until the picture appears on the screen.
We recommend using a tripod.
– Slow Sync.
– Slow Sync./Red-Eye Reduction
– [Clear Nightscape]/[Cool Night Sky]/[Warm Glowing Nightscape]/[Artistic Nightscape]/
[Glittering Illuminations]/[Clear Night Portrait] (Scene Guide Mode)
– When you set to a slow shutter speed