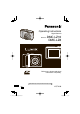
Operating Instructions Digital Camera Model No. DMC-LZ10 DMC-LZ8 Before use, please read these instructions completely. Web Site: http://www.panasonic-europe.com EB VQT1L98_DMC-LZ10_EB.
Before Use Dear Customer, We would like to take this opportunity to thank you for purchasing this Panasonic Digital Camera. Please read these Operating Instructions carefully and keep them handy for future reference. Information for Your Safety WARNING: TO REDUCE THE RISK OF FIRE, ELECTRIC SHOCK OR PRODUCT DAMAGE, * DO NOT EXPOSE THIS APPARATUS TO RAIN, MOISTURE, DRIPPING OR SPLASHING AND THAT NO OBJECTS FILLED WITH LIQUIDS, SUCH AS VASES, SHALL BE PLACED ON THE APPARATUS.
Before Use -If you see this symbolInformation on Disposal for Users of Waste Electrical & Electronic Equipment (private households) This symbol on the products and/or accompanying documents means that used electrical and electronic products should not be mixed with general household waste. For proper treatment, recovery and recycling, please take these products to designated collection points, where they will be accepted on a free of charge basis.
Before Use ■ Care for the camera • Do not strongly shake or bump the camera. The camera may not be operated normally, recording of pictures may be disabled or the lens and the LCD monitor may be damaged. • Sand or dust may cause the camera to malfunction. Make sure that sand or dust does not get into the lens, the flash or the terminals when using the camera on a beach etc. • Make sure that water does not get into the camera when using it on a rainy day or on a beach. • This camera is not waterproof.
Before Use ■ About the Lens • Do not press the lens or the lens barrel with excessive force. • Do not leave the camera with the lens facing the sun as rays of light from the sun may cause it to malfunction. Also, be careful when you leave the camera outside or near a window. ■ About Condensation (When the lens is fogged up) • Condensation occurs when the ambient temperature or humidity changes as described below. Be careful of condensation since it causes lens stains, fungus and camera malfunction.
Contents Before Use Information for Your Safety....................... 2 Preparation Accessories .............................................. 8 Names of the Components ....................... 9 Quick Guide ............................................ 10 About the Batteries ................................. 11 Inserting/Removing the Batteries/ Card (Optional) ................................... 15 About the Built-in Memory/the Card .......
Displaying the Time at the Travel Destination .......................................... 65 Using the [REC] Mode Menu .................. 67 [PICTURE SIZE] / [QUALITY]............. 68 [ASPECT RATIO] ............................... 69 [INTELLIGENT ISO] ........................... 69 [SENSITIVITY] .................................... 70 [WHITE BALANCE] ............................ 70 [METERING MODE] ........................... 72 [AF MODE] / [QUICK AF] ................... 73 [BURST]............................
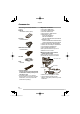
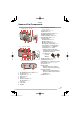
Preparation Accessories Before using your camera, check the contents. Batteries AA Alkaline batteries (LR6) AV Cable K1HA08CD0008 USB Connection Cable K1HA08CD0007 CD-ROM ■ Optional Accessories • DC coupler: DMW-DCC2 • AC Adaptor: DMW-AC6EB • Soft Case: DMW-CLZ10 • Semi Hard Case: DMW-CHTZ3 • SDHC Memory Card 16 GB: RP-SDV16GE1K 8 GB: RP-SDV08GE1K 4 GB: RP-SDM04GE1K/RP-SDV04GE1K SD Memory Card 2 GB: RP-SDM02GE1A/RP-SDV02GE1A 1 GB: RP-SDR01GE1A/RP-SDV01GE1A • USB 2.
Preparation Names of the Components 1 23 4 5 6 9 AV OUT DIGITAL 7 11 8 10 12 13 14 15 23 16 17 18 19 20 21 22 24 1 2 3 4 5 6 25 [E.
Preparation Quick Guide This is the overview of the procedure to record pictures with this camera. For each operation, be sure to refer to the corresponding pages. 3 Play back the pictures. 1 1 Insert the batteries. 2 1 Set the Recording/playback switch to [Q]. 2 Select the picture you want to view. (P37) • When you do not use the card (optional), you can record or play back pictures on the built-in memory. Refer to P16 when you use a card. 2 Turn the camera on to take pictures. • Set the clock.
Preparation About the Batteries ■ Usable batteries AA Alkaline batteries (supplied) AA Rechargeable Ni-MH (nickel metal hydride) batteries (optional) AA Oxyride batteries (optional) • One of the following messages appears when you insert batteries for the first time, change the batteries when they become exhausted etc.
Preparation ■ Battery shapes that cannot be used • Batteries with unusual shapes cause leakage, heat generation or explosion if inserted in the camera. • Batteries with the covering partly or fully peeled off. Never use these batteries. (Refer to the illustration below.) • All or part of the covering on the battery is peeled off. • The ) pole is flat. ■ Proper Care and Handling of Batteries Mishandling batteries may cause leakage, heat generation, fire or explosion. Observe the following.
Preparation • We recommend charging the batteries after they are fully discharged. If you charge the batteries before they are fully discharged, it can reduce battery performance. This is called “memory effect”. • If “memory effect” occurs, continue using the batteries until the camera stops working and then charge them fully. Battery performance will be restored after a few charges and discharges. • Over time Ni-MH batteries naturally discharge and their capacity lowers even when they are not used.
Preparation The number of recordable pictures varies depending on the recording interval time. If the recording interval time becomes longer, the number of recordable pictures decreases. (e.g. When recording once every 2 minutes: about 1/4 the number when recording once every 30 seconds) • The number of recordable pictures and the playback time will also vary depending on the brand and type of batteries used.
Preparation Inserting/Removing the Batteries/Card (Optional) • Check that the camera is turned off. • Use alkaline batteries (supplied), Ni-MH batteries (optional) or oxyride batteries (optional). • Prepare a card. • You can record or play back pictures on the built-in memory when you are not using a card. (P16) • The card may be damaged if it is not fully inserted. 3 1Close the battery door or the card door. 2Slide the battery door or the card door to the end and then close it firmly.
Preparation About the Built-in Memory/the Card The built-in memory can be used as a temporary storage device when the card being used becomes full. ] ■ Built-in Memory [ You can record or play back pictures on the built-in memory when you are not using a card. (The built-in memory cannot be used when a card is inserted.) • You can copy pictures from the builtin memory to a card (P99). • The built-in memory capacity is about 20 MB.
Preparation Setting Up the Clock (Turning the camera [ON] for the first time) ■ Initial setting The clock is not set when the camera is shipped. When you turn the camera on, the following screen appears. (It does not appear in playback mode.) 3 Press [MENU/SET]. Checking the clock setting Press [DISPLAY] several times. – Current date and time will be displayed on the bottom left of the screen for about 5 seconds.
Preparation Basics of Modes and Menus About the mode Selecting recording modes or playback mode. Recording mode Intelligent auto mode P27 Taking pictures easily. Programme AE mode P30 Taking pictures in the desired setting. A/S/M mode 1 P50 This mode allows you to create elaborate pictures. A: Aperture-priority AE S: Shutter-priority AE M: Manual exposure Slide the recording/playback switch A to (up) or Q (down).
Preparation About the menu This camera contains various menus to enable you to setup your own preferences for recording and playing. Displayed menu items vary depending on each mode. Setup menu (Common in recording mode / playback mode) P20 To setup the default setting of the camera, such as the batteries, clock, etc. Recording menu (Only in recording mode) P67 To setup the picture size, ISO sensitivity, etc.
Preparation Basic settings (Setup menu) Setting up the preference of battery type, clock, economy mode, etc. Make sure to set [BATTERY TYPE]. • If the type of battery being used and the type of battery selected are not the same, the battery indication will not be displayed correctly. The battery life may also become shorter. • We recommend confirming the settings for [CLOCK SET], [AUTO REVIEW] and [ECONOMY]. 4 Press q and select settings using e/r. • The further items will be displayed depending on items.
Preparation Press [ ] to display menu, enter the setup menu [ ] and select the item. (P20) The setting marked “q” means it is the initial setting. Select the type of batteries you have inserted. BATTERY TYPE Select the type of battery being used from the following 2 types. q ALKALINE (LR6)/Ni-MH OXYRIDE (ZR6) • If the type of battery being used and the type of battery selected are not the same, the battery indication will not be displayed correctly. 3 Set the date and time.
Preparation Press [ ] to display menu, enter the setup menu [ ] and select the item. (P20) The setting marked “q” means it is the initial setting. HISTOGRAM (P41) Set whether histogram is displayed or not with the recording information. q OFF ON TRAVEL DATE (P63) Set the departure and return dates. q OFF SET Restrict battery consumption ECONOMY POWER SAVE If you perform no operations, the camera turns off automatically after the interval you set. OFF 2 MIN. q 5 MIN. 10 MIN.
Preparation Press [ ] to display menu, enter the setup menu [ ] and select the item. (P20) The setting marked “q” means it is the initial setting. 2 NO.RESET Set this when you want to start the file number of the picture from 0001 on the next recording. • The folder number is updated, and the file number starts from 0001. • The folder number can be assigned from 100 to 999. When the folder number reaches 999, it cannot be reset the number.
Preparation Press [ ] to display menu, enter the setup menu [ ] and select the item. (P20) The setting marked “q” means it is the initial setting. m/ft Set the unit to display available recording range m: displayed in meter q ft: displayed in feet SCENE MENU (P52, 55) Setup the screen in advanced scene mode or scene mode OFF: Displays scene currently selected q AUTO: Displays scene selection screen DIAL DISPLAY Set whether the mode dial position is displayed on screen when turning the mode dial.
Preparation Press [ ] to display menu, enter the setup menu [ ] and select the item. (P20) The setting marked “q” means it is the initial setting. DEMO MODE Display the demonstration. JITTER, SUBJ. MOVE DEMO. (below) AUTO DEMO: Displays the product feature as a slide show • [JITTER, SUBJ. MOVE DEMO.] only works in recording mode. • Press [DISPLAY] to finish [JITTER, SUBJ. MOVE DEMO.]. • Press [MENU/SET] to finish [AUTO DEMO].
Preparation LCD Monitor and Changes to the Display ■ Display in programme AE mode [ (at the time of purchase) 1 2 14 13 3 4 P 5 6 7 10 M 3 2 ]. 8 9 10 F3.3 1 2 3 4 5 6 7 1/30 ISO 100 12 11 Recording mode Flash mode (P43) • The flash icon turns red when activating the flash and pressing the shutter button halfway. AF area • The AF area displayed is bigger than usual when taking pictures in dark places.
Basic Taking Pictures Easily ( The camera automatically sets the appropriate settings according to the subject and recording condition. This mode is recommended for beginners to take pictures easily. 1 Set the camera to intelligent auto mode [ ]. Intelligent Auto Mode) D AF area • By using face detection, AF area is automatically displayed on person’s face.Otherwise, AF area is displayed on suitable focus points. E Aperture value • The camera beeps twice when the subject is focused.
Basic – Recording conditions Dusk/Sunrise glow/Low-light intensity/Jitter (example) The camera cannot detect the face since the face occupied in the screen is too big. • In any case, the camera makes the best setting. To take pictures in some specific scene, using the recording mode matching your purpose is recommended.
Basic ■ The Backlight Compensation (Intelligent auto mode [ ] only) Press e to compensate that backlight cause the subject to appear dark. (Press again to cancel.) Menu 10 M 2 ■ Change the setting Press [MENU/SET] to set the following recording menu, setup menu. Refer to each corresponding page for the details on each mode. 19 BACKLIGHT This icon appears when you are using backlight compensation. ■ Intelligent auto mode [ (fixed) ] setting Quality: Fine (When the picture size is 0.
Basic Taking Pictures in the Desired Setting ( Programme AE Mode) This mode allows you to take pictures freely as more options are setup is available than Intelligent auto mode [ 1 Select programme AE mode [ ]. ]. 2 Hold the camera gently with both hands, keep your arms still at your side and stand with your feet shoulder-width apart. A B A Flash B AF assist lamp 3 Aim the AF area D to the point you want to focus on, and press the shutter button halfway to focus. D C P F3.
Basic Photography basics – exposure, focus, and colour A little knowledge about exposure, focus and colour will come in handy when you are having trouble with a shot. Are images dark? Exposure problems Refer to P48 Focus problems Refer to P32, 46 Colour problems Refer to P70 In programme AE mode [ ], Auto Exposure (AE) normally sets the correct exposure for you, but images may be dark if there is backlight. Use exposure compensation in these situations for brighter images.
Basic ■ When you want to take a picture of a subject outside the AF area (AF/AE Lock) When recording a picture of people with a composition like the following picture, you will not be able to focus the camera on the subject because the people are outside the AF area. P 10 M 19 In this case, 1 Aim the AF area at the subject. 2 Press the shutter button halfway to fix the focus and the exposure. • The focus indication lights when the subject is focused.
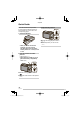
Basic Taking Pictures with the Zoom Using the optical zoom / the extra optical zoom (EZ) You can make people and subjects appear closer with the 5 times optical zoom, and landscapes can be recorded in wide angle.
Basic ■ How the extra optical zoom works The extra optical zoom works by extracting the centre of the picture and expanding it for a higher telephoto effect. So, for ] (3M EZ] example, if you choose [ (3 million pixels), the 10M (10.1 million) (DMC-LZ10) or 8M (8.1 million) (DMC-LZ8) CCD area is cropped to the centre 3M (3 million pixels) area, allowing a picture with a higher zoom effect. • The optical zoom is set to Wide (1 ×) when the camera is turned on.
Basic • If you press [E.ZOOM] three times, the zoom position returns to Wide and the resolution returns to the original. The resolution also returns to normal when you return the zoom lever to the optical zoom position. ■ When the picture size is set except at the highest resolution for each aspect ratio 4 EZ W 5 EZ W 1 T D 1 4 Press [E.ZOOM] once. 5 Press [E.ZOOM] twice. D Extra optical zoom E Maximum extra optical zoom magnification E T E • Press [E.ZOOM] until the zoom starts working.
Basic ■ Entering the digital zoom range When you rotate the zoom lever to the extreme Tele position, the on-screen zoom indication may momentarily pause. You can enter the digital zoom range to continuously rotate the zoom lever to Tele or to release the zoom lever once and then rotate it to Tele again. • [OFF]: W • [ON]: W 1 EZ W 1 T 1 3 5 2 8.9 T 20 2 T 35.6 For example: When using the digital zoom and the extra optical ] (3M EZ) at the same zoom [ time with DMC-LZ10.
Basic Playing Back Pictures (Q Normal playback mode) Select the normal playback mode [Q] (P18). The picture data on the built-in memory appears when a card is not inserted. The picture data on the card appears when a card is inserted. ■ Playing back pictures Press w/q to select the picture. 10 M 100-0001 1/19 10:00 15. 15.JAN.2008 JAN.2008 w : Play back the previous picture. q : Play back the next picture. ■ Fast forwarding/Fast rewinding Press and hold w/q during playback.
Basic Deleting Pictures Select the normal playback mode [Q] (P18). The picture data on the built-in memory is deleted when a card is not inserted. The picture data on the card is deleted when a card is inserted. • Once deleted, pictures cannot be recovered. Please double-check before deleting pictures. ■ To delete a single picture ■ To delete [DELETE MULTI] (up to 50 pictures) / [DELETE ALL] 1 Press [ 2 Press e/r to select [DELETE MULTI] or [DELETE ALL] and then press [MENU/SET].
Basic 4 Press [MENU/SET]. 5 Press e to select [YES] and then press [MENU/SET] to set. (Screen when selecting [DELETE MULTI]) DELETE MULTI DELETE THE PICTURES YOU MARKED ? YES NO CANCEL A SELECT MENU SET SET • When you delete all pictures, only pictures in either of the built-in memory or the card can be deleted. (You cannot delete pictures in both the built-in memory and the card at the same time.
Advanced-Shooting About the LCD Monitor In playback mode Changing the information displayed G 10 M 100 0001 1/19 1ST DAY 1 month 10 days 10:00 1.JAN.2008 I 1 2 3 H 10 M 100 0001 1/19 A F2.8 1/200 10:00 1.JAN.2008 [DISPLAY] A LCD monitor (LCD) Press [DISPLAY] to switch to the screen to be used. • When the menu screen appears, the [DISPLAY] button is not activated. • During playback zoom, motion picture playback, slideshow, you can only select “Normal display” or Non-display“.
Advanced-Shooting ■ Histogram A histogram is a graph that displays brightness along the horizontal axis and the number of pixels at each brightness level on the vertical axis. You can see the exposure condition of the picture by looking at the histogram shape (graph distribution) for the picture taken. • If the graph forms mountain shape with its top located in the centre A, this means medium parts and bright parts are distributed in a well-balanced manner. This picture is good for recording.
Advanced-Shooting Making the LCD monitor easier to see (LCD mode) 1 Press and hold [Q.MENU] until quick setting screen is displayed. Q.MENU 2 Select indication at the right end (initial setting: [ ]) using q, select mode using e/r and press [MENU/SET]. 2 AWB AUTO 10M MENU SELECT EXIT MENU SET Mode Uses Brightness of the LCD monitor automatically AUTO POWER LCD changes depending on brightness of the environment.
Advanced-Shooting Taking Pictures Using the Built-in Flash ■ Flash setting A : AUTO The flash is automatically activated according to the recording condition. : AUTO/Red-eye reduction*1 (White) The flash is automatically activated according to the recording condition. • Use this when you take pictures of people in low lighting conditions. A Flash • Do not cover the photo flash with your fingers or any other items.
Advanced-Shooting ■ Available flash settings by recording mode The available flash settings depend on the recording mode. (○ : Available, — : Not available, ◎ : Initial setting) *2 • The flash setting may change when you change the recording mode. Change the flash setting again if necessary. • The flash setting is memorized even if the camera is turned off.However, the flash setting is reset to the initial setting when the advanced scene mode or scene mode is changed.
Advanced-Shooting ■ The available flash range to take pictures in Intelligent ISO are as follows: ISO LIMIT Available flash range ISO MAX400 60 cm to 4.3 m (Wide) 1.0 m to 2.4 m (Tele) ISO MAX800 80 cm to 6.0 m (Wide) 1.0 m to 3.4 m (Tele) ISO MAX 1.15 m to 8.6 m (Wide) 1600 1.0 m to 4.8 m (Tele) ■ Shutter speed for each flash mode Flash mode Shutter speed (sec.) 1/30 to 1/2000 : AUTO : AUTO/ 1/30 to 1/2000 Red-eye reduction : Forced 1/30 to 1/2000 FLASH ON : Forced ON/Red-eye reduction : Slow sync.
Advanced-Shooting Taking Close-up Pictures (AF w Macro Shooting) This mode allows you to take close-up pictures of the subject, e.g. when taking pictures of flowers. You can take pictures approaching the subject at a distance up to 5 cm from the lens by rotating the zoom lever upmost to Wide (1 ×). 1 Press r (w) • Macro shooting starts. ■ Focus range 5 cm W Changes gradually T 1.0 m • Use a tripod and the self-timer for best results.
Advanced-Shooting Taking Pictures with the Self-timer 1 Press w [ ]. 2 Select shutter speed using e/r or w [ ]. SELFTIMER OFF 10SEC. 2SEC. SET SELECT 3 Press [MENU/SET]. • You can also press the shutter button halfway to set. • When 5 seconds pass without any operation, the setting selected at the time is automatically adopted. 4 Press the shutter button halfway to focus and then press it fully to take a picture.
Advanced-Shooting Compensating the Exposure Use this function when you cannot achieve appropriate exposure due to the difference of brightness between the subject and the background. 1 Press e [C] to display [EXPOSURE] and press w/q to compensate the exposure. EXPOSURE Over exposed SELECT EXIT MENU A Compensate the exposure toward negative. Properly Exposed A The exposure compensation value • You can compensate from -2 EV to +2 EV in steps of 1/3 EV.
Advanced-Shooting Auto Bracket Recording 3 pictures are taken in succession, automatically changing the exposure. The pictures are based on the selected compensation range after setting the exposure (P48). 1 Press e (C) several times to display [AUTO BRACKET] and set the compensation range of the exposure using w/q. AUTO BRACKET SELECT EXIT • You can select OFF, ±1/3 EV, ±2/3 EV or ±1 EV. (When you do not use auto bracket, select [OFF].
Advanced-Shooting Set Aperture/Shutter Speed/Exposure (A/S/M) Set the recording/playback switch to REC [ ] side. (P18) You can take your favourite pictures by setting each item manually. See P51 for values that can be set. S 10 M 19 1 Turn the mode dial to match [A/S/M]. 2 Select mode with e/r and press [MENU/SET]. A/S/M MODE APERTURE-PRIORITY 1/30 M: Manual exposure Determine the exposure by adjusting the aperture value and shutter speed.
Advanced-Shooting ■ To change mode Press [MENU/SET], select mode with e/r and press [MENU/SET] again. You can move to the recording menu or SETUP menu. Select [A/S/M] icon with w and select [ ] (Recording menu) or [ ] (SETUP menu) with r. ■ Aperture-priority AE setting value Aperture value Shutter speed setting (with 1/3 EV setting (sec.) step) F3.5, F3.3 8 to 1/1000 F5.0, F4.5, F4.0 8 to 1/1300 F7.1, F6.3, F5.6 8 to 1/1600 F8.
Advanced-Shooting Taking Pictures of People, Scenery, etc. Expressively (Advanced Scene Mode) Set the recording/playback switch to REC [ ] side. (P18) You can take pictures of people, scenery, sports and night portrait more effectively according to recording environment. ■ Information • When you press [DISPLAY] while the advanced scene is selected in step 2, the explanation for the selected scene mode is displayed. (Press again to return to the advanced scene mode menu.
Advanced-Shooting To select each advanced scene (P52) ■ Recording technique • Place the zoom position to T side (Tele) as closely as possible and record moving close to the subject. U SPORTS mode Set here when you want to take pictures of sports scenes or other fast-moving events. NORMAL SPORTS • ISO sensitivity is fixed to [ISO 100]. (However, when selecting INDOOR PORTRAIT, [ISO MAX400] of intelligent ISO is set.) ] (face detection) is set for AF mode •[ as default setting.
Advanced-Shooting To select each advanced scene (P52) NIGHT PORTRAIT mode This allows you to take pictures of a person and the background with near reallife brightness. NIGHT PORTRAIT This function is suitable for taking pictures of a person in dark places. NIGHT SCENERY Night scenery is vividly photographed with maximum of 8 seconds slow shutter. ILLUMINATIONS Illuminations are photographed beautifully. CREATIVE NIGHT SCENERY The aperture value can be changed with the same setting in [NIGHT SCENERY].
Advanced-Shooting Scene Mode Set the recording/playback switch to [ ] (P18). When you select a scene mode to match the subject and recording situation, the camera sets the optimal exposure and hue to obtain the desired picture. • Refer to P56 to 60 for details about the modes. 1 Turn the mode dial to match [SCN]. • If you set [SCENE MENU] in SETUP menu to [OFF], the previous scene mode is set. 2 Press e/r/w/q to select the scene mode. SCENE MODE BABY1 SELECT DISPLAY SET 3 Press [MENU/SET].
Advanced-Shooting Refer to P55 for details on selecting a scene menu. f Food mode Use to take pictures of food in restaurants, irrespective of the lighting, so that the natural colours of the subject come out. • Focus range is 5 cm (Wide) / 1 m (Tele) to Z. • You cannot change the white balance setting. a Party mode Use to take pictures at wedding receptions, indoor parties, etc. Both the people and the background can be shot with natural brightness. ■ Technique for Party mode • Use the flash.
Advanced-Shooting Refer to P55 for details on selecting a scene menu. • The setting on the AF assist lamp is disabled. • Optical image stabilizer is fixed to [MODE2]. • The initial setting for the AF mode is [ ] (face detection). Sunset mode Use to take pictures of the sunset. Sunset colour can be reproduced vividly. • The flash setting is fixed to Forced FLASH OFF [ ]. • The setting on the AF assist lamp is disabled. • ISO sensitivity is fixed to [ISO100]. • You cannot change the white balance setting.
Advanced-Shooting Refer to P55 for details on selecting a scene menu. Pet mode Beach mode Suitable for taking pictures of your pet. This allows you to set the birthday (age) and name of your pet. For details on how to set age and birthday, see [BABY1]/[BABY2]. • Sensitivity will be the same as when you have set ISO limit in Intelligent ISO to [ISO MAX 800]. • The AF assist lamp is changed to [OFF]. • The AF mode is changed to [1-AREA]. • Refer to [BABY] for more details.
Advanced-Shooting Refer to P55 for details on selecting a scene menu. • The countdown screen appears. Do not move the camera. [PLEASE WAIT...] appears for the number of seconds you chose for shutter speed after the countdown. This is to process the signals. • To cancel the shot, press [MENU/SET] while the countdown screen is displayed. ■ Technique for Starry sky mode • The shutter opens for 15, 30 or 60 seconds, so use a tripod and the selftimer for best results. • The histogram is displayed in orange.
Advanced-Shooting Refer to P55 for details on selecting a scene menu. High-speed burst mode This is a convenient mode for shooting rapid movement or a decisive moment. Burst speed: Approx.5 fps (DMC-LZ10)/ Approx.5.5 fps (DMC-LZ8) ■ Setting the aspect ratio and a picture size HI-SPEED BURST PICTURE SIZE CANCEL A SELECT fixed to the values set for the first picture. • The recorded picture becomes slightly rougher. (Suitable for 4˝ × 6˝/10 × 15 cm printing.) • The following function cannot be used.
Advanced-Shooting Motion Picture Mode Set the recording/playback switch to REC [ ] side. (P18) ■ Changing the aspect ratio and the picture quality settings 1 Turn the mode dial to match [i]. 1 Press [MENU/SET]. 2 Press the shutter button halfway to focus and then press it fully to start recording. 2 Press e/r to select [ASPECT RATIO] and then press q.
Advanced-Shooting • fps (frame per second); This refers to the number of frames used in 1 second. • You can record smoother motion pictures with 30 fps. • You can record longer motion pictures with 10 fps although the picture quality is lower. • [10fpsQVGA]: The file size is smaller, so the files are suitable to be attached to e-mails. * Set [ASPECT RATIO] to [h] and the [PICTURE MODE] to [30fpsQVGA] or [10fpsQVGA] (320 × 240 pixels) when you record motion pictures to the built-in memory.
Advanced-Shooting Vacation Date Recording By setting the departure and return dates, you can record which date of the vacation you take a picture. The day of the vacation A is shown when you play a picture and you can add it to the picture for printing with [TEXT STAMP] (P88). • When you play back a picture, the date on which it was taken is displayed. 10 M 100-0001 1/19 1ST DAY A 10:00 15. JAN.
Advanced-Shooting 8 Take a picture. P 1 A 10 M 19 1ST DAY 10:00 15. JAN. 2008 • The day of the vacation A appears for about 5 seconds after setting the travel dates and when the camera is turned on when the travel date is set. • When [TRAVEL DATE] is set, [ ] appears on the lower right of the screen. (It is not displayed if the current date is after the return date.) ■ Cancelling the travel date The travel date is cleared if the current date is after the return date.
Advanced-Shooting Displaying the Time at the Travel Destination If you set your home area and the travel destination area when traveling abroad etc., the local time at the travel destination area can be displayed on the screen and recorded on the pictures taken. • Select [CLOCK SET] to set the current date and time in advance. (P17) (Example for the programme AE mode [ ]) 1 Press [MENU/SET] and then press w. 2 Press r to select the [SETUP] menu icon [ ] and then press q.
Advanced-Shooting ■ Setting the travel destination area (Perform steps 1, 2 and 3 on P65.) 1 Press e to select [DESTINATION] and then press [MENU/SET] to set. 3 Press [MENU/SET] to close the menu. SETUP WORLD TIME LCD DESTINATION SELECT HOME – –:– – – –.– –.– – – – CANCELA SELECT SET MENU SET A A Depending on the setting, the time at the travel destination area or the home area is displayed.
Advanced-Shooting Using the [REC] Mode Menu The items that can be set differ depending on the recording mode. Setting the colour, picture quality adjustment, etc. allows you to create wide variations on taking pictures. The menu items that can be set differ depending on the recording mode. ■ Using the [REC] mode menu Press [MENU/SET] to show the recording menu, then select the item you want to change (P19).
Advanced-Shooting Press [ Z Q ] to display the [REC] mode menu and select the item to set. (P19) [PICTURE SIZE] / [QUALITY] Setting a picture size and quality that matches your use of the pictures A digital picture is made of numerous dots called pixels. Although you cannot see the difference on the camera’s screen, the more the pixels the finer the picture will be when it is printed on a large piece of paper or displayed on a computer monitor.
Advanced-Shooting ] to display the [REC] mode menu and select the item to set. (P19) Press [ • The number of recordable pictures vary depending on the subject. • The number of recordable pictures displayed on LCD monitor may not correspond with recorded pictures. [ASPECT RATIO] i Setting the aspect ratio of pictures By changing the aspect ratio, you can select an angle of view that matches the subject. Select to take pictures with the same aspect ratio as a 4:3 TV or a computer monitor.
Advanced-Shooting Press [ J ] to display the [REC] mode menu and select the item to set. (P19) [SENSITIVITY] [WHITE BALANCE] Setting the light sensitivity K ISO sensitivity represents the sensitivity of the image sensor to light. If you set the ISO sensitivity higher, the camera becomes more suitable for recording in dark places. • When setting to [AUTO], the ISO sensitivity is automatically adjusted to a maximum of [ISO400] according to the brightness.
Advanced-Shooting Press [ ] to display the [REC] mode menu and select the item to set. (P19) ■ Auto White Balance (AWB) Use of auto white balance adjustment in inappropriate lighting conditions may result in reddish or bluish pictures. Where the subject is surrounded by many light sources or there are no white or whitish objects in the frame, auto white balance adjustment may not operate properly. In this case, set the white balance to a mode except [AWB] manually.
Advanced-Shooting Press [ ] to display the [REC] mode menu and select the item to set. (P19) ■ To finely adjust the white balance If you set other than [AWB], you can finely adjust the white balance while the recording screen is displayed. The white balance can be adjusted for each setting independently and is memorized even if the camera is turned off. 1 Press e several times until [WB ADJUST.] is displayed. WB ADJUST. RED ADJUST. BLUE EXIT MENU 2 Adjust with w/q.
Advanced-Shooting Press [ ] to display the [REC] mode menu and select the item to set. (P19) 1-area-focusing: The camera focuses on the subject in AF area on the centre of the screen. [AF MODE] / [QUICK AF] Setting the focus method ■ AF MODE W Select the mode that matches the recording conditions and the composition. Face detection: The camera automatically detects the person’s face. The focus and exposure can then be adjusted. Spot-focusing: The camera focuses on a limited narrow area in the screen.
Advanced-Shooting Press [ ] to display the [REC] mode menu and select the item to set. (P19) – When the face appears small on the screen – When there is rapid movement of subjects – When the subject is other than a human being – When there is jitter – When the digital zoom is used About 3-area-focusing/1-area-focusing (High speed) • You can focus on the subject more quickly than other AF modes.
Advanced-Shooting Press [ ] to display the [REC] mode menu and select the item to set. (P19) [BURST] Shooting in quick succession When you press and hold the shutter button several pictures are taken in succession. Burst mode Burst speed 2.5 fps* Approx. 2 fps G Number of recordable pictures Max. 3 (DMC-LZ10)/ Depending on Max. 4 the remaining (DMC-LZ8) capacity of H the built-in Max. 5 (DMC-LZ10)/ memory / card. Max.
Advanced-Shooting Press [ U ] to display the [REC] mode menu and select the item to set. (P19) [PICT.ADJ.] [STABILIZER] Setting the picture quality for the pictures taken This feature detects jitter and corrects for it Set PICT. ADJ. depending on recording situations and recording images. CONTRAST Adjust the difference between the brightness and the darkness in the picture. SHARPNESS The picture is sharply (+) defined or softly (–) focused.
Advanced-Shooting Press [ ] to display the [REC] mode menu and select the item to set. (P19) [MIN. SHTR SPEED] Setting the minimum shutter speed You can prevent jitter by setting the minimum shutter speed (a number which indicates the slowest speed). • The slow shutter speeds you can select are: [1/250], [1/125], [1/60], [1/30], [1/15], [1/8 (initial setting)], [1/4], [1/2], [1] • When intelligent ISO is used, the minimum shutter speed cannot be set.
Advanced-Viewing Displaying Multiple Screens (Multi Playback) 1 Rotate the zoom lever towards [ ] [W] to display multiple screens. 15. JAN. 2008 1/34 CANCEL MENU For example: When you have chosen to show 12 pictures • :1 screen➝ 12 screens➝ 30 screens➝Calendar screen display (P79) • Rotate the zoom lever towards [3] [T] to return to the previous screen. 2 Press e/r/w/q to select a picture. A 15. JAN.
Advanced-Viewing Displaying Pictures by Recording Date ( You can display pictures by recording date using the calendar function. 1 Rotate the zoom lever towards [ ] [W] several times to display the calendar screen.
Advanced-Viewing Using the Playback Zoom 1 Rotate the zoom lever towards [3] [T] to enlarge the picture. 2X A 4X CANCEL DELETE 3: 1×➝2×➝4×➝8×➝16× • When you rotate the zoom lever towards [ ] [W] after enlarging the picture, the magnification becomes lower. When you rotate the zoom lever towards [3] [T], the magnification becomes higher. • When you change the magnification, the zoom position indication A appears for about 1 second to check the position of the section enlarged.
Advanced-Viewing Playing Back Pictures Automatically (a Slide Show) Set the recording/playback switch to the playback [Q]. (P18) Playing back pictures automatically in order. Recommended when viewing on TV screen, etc. 1 Press [MENU/SET] and press q. 2 Select [SLIDE SHOW] with e/r and then press [MENU/SET] button. EFFECT SETUP NATURAL CANCELA SELECT MENU SET SET • The cursor displayed during playback corresponds to e/r/ w/q. To finish the slide show [a] Press r.
Advanced-Viewing ■ Setting EFFECT 1 Select [EFFECT] in step 4 and press q. 2 Select one of EFFECTs for your preference with e/r and press [MENU/ SET]. EFFECT Details (only when [CATEGORY] is selected) AUTO The camera automatically adjusts the effect. NATURAL Slow effect with music (1) SLOW Slow effect with music (2) Up-tempo effect with music SWING (1) Up-tempo effect with music URBAN (2) OFF No effect ■ Setting DURATION or REPEAT 1 Select [SETUP] in step 4 and press q.
Advanced-Viewing Searching by Recording Information ( Set the recording/playback switch to the playback [Q]. (P18) You can perform category playback by classifying pictures according to the recording information such as scene mode ([PORTRAIT], [SCENERY], etc.). 1 Press [MENU/SET] and press q. CATEGORY PLAY] 2 Select [ with e/r and then press [MENU/ SET]. PLAYBACK MODE NORMAL PLAY SLIDE SHOW CATEGORY PLAY FAVORITE PLAY SELECT SET • Category search starts.
Advanced-Viewing Playing Back Your Favourite Pictures (★ Favorite Play) Set the recording/playback switch to the playback [Q]. (P18) You can playback the pictures set as favourites only. 1 Press [MENU/SET] and press q. 2 Select [★ FAVORITE PLAY] with e/r and then press [MENU/SET]. PLAYBACK MODE NORMAL PLAY SLIDE SHOW CATEGORY PLAY FAVORITE PLAY SELECT SET ■ To cancel the favourite setting [★] You may not be able to cancel the favourite in [★ FAVORITE PLAY].
Advanced-Viewing Playing Back Motion Pictures Press w/q to select a picture with a motion picture icon [ ]/[ ]/ [ ]/[ ]/[ ]/[ ]A and then press e to play back. A 30fps VGA 100-0001 1/19 15S B 10:00 1.JAN. 1.JAN.2008 2008 • The motion picture recording time B is displayed on the LCD monitor. After playback starts, the elapsed playback time is displayed on the upper right of the LCD monitor. For example, 8 minutes and 30 seconds is displayed as [8m30s].
Advanced-Viewing Using the [PLAYBACK] Mode Menu You can use various functions in playback mode to rotate pictures, set protection for them etc. 1 Press [MENU/SET]. 2 Press r to select [ press q. ] and then 3 Press e/r to select the menu item and then press q. CALENDAR TITLE EDIT TEXT STAMP RESIZE TRIMMING [CALENDAR] Seaching pictures at the date PLAYBACK CAL • When saving the edited picture in [TEXT STAMP], [RESIZE], [TRIMMING] and [ASPECT CONV.], the picture will be saved as new file.
Advanced-Viewing Press [ ] to display the [PLAYBACK] mode menu and select the item to set. (P86) Press [DISPLAY] to switch text between [A] (capitals), [a] (small case) and [&1] (special characters and numbers). Rotate the zoom lever. Move the cursor to [SPACE] and press [MENU/SET]. Move the cursor to [DELETE] and press [MENU/SET]. PLAYBACK CAL CALENDAR TITLE EDIT TEXT STAMP RESIZE TRIMMING Text SINGLE MULTI Cursor Blank SET SELECT • Title edit cannot be used on the following pictures.
Advanced-Viewing Press [ ] to display the [PLAYBACK] mode menu and select the item to set. (P86) ■ Delete the title (for [SINGLE] only) 1. In step 2 when [SINGLE] is selected, delete all the texts, select [EXIT], and press [MENU/SET]. 2. Press [ ] twice to close the menu. • Registered text can be displayed on the screen of this unit. (Displayed on slide if too many texts are input.) • The name setting of [BABY] or [PET] mode can be registered by using the same operation as “Single setting”.
Advanced-Viewing ] to display the [PLAYBACK] mode menu and select the item to set. (P86) Press [ 2 Press e/r/w/q to select [SHOOTING DATE], [AGE], [TRAVEL DATE] or [TITLE] and change the settings for the item, and then press [MENU/SET].
Advanced-Viewing Press [ ] to display the [PLAYBACK] mode menu and select the item to set. (P86) ■ Multi setting (up to 50 pictures) After the common operation 1 Select the picture using e/r/w/q and press [DISPLAY] to set/cancel. TEXT STAMP 7 8 10 11 9 CANCELA OK SET/CANCEL SELECT Set Cancel The [ The [ ] icon appears. ] icon disappears.
Advanced-Viewing ] to display the [PLAYBACK] mode menu and select the item to set. (P86) Press [ 2 Press w/q to select the size and then press [MENU/SET]. RESIZE 7M 100-0001 1/19 7M 5M A MENU SET CANCELA SELECT SET • Sizes smaller than the recorded picture are displayed. 3 Press e to select [YES] and then press [MENU/SET]. RESIZE SAVE NEW PICTURES? YES NO CANCEL A SELECT MENU SET SET • If you select [NO], the screen returns to the one shown in step 2 4 Press [ menu.
Advanced-Viewing ] to display the [PLAYBACK] mode menu and select the item to set. (P86) Press [ 4 Press [MENU/SET]. [TRIMMING] f Enlarging a picture and trimming it Use this function when you trim unnecessary parts of the recorded picture. Select [f TRIMMING] from playback menu (P86). 1 Press w/q to select the picture and then press [MENU/SET]. TRIMMING 10 M TRIMMING SAVE NEW PICTURES? YES NO CANCEL A SELECT SET • If you select [NO], the screen returns to the one shown in step 2.
Advanced-Viewing Press [ ] to display the [PLAYBACK] mode menu and select the item to set. (P86) [ASPECT CONV.] i Changing the aspect ratio of a 16:9 picture You can convert pictures taken with a [j] aspect ratio to a [i] or a [h] aspect ratio. Select [i ASPECT CONV.] from playback menu (P86). 1 Select [i] or [h] using e/r and then press [MENU/SET]. 1/ 3 PLAYBACK ON OFF SET MENU • Use r/e to set the frame position for pictures rotated vertically.
Advanced-Viewing Press [ ] to display the [PLAYBACK] mode menu and select the item to set. (P86) [ROTATE] / [ROTATE DISP.] b To display the picture rotated j This mode allows you to automatically display pictures vertically if they were recorded holding the camera vertically or rotate pictures manually in 90° increments. ■ Rotate (The picture is rotated manually.) Select [b ROTATE] from playback menu (P86). • When [ROTATE DISP.] is set to [OFF], [ROTATE] function is disabled.
Advanced-Viewing ] to display the [PLAYBACK] mode menu and select the item to set. (P86) Press [ ★ [FAVORITE] Setting your favourite pictures You can do the following if a mark [★] has been added to pictures and they have been set as favourites. • Play back the pictures set as favourite. (P84) • Play back the pictures set as favourites only as a slide show. (P81) • Delete all the pictures not set as favourites. ([ALL DELETE EXCEPT ★]) (P38) • Print only the pictures set as favourites.
Advanced-Viewing Press [ ] to display the [PLAYBACK] mode menu and select the item to set. (P86) [DPOF PRINT] l Setting the picture to be printed and the number of prints DPOF (Digital Print Order Format) is a system that allows the user to select which pictures to print, how many copies of each picture to print and whether or not to print the recording date on the pictures when using a DPOF compatible photo printer or photo printing store. For details, ask at your photo printing store.
Advanced-Viewing ] to display the [PLAYBACK] mode menu and select the item to set. (P86) Press [ ■ To cancel all settings After the common operation 1 Press e to select [YES] and then press [MENU/SET]. DPOF PRINT CANCEL ALL DPOF PRINT SETTINGS? YES NO CANCEL A SELECT SET 2 Press [MENU/SET] to close the menu. • DPOF print settings on the built-in memory are cancelled when a card is not inserted. DPOF print settings on the card are cancelled when a card is inserted.
Advanced-Viewing ] to display the [PLAYBACK] mode menu and select the item to set. (P86) Press [ [PROTECT] g Preventing accidental erasure of the picture You can set protection for the pictures you do not want to delete to prevent them from accidental erasure. Select [g PROTECT] from playback menu (P86). ■ Common operation Press e/r to select [SINGLE], [MULTI] or [CANCEL] and then press [MENU/SET].
Advanced-Viewing ] to display the [PLAYBACK] mode menu and select the item to set. (P86) Press [ [COPY] Copying the picture data You can copy recorded picture data from the built-in memory to a card or vice versa. Select [ (P86). COPY] from playback menu 1 Press e/r to select the copy destination and then press [MENU/SET]. PLAYBACK 4 Press [ ] several times to close the menu.
Connecting to other equipment Connecting to a PC • By connecting the camera to a computer, you can upload your pictures, then use the software on the included CDROM ([PHOTOfunSTUDIO-viewer-] for Windows®) to print or send your images by e-mail. • If you use Windows 98/98SE, install the USB driver and then connect the camera to the computer. • For details, refer to the operating instructions (PDF file) of the software. 1 Turn on the camera and the PC.
Connecting to other equipment ■ Motion picture playback on a PC Use “QuickTime” (for Windows 2000/XP/ Vista) in the supplied CD-ROM when you play back motion pictures recorded on this camera on your PC. • Download [QuickTime6.5.2 for Windows] from the following website and install it on your PC when you use Windows98/ 98SE/Me. http://www.apple.com/support/ downloads/quicktime652forwindows.html • The software is a standard Macintosh feature. ■ Folder composition Folders appear as follows.
Connecting to other equipment • Do not use any other USB connection cables except the supplied one. • While [ACCESS] is being displayed, do not disconnect the USB connection cable. • When using Windows PC, click Safety Remove Hardware icon on the task trey first to remove USB cable.When the icon is not displayed, make sure the connection screen is not displayed, and turn the camera [OFF] to remove.
Connecting to other equipment Connecting to a PictBridge-compliant Printer By connecting the camera directly to a printer supporting PictBridge via the USB connection cable (supplied), you can select the pictures to be printed or start printing on the LCD monitor. Make the necessary settings on your printer beforehand. (Read your printer’s operating instructions.) 1 Turn on the camera and the printer. 2 Connect the camera to a printer via the USB connection cable A (supplied).
Connecting to other equipment ■ Printing the selected picture (making a single print) 1 Press w/q to select the picture and then press [MENU/SET]. PictBridge 10 M 100-0001 1/19 PLEASE SELECT THE PICTURE TO PRINT SELECT MULTI PRINT PRINT MENU • A message displays for about 2 seconds. 2 Press e to select [PRINT START] and then press [MENU/SET]. SINGLE SELECT PRINT START PRINT WITH DATE NUM.OF PRINTS PAPER SIZE PAGE LAYOUT CANCEL A SELECT OFF 1 SET • Press [MENU/SET] to cancel printing.
Connecting to other equipment • When you select [DPOF PICTURE], [DPOF SET] is selectable. When you select [DPOF SET], refer to P96. • Press [MENU/SET] when you wish to cancel printing halfway. • When you select [MULTI SELECT], [SELECT ALL] or [FAVORITE], the print confirmation screen appears. Select [YES] and perform printing. • When the number of prints exceeds 1,000, [PRINTING --- PICTURES DO YOU WANT TO PROCEED?] appears on the print confirmation screen.
Connecting to other equipment • Do not disconnect the USB connection cable when the cable disconnection warning icon [K] is indicated. (Depending on the printer, the icon may not be displayed.) • If the remaining battery power becomes low while the camera and the printer are connected, the status indicator blinks and the alarm beeps. If this happens during printing, press [MENU/SET] and stop printing at once. If not printing, disconnect the USB connection cable.
Connecting to other equipment Playing Back Pictures with a TV Screen ■ Playing back pictures using the AV cable (supplied) • Set the [TV ASPECT]. (P23) • Turn the camera and the TV off. 1 AV OUT 2 DIGITAL B A 1 Connect the AV cable A (supplied) to the [AV OUT] socket of the camera. • Connect the AV cable with the [c] mark facing the [q] mark on the [AV OUT] socket. • Hold B and then insert or pull the AV cable straight.
Others Screen Display The LCD monitor shows the status of the camera. In programme AE mode [ ] (Initial setting) In recording (After settings) 1 16 15 2 3 4 P 5 6 7 10 M F3.
Others In Playback 1 19 18 17 16 15 14 2 3 4 5 6 7 10 M 100-0001 1/19 1 8 9 10 1ST DAY AWB ISO100 10:00 1. JAN. 2008 P F3.
Others Cautions for Use ■ Optimal Use of the Camera Take care not to drop or knock the unit or put a lot of pressure on it. • Do not leave the unit in your pants pocket when you sit down or forcefully insert it into a full bag etc. • Take care not to drop or knock the bag that you inserted the unit in as it may strongly shock the unit. • A strong shock may break the lens, screen or outer case and cause the camera to malfunction.
Others ■ Batteries Be sure to remove the batteries when you will not be using the camera for a long period of time. • If the temperature is too high or low, the terminals may rust causing a malfunction. If you drop the batteries accidentally, check to see if the body of the batteries and the terminals are damaged. • Inserting a damaged battery in the camera will damage the camera. Bring charged spare batteries when going out.
Others Message Display Confirmation messages or error messages will be displayed on the screen in some cases. The major messages are described below as examples. [CURRENT BATTERY TYPE SETTING: ALKALINE/Ni-MH]/[CURRENT BATTERY TYPE SETTING: OXYRIDE] This message is displayed the first time you insert batteries and when the batteries are exhausted and you replace them.
Others [MEMORY CARD ERROR FORMAT THIS CARD?] The format of the card cannot be recognised by this camera. Format the card again with this camera. Save your data to your computer, then use this unit to reformat the card. (P24) [PLEASE TURN CAMERA OFF AND THEN ON AGAIN] This message appears when the camera is not operating properly. Turn the camera off and on. If the message persists, contact the dealer or your nearest Service Centre.
Others Troubleshooting If you put the menu back to the settings at the time of purchase, the conditions may be improved. Carry out the [RESET] in the setup menu while the camera is in the recording mode. (P23) ■ Batteries and power supply Conditions The camera turns off immediately even when battery power is full. The remaining battery power is low even if new batteries are inserted.
Others Conditions The subject is not focused properly. The recorded picture is blurred. The optical image stabilizer is not effective. Images are grainy or noisy. The brightness or colour of the picture differs from the actual scene. Shooting of motion pictures stops unexpectedly. Reddish vertical lines appear on the LCD monitor while shooting Causes The focus range varies depending on the recording mode. Set the proper recording mode for the distance to the subject.
Others ■ LCD Conditions The LCD monitor sometimes turns off although the camera is turned on. The brightness of the LCD monitor becomes dark or bright for a moment. The LCD monitor flickers indoors. Causes The LCD turns off immediately after using the flash while it recharges. The LCD may turn off immediately after setting to recording mode while it recharges.
Others ■ Playback Conditions Pictures rotate unexpectedly. Causes One of the features of this unit can automatically detect when you have turned the camera sideways to take a picture, then rotate that picture for you when you play it back. In some cases, the unit may detect that you have turned the camera sideways, when in fact you are facing it up or down. • Set [ROTATE DISP.] (P94) to [OFF] so that the camera does not rotate these kinds of pictures for you.
Others ■ Connecting to a TV, computer or printer Conditions The picture does not appear on the television. The TV screen is disturbed or displayed in monochrome. The display areas on the TV screen and the camera’s LCD monitor are different. Causes Is the camera connected to the TV correctly? Set the TV to video input mode.
Others Conditions When the shutter button is pressed halfway, a red lamp turns on sometimes. The AF assist lamp does not turn on. Causes In dark places, the AF assist lamp (P77) lights red to make it easier to focus on a subject. Is [AF ASSIST LAMP] on the [REC] mode menu set to [ON]? (P77) Are you taking pictures in dark places? The AF assist lamp does not turn on in bright places.
Others Number of Recordable Pictures and Available Recording Time • The number of recordable pictures and the available recording time are an approximation. (These vary depending on the recording conditions and the type of card.) • The number of recordable pictures and the available recording time vary depending on the subjects.
Others Aspect ratio Picture size Quality Built-in Memory (Approx.
Others Aspect ratio Picture size Quality Built-in Memory (Approx. 20MB) 16 MB 32 MB 64 MB 128 MB 256 MB Card 512 MB 1 GB 2 GB 4 GB 8 GB 16 GB j DMC-LZ10 only : 7.5M (3648 × 2056 pixels) Quality Built-in Memory (Approx. 20MB) 16 MB 32 MB 64 MB 128 MB 256 MB Card 512 MB 1 GB 2 GB 4 GB 8 GB 16 GB DMC-LZ10 only : 5.
Others ■ Available recording time (In Motion picture mode) Picture quality setting Built-in Memory (Approx.
Others Specifications Digital Camera: Power Source: Power Consumption: Information for your safety DC 3.0 V DMC-LZ10: 1.5 W (When recording) DMC-LZ8: 1.4 W (When recording) 0.6 W (When playing back) Camera Effective pixels: DMC-LZ10: 10,100,000 pixels DMC-LZ8: 8,100,000 pixels Image sensor: DMC-LZ10: 1/2.33˝ CCD DMC-LZ8: 1/2.5˝ CCD Total pixels DMC-LZ10: 10,700,000 pixels DMC-LZ8: 8,320,000 pixels Primary colour filter Lens: Optical 5 × zoom, f=5.
Others Number of recordable pictures: DMC-LZ10: Max. 5 pictures (Standard), max. 3 pictures (Fine), DMC-LZ8: Max. 7 pictures (Standard), max. 4 pictures (Fine), Depends on the remaining capacity of the built-in memory or the card (Unlimited). Hi-speed burst Burst speed: Picture size ISO sensitivity: Shutter speed: White balance: Exposure (AE): Metering mode: LCD monitor: Flash: Microphone: Speaker: Recording media: DMC-LZ10: Approx. 5 pictures/second DMC-LZ8: Approx. 5.
Others Still picture: Motion picture: Quality: Recording file format Still Picture: Motion pictures: Interface Digital: Analogue video / audio: Terminal AV OUT / DIGITAL: DC IN: Dimensions: Mass (Weight): Operating Temperature: Operating Humidity: Aspect ratio [h]: DMC-LZ10: 3648 × 2736 pixels / 3072 × 2304 pixels / 2560 × 1920 pixels / 2048 × 1536 pixels / 1600 × 1200 pixels / 640 × 480 pixels DMC-LZ8: 3264 × 2448 pixels / 2560 × 1920 pixels / 2048 × 1536 pixels / 1600 × 1200 pixels / 640 × 480 pixels
VQT1L98 VQT1L98_DMC-LZ10_EB.
QuickTime and the QuickTime logo are trademarks or registered trademarks of Apple Inc., used under license therefrom. B VQT1L98 H1207HM0 VQT1L98_DMC-LZ10_EB.indd 128 Matsushita Electric Industrial Co., Ltd. Web Site: http://panasonic.net Pursuant to at the directive 2004/108/EC, article 9(2) Panasonic Testing Centre Panasonic Marketing Europe GmbH Winsbergring 15, 22525 Hamburg, F.R.