Operating Instructions for advanced features Digital Camera Model No. DMC-FS40 DMC-FS41 DMC-FS28 DMC-FS40 DMC-FS41 DMC-FS28 DMC-S5 DMC-S2 DMC-S5 DMC-S2 Before use, please read these instructions completely.
Contents Before use Basics Before use............................................... 4 Standard Accessories............................ 6 Names and Functions of Main Parts..... 7 Sequence of operations....................... 18 Taking pictures with automatic settings [Intelligent Auto] Mode......................... 22 Automatic Scene Detection..........................23 About flash...................................................23 About the Happy colour setting....................
Contents Application (Record) Application (View) Taking pictures with your own settings [Normal Picture] Mode......................... 40 How to adjust focus............................. 41 Using zoom........................................... 43 Different playback methods [Playback Mode]................................... 64 Taking pictures with flash.................... 45 Taking pictures with self-timer............ 47 Taking pictures with Exposure Compensation.......................................
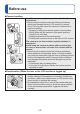
Before use ■■Camera handling Keep the camera away from excessive vibration, force, or pressure. ●●Avoid using the camera under the following conditions, which may damage the lens, LCD monitor, or camera body. This may also cause the camera to malfunction or prevent recording.
Before use ■■Always take a test shot first Before important events when you will use the camera (at weddings, for example), always take a test shot to make sure that pictures and sound record correctly. ■■No compensation for missed shots We cannot compensate for missed shots if technical problems with the camera or card prevent recording.
Standard Accessories Check that all the accessories are supplied before using the camera. ●●The accessories and their shape will differ depending on the country or area where the camera was purchased. For details on the accessories, refer to Basic Operating Instructions. ●●Battery Pack is indicated as battery pack or battery in the text. ●●Battery Charger is indicated as battery charger or charger in the text. ●●SD Memory Card, SDHC Memory Card and SDXC Memory Card are indicated as card in the text.
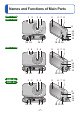
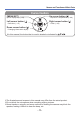
Names and Functions of Main Parts DMC-FS40 DMC-FS41 1 2 3 4 5 6 7 8 9 10 11 12 13 20 19 DMC-FS28 1 2 18 17 3 4 16 15 14 5 6 7 8 9 10 11 12 13 20 19 DMC-S5 DMC-S2 1 2 18 17 3 4 16 15 14 5 6 7 8 9 10 11 12 13 20 19 18 17 -7- 16 15 14
Names and Functions of Main Parts 1 2 3 4 5 6 7 8 9 Self-timer indicator (→47)/AF Assist Lamp (→62) Flash (→45) Lens Lens barrel LCD monitor (→88) Power button (→16) Microphone (→25) Shutter button (→20) DMC-FS40 DMC-FS41 Zoom lever (→43) DMC-FS28 10 11 12 13 14 15 16 17 18 19 We recommend using the supplied hand strap to avoid dropping the camera.
Names and Functions of Main Parts [MENU/SET] Cursor button (menu display/set) (→33) Up cursor button ( ) •• Exposure Compensation (→48) Left cursor button ( ) Right cursor button ( ) •• Self-timer (→47) •• Flash (→45) Down cursor button ( ) •• Changing information display ●●In this manual, the button that is used is shaded or indicated by . ●●The illustrations and screens in this manual may differ from the actual product. ●●Do not block the microphone when recording motion pictures.
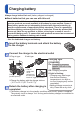
Charging battery Always charge before first use! (battery shipped uncharged) ■■About batteries that you can use with this unit It has been found that counterfeit battery packs which look very similar to the genuine products are made available to purchase in some markets. Some of these battery packs are not adequately protected with internal protection to meet the requirements of appropriate safety standards. There is a possibility that these battery packs may lead to fire or explosion.
Charging battery Guidelines for number of recordable pictures and operating time The number of recordable pictures or available operating time may vary according to surrounding environment and usage conditions. Figures may be reduced if flash, zoom, or other functions are used frequently, or in colder climates. DMC-FS40 DMC-FS41 DMC-FS28 DMC-S2 DMC-S5 280 pictures 260 pictures 140 min. 130 min. Number of recordable pictures (Approx.) Recording time (Approx.
Inserting and removing the card (optional)/ the battery Turn off the power and slide the card/battery door out ( ) before opening the door ( ) as illustrated Insert the battery and card, making sure that their orientation is correct ••Battery: Insert all the way firmly until a locking sound is heard, and check that the lever is hooked over the battery. ••Card: Insert all the way firmly until it clicks.
Inserting and removing the card (optional)/the battery ■■To remove ••To remove battery: Move lever in direction of arrow. DMC-FS40 DMC-FS41 DMC-FS28 DMC-S5 DMC-S2 ••To remove card: Press down in centre. ●●Always use genuine Panasonic batteries. ●●If you use other batteries, we cannot guarantee the quality of this product. ●●Remove battery from camera after use.
Inserting and removing the card (optional)/the battery Picture save destination (cards and built-in memory) ■■Built-in memory (Approx. 70 MB) ●●Pictures may be copied between cards and the built-in memory. (→77) ●●The access time for the built-in memory may be longer than the access time for a card.
Inserting and removing the card (optional)/the battery Remaining battery and memory capacity Remaining battery (only when using battery) (flashes red) If the battery mark flashes red, recharge or replace battery. Estimated remaining pictures or recording time capacity Displayed when no card is inserted (pictures will be saved to built-in memory) When in operation (Card) or (Built-in memory) are illuminated red. While the light remains lit, an operation is taking place, such as picture writing or reading.
Setting the clock The clock is not set when the camera is shipped. Press the Power button The power is turned on. If the language select screen is not displayed, proceed to step . Press [MENU/SET] while the message is displayed Press to select the language, and press [MENU/SET] ••The [Please set the clock] message appears. Press [MENU/SET] Press to select the items (year, month, day, hour, minute, display order or time display format), and press to set ••To cancel → Press [ / ] button.
Setting the clock To change time setting When resetting date and time, select [Clock Set] from the [Setup] menu. ••Clock settings will be saved for approx. 3 months even after battery is removed, provided a fully-charged battery was installed in the camera for 24 hours beforehand. Select [Clock Set] from the [Setup] menu or [Rec] menu (→35) Set the date and time ••Press to select the items (year, month, day, hour, minute, display order or time display format), and press to set.
Sequence of operations Press the Power button Press [MODE] button Use cursor button to select the recording mode and press [MENU/SET] ■■Recording mode [Intelligent Auto] Mode (→22) Take pictures with automatic settings. [Normal Picture] Mode (→40) Take pictures with your own settings. [Scene Mode] (→49) Take pictures according to scene. [Motion Picture] Mode (→25) Take motion pictures.
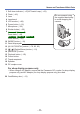
Sequence of operations Flash Microphone Speaker AF Assist Lamp We recommend using the supplied hand strap to avoid dropping the camera. Holding the camera ••To avoid camera shake, hold it with both hands keeping your arms close to your body and standing with your feet slightly apart. ••Do not touch the lens. ••Do not block the flash or the AF Assist Lamp. Do not look at it from close range. ••Try to hold the camera steady when you press the shutter button.
Sequence of operations Press the shutter button and take pictures Press halfway (press lightly to focus) Press fully (press the button all the way to record) ••For motion pictures, recording will start. To end recording, press the shutter button again. Press the Playback button Press [MODE] button Use cursor button to select playback mode and press [MENU/SET] ■■Playback mode [Normal Play] Mode (→26) Displays all pictures that can be played back.
Sequence of operations Use cursor button to select a picture to be played back •• Play back motion pictures or panorama pictures •• [Auto Retouch] •• [Beauty Retouch] DMC-FS40 DMC-FS41 Previous Next Changing information display ••Editing or performing settings for pictures using the Playback menu (→71) Press the Power button - 21 -
Taking pictures with automatic settings [Intelligent Auto] Mode Recording mode: Optimum settings are made automatically from information such as “face”, “movement”, “brightness”, and “distance” just by pointing the camera at the subject, meaning that clear pictures can be taken without the need to make settings manually.
Taking pictures with automatic settings [Intelligent Auto] Mode Automatic Scene Detection Camera reads scene when pointed at subject, and makes optimum settings automatically. The icon of scene detected Recognises people Recognises landscapes Recognises night scenes and people in them (Only when is selected)* Recognises night scenes* Recognises close-ups Recognises sunsets Reads subject movement to avoid blurring when scene does not correspond to any of the above.
Taking pictures with automatic settings [Intelligent Auto] Mode Notes on setting items Only menu items which are displayed in the [Intelligent Auto] Mode can be set. The settings selected in the [Normal Picture] Mode or other modes are reflected for not displayed menu items on the [Setup] menu.
Taking motion pictures [Motion Picture] Mode Recording mode: Microphone (Do not block the microphone with your fingers) Display the screen for recording mode selection Select [Motion Picture] Mode Start recording Press halfway (adjust the focus) Remaining recording time (approx.) Press fully (start recording) ••Immediately release the shutter button after pressing it all the way. ••The focus and zoom will remain as they were at the beginning of recording.
Viewing your pictures [Normal Play] When a card is in the camera, pictures are played back from the card, and without a card, pictures are played back from the built-in memory. Press the Playback button ••Press again to enter the recording mode. Scroll through pictures Previous Next File number Picture number/Total pictures ••Hold down to quickly scroll forwards/ backwards. ••Press the shutter button to switch to recording mode. ■■Changing recording information display Press .
Viewing your pictures [Normal Play] Viewing motion pictures Select a picture with the motion picture icon, and press Playback now starts. Motion picture recording time When playback starts, the elapsed playback time is displayed in the top right of the screen.
Viewing your pictures [Normal Play] Zooming in and viewing “Playback Zoom” DMC-FS40 DMC-FS41 Turn the zoom lever to T side DMC-FS28 DMC-S5 DMC-S2 Press the T side of the zoom button 1x 2x Current zoom position (displayed for 1 sec.
Viewing your pictures [Normal Play] Viewing a list of pictures “Multi Playback” Picture no./Total no.
Viewing your pictures [Normal Play] Viewing pictures by their recording date “Calendar Playback” Selected date (First picture from the date) DMC-FS40 DMC-FS41 Turn the zoom lever to W several times DMC-FS28 DMC-S5 DMC-S2 Press the W side of the zoom button several times 1-picture screen 12-picture screen 30-picture screen Calendar Playback DMC-FS40 DMC-FS41 Turn the zoom lever to W side/ DMC-FS28 DMC-S5 DMC-S2 Press the W side of the zoom button DMC-FS40 DMC-FS41 Turn the zoom lever to T side/ DM
Deleting pictures Pictures will be deleted from the card if the card is inserted, or from the built-in memory if the card is not inserted. (Deleted pictures cannot be recovered.) Press to delete displayed picture ••A confirmation screen is displayed. Select [Yes] with cursor button and then press [MENU/SET]. ●●Do not turn off the power during deletion. ●●Use a sufficiently charged battery. ●●Pictures cannot be deleted in the following cases: ••Protected pictures ••Card switch is in “LOCK” position.
Deleting pictures To delete multiple (up to 50)/To delete all pictures Press to delete displayed picture Select [Delete Multi]/[Delete All] ●●[Delete Multi] Use cursor button to select picture and press [MENU/SET]. ••To cancel → Press [MENU/SET] again. Use cursor button to select [OK] and press [MENU/SET]. Picture selected ••You can select [All Delete Except Favorite] in [Delete All] if there are pictures that have been set as [Favorite] (→74). ••A confirmation screen is displayed.
Setting the menu Refer to the procedure below for example on how to operate the menus. Example: Changing [AF Mode] in the [Rec] menu in [Normal Picture] Mode Press [MENU/SET] The menu selection screen is displayed. Select [Rec] menu and press [MENU/SET] Press to select [AF Mode] and press [MENU/SET] Pages The pages can also be selected with the zoom lever or the zoom button. Press to select a setting, and then press [MENU/SET] The selected setting is set. ••To cancel → Press [ / ] button.
Setting the menu ●●The operation screen examples in this manual may differ from the actual screen display or some parts of the screen display are omitted. ●●The menu types and items that are displayed vary according to the mode. ●●The setting methods vary depending on the menu item. ●●In recording mode, the menu screen can also be exited by pressing the shutter button halfway.
Using the [Setup] menu [Clock Set], [Auto Power Off] and [Auto Review] are important for clock setting and battery life. Please check these before use. ••For details about the setting procedure in the [Setup] menu (→33) Item [Clock Set] Settings, notes Set time, date, and display format. (→16) [World Time] Set the local time at travel destination. Message will be displayed when setting for the first time. In this case, press [MENU/SET] and skip to step .
Using the [Setup] menu ••For details about the setting procedure in the [Setup] menu (→33) Item DMC-FS40 DMC-FS41 [Beep] Settings, notes [Beep Level] / Change or mute the beep/shutter sounds. / : Low / High / Mute [Beep Tone] / / : Change beep tone. [Shutter Vol.] / / : Low / High / Mute [Shutter Tone] / DMC-FS28 DMC-S2 DMC-S5 / / : Change shutter tone. / : Low / High / Mute [Beep] Adjust volume of beep sounds. [Volume] Adjust volume of sound from speakers (7 levels).
Using the [Setup] menu ••For details about the setting procedure in the [Setup] menu (→33) Item [Focus Icon] Change the focus icon. [Auto Power Off] Turn off the power when you are not using the camera to minimise battery consumption. [Auto Review] Automatically display still pictures immediately after taking them. Settings, notes / / / / / [2 MIN.] / [5 MIN.] / [10 MIN.
Using the [Setup] menu ••For details about the setting procedure in the [Setup] menu (→33) Item [Output] Adjust the settings used when the camera is connected to a TV, etc. via the AV cable. (Playback mode only.) [Rotate Disp.] Automatically rotate portrait still pictures. Settings, notes [Video Out] [NTSC] / [PAL] [TV Aspect] / : Rotate and display pictures displayed on a TV screen as well as those displayed on the LCD monitor of the camera in portrait orientation.
Using the [Setup] menu ••For details about the setting procedure in the [Setup] menu (→33) Item [Format] Use when [Built-In Memory Error] or [Memory Card Error] appears, or when formatting the built-in memory or card. When a card/built-in memory is formatted, the data cannot be restored. Check the content of the card/ built-in memory carefully before formatting. [Language] Settings, notes ••This requires a sufficiently charged battery. When formatting the built-in memory, remove the cards.
Taking pictures with your own settings [Normal Picture] Mode Recording mode: Using the [Rec] menu to change settings and set up your own recording environment. Shutter button Display the screen for recording mode selection Select [Normal Picture] Mode Take a picture Press halfway (press lightly to focus) Press fully (press the button all the way to record) ■■Changing recording information display Press . ●●If a warning is displayed about jitter, use [Stabilizer], a tripod, or [Selftimer].
How to adjust focus Useful when subject is not in centre of picture. First adjust focus according to subject Align the AF area with the subject Focus display ( When focus is aligned: illuminated When focus is not aligned: flashing) AF area ( When focus is aligned: green When focus is not aligned: red) Hold down halfway Return to desired composition ●●Subjects/environments which may make focusing difficult: ••Fast-moving or extremely bright objects, or objects with no colour contrast.
How to adjust focus ■■Focus range Zoom position The shortest focusing distance from the surface of the lens W end 5 cm (0.16 feet) T end 1 m (3.3 feet) * When the zoom is operated from the W (wide-angle) end to the T (telephoto) end, the shortest focusing distance changes in stages. ●●The focus display flashes and beep sounds when focus is not aligned. Use the focus range displayed in red as a reference.
Using zoom Recording mode: You can adjust the area of a picture to be taken using zoom. DMC-FS40 DMC-FS41 Capture a wider area (wide-angle) DMC-FS28 DMC-S5 Enlarge the subject (telephoto) DMC-S2 Capture a wider area (wide-angle) Enlarge the subject (telephoto) When Extra Optical Zoom is set 1m- ∞ Focus range 5X Zoom ratio Digital Zoom range Optical Zoom range Zoom bar i.Zoom range ●●Adjust the focus after adjusting the zoom. ●●Do not touch the lens barrel during zooming.
Using zoom Zoom types and use The zoom ratio changes when the number of recording pixels is changed. (→55) ■■Optical Zoom Zooming in up to 5 times DMC-FS40 DMC-FS41 /4 times DMC-FS28 DMC-S5 DMC-S2 is possible if pictures without have been selected by [Picture Size] on the [Rec] menu. ●●Optical Zoom cannot be used in [Panorama Shot] Scene Mode.
Taking pictures with flash Recording mode: Press to display [Flash] Use cursor button to select the desired type and press [MENU/SET] Type, operations Uses [Auto] Normal use •• Automatically judges whether or not to flash [Auto/Red-Eye]∗ Taking pictures of subjects in dark •• Automatically judges whether or not to flash places (reduce red-eye) Taking pictures with backlight or [Forced Flash On] •• Always flash under bright lighting (e.g. fluorescent) ∗ [Slow Sync.
Taking pictures with flash ■■Available types in each mode (○: Available, –: Not available, : Default setting) [Scene Mode] ○ ○ ○ ○∗1 ○ ○ – – – – ○ ○ ○ – ○ ○ ○ ○ – ○ ○ – ○ ○ – – – – ○ ○ ○ – ○ – ○ ○ ○ ○ – – ○ – ○ – – ○ ○ ○ ○ DMC-FS40 DMC-FS41 Max. W Approx. 40 cm-4.1 m (1.3 feet-13 feet) Max. T Approx. 1.0 m-1.6 m (3.3 feet-5.2 feet) DMC-FS28 DMC-S5 – ○ ∗1 Set to , , or depending on the subject and brightness.
Taking pictures with self-timer Recording mode: We recommend using a tripod. This is also effective for correcting jitter when pressing the shutter button, by setting the self-timer to 2 seconds. Press to display [Selftimer] Use cursor button to select time duration and press [MENU/SET] Take a picture Press the shutter button fully to start recording after the preset time.
Taking pictures with Exposure Compensation Recording mode: Corrects exposure when adequate exposure cannot be obtained (if difference between brightness of object and background, etc.). Press to display [Exposure] Use cursor button to select a value and press [MENU/SET] No compensation: ±0 ••If the picture is too dark, adjust the exposure to the “+” direction. ••If the picture is too bright, adjust the exposure to the “-” direction.
Taking pictures according to the scene [Scene Mode] Recording mode: Using [Scene Mode] enables you to take pictures with optimum settings (exposure, colouring, etc.) for given scenes. Display the screen for recording mode selection Select [Scene Mode] Select and set the scene ●●Scene menu ●●Selecting a Scene Mode inappropriate for the actual scene may affect the colouring of your picture. ●●Following [Rec] menu settings will be automatically adjusted and cannot be selected manually.
Taking pictures according to the scene [Scene Mode] ••How to select a scene (→49) ••Using flash in Scene Modes (→45) Improves the skin tone of subjects for a healthier appearance in bright daylight conditions. [Portrait] Tips •• The closer the zoom is positioned to the T (telephoto) edge and the closer the camera is brought to the subject, the greater the effect will be. Smooths skin colours in bright, outdoor daylight conditions (portraits from chest upwards).
Taking pictures according to the scene [Scene Mode] ••How to select a scene (→49) ••Using flash in Scene Modes (→45) Creates a single panorama picture by stitching multiple still pictures taken in rapid succession. Use cursor button to select the recording direction, and press [MENU/SET] to set Check the recording direction and press [MENU/SET] Special panorama guidelines will be displayed during recording.
Taking pictures according to the scene [Scene Mode] ••How to select a scene (→49) ••Using flash in Scene Modes (→45) [Panorama Shot] (Continued) Notes •• The zoom position is fixed to the W end. •• Since the focus, White Balance, and Exposure Compensation are all fixed when settings are made for the first picture, recording settings such as brightness and colour may not be optimal for subsequent pictures. •• The following functions are fixed to the settings indicated below.
Taking pictures according to the scene [Scene Mode] ••How to select a scene (→49) ••Using flash in Scene Modes (→45) Takes pictures of scenes with fast movement, e.g. sports. [Sports] Tips •• Stand at least 5 m (16 feet) away. Notes •• Shutter speed may slow down up to 1 second. Takes pictures of people and nightscapes with close to actual brightness. [Night Portrait] Tips •• Use flash. •• Subject should not move. •• Tripod, self-timer recommended. Notes •• Shutter speed may slow down up to 8 seconds.
Taking pictures according to the scene [Scene Mode] ••How to select a scene (→49) ••Using flash in Scene Modes (→45) Uses weak flash to bring out skin colours. ([Baby1] and [Baby2] can be set separately.) Use cursor button to select [Age] and press [MENU/SET]. Use cursor button to select [SET] and press [MENU/SET]. Set birthday with cursor button, and press [MENU/SET]. Use cursor button to select [Exit] and press [MENU/SET]. [Baby] Tips •• Make sure [Age] is [ON] before taking a picture.
Using the [Rec] menu [Picture Size] ••For [Rec] menu setting procedures (→33) Set the size (number of pixels) of still pictures. Number of pictures which can be recorded depends on this setting. ■■Recording mode: ■■Settings: DMC-FS40 DMC-FS41 DMC-FS28 DMC-S2 DMC-S5 Recording pixel level type Recording pixel level type 14 M ∗ 10 M 5M 3M 16 M 4320×3240 ∗ 0.3 M 3648×2736 10 M 2560×1920 5M 2048×1536 3M 640×480 0.3 M 4608×3456 ∗ 3648×2736 2560×1920 ∗ 2048×1536 640×480 12.
Using the [Rec] menu [Rec Quality] ••For [Rec] menu setting procedures (→33) Set the picture size of motion pictures. ■■Recording mode: ■■Settings: Picture Quality Picture Size [HD] 1280 × 720 pixels [VGA] 640 × 480 pixels [QVGA]*3 320 × 240 pixels No. of Frames 24 fps*1 / 30 fps*2 Picture Aspect Ratio 30 fps 4:3 16:9 *1 DMC-S5 *2 DMC-FS40, DMC-FS41, DMC-FS28, DMC-S2 *3 [QVGA] is fixed when recording to the built-in memory.
Using the [Rec] menu [White Balance] ••For [Rec] menu setting procedures (→33) Adjust colouring to suit light source if colours otherwise appear unnatural.
Using the [Rec] menu [AF Mode] ••For [Rec] menu setting procedures (→33) Method of aligning focus can be changed according to position and number of subjects. ■■Recording mode: ■■Settings: / / Taking front-on pictures of people (Face Detection) Subject not centred in picture Recognises faces (up to 15 people) and adjusts exposure and focus accordingly. AF area Yellow: When the shutter button is pressed halfway, the frame turns green when the camera is focused.
Using the [Rec] menu [i.Exposure] ••For [Rec] menu setting procedures (→33) Automatically adjusts contrast and exposure to give more lifelike colours when there is significant contrast between background and subject. ■■Recording mode: ■■Settings: [ON] / [OFF] ●●When [i.Exposure] works, the colour of changes. ●●Even if [Sensitivity] is set to [100], when [i.Exposure] is activated, pictures may be taken at a higher ISO Sensitivity than the setting. [i.
Using the [Rec] menu [Burst] DMC-FS40 DMC-FS41 ••For [Rec] menu setting procedures (→33) Enables still pictures to be taken in succession while the shutter button is pressed fully. ■■Recording mode: ■■Settings: Item [Burst] Settings Maximum burst speed: Approx. 1.5 fps •• You can record a series of still pictures successively until the card or built-in memory is full, but at some point the burst speed drops.
Using the [Rec] menu ●●About [Hi-Speed Burst] and [Flash Burst] ••The settings can be made in [Normal Picture] Mode only. ••The picture size is changed in accordance with the aspect ratios of the pictures (→55) prior to the setting. Picture Aspect Ratio 4:3 3:2 16:9 1:1 Picture Size 3M 2.5 M 2M 2.5 M ●●When ISO Sensitivity is set to high, or when the shutter speed becomes slow in dark locations, the burst speed may become slow.
Using the [Rec] menu [Color Mode] ••For [Rec] menu setting procedures (→33) Set colour effects. ■■Recording mode: ■■Settings: [STANDARD] / [VIVID]*1 (sharper) / [B&W] / [SEPIA] / [Happy]*2 *1 [Normal Picture] Mode and [Motion Picture] Mode only *2 [Intelligent Auto] Mode only [AF Assist Lamp] ••For [Rec] menu setting procedures (→33) Illuminates lamp when dark to facilitate focus alignment.
Using the [Rec] menu [Stabilizer] ••For [Rec] menu setting procedures (→33) Automatically detects and prevents jitter. ■■Recording mode: ■■Settings: [ON] / [OFF] ●●Cases where Optical Image Stabiliser may be ineffective: Heavy jitter, high zoom ratio (also in the Digital Zoom range), fast-moving objects, indoors or in dark locations (due to low shutter speed) [Date Stamp] ••For [Rec] menu setting procedures (→33) Still pictures can be taken with the recording date and time stamped on the still picture.
Different playback methods [Playback Mode] Recorded pictures can be played back in a variety of ways. Press the Playback button Display the screen for [Playback Mode] selection Select the method of playback ●●When no card is inserted, pictures are played back from the built-in memory. ●●The [Playback Mode] automatically becomes [Normal Play] when switching from recording mode to playback mode.
Different playback methods [Playback Mode] [Slide Show] ••For switching [Playback Mode] (→64) Automatically play pictures in order and to music. Recommended when viewing on TV screen. Use cursor button to select the playback method and press [MENU/SET] [All] Play all. [Category Selection] Select category and playback. (Select category with cursor button and press [MENU/SET].) (→66) [Favorite] Play back pictures set as [Favorite].
Different playback methods [Playback Mode] ●●When [URBAN] has been selected, the picture may appear in black and white as a screen effect. ●●When panorama pictures are played back, the [Duration] setting is disabled. ●●Part of [Effect] cannot be used when displaying pictures recorded in portrait position. ●●Music effects cannot be added. ●●Motion pictures cannot be played back in a Slide Show. The initial screens of motion pictures are played back as still pictures in the Slide Show.
Different playback methods [Playback Mode] [Calendar] ••For switching [Playback Mode] (→64) Select the date from the calendar screen to view only the pictures taken on that day.
Retouching pictures [Auto Retouch] You can adjust the colour and brightness of a still picture to bring them into balance. ••New pictures are created after editing pictures with [Auto Retouch]. Before starting to edit, make sure that there is enough free space in the built-in memory or memory card. DMC-FS40 DMC-FS41 Select a still picture to retouch during playback and press Use cursor button to select [Auto Retouch] and press [MENU/SET] A still picture retouched with colours and brightness is displayed.
Retouching pictures [Beauty Retouch] DMC-FS40 DMC-FS41 Still pictures taken by the camera that recognise the subject as a face can be retouched using the makeup effect etc., to enhance the portrait. ••New pictures are created after editing pictures with [Beauty Retouch]. Before starting to edit, make sure that there is enough free space in the built-in memory or memory card.
Retouching pictures ●●You cannot retouch an already-retouched subject or two or more subjects at once. To perform such an operation, save the picture once and then select a subject that you want to retouch again. ●●The brightness or colour between a picture viewed before saving and the saved picture may be different. ●●It may not be possible to retouch still pictures taken with other cameras. ●●You cannot retouch motion pictures and still pictures recorded in [Panorama Shot] Scene Mode.
Using the [Playback] menu You can set the recorded picture to upload to the image-sharing websites, edit the picture (for example, trimming), and set a protection setting in the picture. ••For Playback menu display and operation methods (→33). ••Depending on the [Playback Mode], some [Playback] menu items are not displayed. ••It may not be possible to set or edit pictures taken with other cameras.
Using the [Playback] menu ■■To clear all Select [CANCEL] in step and select [Yes]. ●●Not available on cards with less than 512 MB. [Resize] ••For Playback menu display and operation methods (→33). Picture size can be reduced to facilitate e-mail attachment and use in web pages, etc. (Still pictures recorded at the smallest recording pixel level cannot be further reduced.
Using the [Playback] menu ■■[MULTI] Use cursor button to select [MULTI] and press [MENU/SET] Use cursor button to select size and press [MENU/SET] Use cursor button to select a still picture and press [MENU/SET] (up to 50 pictures) •• To cancel → Press [MENU/SET] again. •• To execute → Use cursor button to select [OK] and press [MENU/SET]. Resize setting Number of pixels before/ after resizing ••Confirmation screen is displayed. If you select [Yes], the operation is executed.
Using the [Playback] menu [Favorite] ••For Playback menu display and operation methods (→33). By labelling your favourite pictures with a star ( ), you can play back your favourite pictures only, or you can delete all pictures except your favourites. Use cursor button to select [SINGLE] or [MULTI] and press [MENU/SET] Use cursor button to select picture and press [MENU/SET] ●●[SINGLE] Favourite picture setting ●●[MULTI] Favourite picture setting ••To cancel → Press [MENU/SET] again.
Using the [Playback] menu [Print Set] DMC-FS40 DMC-FS41 ••For Playback menu display and operation methods (→33). Picture/picture no./date printing settings can be made for when printing with DPOF printcompatible shops or printers.
Using the [Playback] menu [Protect] ••For Playback menu display and operation methods (→33). Set protection to disable picture deletion. Prevents deletion of important pictures. Use cursor button to select [SINGLE] or [MULTI] and press [MENU/SET] Use cursor button to select picture and press [MENU/SET] ●●[SINGLE] ●●[MULTI] Picture protected Picture protected ••To cancel → Press [MENU/SET] again. ■■To clear all Select [CANCEL] in step and select [Yes].
Using the [Playback] menu [Copy] ••For Playback menu display and operation methods (→33). You can copy pictures between built-in memory and memory card. Use cursor button to select the copy method (direction) and press [MENU/SET] : Copy all pictures from built-in memory to card (go to step : Copy 1 picture at a time from card to built-in memory. ). Select picture with cursor button and press [MENU/SET] Use cursor button to select [Yes] and press [MENU/SET] ••To cancel → Press [MENU/SET].
Viewing on TV screen You can view pictures on a TV screen by connecting your camera to your TV with the AV cable. Getting Ready: ••Set [TV Aspect]. (→38) ••Turn off both camera and TV. Connect camera to TV Turn on TV ●●Set to auxiliary input. Turn on camera Press the Playback button Check socket direction and insert straight in. (Damage to socket shape can lead to faulty operation.
Viewing on TV screen ●●Also consult TV operating manual. ●●Always use a genuine Panasonic AV cable (optional). ●●You can play back pictures on TVs in other countries (regions) which use the NTSC or PAL system when you set [Video Out] in [Setup] menu. ●●Pictures rotated to portrait may be blurred slightly. ●●Change picture mode settings on TV if aspect ratios are not displayed correctly on widescreen or high-definition televisions.
Using with your PC Still/motion pictures can be copied from the camera to your computer by connecting the two together. ••Some computers can read directly from the camera’s memory card. For details, see the manual for your computer. ••If your computer does not support SDXC Memory Cards a message will be displayed requesting you to format the card. (Do not format the card. This will erase recorded pictures.) If the card is not recognised, refer to the following support website. http://panasonic.
Using with your PC Installing supplied software (PHOTOfunSTUDIO) This software allows you to acquire pictures to the PC, and also categorise these acquired pictures by their recording date or the model name of the camera used. ••Before inserting the CD-ROM, close all running applications. Check the environment of your PC Operating environment of PHOTOfunSTUDIO 8.
Using with your PC Copying still pictures and motion pictures Getting Ready: ••Charge the battery sufficiently. ••When importing pictures from the built-in memory, remove any memory cards. ••Turn on the camera and computer. Check socket direction and insert straight in. (Damage to socket shape can lead to faulty operation.) USB connection cable (always use cable supplied) [Access] (sending data) •• Do not disconnect the USB connection cable while [Access] is displayed.
Using with your PC ■■Folder and file names on computer ●●Windows Drives are displayed in “My Computer” or “Computer” folder. ●●Mac Drives are displayed on the desktop. (Displayed as “LUMIX”, “NO_NAME”, or “Untitled”.) DCIM (Still/motion pictures) 100_PANA (Up to 999 pictures/folder) P1000001.JPG JPG: : Still pictures P1000999.JPG MOV: 101_PANA Motion pictures 1 : 999_PANA ∗ MISC (Favourite) AD_LUMIX (Folder for Web uploading)∗2,∗3 LUMIXUP.
Using with your PC Uploading pictures to image-sharing websites Using the uploading tool ([LUMIX Image Uploader]), you can upload still pictures and motion pictures to image-sharing websites (Facebook or YouTube). There is no need to copy pictures to your computer or install specialised software. Uploading pictures from the camera is easy with a computer connected to a network, even when you are away from your regular computing environment.
Printing You can connect directly to a PictBridge-compatible printer for printing. ••Some computers can read directly from the camera’s memory card. For details, see the manual for your computer. •• Do not disconnect the USB connection cable when Getting Ready: the cable disconnection icon is displayed (may not ••Charge the battery sufficiently. be displayed with some printers). ••When copying pictures from the built-in memory, remove any memory Check socket direction and insert straight in. cards.
Printing Printing multiple pictures Connect camera to printer ••Please make sure you use the supplied USB connection cable. Use of cables other than the supplied USB connection cable may cause malfunction. Use cursor button on the camera to select [PictBridge (PTP)], and press [MENU/SET] Press Use cursor button to select item and press [MENU/SET] ••[Multi Select]: croll between pictures with cursor button select pictures S to print with [MENU/SET]. (Press [MENU/SET] again to release selection.
Printing Making print settings on the camera (Make settings before selecting [Print start]) Use cursor button to select the item and press [MENU/SET] Item Settings [Print with Date] [ON] / [OFF] [Num.of prints] Set number of pictures (up to 999 pictures) [Paper Size] When [Page Layout] is selected, the printer settings take priority.
List of LCD monitor displays ■■In recording 1 2 3 4 5 6 7 14 13 12 11 8 10 9 1 Recording Mode (→18) 2 Picture Size (→55) 3 4 5 6 7 8 9 ISO Sensitivity (→56) Recording quality (→56) Backlight Compensation (→23) Flash Mode (→45) Optical Image Stabiliser (→63) Jitter alert (→40) White Balance (→57) Colour Mode (→62) Battery capacity (→15) Burst Mode (→60) Intelligent exposure (→59) Focus (→22) AF area (→41) Self-timer Mode (→47) Focus range Zoom (→43) 1m- ∞ 10 11 12 13 14 Aperture value/Shutter sp
List of LCD monitor displays ■■In playback 1 2 9 8 3 4 5 7 6 1 Playback Mode (→64) 2 Protected picture (→76) 6 Recorded date and time Favourites (→74) Date Stamp (→63) Colour Mode (→62) Picture Size (→55) Auto Retouch (→68) Beauty Retouch (→69) DMC-FS40 DMC-FS41 3 Battery capacity (→15) 4 Picture number/Total pictures (→26) Elapsed playback time (→27) 5 Print settings (→75) DMC-FS40 DMC-FS41 World time setting (→35) Age in years/months (→54) Aperture value/Shutter speed (→40) ISO Sensitivity (→5
Message displays Meanings of and required responses to major messages displayed on LCD monitor. [This memory card cannot be used] ●●A MultiMediaCard was inserted. → Not compatible with the camera. Use a compatible card. [Some pictures cannot be deleted] [This picture cannot be deleted] ●●Non-DCF pictures (→26) cannot be deleted. → Save needed data on a computer or other device, and then use [Format] on the camera.
Message displays [Memory Card Error] [Memory card parameter error] ●●Card is not of SD standard. ●●When cards in capacities of 4 GB or more are used, only SDHC or SDXC Memory Cards are supported. [Read Error]/[Write Error] [Please check the card] ●●Data read has failed. → Check whether card has been inserted correctly (→12). ●●Data write has failed. → Turn off power and remove card, before re-inserting and turning on power again. ●●Card may possibly be damaged. ●●Try with a different card.
Q&A Troubleshooting Try checking these items (→92 - 97) first. If the problem persists, performing [Reset] in the [Setup] menu may resolve the issue. (Note that except for some items such as [Clock Set], all settings are returned to their values from the time of purchase.) Battery, power Camera does not work even if power is turned on. ●●Battery is not inserted correctly (→12), or needs recharging. The power cuts off during use. ●●Battery needs recharging. ●●Camera is set to [Auto Power Off].
Q&A Troubleshooting Recording (Continued) Brightness or colouring of recorded picture different from real life. ●●When recording under fluorescent or LED lighting fixture etc., increasing the shutter speed may introduce slight changes to brightness and colour. These are a result of the characteristics of the light source and do not indicate a malfunction. Red banding may appear on the LCD monitor or part or the entire screen may have a reddish tint, when recording or pressing the shutter button halfway.
Q&A Troubleshooting Flash No flash emitted. ●●Flash set to [Forced Flash Off] (→45). ●●The flash is unavailable when using [Burst] (other than [Flash Burst] DMC-FS40 DMC-FS41 ) or when using [Scenery], [Panorama Shot], [Night Scenery], [Sunset], or [Glass Through] Scene Modes. Multiple flashes are emitted. ●●Red-Eye Reduction is active (→45). (Flashes twice to prevent eyes from appearing red.) ●●[Burst] is set to [Flash Burst] DMC-FS40 DMC-FS41 (→60). Playback Pictures have been rotated.
Q&A Troubleshooting Playback (Continued) Blackened red areas in recorded pictures. ●●When digital red-eye correction ( , ) is operating, if a subject is recorded that has skincoloured areas with red areas inside, the digital red-eye correction function may blacken the red areas. → We recommend setting the Flash Mode to , or , or [Red-Eye Removal] to [OFF] before recording. The sound of recorded motion pictures is not audible.
Q&A Troubleshooting TV, computer, printer (Continued) The card is not recognised by the computer. (You are using an SDXC Memory Card.) ●●Make sure your computer supports SDXC memory cards. http://panasonic.net/avc/sdcard/information/SDXC.html ●●When you insert a card, a message will be displayed requesting you to format the card, but do not format it. ●●If [Access] remains displayed on the LCD monitor, turn off the camera and then disconnect the USB cable.
Q&A Troubleshooting Others Menu not displayed in desired language. ●●Change [Language] setting (→39). Camera rattles if shaken. ●●This sound is made by the lens movement and is not a fault. Red lamp illuminated when pressing shutter button halfway in dark locations. ●●[AF Assist Lamp] is set to [ON] (→62). AF Assist Lamp is not illuminated. ●●[AF Assist Lamp] is set to [OFF]. ●●Not illuminated in bright locations. Camera is hot.
Usage cautions and notes When in use ●●Camera may become warm if used for long periods of time, but this is not a fault. ●●Keep this unit as far away as possible from electromagnetic equipment (such as microwave ovens, TVs, video games etc.). •• If you use this unit on top of or near a TV, the pictures and/or sound on this unit may be disrupted by electromagnetic wave radiation. •• Do not use this unit near cell phones because doing so may result in noise adversely affecting the pictures and/or sound.
Usage cautions and notes Memory cards ●●To prevent damage to cards and data •• Avoid high temperatures, direct sunlight, electromagnetic waves, and static electricity. •• Do not bend, drop, or expose to strong impacts. •• Do not touch connectors on reverse of card or allow them to become dirty or wet.
Usage cautions and notes Lens ●●If lens is dirty: Images may appear slightly white if lens is dirty (fingerprints, etc.). Turn the power on, hold the extracted lens barrel with your fingers, and gently wipe the lens surface with a soft, dry cloth. ●●Do not leave the lens exposed to direct sunlight. ●●Do not touch the lens barrier, as this may damage lens. Be careful when removing camera from bag, etc. When using a tripod or unipod ●●Do not apply excessive force or tighten screws when they are crooked.
••SDXC Logo is a trademark of SD-3C, LLC. ••QuickTime and the QuickTime logo are trademarks or registered trademarks of Apple Inc., used under license therefrom. ••Mac and Mac OS are trademarks of Apple Inc., registered in the U.S. and other countries. ••Windows and Windows Vista are either registered trademarks or trademarks of Microsoft Corporation in the United States and/or other countries. ••YouTube is a trademark of Google Inc. ••This product uses “DynaFont” from DynaComware Corporation.