DMP-BD10PP_Book1.book Page 1 Friday, April 6, 2007 7:06 PM Operating Instructions BD/DVD Player Model No. DMP-BD10A Dear customer Thank you for purchasing this product. For optimum performance and safety, please read these instructions carefully. Before connecting, operating or adjusting this product, please read the instructions completely. Please keep this manual for future reference. Region management information BD-Video This unit plays BD-Video marked with labels containing the region code A.
DMP-BD10PP_Book1.book Page 2 Friday, April 6, 2007 Getting started 7:06 PM 11 IMPORTANT SAFETY INSTRUCTIONS IMPORTANT SAFETY INSTRUCTIONS Read these operating instructions carefully before using the unit. Follow the safety instructions on the unit and the applicable safety instructions listed below. Keep these operating instructions handy for future reference. 1) 2) 3) 4) 5) 6) 7) 8) 9) Read these instructions. Keep these instructions. Heed all warnings. Follow all instructions.
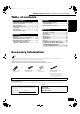
DMP-BD10PP_Book1.book Page 3 Friday, April 6, 2007 7:06 PM Getting started 11 Table of contents / Accessory information Getting started Settings IMPORTANT SAFETY INSTRUCTIONS............. 2 Accessory information ..................................... 3 Disc information................................................. 4 Control reference guide..................................... 6 Connection ......................................................... 8 Easy Setting.......................................
DMP-BD10PP_Book1.book Page 4 Getting started Friday, April 6, 2007 7:06 PM 11 Disc information Disc information This unit is compatible with a variety of disc types and formats, including both packaged discs and recorded discs. Use the following chart to learn more about the discs that can be played on this unit. Packaged discs This chart shows the different type of retail/commercial discs you can use, and also includes the industry-standard logos that should appear on the discs and/or packaging.
DMP-BD10PP_Book1.book Page 5 Friday, April 6, 2007 7:06 PM Getting started 11 Disc information ≥When BD-J application (➡ 29, Glossary) is executed, operations may take a little more time than usual. Please wait, there is nothing wrong with this unit. ≥When playing a set of two BD-Video discs, once the first disc finishes playing, video may continue to display even if playback has been stopped.
DMP-BD10PP_Book1.book Page 6 .Getting Friday, April 6, 2007 started 7:06 PM 11 Control reference guide Control reference guide Remote control BD POWER ! Turn the unit on and off (➡ 11) @ TV operation buttons You can operate the TV through the unit’s remote control. See page 11 for the remote control setting. POWER BD POWER POWER TV/VIDEO CONTRAST BRIGHTNESS SHARPNESS COLOR CH VOLUME GAMMA # SKIP .
DMP-BD10PP_Book1.book Page 7 Friday, April 6, 2007 7:06 PM Getting started 11 Control reference guide Getting started Main unit OPEN/CLOSE POWER POWER ! POWER button (Í/I POWER)(➡ 12) Press to switch the unit from on to standby mode or vice versa. In standby mode, the unit is still consuming a small amount of power. @ Disc tray (➡ 12) # Display ^ .
DMP-BD10PP_Book1.book Page 8 Getting started Friday, April 6, 2007 7:06 PM 11 Connection Connection From the list below, please choose the connection method that fits your TV viewing environment best and follow the illustrations to connect your player.
DMP-BD10PP_Book1.book Page 9 Friday, April 6, 2007 7:06 PM Getting started 11 Connection You can connect the player to your HDMI compatible amplifier/receiver with an HDMI cable to enjoy digital surround sound along with high quality digital video. Using an additional HDMI cable, you can connect the amplifier/receiver to your HDMI compatible television. Multi channel speakers AC power supply cord HDMI compatible (included) television Connect only after all other connections are complete.
DMP-BD10PP_Book1.book Page 10 Friday, April 6, 2007 Getting started 7:06 PM 11 Connection Connecting an amplifier/receiver (excluding HDMI connection) F Connecting to an amplifier/receiver with 7.1ch/5.1ch AUDIO IN terminal You can enjoy surround sound using the 7.1ch AUDIO OUT terminals. The 7.1ch AUDIO OUT terminals offer you another option for enjoying surround sound.
DMP-BD10PP_Book1.book Page 11 Friday, April 6, 2007 7:06 PM Getting started 11 Easy Setting / Remote control setting After connecting your new player and pressing the power button, a screen will appear prompting you to perform setup for the basic settings. Please follow the guide and perform setup. ≥You can perform this setup anytime by selecting “Easy Preparation Setting” in Setup menu Turn on the television and select the appropriate video input on the TIPS (➡ 21,“Setup” tab). television.
DMP-BD10PP_Book1.book Page 12 Friday, April 6, 2007 Playback 7:06 PM 11 Basic play Basic play Instructions for operations are generally described using the remote control in this manual. Start play Preparation Turn on the television and select the appropriate video input on the television with the remote control for the television. VIDEO1 1 Open the front cover. 2 Press [Í/I POWER] to turn on the unit. 3 Press [< OPEN/CLOSE] to open the disc tray and load the disc.
DMP-BD10PP_Book1.book Page 13 Friday, April 6, 2007 7:06 PM Playback 11 Basic play Other operations during play Starting from a selected item Play starts from the selected title, chapter or track. [MP3] [JPEG] e.g., 5: [0] ➡ [0] ➡ [5] 15: [0] ➡ [1] ➡ [5] Open remote control cover Other discs (You can select a track with DVD-Audio.) e.g., 5: [0] ➡ [5] 15: [1] ➡ [5] [DVD-A] Selecting groups While stopped (screen saver is displayed on the television ➡ right) e.g.
DMP-BD10PP_Book1.book Page 14 Friday, April 6, 2007 Playback 7:06 PM 11 Adjusting picture and sound quality Adjusting picture and sound quality CONTRAST BRIGHTNESS SHARPNESS COLOR GAMMA 3D-NR INTEGRATED RE-MASTER DNR Adjusting the picture During video playback, pressing each of the following buttons will display the corresponding on-screen adjustment as shown in the illustration on the right. Adjustments are made in units of 1 each time the button is pressed.
DMP-BD10PP_Book1.book Page 15 Friday, April 6, 2007 7:06 PM Playback 11 Operations using menu screen Operations using menu screen Showing Pop-up menu [BD-V] The Pop-up menu is a special feature available with some BD-Video discs. This menu may be different depending on discs, and selectable items may differ as well. For more information on how to operate the menu on your BD-Video discs please read the operating instructions that came with the disc. . 1 Press [POP-UP MENU]. e.g.
DMP-BD10PP_Book1.book Page 16 Friday, April 6, 2007 Playback 7:06 PM 11 Playing MP3 files and still pictures Playing MP3 files and still pictures Playing MP3 files [MP3] You can play MP3 files recorded onto a CD-R/RW. 1 Press [DIRECT NAVIGATOR]. ≥When the JPEG Menu is displayed, perform steps below. Selected group G: Group No. T: Track No. in the group Total: Track No./Total tracks in all groups No.
DMP-BD10PP_Book1.book Page 17 Friday, April 6, 2007 7:06 PM Playback 11 Playing MP3 files and still pictures Useful functions during still picture play Start Slideshow You can display still pictures one by one at a constant interval. 1 While the “Album View” (DVD-RAM) or “Picture View” (CD-R/RW) screen is displayed Press [3, 4, 2, 1] to select the album (for DVD-RAM) or “Folder” (for CD-R/RW) and press [SUB MENU]. 2 Press [3, 4] to select “Start Slideshow” and press [ENTER].
DMP-BD10PP_Book1.book Page 18 Friday, April 6, 2007 7:06 PM Playback 11 Linked operations with the TV Linked operations with the TV (EZ SyncTM “HDAVI ControlTM”) What is EZ Sync “HDAVI Control”? EZ Sync “HDAVI Control” is a convenient function that offers linked operations of this unit, and a Panasonic TV (VIERA) or amplifier/receiver under “HDAVI Control”. You can use this function by connecting the equipment with the HDMI cable.
DMP-BD10PP_Book1.book Page 19 Friday, April 6, 2007 7:06 PM Settings 11 Changing settings with the On-screen menu Changing settings with the On-screen menu What is On-screen menu? The On-screen menu is a menu that appears on screen, regardless of whether a disc is being played or stopped, when [DISPLAY] is pressed. The On-screen menu allows you to turn subtitles on or off, switch audio tracks, and change a variety of other settings.
DMP-BD10PP_Book1.book Page 20 Friday, April 6, 2007 Settings 7:06 PM 11 Changing settings with the On-screen menu Menus Items Settings and details Play Repeat play (Only when the elapsed time is being displayed on the unit display.) Selects the item which you want to repeat. The items displayed differ depending on the type of disc. ≥All Entire disc ≥Chapter Chapter ≥Group Entire group ≥PL Playlist ≥Title Title (DVD-Video, etc.) ≥Track Track ≥Off Select “Off” to cancel.
DMP-BD10PP_Book1.book Page 21 Friday, April 6, 2007 7:06 PM Settings 11 Changing the unit’s settings Changing the unit’s settings Tabs Setup Setup Disc Video Audio Display Connection HDMI Menus Options Off Timer Remote Control Code 6 Hours Set Code 1 Multi-jog Setting On Easy Setting Restore Default Settings Setup menu operations 1 While stopped 2 3 4 Press [SETUP]. Press [3, 4] to select the tab and press [1]. Press [3, 4] to select the menu and press [ENTER].
DMP-BD10PP_Book1.book Page 22 Friday, April 6, 2007 Settings 7:06 PM 11 Changing the unit’s settings Tabs Video Menus Options (Underlined items are the factory presets.) ≥Automatic ≥Field: Select if jittering occurs when “Automatic” is selected. (The picture is coarser.) ≥Frame: Select if small text or fine patterns cannot be seen clearly when “Automatic” is selected. (The picture is clearer and finer.) ≥On: The chapters in playlists are played seamlessly.
DMP-BD10PP_Book1.book Page 23 Friday, April 6, 2007 7:06 PM Settings 11 Changing the unit’s settings Tabs Menus Options (Underlined items are the factory presets.) ≥Multi-channel: When using three or more speakers with Connection Speaker equipment that cannot set the speaker (Continued) You can set the unit to output the best possible sound for your speakers. Select “2 Channel” if the speaker settings can be set on the connected equipment.
DMP-BD10PP_Book1.book Page 24 Friday, April 6, 2007 Reference 7:06 PM 11 Frequently asked questions / Troubleshooting guide Frequently asked questions Refer to the following items if you have any doubts about unit operations. Setup Page What do I need to play multi channel surround sound? ≥Connect to... –an amplifier/receiver compatible with HDMI. –an amplifier/receiver with 7.1ch/5.1ch AUDIO IN. –an amplifier/receiver with a built-in (Dolby Digital or DTS) decoder.
DMP-BD10PP_Book1.book Page 25 Friday, April 6, 2007 7:06 PM Reference 11 Troubleshooting guide Operation Cannot operate the television. The remote control doesn’t work properly. Page ≥Change the manufacturer code. Some televisions cannot be operated even if you change the code. ≥It may be necessary to set the manufacturer code again after changing the batteries. ≥The remote control and main unit are using different codes. Change the code on the remote control.
DMP-BD10PP_Book1.book Page 26 Friday, April 6, 2007 Reference 7:06 PM 11 Troubleshooting guide Sound No sound. Low volume. Distorted sound. Cannot hear the desired audio type. Cannot switch audio. Page ≥Check the connections and the “Digital Audio Output” settings. Check the input mode on the amplifier/receiver if you have connected one. ≥Press [AUDIO] to select the audio. ≥Turn off V. Surround Sound in the following cases.
DMP-BD10PP_Book1.book Page 27 Friday, April 6, 2007 7:06 PM Reference 11 Messages / Disc handling / Maintenance Messages The following messages or service numbers appear on the television or unit’s display when something unusual is detected during startup and use. On the television Page Cannot play. ≥You inserted an incompatible disc (Discs recorded in PAL video, etc.). Cannot display on this unit. ≥You tried to play a non-compatible image. Copyrighted material.
DMP-BD10PP_Book1.book Page 28 Friday, April 6, 2007 Reference 7:06 PM 11 Product Service / Specifications Product Service 1. Damage requiring service—The unit should be serviced by qualified service personnel if: (a)The AC power supply cord or AC adaptor has been damaged; or (b)Objects or liquids have gotten into the unit; or (c)The unit has been exposed to rain; or (d)The unit does not operate normally or exhibits a marked change in performance; or (e)The unit has been dropped or the cabinet damaged.
DMP-BD10PP_Book1.book Page 29 Friday, April 6, 2007 7:06 PM Reference 11 Glossary Glossary BD-J Some BD-Video discs contain Java applications, and these applications are called BD-J. Depending on the BD-J application, you can enjoy various interactive features in addition to playing normal video. Bitstream This is the digital form of multi-channel audio data (e.g., 5.1 channel) before it is decoded into its various channels.
DMP-BD10PP_Book1.book Page 30 Friday, April 6, 2007 Reference 7:06 PM 11 Limited Warranty Limited Warranty (ONLY FOR U.S.A. ) Panasonic Consumer Electronics Company, Division of Panasonic Corporation of North America One Panasonic Way Secaucus, New Jersey 07094 Panasonic Puerto Rico, Inc. Ave. 65 de Infantería, Km. 9.
DMP-BD10PP_Book1.book Page 31 Friday, April 6, 2007 7:06 PM Reference 11 Limited Warranty Limited Warranty (ONLY FOR CANADA) Panasonic Canada Inc. PANASONIC PRODUCT—LIMITED WARRANTY Panasonic Canada Inc. warrants this product to be free from defects in material and workmanship and agrees to remedy any such defect for a period as stated below from the date of original purchase.
DMP-BD10PP_Book1.book Page 32 Friday, April 6, 2007 Reference 7:06 PM 11 Referencia rápida en español Conexiones básicas B Conexión a un televisor con un cable HDMI A Conexión a un televisor con un cable para audio/vídeo Cable para audio/ vídeo (incluido) COMPONENT VIDEO OUT Y 2ch AUDIO OUT L R D L 1 PB L AUDIO IN R L VIDEO IN Please connect directly to TV.
DMP-BD10PP_Book1.book Page 33 Friday, April 6, 2007 7:06 PM Reference 11 index Index AAge limit for BD-Video viewing . . . . . . . . . . . . . . . . . . . . . . . 21 Angle . . . . . . . . . . . . . . . . . . . . . . . . . . . . . . . . . . . . . . . . . . . . 19 Audio Attribute . . . . . . . . . . . . . . . . . . . . . . . . . . . . . . . . . . . . . . . . 19 Changing audio . . . . . . . . . . . . . . . . . . . . . . . . . . . . . . . . . . 13 Channel . . . . . . . . . . . . . . . . . . . . . . . . . .