7303en.book 1 ページ 2004年5月31日 月曜日 午前9時32分 Operating Instructions DVD Video Recorder Model No. Dear customer Thank you for purchasing this product. For optimum performance and safety, please read these instructions carefully. Before connecting, operating or adjusting this product, please read these instructions completely. Please keep this manual for future reference. DMR-E65 The warranty can be found on page 55. La referencia rápida en español se puede encontrar en la página 56.
7303en.book 2 ページ 2004年5月31日 月曜日 午前9時32分 CAUTION! Getting started THIS PRODUCT UTILIZES A LASER. USE OF CONTROLS OR ADJUSTMENTS OR PERFORMANCE OF PROCEDURES OTHER THAN THOSE SPECIFIED HEREIN MAY RESULT IN HAZARDOUS RADIATION EXPOSURE. DO NOT OPEN COVERS AND DO NOT REPAIR YOURSELF. REFER SERVICING TO QUALIFIED PERSONNEL.
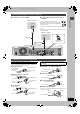
7303en.book 3 ページ 2004年5月31日 月曜日 午前9時32分 Table of contents Transfer (Dubbing) IMPORTANT SAFETY INSTRUCTIONS . . . . . . . . . . . . . . .2 Useful features . . . . . . . . . . . . . . . . . . . . . . . . . . . . . . . . . .3 Accessories. . . . . . . . . . . . . . . . . . . . . . . . . . . . . . . . . . . . .4 The remote control . . . . . . . . . . . . . . . . . . . . . . . . . . . . . . .4 Control reference guide . . . . . . . . . . . . . . . . . . . . . . . . . . .5 STEP 1 Connection . . . . . . . . .
7303en.book 4 ページ 2004年5月31日 月曜日 午前9時32分 Accessories Getting started Please check and identify the supplied accessories. Use numbers indicated in parentheses when asking for replacement parts. To order accessories, refer to “Accessory Purchases” on page 55. ∏ ∏ ∏ 1 Remote control (EUR7721KB0) 1 AC power supply cord (K2CB2CB00006) 1 75 ≠ coaxial cable (VJA1125) ≥For use with this unit only. Do not use it with other equipment.
7303en.book 5 ページ 2004年5月31日 月曜日 午前9時32分 Control reference guide DVD POWER Turn the unit on (➡ page 10) TV POWER INPUT SELECT TV/VIDEO VOLUME CH Television operations (➡ page 12) Input select (L1, L2 or L3) (➡ page 39) DVD DRIVE SELECT SD/PC Select drive (DVD, SD or PC) (➡ page 16, 24, 29) PAGE Select channels and title numbers, etc.
7303en.book 6 ページ 2004年5月31日 月曜日 午前9時32分 STEP 1 Connection ∫ Examples of equipment you can connect to this unit’s terminals Amplifier Getting started Television From OUT1 or OUT2 terminals From AUDIO OUT terminals or DIGITAL AUDIO OUT terminal This unit To L2 input terminals (front) (➡ page 39) To IN3 (L3) input terminals (rear) To IN1 (L1) input terminals (rear) Video cassette recorder Camcorder Cable TV box Do not place the unit on amplifiers or equipment that may become hot.
303en.book 7 ページ 2004年5月31日 月曜日 午前9時32分 ≥The equipment connections described are examples. ≥Before connection, turn off all equipment and read the appropriate operating instructions. ≥Peripheral equipment and optional cables sold separately unless otherwise indicated. A to X are indexes for Spanish Quick Reference. A 1–4 indicates included accessories. indicates accessories not included. are required connections. Connect in the numbered order.
7303en.book 8 ページ 2004年5月31日 月曜日 午前9時32分 STEP 1 Connection Connecting a cable TV box Getting started ≥You need to subscribe to a cable TV service to enjoy viewing their programming. ≥Consult your service provider regarding appropriate cable TV box. ≥If you receive your programming solely from a satellite service, the program guide in this unit will not receive program listings or channel information. Without this information, program-based recordings cannot be made.
7303en.book 9 ページ 2004年5月31日 月曜日 午前9時32分 Connecting an amplifier or system component ∫ To enjoy multi-channel surround sound on DVD-Video Amplifier’s rear panel Connect an amplifier with a built-in decoder displaying these logo marks using an optical digital audio cable and change the settings in “Digital Audio Output” (➡ page 44). AUDIO IN R L ≥You cannot use DTS Digital Surround decoders not suited to DVD. ≥Even if using this connection, output will be only 2 channels when playing DVD-Audio.
7303en.book 10 ページ 2004年5月31日 月曜日 午前9時32分 STEP 2 Setting up the TV Guide On ScreenTM system POWER Í/I OPEN/CLOSE SD CARD PC CARD REC EJECT Getting started POWER TIME SLIP DVD SD PC DRIVE SELECT TIME SLIP DVD POWER Í DVD POWER /x1.3 CH 1 TV POWER INPUT SELECT TV/VIDEO DVD Preparation ≥Turn on the television and select the appropriate video input to suit the connections to this unit. ≥When using the cable TV box, check the following.
2004年5月31日 月曜日 午前9時32分 If you are using a cable TV box, set the following: ≥Cable TV box connection channel (Ch2/Ch3/Ch4/L3) –If you are connecting the cable TV box to this unit’s IN3 (L3) terminal, select “L3”. –If you are connecting the cable TV box to this unit’s RF terminal, select “Ch2”, “Ch3” or “Ch4”, according to the cable TV box setting. ≥Cable TV box brand (Move down with [4] for more brands. Select “Not Listed” if you cannot find your cable TV box on the list.
7303en.book 12 ページ 2004年5月31日 月曜日 午前9時32分 STEP 3 Set up to match your television and remote control DVD POWER Television operation TV POWER Getting started DVD VOLUME CH INPUT SELECT TV/VIDEO TV operation buttons SD/PC DRIVE SELECT PAGE 1 Numbered buttons 2 While pressing [Í POWER TV], enter the code with the numbered buttons. 3 CH 4 5 7 8 6 e.g., 01: [0] ➡ [1] Manufacturer and Code No. AUDIO 9 VCR Plus+ CM SKIP CANCEL 0 SKIP STOP SLOW/SEARCH PAUSE PLAY/x1.
7303en.book 13 ページ 2004年5月31日 月曜日 午前9時32分 Change the remote control code on the main unit and the remote control (the two must match) if you place other Panasonic products close together. Use “1”, the factory set code, under normal circumstances. 1 2 3 4 Press [SETUP]. Press [3, 4] to select “Set Up” and press [1]. Press [3, 4] to select “Remote Control Code” and press [ENTER]. Press [3, 4] to select the code (1, 2, or 3) and press [ENTER].
7303en.book 14 ページ 2004年5月31日 月曜日 午前9時32分 Disc and card information Discs you can use for recording and play [12 cm (5z)/8 cm (3z)] Getting started Disc type Logo Instructions Re-writable discs ≥You can record up to 16 hours [in EP (8H) mode on double-sided disc. You cannot record or play continuously on two sides.] (➡ page 17, Recording modes and approximate recording times). ≥You can view the title being recorded from the beginning (Chasing playback, Time Slip) (➡ page 18).
7303en.book 15 ページ 2004年5月31日 月曜日 午前9時32分 Cards useable on this unit Instructions SD Memory Card MultiMediaCard You can insert directly into the SD card slot. [SD] SD Memory Card MultiMediaCard CompactFlash SmartMedia MEMORYSTICK xD-Picture Card Microdrive ≥You can play and transfer (dub) still pictures taken on a digital camera etc. (➡ page 28, 38). ≥You can set the DPOF (Digital Print Order Format) for automatic printing on your home printer or at a photo developing store (➡ page 36, 48).
7303en.book 16 ページ 2004年5月31日 月曜日 午前9時32分 Recording television programs DVD indicator 2 1∫ 5 1 1 The DVD indicator lights up on the unit. 2 OPEN/CLOSE SD CARD PC CARD REC EJECT POWER TIME SLIP DVD SD PC TIME SLIP Recording Time Slip indicator TIME SLIP DVD POWER Numbered buttons /x1.3 DVD ≥Press the button again to close the tray. CH Insert label-up.
2004年5月31日 月曜日 午前9時32分 ∫ To specify a time to stop recording—One Touch Recording Selecting audio to record During recording [RAM] Press [¥ REC] to select the recording time. Press [AUDIO]. Each time you press the button: 0:30 "# 1:00 "# 1:30 "# 2:00 "# 3:00 "# 4:00 ^"""""""""""" Counter (cancel) ,"""""""""""} ≥This does not work during timer recordings (➡ page 19) or while using Flexible Recording (➡ page 18). To stop recording partway Press [∫].
7303en.book 18 ページ 2004年5月31日 月曜日 午前9時32分 Recording television programs Refer to the control reference on page 16. [RAM] [RAM] [DVD-R] Playing while you are recording Recording While recording to the DVD-RAM you can view the title being recorded from the beginning as well as play a recorded title. Playing from the beginning of the title you are recording—Chasing playback Flexible Recording The unit sets the best possible picture quality that fits the recording within the remaining disc space.
7303en.book 19 ページ 2004年5月31日 月曜日 午前9時32分 Timer recording Í DVD POWER ≥As long as the setting is not changed, the program is recorded in the recording mode selected by the unit. To change the setting ➡ below. TV POWER INPUT SELECT TV/VIDEO DVD VOLUME CH SD/PC DRIVE SELECT PAGE Numbered buttons 1 2 3 4 5 6 PAGE WX CH CH ∫ To change the setting 1Press [3] several times to select “LISTINGS”. 2Press [2, 1] to select “SCHEDULE”. 3Press [3, 4] to select the program and press [ENTER].
7303en.book 20 ページ 2004年5月31日 月曜日 午前9時32分 Timer recording DVD POWER Í DVD POWER ≥To enter the channel Press [3, 4] to select “Channel” and press the numbered buttons. –To select the input channel (L1/L2/L3) Press the “Blue” button. ≥To change the recording mode Press [3, 4] to select “Quality” and press the “Blue” button.
2004年5月31日 月曜日 午前9時32分 Using VCR Plusi system to make timer recordings Entering PlusCode® number is an easy way of timer recording. You can find them in TV listings in newspapers and magazines. ≥You can enter up to 8 days in advance. ≥VCR Plusi system works only after this unit downloads the television program list (➡ page 10). 1 2 3 Press [VCR Plusr].
7303en.book 22 ページ 2004年5月31日 月曜日 午前9時32分 Timer recording ∫ To change the recording frequency DVD POWER Í DVD POWER Press the “Green” button. TV POWER DVD ∫ To change the time and recording mode VOLUME CH INPUT SELECT TV/VIDEO 1 Press [ENTER]. SD/PC DRIVE SELECT PAGE 1 Recording Numbered buttons 2 3 PAGE WX CH CH 4 5 6 7 8 9 Start early by : End late by : Quality : 00 minutes 00 minutes SP AUDIO 2 Change the setting as necessary and press [ENTER].
7303en.book 23 ページ 2004年5月31日 月曜日 午前9時32分 Utilizing TV Guide On ScreenTM system ∫ Customizing the channel line-up Press [TV GUIDE]. 1 Press [3] several times to select “LISTINGS”. 2 Press [2, 1] to select “SETUP” and press [4]. 3 Press [3, 4] to select “Change channel display” and press [ENTER]. 4 Press [3, 4] to select the channel. ≥Press [PAGE WX CH] to skip one screen. SCHEDULE TODAY LISTINGS 8:00PM SORT 8:30PM Last Channel Advertisements 87 NWGB 8:00 8:30 FAVORITES RECORD INFO.
7303en.book 24 ページ 2004年5月31日 月曜日 午前9時32分 Playing recorded video contents/Playing play-only discs 3 DVD indicator 2 1∫ 3 OPEN/CLOSE SD CARD PC CARD REC EJECT POWER TIME SLIP DVD SD PC DRIVE SELECT TIME SLIP DVD POWER TIME SLIP WX CH 45 TV POWER INPUT SELECT TV/VIDEO /x1.3 CH Playing back 1 Numbered buttons DVD DRIVE SELECT SD/PC ∫ Selecting recorded programs (titles) to play– Direct Navigator :9 ; ∫ 2 3 4 5 6 7 8 CH SKIP STOP SLOW/SEARCH PAUSE PLAY/x1.
7303en.book 25 ページ 2004年5月31日 月曜日 午前9時32分 Operations during play Press [∫]. Pause PLAY Press [;]. Press again to restart play. Press [6] or [5]. Search Skip ≥On the main unit, press and hold [D] or [E]. ≥The speed increases up to 5 steps. ≥Press [1] (PLAY) to restart play. ≥Audio is heard during first level search forward. You can turn off the sound during search (➡ page 43, “Search Audio & PLAY k1.3”). Audio is heard during all levels of search.
7303en.book 26 ページ 2004年5月31日 月曜日 午前9時32分 Playing recorded video contents/Playing play-only discs Refer to the control reference on page 24. Editing operations during play Playing back Erase 1 Press [ERASE]. 2 Press [2, 1] to select “Erase” and press [ENTER]. [RAM] [DVD-R] ≥A title cannot be restored once it is erased. Make certain before proceeding. ≥You cannot erase while recording and playing at the same time. Create chapters Press [CHAPTER].
7303en.book 27 ページ 2004年5月31日 月曜日 午前9時32分 Using menus to play MP3 Using the tree screen to find a group DVD POWER While the file list is displayed TV POWER INPUT SELECT TV/VIDEO DVD Press [1] while a track is highlighted to display the tree screen. SD/PC DRIVE SELECT Selected group No. /Total groups If the group has no track, “– –” is displayed as group number.
7303en.book 28 ページ 2004年5月31日 月曜日 午前9時32分 Playing still pictures PC card slot DRIVE SELECT OPEN/CLOSE SD CARD PC CARD REC EJECT POWER TIME SLIP DVD SD PC TIME SLIP DRIVE SELECT /x1.3 CH DVD, SD, PC indicator SD card slot ∫ DVD POWER TV POWER INPUT SELECT TV/VIDEO Inserting/Removing the SD/PC card Only insert or remove the SD/PC card after turning the unit off. When the card indicator (“SD” or “PC”) on the unit’s display is flashing, the card is being read from or written to.
7303en.book 29 ページ 2004年5月31日 月曜日 午前9時32分 ∫ To select the still pictures in another folder 1 Press [DVD] or [SD/PC] to select the drive. ≥Each time you press [SD/PC]: SD card drive ,". PC card drive ≥On the main unit, press [DRIVE SELECT] several times. The indicator lights up on the unit. 2 e.g., SD card drive Picture (JPEG) View PICTURE SD CARD Folder 100__DVD 0001 0002 0003 0004 0005 0006 0007 0008 0009 ---- ---- ---- \DCIM DIRECT NAVIGATOR Picture (JPEG) View PICTURE SD CARD
7303en.book 30 ページ 2004年5月31日 月曜日 午前9時32分 Using on-screen menus and Status messages Disc menu–Setting the disc content DVD POWER TV POWER DVD DRIVE SELECT Sound track§ VOLUME CH INPUT SELECT TV/VIDEO [RAM] [DVD-R] The disc’s audio attributes appear. [DVD-A] [DVD-V] Select the audio and language (➡ below, Audio attribute, Language).
7303en.book 31 ページ 2004年5月31日 月曜日 午前9時32分 Play menu–Change the play sequence Audio menu–Change the sound effect This function works only when the elapsed play time is displayed. ≥All [VCD] [CD] (excluding MP3 discs) ≥Chapter [RAM] [DVD-R] [DVD-V] ≥Group [DVD-A] [CD] (MP3 discs only) ≥PL (Play list) [RAM] ≥Title [RAM] [DVD-R] [DVD-V] ≥Track [DVD-A] [VCD] [CD] Select “OFF” to cancel. V.S.S.
7303en.book 32 ページ 2004年5月31日 月曜日 午前9時32分 Editing titles/chapters DVD POWER INPUT SELECT TV/VIDEO DVD Editing titles/chapters and playing chapters TV POWER DVD Preparation ≥Press [DVD] to select the DVD drive. ≥Release protection (➡ page 40). [RAM] VOLUME CH SD/PC DRIVE SELECT 1 2 PAGE 1 2 3 4 5 6 7 8 CH AUDIO 9 VCR Plus+ CM SKIP CANCEL 0 SKIP :9 STOP SLOW/SEARCH PAUSE 3 ; PLAY/x1.
7303en.book 33 ページ 2004年5月31日 月曜日 午前9時32分 Title operations Erase§ [RAM] [DVD-R] Press [2, 1] to select “Erase” and press [ENTER]. ≥Once erased, the recorded contents are lost and cannot be restored. Make certain before proceeding. ≥The available recording time on DVD-R does not increase when you erase titles. Information (e.g., time and date) is shown. Properties Properties Dinosaur No.
7303en.book 34 ページ 2004年5月31日 月曜日 午前9時32分 Creating, editing and playing play lists 2 DVD POWER TV POWER INPUT SELECT TV/VIDEO VOLUME CH Press [3, 4, 2, 1] to select “PLAY LIST” and press [ENTER]. PLAY LIST DVD-RAM Play List View -- DVD DVD 2 3 4 5 6 7 8 -- -- -- Create PAGE 1 -- SD/PC DRIVE SELECT -- CH AUDIO 9 01/01 Previous VCR Plus+ CM SKIP CANCEL Next 0 SKIP STOP SLOW/SEARCH PAUSE 3 PLAY/x1.
2004年5月31日 月曜日 午前9時32分 Editing and playing play lists/chapters 1 2 3 Play list operations Press [FUNCTIONS]. Erase§ Press [3, 4, 2, 1] to select “PLAY LIST” and press [ENTER]. Press [3, 4, 2, 1] to select the play list. Play list information (e.g., time and date) is shown. To start play ➡ Press [ENTER]. To edit ➡ Step 4. PLAY LIST DVD-RAM -- 10/27 Mon 0:30 Create -- -- No. Chapters SUB MENU Next Select Press [SUB MENU], then [3, 4] to select the operation and press [ENTER].
7303en.book 36 ページ 2004年5月31日 月曜日 午前9時32分 Editing still pictures 2 DVD POWER TV POWER INPUT SELECT TV/VIDEO DVD VOLUME CH DRIVE SELECT SD/PC DVD, SD/PC 3 PAGE 1 2 3 4 5 6 7 8 AUDIO 4 9 VCR Plus+ CM SKIP 0 SKIP STOP SLOW/SEARCH PAUSE Press [3, 4, 2, 1] to select “PICTURE” tab and press [ENTER]. Press [3, 4, 2, 1] to select the still picture. ≥To show other pages/Multiple editing (➡ page 32) ≥To select the still pictures in another folder (➡ page 29) CH CANCEL [RAM] PLAY/x1.
7303en.book 37 ページ 2004年5月31日 月曜日 午前9時32分 Entering text 1 INPUT SELECT TV/VIDEO DVD VOLUME Title Select “Enter Name” in step 4 on page 32. SD/PC Play list Select “Enter Name” in step 4 on page 35. CH DRIVE SELECT PAGE Numbered buttons 1 2 3 4 5 6 CH 8 9 Folder of still pictures Select “Folder Name” in step 4 on page 36. VCR Plus+ CM SKIP CANCEL 0 SKIP ; Disc Select “Disc Name” in step 3 on page 40. AUDIO 7 ¢ CANCEL Show Enter Name screen.
7303en.book 38 ページ 2004年5月31日 月曜日 午前9時32分 Transferring (dubbing) still pictures ∫ To register on a folder by folder basis VOLUME CH INPUT SELECT TV/VIDEO 1 Press [3, 4] to select “Picture/Folder” and press [ENTER]. INPUT SELECT DVD DRIVE SELECT SD/PC PAGE 1 2 DVD, SD/PC Dubbing 3 4 5 7 8 6 1 Dubbing direction SD card > DVD AUDIO Picture High Speed 2 Press [3, 4] to select “Folder” and press [ENTER]. 3 Press [3, 4] to select “New entry” and press [ENTER].
7303en.book 39 ページ 2004年5月31日 月曜日 午前9時32分 Recording from a video cassette recorder Transferring (dubbing) all the still pictures of a card onto a DVD-RAM— COPY ALL PICTURES [SD] or [PC] > [RAM] Refer to the control reference on page 38. [RAM] [DVD-R] Preparation ≥Connect a video cassette recorder to this unit’s input terminals. ≥Press [DVD] to select the DVD drive. Preparation Press [SD/PC] to select the source drive.
7303en.book 40 ページ 2004年5月31日 月曜日 午前9時32分 FUNCTIONS window Disc and card setting Refer to the control reference on the left. DVD POWER Setting the protection TV POWER INPUT SELECT TV/VIDEO DVD DRIVE SELECT SD/PC PAGE 2 3 4 5 6 7 8 9 DVD, SD/PC PROTECT CH [SD] [PC] Switch the write-protect switch to the “LOCK” position.
2004年5月31日 月曜日 午前9時32分 Erasing all titles and play lists—Erase all titles [RAM] Preparation ≥Press [DVD] to select the DVD drive. ≥Release protection (➡ page 40). 1 To stop formatting Press [RETURN]. (You can cancel formatting if it takes more than 2 minutes. The disc or card must be reformatted if you do this.) ≥Formatting cannot be performed on DVD-R or CD-R/RW. ≥When a disc or card has been formatted using this unit, it may not be possible to use it on any other equipment.
7303en.book 42 ページ 2004年5月31日 月曜日 午前9時32分 Changing the unit’s settings Common procedures DVD POWER Í DVD POWER 1 TV POWER DVD DRIVE SELECT While stopped VOLUME CH INPUT SELECT TV/VIDEO Press [SETUP]. Tabs SD/PC Menus Options PAGE Numbered buttons 1 2 3 4 5 6 SETUP CH 7 8 Antenna System 9 0 SKIP STOP 2 SLOW/SEARCH PAUSE Press [3, 4] to select the tab and press [1]. Press [3, 4] to select the menu and press [ENTER]. Press [3, 4] to select the option and press [ENTER].
2004年5月31日 Tabs Disc Continued Video 月曜日 午前9時32分 Menus Options (Underlined items are the factory presets.) Ratings Set a ratings level to limit DVD-Video play. ≥8 No Limit: ≥1 to 7: Follow the on-screen instructions. Enter a 4-digit password with the numbered buttons when the password screen is shown. ≥Do not forget your password. ≥0 Lock All: Recording Time in EP Mode Select the maximum number of hours for recording in EP mode (➡ page 17, Recording modes and approximate recording times).
7303en.book 44 ページ 2004年5月31日 月曜日 午前9時32分 Changing the unit’s settings Tabs Audio Continued Menus Digital Audio Output Change the settings when you have connected equipment through this unit’s DIGITAL AUDIO OUT terminal (➡ page 9). ≥Press [ENTER] to show the following settings. Signals are converted to 48 kHz or 44.1 kHz. (Choose when the connected equipment cannot process signals with sampling frequency of 96 kHz or 88.2 kHz.) Signals are output as 96 kHz or 88.2 kHz.
7303en.book 45 ページ 2004年5月31日 月曜日 午前9時32分 Channel/Clock settings when TV Guide On ScreenTM system is not used Refer to the control reference on page 42. Preparation: If the television program list has already been downloaded, return the unit to the factory preset condition using the steps indicated below. When the unit is on and stopped 1 Press and hold [X CH] and [W CH] on the main unit for about five seconds. The unit turns off. 2 Press [Í DVD POWER] to turn the unit on.
7303en.book 46 ページ 2004年5月31日 月曜日 午前9時32分 Channel/Clock settings when TV Guide On ScreenTM system is not used Refer to the control reference on page 42. Channel captions You can use the preset captions, or manually enter new ones yourself. The captions you enter are displayed when the channel is displayed and in the Direct Navigator screen. ≥You can set channel captions only after “Auto Channel Setting” is completed. 1 Press [SETUP].
7303en.book 47 ページ 2004年5月31日 月曜日 午前9時32分 Specifications DVD Video Recording format (DVD-RAM) DVD-Video format (DVD-R) Recordable discs: DVD-RAM : 12 cm (5q) 4.7 GB, 12 cm (5q) 9.4 GB, 8 cm (3q) 2.8 GB 12 cm (5q) 4.7 GB (Ver. 2.1/3k–SPEED DVD-RAM Revision 1.0) DVD-R : 12 cm (5q) 4.7 GB, 8cm (3q) 1.4 GB (for General Ver. 2.0) 12 cm (5z) 4.7 GB (for General Ver. 2.0/4k–SPEED DVD-R Revision 1.0) Recording time: ≥Maximum 8 hours (with 4.7 GB disc) XP: Approx. 1 hour SP: Approx. 2 hours LP: Approx.
7303en.book 48 ページ 2004年5月31日 月曜日 午前9時32分 Glossary Bitstream This is the digital form of multi-channel audio data (e.g., 5.1 channel) before it is decoded into its various channels. CPRM (Content Protection for Recordable Media) CPRM is technology used to protect broadcasts that are allowed to be recorded only once. Such broadcasts can be recorded only with CPRM compatible recorders and discs. Dolby Digital This is a method of coding digital signals developed by Dolby Laboratories.
7303en.book 49 ページ 2004年5月31日 月曜日 午前9時32分 Frequently asked questions Set up What equipment is necessary to play multi channel surround sound? Page ≥ DVD-Video: You can play DVD-Video multi channel surround by digitally connecting an amplifier equipped with a Dolby Digital and a DTS decoder. ≥DVD-Audio: This unit plays DVD-Audio in 2 channels. You cannot play multi channel surround sound. 9 — Are the headphones and speakers directly connected to the unit? ≥You cannot directly connect to the unit.
7303en.book 50 ページ 2004年5月31日 月曜日 午前9時32分 Error messages On the television Cannot finish recording completely. Cannot play. Cannot record on the disc. Please check the disc. Unable to format. Cannot play back on this DVDRecorder. Cannot record. Disc is full. Cannot record. Maximum number of titles exceeded. Error has occurred. Please press ENTER. No disc No folders. No PC CARD No SD CARD No valid PC card. No valid SD card. Not enough space on dubbing destination. Please change the disc.
7303en.book 51 ページ 2004年5月31日 月曜日 午前9時32分 Troubleshooting guide Before requesting service, make the following checks. If you are in doubt about some of the check points, or if the remedies indicated in the chart do not solve the problem, refer to the “Customer Services Directory” on page 55. The following do not indicate a problem with this unit: ≥Regular disc rotating sounds. The sound of the disc rotating may become louder especially when finalizing a DVD-R.
7303en.book 52 ページ 2004年5月31日 月曜日 午前9時32分 Troubleshooting guide Sound No sound. Low volume. Distorted sound. Cannot hear the desired audio type. Cannot switch audio. Page ≥Check the connections and settings. Check the input mode on the amplifier if you have connected one. ≥Press [AUDIO] to select the audio. ≥Turn off V.S.S. in the following cases. –When using discs that do not have surround sound effects such as Karaoke discs. –When playing MTS broadcast programs.
7303en.book 53 ページ 2004年5月31日 月曜日 午前9時32分 TV Guide On ScreenTM system Page Television program list does not display when [TV GUIDE] is pressed. ≥Leave the unit turned off over night. ≥Check the connection and set up the TV Guide On ScreenTM system again. ≥Consult your service provider if you are using a cable TV box. ≥Television program list is not available in your area. Set the unit using “Auto Channel Setting”.
7303en.book 54 ページ 2004年5月31日 月曜日 午前9時32分 Troubleshooting guide Still pictures Page Cannot display Direct Navigator screen. ≥This screen cannot be displayed during recording or while the unit is standing by for timer recording. — Cannot edit or format a card. ≥Release the card’s protection setting. (With some cards, the “Write protection Off” message sometimes appears on the screen even when protection has been set.) 40 The contents of the card cannot be read.
7303en.book 55 ページ 2004年5月31日 月曜日 午前9時32分 Limited Warranty Panasonic Consumer Electronics Company, Division of Matsushita Electric Corporation of America One Panasonic Way Secaucus, New Jersey 07094 Panasonic Sales Company, Division of Matsushita Electric of Puerto Rico, Inc., Ave. 65 de Infantería, Km. 9.
7303en.book 56 ページ 2004年5月31日 月曜日 午前9時32分 Instalación básica Guía de referencia rápida en español Español Conexión de un televisor y videograbadora Conexión de un receptor de TV por cable Consulte la ilustración que aparece en la página 7 de la sección en idioma inglés. Consulte la ilustración que aparece en la página 8 de la sección en idioma inglés. ≥Las conexiones del equipo descritas son ejemplos.
7303en.book 57 ページ 2004年5月31日 Ranura de tarjeta PC 月曜日 午前9時32分 Bandeja de disco < OPEN/CLOSE OPEN/CLOSE SD CARD PC CARD REC EJECT POWER TIME SLIP DVD SD PC TIME SLIP DRIVE SELECT /x1.3 CH Indicador Time Slip Ranura de tarjeta SD Indicador DVD, SD, PC DVD POWER Í DVD POWER –Si el receptor de TV por cable ha cambiado al canal 09, seleccione “Yes” (Sí) y pulse [ENTER]. –Si el receptor de TV por cable sigue sintonizado al mismo canal, seleccione “No” y pulse [ENTER].
7303en.book 58 ページ 2004年5月31日 月曜日 午前9時32分 Grabación de programas de televisión Consulte la referencia de controles en la página 57. [RAM] [DVD-R] ≥Puede grabar hasta 99 títulos en un disco. ≥No es posible grabar continuamente desde una cara a la otra en un disco de dos caras. Tendrá que expulsar el disco y darlo la vuelta. ≥Cuando utilice discos DVD-RAM de 8 cm (3″ ), retire el disco del cartucho.
7303en.book 59 ページ 2004年5月31日 月曜日 午前9時32分 Reproducción de discos y tarjetas Consulte la referencia de controles en la página 57 . 1 Pulse [DVD] para seleccionar la unidad DVD. 2 Pulse [< OPEN/CLOSE] en la unidad principal para abrir la bandeja e insertar un disco. Pulse de nuevo el botón para cerrar la bandeja. 3 Pulse [1] (PLAY). [RAM] [DVD-R] La reproducción empieza desde el título grabado más recientemente. [DVD-A] [DVD-V] [VCD] [CD] La reproducción empieza desde el comienzo del disco.
7303en.book 60 ページ 2004年5月31日 月曜日 午前9時32分 Index Angle. . . . . . . . . . . . . . . . . . . . . . . . . . . . Antenna system . . . . . . . . . . . . . . . . . . Audio attribute . . . . . . . . . . . . . . . . . . . . . . language . . . . . . . . . . . . . . . . . . . . . playback. . . . . . . . . . . . . . . . . . . . . . receiving, recording . . . . . . . . . . . . . 30 42 30 42 26 17 Change Thumbnail . . . . . . . . . . . . . . . . 33 Channel adjusting, hiding. . . . . . . . . . . . . . . .