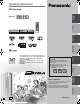
Operating Instructions DVD Recorder Getting started DMR-EX75 DMR-EX85 Viewing Model No. Region numbers are allocated to DVD players and DVD-Video according to where they are sold. ≥The region number of this unit is “4”. ≥The unit will play DVD-Video marked with labels containing “4” or “ALL”. Example: 4 ALL 2 3 4 Dear customer Thank you for purchasing this product. For optimum performance and safety, please read these instructions carefully.
CAUTION! THIS PRODUCT UTILIZES A LASER. USE OF CONTROLS OR ADJUSTMENTS OR PERFORMANCE OF PROCEDURES OTHER THAN THOSE SPECIFIED HEREIN MAY RESULT IN HAZARDOUS RADIATION EXPOSURE. DO NOT OPEN COVERS AND DO NOT REPAIR YOURSELF. REFER SERVICING TO QUALIFIED PERSONNEL. WARNING: TO REDUCE THE RISK OF FIRE, ELECTRIC SHOCK OR PRODUCT DAMAGE, ≥DO NOT EXPOSE THIS APPARATUS TO RAIN, MOISTURE, DRIPPING OR SPLASHING AND THAT NO OBJECTS FILLED WITH LIQUIDS, SUCH AS VASES, SHALL BE PLACED ON THE APPARATUS.
Table of contents Getting started Editing HDD, disc and card information . . . . . . . . . . . . . . . . . . . .4 Important notes for recording . . . . . . . . . . . . . . . . . . . . .8 HDD (Hard disk drive) handling care . . . . . . . . . . . . . . . .9 Disc and card handling . . . . . . . . . . . . . . . . . . . . . . . . . .10 Unit care . . . . . . . . . . . . . . . . . . . . . . . . . . . . . . . . . . . . . .10 Included accessories . . . . . . . . . . . . . . . . . . . . . . . . . . .
HDD, disc and card information HDD and discs you can use for recording and play Disc type Hard disk drive (HDD) ≥[DMR-EX75] 160 GB [DMR-EX85] 250 GB Logo DVD-RAM ≥4.7 GB/9.4 GB, 12 cm ≥2.8 GB, 8 cm – Indicated in these instructions by [HDD] [RAM] DVD Video Recording format Recording format Data that can be recorded and played This is a recording method which allows you to record and edit television broadcasts and so on. ≥You can delete unwanted parts of a title, create playlists, etc.
HDD and discs you can use for recording and play (continued) +R DL (double layer on single side) ≥You cannot directly record to a +R DL disc on this unit (➡ 8) Logo Indicated in these instructions by – – [+R] before finalization [+R]DL] before finalization [DVD-V] after finalization [DVD-V] after finalization +RW – [+RW] +VR (+R/+RW Video Recording) format Recording format Data that can be recorded and played Re-writable This is a method for recording moving pictures to +R/+RW discs.
HDD, disc and card information Play-only discs (12 cm/8 cm) Disc type DVD-Video DVD-Audio DVD-RW (DVD Video Recording format) [DVD-A] [-RW‹VR›] Logo Indicated in these [DVD-V] instructions by Instructions High quality movie and music discs High fidelity music DVD-RW recorded on another DVD Recorder discs ≥You can play programmes that allow “One time only recording” ≥Played on this unit if they have been recorded to a CPRM compatible disc.
Type SD Memory Card miniSD Card§ MultiMediaCard Indicated in these instructions by [SD] Data that can be recorded and played Still pictures Video (MPEG2) Instructions You can insert directly into the SD card slot. A miniSD card adaptor included with the miniSD card is necessary. ≥You can play and copy still pictures taken on a digital camera etc. (➡ 36, 52). ≥You can set the DPOF (Digital Print Order Format) for automatic printing on your home printer or at a photo developing store (➡ 45, 76).
Important notes for recording When recording a bilingual programme [HDD] [RAM] Both main and secondary audio can be recorded. You can change the audio during playback.
HDD (Hard disk drive) handling care The HDD is a high precision recording instrument and because of its long recording capability and high speed operation it is a very special device that is easily susceptible to damage. As a basic rule, save important content to a disc as backup. ∫ The HDD is a device that is not built to withstand vibration/shock or dust ∫ The HDD is a temporary storage device The HDD is not an everlasting storage device for recorded content.
Disc and card handling ∫ How to hold a disc or card ∫ Handling precautions Do not touch the recorded surface or the terminal surface. ≥Do not attach labels or stickers to discs. (This may cause disc warping and un-balanced rotation, rendering it unusable.) ≥Write on the label side of the disc only with a soft, oil-based felt pen. Do not use ballpoint pens or other hard writing implements. ≥Do not use record cleaning sprays, benzine, thinner, static electricity prevention liquids or any other solvent.
Included accessories Please check and identify the supplied accessories. (Product numbers correct as of September 2006. These may be subject to change.) ∏ 1 Remote control 1 AC mains lead (EUR7659T20) ∏ 2 RF coaxial cables ∏ 2 Batteries for remote control ∏ 1 Audio/video cable ≥For use with this unit only. Do not use it with other equipment. Also, do not use cords for other equipment with this unit.
Control reference guide Remote control Instructions for operations are generally described using the remote control. > DVD 1 2 TV Í Í VOLUME CH DRIVE SELECT AV ? PAGE 3 4 1 2 3 4 5 6 7 8 9 INPUT 0 SELECT SKIP CH ANALOGUE CH G-Code ; @ A B C SLOW/SEARCH 5 STOP 9 : ; < = RQT8388 12 PROG/CHECK ENTER SUB MENU TIONS FUNC 8 PLAY/x1.
Main unit 5 4 OPEN/CLOSE REC DRIVE SELECT k1.3 1.3 CH DV IN S VIDEO IN VIDEO IN L/MONO -AUDIO IN- R AV3 6 7 Opening the front panel 8 9 : ; < = Press down on the part with your finger 8 Open/close disc tray (➡ 22, 30) 9 Select drive (➡ 22, 30, 36) Drive changes each time you press [DRIVE SELECT].
STEP 1 Connection Make sure to use the pair of supplied RF coaxial cables Use the pair of supplied RF coaxial cables only when you make connections to the unit through its RF IN and RF OUT terminals. Striping may appear and disrupt images on the TV if you use different cables for connection. ≥Before connection, turn off all equipment and read the appropriate operating instructions. ≥Select the connection pattern that matches your environment from pattern A–B.
B Connecting a television and VCR Connect the unit directly to the television If you connect the unit through an AV selector or video cassette recorder to the television, video signal will be affected by copyright protection systems and the picture may not be shown correctly. ≥When connecting to a television with a built-in VCR Connect to the input terminals on the television side if there are both television and VCR input terminals.
STEP 1 Connection Other connections Connecting a television with S VIDEO terminals The S VIDEO OUT terminal achieves a more vivid picture than the VIDEO OUT terminal. (Actual results depend on the television.
Connecting with an HDMI (High Definition Multimedia Interface) terminal Connecting to a TV Connecting to an amplifier/receiver Television’s rear panel HDMI IN This unit’s rear panel HDMI IN HDMI OUT HDMI IN HDMI AV OUT Television’s rear panel Amplifier/receiver’s rear panel OUT STEP 1 Connection HDMI is the next-generation interface for digital devices. When connected to an HDMI compatible unit, an uncompressed digital audio and video signal is transmitted.
STEP 2 Channel reception settings and TV aspect settings 3 Í/ l OPEN/CLOSE Press [3, 4] to select your area and press [ENTER]. TV Aspect REC DRIVE SELECT k1.3 1.3 16:9 WIDE TV 16:9 4:3 TV 4:3 Letterbox DVD Í DVD TV Í SELECT Í ENTER VOLUME CH DRIVE SELECT RETURN AV PAGE 1 2 3 4 5 6 7 8 9 INPUT 0 SELECT Numbered buttons SKIP STOP 4 CH Press [3, 4] to select the TV aspect and press [ENTER].
STEP 3 Set up to match your television and remote control 4 Setup TV Í Í VOLUME CH DRIVE SELECT AV TV operation buttons Tuning Disc Picture Sound PAGE 1 2 3 4 5 6 7 8 9 INPUT 0 SELECT SKIP Display CH PAUSE SELECT Connection Others ENTER CH 5 G-Code Off Tuning TIONS FU N C DIRECT NAVIGATO R RETURN Progressive TIME SLIP SUB MENU TAB On PROG/CHECK 3,4,2,1 ENTER Video Video Press [3, 4] to select “Progressive” and press [ENTER]. Setup PLAY/x1.
STEP 3 Set up to match your television and remote control Refer to the control reference on page 19. When other Panasonic products respond to this remote control Television operation You can configure the remote control TV operation buttons to turn the television on/off, change the television input mode, select the television channel and change the television volume. Use “DVD 1”, the factory set code, under normal circumstances.
Watching television Í/ l Digital channel information While stopped REC DRIVE SELECT k1.3 1.3 DVD Í DVD TV Í Í VOLUME CH DRIVE SELECT AV PAGE Numbered buttons 1 2 3 4 5 6 7 8 9 INPUT 0 SELECT SKIP STOP CH CH W X ANALOGUE CH ANALOGUE CH G-Code PAUSE Category ENTER SUB MENU RETURN S AUDIO CREATE CHAPTER REC REC MODE DISPLAY DELETE MANUAL SKIP Change the category (➡ below). Programme is broadcast in multi-channel sound (➡ 39, DVB Multi Audio). During scrambled broadcasting.
Recording television programmes 2 5 OPEN/CLOSE 3 Channels are displayed in the order of digital channels first, and then followed by analogue channels. ≥Digital channel REC DRIVE SELECT Press [W X CH] to select the channel. k1.3 1.3 CH REC S VIDEO IN VIDEO IN L/MONO -AUDIO IN- R DV IN AV3 ∫ 3 1 DVD TV Í 1 Numbered buttons Í You can also select the channel with the numbered buttons. e.g.
Recording modes and approximate recording times HDD [DMR-EX75] (160 GB) [DMR-EX85] (250 GB) Singlesided (4.7 GB) Doublesided§1 (9.4 GB) DVD-R DVD-RW +R +RW (4.7 GB) XP (High picture quality recording mode) 36 hours 55 hours 1 hour 2 hours 1 hour 1 hour 45 min. 1 hour 45 min. SP (Standard recording mode) 70 hours 111 hours 2 hours 4 hours 2 hours 3 hours 35 min. 3 hours 35 min. LP (Long recording mode) 138 hours 222 hours 4 hours 8 hours 4 hours 7 hours 10 min. 7 hours 10 min.
Recording television programmes OPEN/CLOSE Recording settings for High Speed Copy REC DRIVE SELECT k1.3 1.3 ∫ ¥ REC 1 DRIVE SELECT DVD TV Í DRIVE SELECT Numbered buttons Í AV PAGE 1 2 3 4 5 6 7 8 9 INPUT 0 SELECT SKIP ∫ VOLUME CH DRIVE SELECT ANALOGUE CH G-Code SLOW/SEARCH PAUSE STOP CH PLAY/x1.3 Refer to the “Important notes for recording” for more information (➡ 8).
5 When you want to start recording Press [3, 4, 2, 1] to select “Start” and press [ENTER]. (Recording that fits the remaining disc space) [HDD] [RAM] [-R] [-RW‹V›] [+R] [+RW] The unit sets the best possible picture quality that fits the recording within the remaining disc space. The recording mode becomes FR mode. ∫ Using “Flexible Rec” is convenient in these kinds of situations.
Timer recording Using G-CODE system to make timer recordings Entering G-CODE numbers is an easy way of timer recording. You can find these numbers in TV listings in newspapers and magazines. DVD TV Í DRIVE SELECT Numbered buttons Í VOLUME CH DRIVE SELECT [Note] ≥The G-CODE system is not supported for digital broadcasts. AV PAGE 1 2 3 4 5 6 7 8 9 INPUT 0 SELECT SKIP STOP 1 CH Press [G-Code]. ANALOGUE G-Code Record CH G-Code DVD 1:58 SP HDD 30:24 SP Remain 12:53:00 15. 7.
Manually programming timer recordings Press [PROG/CHECK]. Timer Recording HDD 30:24 SP Remain No. Name Date Start DVD 1:58 SP 12:56:00 15. 7. TUE Drive space HDD DVD Mode Stop New Timer Programme 2 3 Press [3, 4] to select “New Timer Programme” and press [ENTER]. Press [1] to move through the items and change the items with [3, 4]. Timer Recording DVD 1:58 SP HDD 30:24 SP Remain Timer recording 1 12:56:00 15. 7. TUE Name Date Start 1 ARD 15. 7.
Timer recording To cancel recording when recording has already begun 1 DVD Í Í DRIVE SELECT ¢ AV Stop Recording PAGE 1 2 3 4 5 6 7 8 9 INPUT 0 SELECT SKIP ∫ VOLUME CH DRIVE SELECT STOP Timer recording in progress. Stop this timer recording? It will be cancelled if you stop. CH ANALOGUE Stop Recording CH G-Code ENTER PAUSE 2 PLAY/x1.
Relief Recording Icons When the recording drive is “DVD” and there is not enough remaining space, recording automatically switches to the “HDD”. If there is no disc in the tray or the disc cannot be recorded on or when timer recording starts while copying, the recording drive will be altered to the HDD. ≥The Direct Navigator shows which programmes were relief- F [ W recorded (“ ” is displayed.) (➡ 30).
Playing recorded video contents/Playing play-only discs Selecting recorded programmes (titles) to play— Direct Navigator 2 [HDD] [RAM] [-R] [-R]DL] [-RW‹V›] [+R] [+R]DL] [+RW] [-RW‹VR›] OPEN/CLOSE REC DRIVE SELECT k1.3 1.3 TV Í Numbered buttons Í 1 2 3 4 5 6 7 8 9 INPUT 0 SELECT DIRECT NAVIGATOR PICTURE ARD 10.10. FRI ARD 11.10. SAT --- Previous ENTER RETURN Rec time 0:52(SP) --- ANALOGUE STOP PAUSE 6, 5 3 PLAY/x1.
∫ When a menu screen appears on the television ≥To return to the menu screen [DVD-V] Press [DIRECT NAVIGATOR] or [SUB MENU]. [DVD-A] Press [DIRECT NAVIGATOR]. [VCD] Press [RETURN]. [Note] ≥It is not possible to play continuously from one side of a double sided disc to the other. You will need to eject the disc and turn it over. ≥Depending on the disc, it may take time for the menu screen, pictures, sound, etc. to start. ≥Discs continue to rotate while menus are displayed.
Playing recorded video contents/Playing play-only discs Refer to the control reference on page 30. Operations during play (continued) Slow-motion While paused, press [6] or [5]. [HDD] [RAM] [-R] [-R]DL] [-RW‹V›] [+R] [+R]DL] [+RW] [DVD-V] [DVD-A] (Motion picture parts only) [-RW‹VR›] [VCD] The speed increases up to 5 steps. ≥Press [1] (PLAY) to restart play. ≥[VCD] Forward direction [5] only.
Playing DivX discs, MP3 discs and still pictures (JPEG/TIFF) Playable discs [-R] [CD] File format DivX ≥Files must have the extension “.DIVX”, “.divx”, “.AVI” or “.avi”. Number of folders Maximum number of folders recognizable: 300 folders (including the root folder) Number of files Maximum number of files recognizable§1: 200 files Support version DivX ver.3.11, 4.x, 5.
Playing DivX discs, MP3 discs and still pictures (JPEG/TIFF) Playing DivX discs [-R] [CD] You can play DVD-R and CD-R/CD-RW discs which contain DivX video contents that have been recorded on a computer. DVD TV Í Í DVD Í DRIVE SELECT VOLUME CH DRIVE SELECT Preparation Press [DRIVE SELECT] to select the DVD drive. AV PAGE 1 2 3 4 5 6 7 8 9 INPUT 0 SELECT Numbered buttons SKIP CH 1 ANALOGUE Press [DIRECT NAVIGATOR]. CH G-Code 001 6, 5 PAUSE STOP PLAY/x1.3 Tree Name of Title No.
Regarding DivX VOD content Playing MP3 discs Display the unit’s registration code. (➡ 64, “DivX Registration” in “Others” tab) Setup [CD] You can play CD-R/CD-RW discs which contain MP3 files that have been recorded on a computer. Preparation Press [DRIVE SELECT] to select the DVD drive. 1 DivX Registration Press [DIRECT NAVIGATOR].
Playing DivX discs, MP3 discs and still pictures (JPEG/TIFF) Refer to the control reference on page 34. 3 Playing still pictures DIRECT NAVIGATOR Picture (JPEG) View HDD [HDD] [RAM] [CD] [SD] ≥You can use SD Memory Cards with capacities from 8 MB to 2 GB (➡ 7). ≥You can playback still pictures recorded onto a CD-R/CD-RW on a PC. ≥You cannot playback still pictures while recording or copying.
Start Slide Show You can display still pictures one by one at a constant interval. Slide Show Setting [HDD] [RAM] [SD] 1 While the Album View screen is displayed Press [3, 4, 2, 1] to select the album. 2 Press [1] (PLAY). You can also start Slide Show with the following steps. While the Album View screen is displayed 1 Press [3, 4, 2, 1] to select the desired album and press [SUB MENU]. 2 Press [3, 4] to select “Start Slide Show” and press [ENTER].
CH Using on-screen menus/Status message ANALOGUE CH G-Code 0 SELECT SKIP STILL-P (Still picture) [DVD-A] SLOW/SEARCH PAUSE STOP Selects the play method for still pictures. Slide Show: Plays according to the default order on the disc. Page: Select the still picture number and play. ≥RANDOM: Plays in random order. ≥Return: Returns to the default still picture on the disc. PLAY/x1.
During playback or recording When the output signal is PAL (When the tray is opened, the setting will return to “Auto”.) The display changes each time you press the button. ≥Auto: ≥Video: ≥Film: Automatically detects the film and video content, and appropriately converts it. Select when using “Auto”, and the content is distorted. Select this if the edges of the film content appear jagged or rough when “Auto” is selected.
Editing titles/chapters TV Í DRIVE SELECT 1 Í VOLUME CH DRIVE SELECT AV Press [DIRECT NAVIGATOR]. PAGE 1 2 3 4 5 6 7 8 9 INPUT 0 SELECT SKIP CH 2 [HDD] [RAM] 3 Press the “Red” button to select “VIDEO”. Press [3, 4, 2, 1] to select the title. ANALOGUE CH G-Code SLOW/SEARCH :, 9 ; STOP PAUSE PLAY/x1.
Title operations After performing steps 1–5 (➡ 40) Press [2, 1] to select “Delete” and press [ENTER]. [HDD] [RAM] [-R] [-R]DL] [-RW‹V›] [+R] [+R]DL] [+RW] ≥Once deleted, the recorded contents are lost and cannot be restored. Make certain before proceeding. ≥The available recording space on DVD-R, DVD-R DL, +R or +R DL does not increase when you delete titles. ≥Available recording space on DVD-RW (DVD-Video format) and +RW increases only when the last recorded title is deleted.
Creating, editing and playing playlists DVD TV Í 3 Press [3, 4] to select “Playlists” and press [ENTER]. 4 Press [3, 4, 2, 1] to select “Create” and press [ENTER]. Í VOLUME CH DRIVE SELECT AV DRIVE SELECT PAGE 1 2 3 4 5 6 7 8 9 INPUT 0 SELECT SKIP CH ANALOGUE Playlists HDD CH Playlist View -- G-Code SLOW/SEARCH PAUSE PLAY/x1.
Editing and playing playlists/chapters [HDD] [RAM] [-RW‹VR›] (Play only) 2 3 4 Delete§ While stopped [HDD] [RAM] Press [FUNCTIONS]. Press [3, 4] to select “To Others” and press [ENTER]. Press [3, 4] to select “Playlists” and press [ENTER]. Press [3, 4, 2, 1] to select the playlist. Properties [HDD] [RAM] [-RW‹VR›] Properties No. 10 Chapters 002 01 -- 12.10. SUN 0:30 Create -- -- Create ➡ 42, Creating playlists, Step 5–8 -- [HDD] [RAM] Press [2, 1] to select “Copy” and press [ENTER].
Editing still pictures 1 2 DRIVE SELECT TV Í 3 VOLUME CH DRIVE SELECT AV PAGE 1 2 3 4 5 6 7 8 9 INPUT 0 SELECT SKIP :, 9 STOP ≥When you want to create an album using “Create Album”, press [SUB MENU] without selecting album. ANALOGUE CH G-Code Editing a still picture: SLOW/SEARCH PAUSE PLAY/x1.3 1 Select the album which contains the still picture to edit and press [ENTER]. 2 Select the still pictures to edit and press [SUB MENU].
Album and picture operation After performing steps 1–4, page 44 [HDD] [RAM] [SD] Enter Album Name [HDD] [RAM] [SD] Set up Protection§ Cancel Protection§ [HDD] [RAM] [SD] Press [2, 1] to select “Delete” and press [ENTER]. ≥Once deleted, the recorded contents are lost and cannot be restored. Make certain before proceeding. ≥When deleting an album, files other than the still picture files inside the album will also be deleted. (This does not apply to folders under the album concerned.
Delete Navigator Using the DELETE Navigator to delete DVD TV Í DRIVE SELECT 1 While stopped 2 Press [FUNCTIONS]. Press [3, 4] to select “Delete” and press [ENTER]. Í VOLUME CH DRIVE SELECT AV PAGE 1 2 3 4 5 6 7 8 9 INPUT 0 SELECT SKIP CH DELETE Navigator Title View VIDEO HDD ANALOGUE 007 PICTURE --- 008 CH ARD 10.10. FRI ARD 11.10. SAT --- --- G-Code --- SLOW/SEARCH :, 9 Previous STOP PAUSE ENTER PLAY/x1.
Copy Easy copying from HDD to DVD with no difficult settings. Features Copy direction HDD ➝ DVD Y DVD ➝ HDD t Y High speed mode copy§1 Changing recording mode Finalize §3 Copying MPEG2 moving pictures from an SD card (➡ 51) Copying playlists§4 Are chapters maintained? Are thumbnails maintained? Recording and Playing while Copying t [-R] [-R]DL] [-RW‹V›] [+R] [+R]DL] Automatically finalized High speed mode Normal speed mode t t t Y Y t t t§5 t§6 t Advanced Copy Make a copy list and then copy.
Copying titles or playlists 2 Press [3, 4] to select “Copy” and press [ENTER]. DVD COPY Navigator TV Í HDD Í DRIVE SELECT 1 2 3 4 5 6 7 8 9 INPUT 0 SELECT SKIP Rec time 0:52(SP) STOP RETURN 3 CH To show other pages Press [:, 9] to show other pages. Multiple editing Select with [3, 4] and press [;]. (Repeat.) Press [ENTER] to register. ≥A check mark appears. Press [;] again to cancel.
6 Register titles and playlists for copy. ≥If you are going to copy a registered list without making any changes to it (➡ step 7). 1 Press [3, 4] to select “Create List” and press [1]. [HDD] ,-. [RAM] [+RW] [-RW‹VR›] > [HDD] [HDD] > [-R] [-R]DL] [-RW‹V›] [+R] [+R]DL] [SD] > [HDD] [RAM] You can order titles and playlists as desired for copy to disc. Copy Cancel All Destination Capacity: 4343MB Size: 0MB ( 0%) 1 Copy Direction No.
Copying titles or playlists (Continued) Refer to the control reference on page 48. ∫ To stop copying Press and hold [RETURN] for 3 seconds. (You cannot stop while finalizing) When High-speed copying All titles that have completely copied at the point cancelled are copied. When Normal Speed copying Copies until the point cancelled. However titles with “One time only recording” restriction, only titles that have completely copied at the point cancelled are copied to the disc.
8 When the top menu is displayed Press [3, 4, 2, 1] to select the title you want to start copying, and press [ENTER]. [DVD-V] > [HDD] You can copy the content of finalized DVD-R, DVD-R DL, DVD-RW (DVD-Video format), +R, and +R DL to the HDD and re-edit. While playing a disc, the content being played is copied to the HDD according to the set time. ≥If you perform search, frame-by-frame or pause while copying, that portion of title is not recorded.
Copying still pictures 6 ≥If you are going to copy a registered list without making any changes to it (➡ step 7). DVD TV Í Í DRIVE SELECT You can register still pictures or still picture folders. ≥Still pictures and folders cannot be registered on the same list. VOLUME CH DRIVE SELECT AV PAGE 1 2 3 4 5 6 7 8 9 INPUT 0 SELECT Numbered buttons Register still pictures for copy.
To show other pages Press [3, 4, 2, 1] to select “Previous” or “Next” and press [ENTER]. ≥You can also press [:, 9] to show other pages. Multiple editing Select with [3, 4, 2, 1] and press [;]. (Repeat.) Press [ENTER] to register to the list. ≥A check mark appears. Press [;] again to cancel.
Copying from a video cassette recorder TV Í DRIVE SELECT 3 Í VOLUME CH DRIVE SELECT AV When you want to start recording Press [¥ REC]. PAGE 1 2 3 4 5 6 7 8 9 INPUT 0 SELECT SKIP PAUSE To skip unwanted parts Press [;] to pause recording. (Press again to restart recording.) To stop recording Press [∫]. ANALOGUE CH G-Code INPUT SELECT SLOW/SEARCH STOP ∫ Recording starts. CH PLAY/x1.3 Almost all videos and DVD-Video on sale have been treated to prevent illegal copying.
HDD, disc and card management Setting the protection [RAM] DVD TV Í Í DRIVE SELECT Preparation ≥Press [DRIVE SELECT] to select the DVD drive. VOLUME CH DRIVE SELECT AV SKIP After performing steps 1–3 (➡ left) CH ANALOGUE CH PAUSE 4 Press [3, 4] to select “Disc Protection” and press [ENTER]. 5 Press [2, 1] to select “Yes” and press [ENTER]. G-Code SLOW/SEARCH STOP Copying from a video cassette recorder/HDD, disc and card management PAGE 1 2 3 4 5 6 7 8 9 INPUT 0 SELECT PLAY/x1.
HDD, disc and card management Refer to the control reference on page 55. Deleting all titles and playlists—Delete all titles [HDD] [RAM] Preparation ≥Press [DRIVE SELECT] to select the HDD or DVD drive. ≥Release protection (➡ 55). After performing steps 1–3 (➡ 55) 4 Press [3, 4] to select “Delete all titles” and press [ENTER]. 5 Press [2, 1] to select “Yes” and press [ENTER]. Press [2, 1] to select “Start” and press [ENTER].
[-R] [-R]DL] [-RW‹V›] [+R] [+R]DL] [+RW] You can select the background that will be displayed as the DVDVideo top menu after finalizing. Preparation Press [DRIVE SELECT] to select the DVD drive. After performing steps 1–3 (➡ 55) 4 5 Press [3, 4] to select “Top Menu” and press [ENTER]. Press [3, 4, 2, 1] to select the background and press [ENTER].
Entering text 2 DVD TV Í Í CH DRIVE SELECT ¢ VOLUME Repeat this step to enter other characters. PAGE ≥To delete a character Press [3, 4, 2, 1] to select the character in the name field and press [;]. (The selected characters are deleted.) AV 1 2 3 4 5 6 7 8 9 INPUT 0 SELECT Numbered buttons SKIP CH ANALOGUE ≥Using the numbered buttons to enter characters CH G-Code e.g., entering the letter “R” 1 Press [7] to move to the 7th row. 2 Press [7] twice to highlight “R”. 3 Press [ENTER].
FUNCTIONS window By using the FUNCTIONS window you may access the main functions quickly and easily. 1 DVD TV Í CH DRIVE SELECT AV Functions displayed depend on the selected drive or type of disc. PAGE 1 2 3 4 5 6 7 8 9 INPUT 0 SELECT SKIP While stopped Press [FUNCTIONS]. VOLUME CH FUNCTIONS Remain 30:00 SP HDD Playback ANALOGUE CH Recording G-Code Delete Copy SLOW/SEARCH To Others ENTER RETURN PAUSE STOP PLAY/x1.
Changing the unit’s settings Common procedures X CH W OPEN/CLOSE REC DRIVE SELECT DV IN 1 While stopped k1.3 1.3 CH Press [FUNCTIONS]. S VIDEO IN VIDEO IN L/MONO -AUDIO IN- R AV3 ∫ < OPEN/CLOSE 2 Press [3, 4] to select “To Others” and press [ENTER]. Press [3, 4] to select “Setup” and press [ENTER]. Press [3, 4] to select the tab and press [1].
Tabs Options (Underlined items are the factory presets.) Settings for Playback ≥Press [ENTER] to show the following settings. Ratings Set a ratings level to limit DVD-Video play. Follow the on-screen instructions. Enter a 4-digit password with the numbered buttons when the password screen is shown. ≥Do not forget your password. ≥8 No Limit: All DVD-Video can be played. ≥1 to 7: Prohibits play of DVD-Video with corresponding ratings recorded on them. ≥0 Lock All: Prohibits play of all DVD-Video.
Changing the unit’s settings Refer to the control reference on page 60. Tabs Sound Menus Options (Underlined items are the factory presets.) Dynamic Range Compression [DVD-V] (Dolby Digital only) Change the dynamic range for late night viewing. ≥On ≥Off Bilingual Audio Selection Select whether to record the main or secondary audio type when: –Recording or copying to a DVD-R, DVD-R DL, DVD-RW (DVDVideo format), +R, +R DL and +RW. –“Rec for High Speed Copy” is set to “On” (➡ 24).
Menus Connection TV Aspect (➡ 18) Progressive (➡ 19) This setting is fixed with “Off” if you set “AV1 Output” to “RGB 1 (without component)” or “RGB 2 (without component)”. Options (Underlined items are the factory presets.) Set to match the type of television connected. TV System (➡ 67) ≥16:9 ≥4:3 ≥On ≥Off ≥PAL ≥NTSC ≥Letterbox HDMI Settings ≥Press [ENTER] to show the following settings. HDMI Video Format You can only select items compatible with the connected equipment.
Changing the unit’s settings Refer to the control reference on page 60. Tabs Others Menus Remote Control (➡ 20) Options (Underlined items are the factory presets.) ≥DVD 1 ≥DVD 2 ≥DVD 3 Clock (➡ 67) Power Save ≥Refer to the following when “Power Save” is set to “On”. –“FL Display” is automatically set to “Automatic” (➡ 62). –The “Quick Start” function does not work. (It is automatically turned to “Off”.) ≥If “Quick Start” is set to “On”, “Power Save” is automatically turned to “Off”.
∫ To change the name of a group Tuning While stopped Press [FUNCTIONS]. 2 3 4 Press [3, 4] to select “To Others” and press [ENTER]. Press [3, 4] to select “Setup” and press [ENTER]. Press [3, 4] to select “Tuning” and press [1]. Setup Edit Favourites 1 Press [1]. 2 Press the “Red” button. ➡ 58, Entering text To browse through the list Press [W X CH]. To exit the screen Press [RETURN] several times.
Changing the unit’s settings Refer to the control reference on page 60. Auto-Setup Restart Manual You can delete analogue channels and set the analogue channel details. You can restart auto channel setting for terrestrial digital and analogue channels if set up (➡ 18) fails for some reason. However, if you perform “Auto-Setup Restart”, the order of analogue channels will change. After performing steps 1–4 (➡ 65) After performing steps 1–4 (➡ 65) 5 Press [3, 4] to select “Manual” and press [ENTER].
Clock Setting Change the setting to match the equipment you are connecting with, or to match the title when there are both PAL and NTSC titles on the HDD. 1 2 3 4 5 6 While stopped Press [FUNCTIONS]. Press [3, 4] to select “To Others” and press [ENTER]. Press [3, 4] to select “Setup” and press [ENTER]. Press [3, 4] to select “Connection” and press [1]. Press [3, 4] to select “TV System” and press [ENTER]. Press [3, 4] to select the TV system and press [ENTER].
Messages On the television Page Authorization Error. ≥You are trying to play the DivX VOD content that was purchased with a different registration code. You cannot play the content on this unit. (DivX) 35 Cannot finish recording completely. ≥The programme was copy-protected. ≥The HDD or disc may be full. ≥The maximum number of times you can record the program is exceeded. — — 22 Cannot playback. TV system is different from the setting. To playback, please change the TV System in Setup.
On the unit’s display The following messages or service numbers appear on the unit’s display when something unusual is detected during startup and use. Page ≥The remote control and main unit are using different codes. Change the code on the remote control. HARD ERR§ ≥If there is no change after turning the unit on and off, consult the dealer where the unit was purchased. No AUDIO § 20 Press and hold [ENTER] and the indicated number button at the same time for more than 2 seconds.
Frequently asked questions Refer to the following items if you have any doubts about unit operations. Set up Which aerial is suitable for receiving digital terrestrial broadcasts? Can this unit receive or record High Definition (HD) broadcasts? ≥No, this unit cannot receive or record High Definition (HD) broadcasts. What equipment is necessary to play multi channel surround sound? ≥You cannot playback multi-channel sound on this unit without other equipment.
Troubleshooting guide The following do not indicate a problem with this unit: ≥Operations do not work due to a poor-quality disc. (Try again using a ≥Regular disc rotating sounds. Panasonic disc.) ≥Poor reception due to atmospheric conditions. ≥The unit freezes due to one of its safety devices being activated. ≥Image disturbance during search. (Press and hold [Í/I] on the main unit for 10 seconds.) ≥Interruptions in reception due to periodic terrestrial broadcasting breaks.
Troubleshooting guide Sound No sound. Low volume. Distorted sound. Cannot hear the desired audio type. Cannot switch audio. ≥Check the connections and the “Digital Audio Output” settings. Check the input mode on the amplifier if you have connected one. ≥Press [AUDIO] to select the audio. ≥Turn off V.S.S. in the following cases. –When using discs that do not have surround sound effects such as Karaoke discs. –When playing bilingual broadcast programmes.
≥Check the connections. Page 14, 15 Startup is slow. ≥Make sure that “Quick Start” is set to “On”. ≥Startup takes time in the following situations: –A disc other than a DVD-RAM is inserted. –The clock is not set. –Immediately after a power failure or the AC mains lead is connected. –For a few minutes after 5:15 am due to system maintenance of this unit. –When the unit is connected with an HDMI cable. 64 — Takes time to read DVD-RAM.
Troubleshooting guide Play Play fails to start even when [1] (PLAY) is pressed. Play starts but then stops immediately. 61 — 35 — — DVD-Video is not played. ≥You have set a ratings level to limit DVD-Video play. Change this setting. 61 Alternative soundtrack and subtitles cannot be selected. ≥The languages are not recorded on the disc. ≥You may not be able to use the on-screen menus to change the soundtrack and subtitles on some discs. Use the disc’s menus to make changes. — 31 No subtitles.
≥Select “Yes” in “Shipping Condition” in the Setup menu. All the settings except for the ratings level, ratings password and time settings return to the factory preset. The timer recording programmes are also cancelled. ≥Select “Yes” in “Default Settings” in the Setup menu. All the settings other than the programmed channels, time settings, disc language settings, ratings level, ratings password, remote control code, return to the factory presets.
Glossary Bitstream This is the digital form of multi-channel audio data (e.g., 5.1 channel) before it is decoded into its various channels. CPPM (Content Protection for Prerecorded Media) A copy protection system used for DVD-Audio files. This unit supports CPPM. CPRM (Content Protection for Recordable Media) CPRM is technology used to protect broadcasts that are allowed to be recorded only once. Such broadcasts can be recorded only with CPRM compatible recorders and discs.
MP3 (MPEG Audio Layer 3) An audio compression method that compresses audio to approximately one tenth of its size without any considerable loss of audio quality. You can play MP3 you have recorded onto CD-R and CD-RW. Pan&Scan/Letterbox In general, DVD-Video are produced with the intention that they be viewed on a widescreen television (16:9 aspect ratio), so images often don’t fit regular (4:3 aspect ratio) televisions. Two styles of picture, “Pan & Scan” and “Letterbox”, deal with this problem.
Specifications Recording system DVD-RAM : DVD Video Recording format DVD-R : DVD-Video format DVD-R DL (Dual Layer) : DVD-Video format DVD-RW : DVD-Video format +R +R DL (Double Layer) +RW Recordable discs DVD-RAM: Ver. 2.0 Ver. 2.1/3X-SPEED DVD-RAM Revision 1.0 Ver.2.2/5X-SPEED DVD-RAM Revision 2.0 DVD-R: for General Ver. 2.0 for General Ver. 2.0/4X-SPEED DVD-R Revision 1.0 for General Ver.2.x/8X-SPEED DVD-R Revision 3.0 for General Ver.2.x/16X-SPEED DVD-R Revision 6.0 for DL Ver.3.0 for DL Ver.3.
Safety precautions Set the unit up on an even surface away from direct sunlight, high temperatures, high humidity, and excessive vibration. These conditions can damage the cabinet and other components, thereby shortening the unit’s service life. Do not place heavy items on the unit. Voltage Do not use high voltage power sources. This can overload the unit and cause a fire. Do not use a DC power source. Check the source carefully when setting the unit up on a ship or other place where DC is used.
Index Album Edit . . . . . . . . . . . . . . . . . . . . . . . . . . . 44 Play . . . . . . . . . . . . . . . . . . . . . . . . . . 36 Angle . . . . . . . . . . . . . . . . . . . . . . . . . . . 38 Aspect. . . . . . . . . . . . . . . . . . . . . . . . . . . 18 Audio Attribute . . . . . . . . . . . . . . . . . . . . . . . 38 Language . . . . . . . . . . . . . . . . . . . . . . 38 Playback . . . . . . . . . . . . . . . . . . . . . . 32 Receiving . . . . . . . . . . . . . . . . . . . . . .