Model No. TC-L24X5 TC-L24X5X Owner’s Manual LCD Television For assistance (U.S.A./Puerto Rico), please call: 1-877-95-VIERA (958-4372) www.panasonic.com/help For assistance (Canada), please call: 1-866-330-0014 concierge.panasonic.ca Para solicitar ayuda (EE.UU./Puerto Rico), llame al: 1-877-95-VIERA (958-4372) www.panasonic.com/help English Thank you for purchasing this Panasonic product. Please read these instructions before operating your set and retain them for future reference.
Contents SAFETY PRECAUTIONS.....................................................................................................
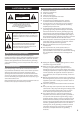
SAFETY PRECAUTIONS CAUTION RISK OF ELECTRIC SHOCK DO NOT OPEN CAUTION: TO REDUCE THE RISK OF ELECTRIC SHOCK, DO NOT REMOVE COVER (OR BACK). NO USER-SERVICEABLE PARTS INSIDE. REFER SERVICING TO QUALIFIED SERVICE PERSONNEL. The lightning flash with arrowhead within a triangle is intended to tell the user that parts inside the product are a risk of electric shock to persons.
25. WARNING: To prevent the spread of fire, keep candles or other open flames away from this product at all times. EXAMPLE OF ANTENNA GROUNDING AS PER NATIONAL ELECTRICAL CODE, ANSI/NFPA 70 ANTENNA LEAD IN WIRE GROUND CLAMP ELECTRIC SERVICE EQUIPMENT ANTENNA DISCHARGE UNIT (NEC SECTION 810-20) GROUNDING CONDUCTORS (NEC SECTION 810-21) GROUND CLAMPS NEC — NATIONAL ELECTRICAL CODE POWER SERVICE GROUNDING ELECTRODE SYSTEM (NEC ART 250, PART H) 19.
FCC STATEMENT This equipment has been tested and found to comply with the limits for a Class B digital device, pursuant to Part 15 of the FCC Rules. These limits are designed to provide reasonable protection against harmful interference in a residential installation.This equipment generates, uses and can radiate radio frequency energy and, if not installed and used in accordance with the instructions, may cause harmful interference to radio communications.
Standard Accessories Attaching the Pedestal Check you have all the items shown. Remote Control (TZZ00000005A) Batteries (AAA) x 2 (392GB1TX1A32GP) Warning Do not disassemble or modify the pedestal. the TV may fall over and become damaged, and • Otherwise personal injury may result. Caution Do not use any pedestal other than that provided with this TV. the TV may fall over and become damaged, and • Otherwise personal injury may result.
Installing Pedestal 1. 2. Wall-hanging (Not supplied) Place the LCD TV screen facing down on a flat surface place where maintained with soft materials (such as a blanket) for protecting the display screen. Use the assembly screw to fasten the neck to the base securely. Wall-hanging Insets Depth of screw : 0.28 inch (7 mm) Diameter : M4 Screw for fixing the TV onto the wall-hanging bracket (not supplied with the TV) (View from the side) VESA standard interface 2.95 x 2.95 inch (75 x 75 mm) 3.
PART NAMES AND FUNCTIONS TV Controls/ Indicators 1 Remote Control Signal Receiver 3 control. 2 Power indicator On: Power indicator lights Red. Standby: Power indicator turns off. 4 3 VOL +/- 5 4 CH a/b 6 7 1 not place any objects between the TV • Do remote control signal receiver and remote 2 to change volume. • Used to adjust the value of the selected item • Used on On-Screen Menu. to change channels. • Used • Used to select item on On-Screen Menu. 5 MENU • Open or close the On-Screen Menu.
Connections Computer Connection Cable used for connection (This cable is not supplied with this LCD TV.) PC/VGA Cable (D-SUB 15pin) Audio Cable • • Note: When connecting the cable, AC Power Cords of both LCD TV and external equipment should be disconnected from AC outlet. Turn LCD TV and peripheral equipment on before your computer is switched on. Note: You can connect the DVI source to HDMI input terminal by using the DVI to HDMI converter then connect audio input to PC audio input terminal .
Remote Control Batteries Installation AC Power Cord Connection This LCD TV uses nominal input voltages of 110-127V AC. It is designed to work with single-phase power systems. To reduce risk of electrical shock, do not plug into any other type of power system. Consult your authorized dealer or service station if you are not sure the type of power being supplied. Connect the LCD TV with all peripheral equipment before turning the LCD TV on. 1. Remove the battery compartment cover. 2.
Remote Control 1 1 14 2 3 15 4 5 16 17 6 18 7 8 9 19 20 21 22 10 23 11 12 13 24 25 Standby On / Off switch TV On or Off standby. •2 Switches Numeric buttons channel. •3 Changes LAST to previously viewed channel. •4 Switches CC to next closed caption selection. •5 Changes STILL to freeze a moving image on the screen. •6 Press VOL +/to adjust the volume. •7 Press INPUT input source list. •8 OpensMUTE to mute or restore the sound. •9 PressFORMAT aspect ratio.
Turning On/Off LCD TV 1. 2. 3. 4. Complete the peripheral connections before turning on LCD TV. Connect LCD TV’s AC Power Cord into an AC outlet. Press POWER button on Side Control of LCD TV or use Remote Control to turn it ON. The POWER indicator will light up (Red). Press POWER button again to enter stand-by status, the POWER indicator will be turned off. Turning on your TV for the first time 1 Language setting OSD menu language from English, Spanish, or • Selects French.
4 Channel scan setting On-Screen Display Auto program Step 4 of 5 Start scanning for available channels in your area? Picture Auto program Skip Picture Audio Lock Auto scan may take 20 minutes or more to complete. TV 0% Back Select Next OK Setup Return Reset to defaults Picture mode Standard Back light 89 Contrast 95 Brightness 50 Color 50 Tint 0 Sharpness 5 Start channel searching 50 Color temp. Auto program Picture Step 4 of 5 1. This may take some time to complete. 2.
Color PC adjustments or decreases the levels of color according to your • Increases • For PC input source only. personal preference. (0~100) Auto Adjust • Adjusts the position and phase automatically. Tint H.position an NTSC signal source connected to the TV, the picture • With • Adjusts the horizontal position. hue can be adjusted to suit your taste. (-50~50) V.position • For NTSC signal reception only. • Adjusts the vertical position.
Lock TV speakers • Selects to turn on or off the TV internal speaker. Off • Turns the TV internal speaker off. On • Turns the TV internal speaker on. Audio Lock TV SPDIF type Setup the initial setting for digital audio output signal from • Selects DIGITAL AUDIO OUT and HDMI terminals. PCM Lock PCM format to DIGITAL AUDIO OUT or HDMI • Outputs terminals. • Disables digital audio output. Dolby Digital audio to Dolby Digital type if the source supports • Outputs Dolby digital audio.
Program Mode: • Sets program lock status. U.S. TV ratings: • Sets U.S. TV program ratings. U.S. movie ratings: • Sets U.S. movie ratings. Canadian english ratings: • Sets Canadian english ratings. Canadian french ratings: • Sets Canadian french ratings. Dimension: program is broadcast with RRT5 rating information, • Ifthetheinformation is downloaded automatically and can be used for parental controls. U.S.
MTS the audio mode. • Selects • For analog channels only. Stereo: • Select this option for programs broadcast in stereo. SAP: this option to listen to a secondary audio program, • Select if available. Mono: this option if there is noise or static on weak stereo • Select broadcasts. • Audio language Selects the audio language. (English/Español/Français) Audio type Time setup Sleep Timer: • Sets a time to switch the TV to standby mode.
Media Player Option List media menu, you can press Blue color key to select • Inonemultiof following options. Media Player Viewing photos Media Select Exit Select Return Photos Access Music Videos Storage Media 1. 2. Insets the USB storage device to the USB port on the TV. Press USB button to enter Multi-media content. Note: Partition: FAT32, Not support NTFS format.
TROUBLESHOOTING Before calling your dealer or service center for assistance, check the matters below once again. 1. Make sure you have connected LCD TV to your equipment. 2. Check cable connection. Verify that all external equipment and power cords are properly connected. 3. Verify that all power is switched on. 4. If LCD TV still does not produce an image, re-start the external equipment. 5. If the image still does not appear, unplug LCD TV from the external equipment and check the external equipment.
SPECIFICATIONS TC-L24X5/TC-L24X5X Power Source Rated Power Consumption Standby Power Consumption AC 110-127 V, 60Hz 35 W 0.5 W Dimensions (W × H × D) With stand: 22.3 in. × 16 in × 6.7 in (567 mm × 406 mm × 170 mm) Without stand (TV only): 22.3 in. × 14.4 in × 1.8 in (567 mm × 367 mm × 46 mm) Mass With stand: 9.9 lb. (4.5 kg) Without stand (TV only): 8.8 lb. (4.0 kg) Display panel Aspect Ratio 16:9 Visible screen size 521.3 mm (H) × 293.2 mm (V) 23.
Input Signal Compatibility Chart COMPONENT (Y, PB, PR), HDMI Signal name 525 (480) / 60i, 60p 750 (720) / 60p 1,125 (1,080) / 60i 1,125 (1,080) / 60p, 24p COMPONENT HDMI Mark : Applicable input signal PC (from D-sub terminal/ HDMI terminal) Signal name 640 × 400 @70 Hz 640 × 480 @60 Hz 640 × 480 @75 Hz 800 × 600 @60 Hz 800 × 600 @75 Hz 800 × 600 @85 Hz 1,024 × 768 @60 Hz 1,024 × 768 @70 Hz 1,024 × 768 @75 Hz 1,024 × 768 @85 Hz 1,280 × 768 @60 Hz 1,280 × 1,024 @60 Hz 1,366 × 768 @60 Hz Macintosh13” (640
Multi-media Supported Specification Photos Format JPEG File extension Image resolution (pixel) .
LICENSE This product incorporates the following software or technology: (1) the software based in part on the work of the Independent JPEG Group, (2) the software developed by the FreeType Project. Dolby under license from Dolby Laboratories. Dolby and the double-D symbol are • Manufactured trademarks of Dolby Laboratories. HDMI the HDMI logo, and High-Definition Multimedia Interface are trademarks or registered • HDMI, trademarks of HDMI Licensing LLC in United States and other countries.
Limited Warranty (for U.S.A.
Customer Services Directory (for U.S.A. and Puerto Rico) Customer Services Directory (United States and Puerto Rico) Obtain Product Information and Operating Assistance; locate your nearest Dealer or Service Center; purchase Parts and Accessories; or make Customer Service and Literature requests by visiting our Web Site at: http://www.panasonic.com/help or, contact us via the web at: http://www.panasonic.
Limited Warranty (for Canada) Panasonic Canada Inc. 5770 Ambler Drive, Mississauga, Ontario L4W 2T3 PANASONIC PRODUCT – LIMITED WARRANTY Panasonic Canada Inc. warrants this product to be free from defects in material and workmanship under normal use and for a period as stated below from the date of original purchase agrees to, at its option either (a) repair your product with new or refurbished parts, (b) replace it with a new or a refurbished equivalent value product, or (c) refund your purchase price.
18 27
USA Only: Disposal may be regulated in your community due to environmental considerations. For disposal or recycling information, please visit Panasonic website: http://www.panasonic.com/environmental or call 1-888-769-0149. Sólo Estados Unidos: La disposición puede estar regulada en su comunidad debido a consideraciones ambientales. Para información sobre la disposición o reciclaje, por favor visite la página web de Panasonic: http://www.panasonic.com/environmental ó llame al 1-888-769-0149.