Model No. TH-42BT300W TH-50BT300W Operating Instructions High Definition Plasma Display English Please read these instructions before operating your set and retain them for future reference.
Dear Panasonic Customer Welcome to the Panasonic family of customers. We hope that you will have many years of enjoyment from your new Plasma Display. To obtain maximum benefit from your set, please read these Instructions before making any adjustments, and retain them for future reference. Retain your purchase receipt also, and note down the model number and serial number of your set in the space provided on the rear cover of these instructions. Visit our Panasonic Web Site http://panasonic.
Important Safety Notice WARNING 1) To prevent damage which may result in fire or shock hazard, do not expose this appliance to dripping or splashing. Do not place containers with water (flower vase, cups, cosmetics, etc.) above the set. (including on shelves above, etc.) No naked flame sources, such as lighted candles, should be placed on / above the set. 2) To prevent electric shock, do not remove cover. No user serviceable parts inside. Refer servicing to qualified service personnel.
Safety Precautions WARNING Setup This Plasma Display is for use only with the following optional accessories. Use with any other type of optional accessories may cause instability which could result in the possibility of injury. (All of the following accessories are manufactured by Panasonic Corporation.) • Speakers ........................................................................ TY-SP42P8W-K (for TH-42BT300W), TY-SP50P8W-K (for TH-50BT300W) • Pedestal ...............................................
Safety Precautions When using the Plasma Display The Plasma Display is designed to operate on 220 - 240 V AC, 50/60 Hz. Do not cover the ventilation holes. • Doing so may cause the Plasma Display to overheat, which can cause fire or damage to the Plasma Display. Do not stick any foreign objects into the Plasma Display. • Do not insert any metal or flammable objects into the ventilations holes or drop them onto the Plasma Display, as doing so can cause fire or electric shock.
Safety Precautions CAUTION When using the Plasma Display Do not bring your hands, face or objects close to the ventilation holes of the Plasma Display. • Heated air comes out from the ventilation holes at the top of Plasma Display will be hot. Do not bring your hands or face, or objects which cannot withstand heat, close to this port, otherwise burns or deformation could result. Be sure to disconnect all cables before moving the Plasma Display.
Safety Precautions 3D Safety Precautions WARNING Small Parts 3D Eyewear contains small parts (battery and specialised band, etc.) and must be kept out of reach of small children to avoid accidental ingestion. Disassembly Do not disassemble or modify the 3D Eyewear. Lithium Battery Batteries must not be exposed to excessive heat such as sunshine, fire or the like. CAUTION To enjoy 3D images safely and comfortably, please read these instructions fully.
Safety Precautions Viewing 3D Content Content for 3D viewing includes commercially available Blu-ray discs, 3D broadcasts, etc. When preparing your own 3D content, ensure that it is properly produced. Do not use the 3D Eyewear if you have a history of over-sensitivity to light, heart problems, or have any other existing medical conditions. Please stop using the 3D Eyewear immediately, if you feel tired, are not feeling well or experience any other uncomfortable sensation.
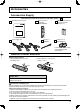
Accessories Accessories Supply Check that you have the accessories and items shown Operating Instruction book Remote Control Transmitter N2QAYB000689 Batteries for the Remote Control Transmitter (R6 Size × 2) Clamper × 1 TMME289 Power supply cord Ferrite core × 2 J0KG00000014 Use the Ferrite cores to comply with the EMC standard. (see page 65) Remote Control Batteries Requires two R6 batteries. 1. Pull and hold the hook, then open the battery cover. 2.
Connections Speaker connection When connecting the speakers, be sure to use only the optional accessory speakers. Refer to the speaker’s Installation Manual for details on speaker installation. 1 Speakers (Optional accessories) Red Black While pressing the lever, insert the core wire. 2 Red Speaker terminal (L) Speaker terminal (R) Black Return the lever.
Connections Video equipment connection 3D IR TRANSMITTER: Connect the 3D IR TRANSMITTER (optional accessory). SERIAL: Control the Plasma Display by connecting to PC (see page 14) SLOT: Terminal board (optional accessories) insert slot (see Note: page 4) The right side slot is for factory use only. The terminal board with 1-slot width does not function when installed in the right side slot. LAN: Connect to a network to control the unit. Terminals are on the bottom side of the Plasma Display.
Connections HDMI connection [Pin assignments and signal names] Signal name Pin No. Pin No. Signal name T.M.D.S Clock Shield 1 T.M.D.S Data2+ 11 2 T.M.D.S Data2 Shield T.M.D.S Data2T.M.D.S Data1+ T.M.D.S Data1 Shield T.M.D.S Data1T.M.D.S Data0+ T.M.D.S Data0 Shield T.M.D.S Data0T.M.D.S Clock+ 12 T.M.D.S Clock- 13 CEC 14 Reserved (N.C.
Connections PC Input Terminals connection (Female) Shared with DVI-D IN. COMPUTER Audio Stereo mini plug (M3) Connect a cable which matches the audio output terminal on the computer. Conversion adapter (if necessary) RGB PC cable Mini D-sub 15p (Male) Notes: • With regard to the typical PC input signals that are described in the applicable input signals list (see page 72), adjustment values such as for the standard picture positions and sizes have already been stored in this unit.
Connections SERIAL Terminals connection The SERIAL terminal is used when the Plasma Display is controlled by a computer. Note: To use serial control for this unit, make sure to set the “Control I/F Select” in the “Network Setup” menu to “RS-232C”. (see page 58) (Male) COMPUTER 9 5 RS-232C Straight cable 8 4 7 3 6 2 1 Pin layout for SERIAL Terminal (Female) D-sub 9p Notes: • Use the RS-232C straight cable to connect the computer to the Plasma Display.
Power On / Off Connecting the AC cord plug to the Plasma Display. Connecting the plug to the Wall Outlet Notes: • Main plug types vary between countries. The power plug shown at right may, therefore, not be the type fitted to your set. • When disconnecting the AC cord, be absolutely sure to disconnect the AC cord plug at the socket outlet first. INPUT MENU -/ VOL +/ ENTER/ Power Indicator Press the Power switch on the Plasma Display to turn the set on: Power-On.
Power On / Off When first switching on the unit Following screen will be displayed when the unit is turned on for the first time. Select the items with the remote control. Unit buttons are invalid. OSD Language 1 Select the language. 2 Set. OSD Language English (UK) Deutsch Français Italiano Español ENGLISH (US) Русский Day/Time Setup 1 Select “Day” or “Time”. Day/Time Setup 2 Setup “Day” or “Time”. Set Time MON 99:99 Day Time 1 Select “Set”. Day/Time Setup Set.
Power On / Off Power ON warning message The following message may be displayed when turning the unit power ON: 3D Safety Precautions When 3D images will be viewed by unspecified number of people or used for commercial applications, someone in authority should convey the following precautions. These precautions should be followed in the home as well. 3D Viewing/ 3D Content/ Viewing distance/ 3D Eyewear recommendations - To enjoy 3D images safely and comfortably, please read the Operating Instructions fully.
Selecting the input signal Press to select the input signal to be played back from the equipment which has been connected to the Plasma Display. INPUT VIDEO COMPONENT HDMI DVI PC Video input terminal in AV IN (VIDEO). Component or RGB input terminal in COMPONENT/RGB IN.* HDMI input terminal in AV IN (HDMI). DVI input terminal in DVI-D IN. PC input terminal in PC IN. * “COMPONENT” may be displayed as “RGB” depending on the setting of “Component/RGB-in select”.
Basic Controls Main Unit Remote control sensor Volume Adjustment Volume Up “+” Down “–” When the menu screen is displayed: “+” : press to move the cursor up “–” : press to move the cursor down (see page 25) INPUT MENU -/ Main Power On / Off Switch Power Indicator The Power Indicator will light. • Power-OFF .... Indicator not illuminated (The unit will still consume some power as long as the power cord is still inserted into the wall outlet.) • Standby ........
Basic Controls Remote Control Transmitter Standby (ON / OFF) button The Plasma Display must first be plugged into the wall outlet and turned on at the power switch (see page 15). Press this button to turn the Plasma Display On, from Standby mode. Press it again to turn the Plasma Display Off to Standby mode. LIGHT button The remote control’s buttons illuminate. AUTO SETUP button Automatically adjusts the position/ size of the screen. (see page 27) HDMI button Press to select HDMI input.
ASPECT Controls The Plasma Display will allow you to enjoy viewing the picture at its maximum size, including wide screen cinema format picture. Note: Be aware that if you put the display in a public place for commercial purposes or a public showing and then use the aspect mode select function to shrink or expand the picture, you may be violating the copyright under copyright law.
Digital Zoom This displays an enlargement of the designated part of the displayed image. To use this function, go to “Function Button Settings” in the Setup menu and set this function to the FUNCTION button (see page 56). 1 1 Display the operation guide. Exit Press to access Digital Zoom. The operation guide will be displayed. During Digital Zoom, only the following buttons can be operated. [Unit] INPUT MENU -/ VOL +/ ENTER/ VOL button 2 Select the area of the image to be enlarged.
Viewing 3D images You can enjoy viewing 3D images with contents or programmes compatible with 3D effect by using the 3D eyewear (optional). Note: You need the 3D IR TRANSMITTER (optional) and the 3D eyewear (optional) to view the 3D images on this display. For further information, see the instruction manuals of the 3D IR TRANSMITTER and the 3D eyewear. This display supports “Frame Sequential*1”, “Side by Side*2”, “Top and Bottom*3” and “Simultaneous*4” 3D formats.
Viewing 3D images Troubleshooting for 3D Eyewear Symptoms Checks Cannot see 3D images 3D Eyewear is turned off automatically There is something wrong with the 3D images • Has the 3D Eyewear been switched On? • Ensure that “3D Function” in “3D Settings” is set to “On”. (see page 44) • Some 3D image signals may not be automatically recognized as 3D images. Set “3D Picture Format” in “3D Settings” to match the picture format. (see page 44) • Check if 3D IR TRANSMITTER is turned on and corrected properly.
On-Screen Menu Displays Remote Control 1 Display the menu screen. Press 2 Select the menu. Picture 2 Access 1 Select Normalise Setup Picture Mode Pos./Size Contrast Sound Brightness 0 Sharpness 0 Press several times. MENU Each time the MENU button is pressed, the menu screen will switch. Normal Viewing Picture Setup Sound Pos. /Size Monitor White balance Options Unit Warm Advanced settings Memory save Memory load The menu can be displayed directly by pressing these buttons.
Adjusting Pos. /Size 1 Display the menu screen. 2 Select “Pos. /Size”. 2 access 1 select 2 adjust 1 select Picture Setup Pos. /Size Sound 3 Select the item and set. Normalise Auto Setup H-Pos 0 H-Size 0 V-Pos 0 V-Size 0 Dot Clock 0 Clock Phase 0 0 Clamp Position 1:1 Pixel Mode Off HV Delay Off Note: Unadjustable items are grayed out. Adjustable items differ depending on the input signal and the display mode. 4 Exit the menu. or To display a menu for adjustment of the Pos.
Adjusting Pos. /Size ● Auto Setup When inputting a PC signal as an example, “H-Pos/V-Pos”, “H-Size/V-Size”, “Dot Clock” and “Clock Phase” are automatically corrected. This setting is enabled under the following conditions: • This setting is not activated during Digital Zoom. • When inputting an analog signal (Component/PC): This setting is enabled if “Component/RGB-in select” (see page 40) in Setup menu is “RGB”. • When inputting a digital signal (HDMI/DVI): A PC format signal enables this setting.
Adjusting Pos. /Size ● Over scan Turn image over scan On/Off. Configurable signals are as follows: 525i, 525p, 625i, 625p, 750/60p, 750/50p (Component Video, RGB, DVI, SDI, HDMI) On Off Notes: • When “Off” is set, “H-Size” and “V-Size” cannot be adjusted. • When the “Display size” is set to “On” in the Options menu, this setting will be invalid.
Picture Adjustments 1 Display the menu screen. 2 Select “Picture”. 2 access 1 select 2 adjust 1 select Picture Setup Pos./Size Sound 3 Select the item and set. Normalise Picture Mode Cinema Contrast 20 Brightness 0 Colour 0 Hue 0 Sharpness 5 White balance Note: Menu that cannot be adjusted is grayout. Adjustable menu changes depending on signal, input and menu setting. Normal Advanced settings 4 Exit the menu.
Picture Adjustments ● Picture Mode You can switch to the optimal picture mode for the video source and viewing environment. Normal Monitor Dynamic Cinema Normal: Cinema: For viewing in standard (evening lighting) environments. For use in viewing tone-focused pictures with brightness This menu selects the normal levels of Brightness and reduced. Contrast. Monitor: Dynamic: For use when creating broadcast or movie content. For viewing in brighter environments.
Picture Adjustments Advanced settings Enables fine picture adjustment at a professional level. Notes: • The adjustment values are memorized separately for each input terminal. • The adjustment range values should be used as an adjustment reference. Select the item and set.
Picture Adjustments ● Cinema reality When “on”, the display attempts to reproduce a more natural interpretation of sources such as movie pictures, which are recorded at 24 frames per second. If the picture is not stable, turn the setting to “off”. On Off Note: When “On”, this setting only affects the following signal input: • NTSC / PAL signal input during Video (S Video) input signal. • 525i (480i), 625i (575i), 1125 (1080) / 60i signal input during “Component” input signal.
Picture Adjustments Colour space adjustment (Colour gamut) Changes the colour space to BT.709 signal standard chromaticity point and fine-tunes it. Advanced settings Normalise Black extension 0 Input level 0 Gamma W/B High R 0 W/B High G 0 W/B High B 0 W/B Low R 0 W/B Low G 0 W/B Low B 0 Cinema reality Studio Gain Noise reduction Colour gamut 2 access 2.2 Select the item and set.
Picture Adjustments ● Reset Resets the adjustment value of colour space. Note: This setting is reflected only for the selected input terminal and the “Picture Mode”. 1 Select “Reset”. Colour gamut Custom Colour gamut 2 access 1 select 1 select 2 set Edit R Ratio G Ratio B Ratio R G B 65535 2110 0 2900 65535 1760 0 0 65535 Reset 2 Select “Ok”. Colour gamut Reset Ok Cancel ● Chromaticity diagram The RGB triangle representing current colour space is shown.
Picture Profiles Up to 16 combinations of picture adjustment values (in the Picture menu and Advanced settings) can be stored in the display memory as profiles and applied as needed, for a convenient way to enjoy your preferred picture settings. Note: If setting items (Picture menu and Advanced settings) are set differently between Memory save and Memory load, they may not reflect for Memory load.
Picture Profiles Saving profiles Follow these steps to save picture adjustment values as profiles. Note: When the settings are locked in “Extended life settings”, profiles cannot be saved. 1 Specify the picture quality in the Picture menu and Advanced settings. (see page 29-34) 2 In the Picture menu, select “Memory save”. 2 access Memory save 5 Memory load Memory edit 3 1 select Select a profile name for saving the picture adjustment values. 2 set Enter a name for the profile.
Picture Profiles Loading profiles Load profiles and apply the picture adjustment values to the display as follows. Notes: • Loaded profiles are stored in memory according to the selected input terminal (see page 18). • When the settings are locked in “Extended life settings”, profiles cannot be loaded. 1 To load profiles 1–9 In the Picture menu, select “Memory load”.
Picture Profiles Editing profiles Delete or rename profiles as follows. 1 In the Picture menu, select “Memory edit”. 2 Memory save access 1 In the Picture menu, select “Memory edit”. Memory save Memory edit 2 Memory name change select 2 set 1 select ] MEMORY1 ] MEMORY2 2 1 All delete Memory edit 2 Memory name change set select 4 Select “Ok”. Memory delete 1 select 2 set 1 select 2 set 1 select 1 Select the profile to rename. 1.
Sound Adjustment 1 Display the menu screen. 2 Select “Sound”. Picture 2 access 1 select 2 adjust 1 select Setup Pos. /Size Sound 3 Select the item and set. Normalise Sound Mode Bass Mid Treble Balance Surround Volume Normal 0 0 0 0 Off 1 4 Exit the menu. or Item Sound Mode Bass Mid Treble Balance Surround Volume Details Normal: Emits the original sound. Dynamic: Accentuates sharp sound. Clear: Attenuates human voice. Adjusts low pitch sounds. Adjusts normal sounds. Adjusts high pitch sounds.
Setup menu 1 Display the menu screen. 2 Select “Setup”. Picture 2 access 1 select Setup Pos. /Size Sound 3 Select the item and set.
Setup menu External scaler mode Off On This menu can be used to specify whether the built-in scaler or an external scaler is used for scaler functions such as resizing and picture quality adjustment. The setting is valid with the following input signals. 1125 (1080) / 24p•25p•30p•50p•60p Off: Use the built-in scaler. On: Use an external scaler. Note: If “On” is set when other than corresponding signal is input, “Input signal must be 1125p(1080p)”message is displayed.
Setup menu Power save Off On When this function is turned On, luminous level of the Plasma Display is suppressed, so power consumption is reduced. Standby save When this function is turned On, power consumption of the microcomputer is reduced during power supply standby (see page 15, 19, 20), so standby power of the set is reduced. PC Power management Off On When this function is set to On, it operates under the following conditions to turn the power on or off automatically.
Setup menu OSD design Choose the background color (transparency). Type1 Type2 Type3 OSD position Choose the display position. Each time you press Display example or , the on-screen menu display position changes. Upper left Centre OSD Language Select your preferred language. Selectable languages English(UK) Deutsch Français Italiano Español ENGLISH(US) .......(Chinese) .......(Japanese) Русский .......
Setup menu 3D Settings To view the 3D images, please adjust and setup the 3D settings. Note: Set these settings for each input terminals. Select the item and set.
Setup menu Signal menu Note: “Signal” setup menu displays a different setting condition for each input signal. Select the item and set.
Setup menu • Sync This function operates only during input from PC IN terminal. Setting RGB sync signal Confirm that the input is set to RGB input (this setting is valid only for RGB input signal). Auto: The H and V sync or synchronized signal is automatically selected. If both input, it is selected the H and V sync. on G: Uses a synchronized signal on the Video G signal, which is input from the G connector. VBS: Uses a synchronized signal of Composite Sync input, which is input from the HD connector.
Setup menu Waveform Monitor The input signal from video equipment is displayed as waveforms so that the signal level can be checked. Notes: • This function is enabled when “Studio mode” in Options menu is set to “On”. • This function is disabled during 3D images. • Applicable input signal; HDMI, DVI, SDI Select the item and set.
Setup menu Marker settings Various markers for editing image are displayed. Notes: • This function is available when “Studio mode” in Options menu is set to “On” • This function is disabled during 3D images. • An aspect of “4:3” or “16:9” is valid for this function. Only an aspect of “16:9” is valid at the input of HD signal. Select the item and set.
Setup menu •4:3 Select 4:3 marker display and the safe area marker type. Off 95% 93% 90% 88% 80% User • Selecting User allows the marker area set in 1% increments in “Marker Size (%)” to be reflected in the configuration of safe area marker. 90% Area marker • Centre The centre marker is displayed. Off On • Cross Hatch The markers at regular vertical and horizontal intervals are displayed. Off On • Marker Size (%) User setting for the marker area can be configured.
Setup menu RGB/MONO settings Turn off R, G, B signals to adjust the image. 3D Settings Signal Waveform Monitor Marker settings RGB/MONO settings Network Setup Screensaver Extended life settings Input label Function Button Settings 2 access 1 select RGB/MONO settings Mode Select On/Off Timer Setup Day/Time Setup Network Setup 1 R On/Off RGB On G On/Off On B On/Off On Select mode by “Mode Select”.
Setup menu Screensaver Do not display a still picture, especially in 4:3 mode, for any length of time. If the display must remain on, a Screensaver should be used.
Setup menu 3 Setup of Screensaver Time After selecting Time Designation, Interval or Standby after SCR Saver, the relevant Time Setup will become available for selection and the Operating Time may be set. (Time cannot be set when “Mode” is “On” or “Off”.
Setup menu Extended life settings The following settings are setup to reduce image retention: Extended life settings 3D Settings Set to the recommended value Set individually Reset to the factory settings Express settings Signal Waveform Monitor Marker settings RGB/MONO settings Network Setup Screensaver 2 access 1 select Extended life settings Custom settings Reset Extended life settings Recommended settings Input label Function Button Settings Picture Mode Contrast On/Off Timer Setup Day/Ti
Setup menu NANODRIFT Saver Moves the display position of the screen slightly to reduce image retention on the display panel. Low–High: NANODRIFT Saver operates. The display position of the screen moves at set time intervals. You can set the screen movement range. Some of the screen may appear to be missing as a result of this operation. If you change the value, a mask is displayed in the range where the picture is missing as a result of position movement.
Setup menu Custom settings Set the individual “Image Retention Reduction” menu. 1 Select “Custom settings”. Extended life settings 2 access 1 select Express settings Custom settings Reset set each menu to the recommended setting: 2 To Select “Recommended settings”.
Setup menu Customizing the Input labels This function can change the label of the Input signal to be displayed. (see page 18) Select an input terminal and set.
Setup menu Day/Time Setup / On/Off Timer Setup Network Setup Screensaver Extended life settings Input label Function Button Settings On/Off Timer Setup Day/Time Setup 2 access 1 select Network Setup Component/RGB-in select RGB Day/Time Setup 1 2 Press to select Day or Time. Day/Time Setup Press to set up Day or Time. Set button: Forward Day button: Back Time Notes: • Pressing “ ” or “ ” button once changes Time 1 minute. • Pressing “ ” or “ ” button continuously changes Time by 15 minutes.
Setup menu Network Setup Make the various settings to use the network function. 3D Settings DHCP, IP address, Subnet mask and Gateway settings Signal 1 Set DHCP. Waveform Monitor Marker settings RGB/MONO settings Network Setup Screensaver When “Off” is selected, IP address and other settings can be set manually. 2 Select the item and press 3 Enter an address. Extended life settings Input label Function Button Settings IP address 192.168. I On/Off Timer Setup Day/Time Setup 0.
Options Adjustments 1 2 3 Display the menu screen. Select “Options”. Press for more than 3 seconds. 2 access (more than 3 seconds) 1 select 2 set 1 select Picture Setup Pos./Size Sound Options 4 Select the item and set.
Options Adjustments Item ID select Remote ID Serial ID Adjustments Sets panel ID number when panel is used in “Remote ID” or “Serial ID”. Set value range: 0 - 100 (Standard value: 0) The setting of this menu is valid only when using ID remote control. Off: Disables ID remote control functions. You can use normal remote control operations. On: Enable ID remote control functions. Note: To use the ID remote control function, it is necessary to set each ID number of remote control and display unit.
Options Adjustments Item Adjustments Sets the operational mode of the automatic position adjustment in the Pos./Size menu. Manual: Automatic position adjustment starts when Auto Setup Advanced Motion Resolution Power On Message (No activity power off) 3D Safety Precautions Auto: is pressed on the remote control or automatic position adjustment is executed from the Pos./Size menu. Other than remote control or menu operation, automatic position adjustment starts: When the display power is turned ON.
Options Adjustments Audio input select Set up the sound when an image input is selected. Audio input select Onscreen display On Studio mode On ID select 0 Remote ID Press Off button Audio input select SLOT INPUT ♪ SLOT INPUT VIDEO ♪ VIDEO COMPONENT ♪ COMPONENT HDMI DVI ♪ HDMI ♪ DVI/PC PC ♪ DVI/PC 2 Select audio input. 1 Select image input.
Using FUNCTION button Assigning functions to the FUNCTION button on the remote control enables a user to switch between show/hide and modes with just a single touch of a button. The function settings are configured by using “Function Button Settings” in the Setup menu (see page 56). The button functions are configured in two ways depending on the setting (On/Off) of “Studio mode” in the Options menu. Similarly, factory default settings vary as follows.
Using FUNCTION button Waveform Monitor The waveform monitor displays (see page 47). To exit this mode, press the FUNCTION button. Marker settings The marker displays (see page 48). Each time the FUNCTION button is pressed, the screen is switched in the following order; Preset 1 → Preset 2 → Off. HV Delay The video blanking period displays (see page 28). Each time the FUNCTION button is pressed, the screen is switched in the following order; H Delay → V Delay → HV Delay→ Off.
Using Network Function This unit has a network function to control the network connected display with your computer. Note: To use the network function, set each “Network Setup” setting and make sure to set the “Control I/F Select” to “LAN”. (see page 58) When “LAN” is set, the slot power is turned on, and power indicator is lit orange under the condition of power “Off” with remote control (stand-by state), regardless of the “Slot power” setting.
Using Network Function PJLink™ Protocol The network function of the unit conforms with PJLink™ class 1 and you can operate the following actions from your computer using PJLink™ protocol. • Display setup • Display status query Supported commands Commands to control the unit with PJLink™ protocol are shown in the table below.
Using Web Browser Control You can use a Web browser to control the unit and set up a network and password. Before Using Web Browser Control To use the Web browser control, the unit and computer setups are required. Unit Setup Set each “Network Setup” setting and make sure to set the “Control I/F Select” to “LAN”. (see page 58) Computer Setup Disable the proxy server settings and enable JavaScript. (Windows) Disable proxy server settings 1 Display [Internet Properties] window.
Using Web Browser Control TOP screen structure of the Web browser control After logging in, the TOP screen of the Web browser control is displayed. Menu Menu items are displayed. When a button is clicked, setup screen of each item is displayed. Item BASIC CONTROL OPTION CONTROL NETWORK SETTING CHANGE PASSWORD Details BASIC CONTROL screen is displayed. (see below) OPTION CONTROL screen is displayed. (see below) Network Setup screen is displayed. (see page 69) Password setup screen is displayed.
Using Web Browser Control NETWORK SETTING (Network Setup Screen) Click NETWORK SETTING from the menu. Various settings of a network can be set. For the details of the setting items, please check Network Setup under the Set up of the unit. (see page 58) Item Notes: • To use a DHCP server, make sure the DHCP server is started. • During a DHCP server is used, IP ADDRESS, SUBNET MASK, and GATEWAY values cannot be entered. • When the set values are changed properly, “NETWORK SETTING CHANGED.
Troubleshooting Before you call for service, determine the symptoms and make a few simple checks as shown below. Symptoms Picture Sound Interference Noisy Sound Normal Picture No Sound Checks Electrical Appliances Cars / Motorcycles Fluorescent light Volume (Check whether the mute function has been activated on the remote control.) Check if speakers are corrected properly.
List of Aspect Modes Aspect mode All Aspect: Factory setting On All Aspect: Off 16:9 14:9 16:9 Just – The pictures with a 4:3 aspect ratio among the 16:9 aspect ratio signals are enlarged horizontally so that the picture distortion is minimized. The left and right edges of the pictures are cut off. The display of the areas around the left and right edges of the screen is slightly elongated.
Applicable Input Signals *Mark: Applicable input signal Signal name 1 2 3 4 5 6 7 8 9 10 11 12 13 14 15 16 17 18 19 20 21 22 23 24 25 26 27 28 29 30 31 32 33 34 35 36 37 38 39 40 41 42 43 44 45 46 47 48 49 50 51 52 53 54 525 (480) / 60i 525 (480) / 60p 625 (575) / 50i 625 (576) / 50i 625 (575) / 50p 625 (576) / 50p 750 (720) / 60p 750 (720) / 50p 1,125 (1,080) / 60p 1,125 (1,080) / 60i 1,125 (1,080) / 50p 1,125 (1,080) / 50i 1,125 (1,080) / 24sF 1,125 (1,080) / 30p 1,125 (1,080) / 25p 1,125 (1,080) / 24p 1
Applicable Input Signals Video input (VIDEO) Horizontal frequency(kHz) 15.73 15.63 15.73 15.63 15.73 Signal name 1 2 3 4 5 NTSC PAL PAL60 SECAM Modified NTSC Vertical frequency(Hz) 59.94 50.00 59.94 50.00 59.94 ID Remote Control Function You can set the remote control ID when you want to use this remote control on one of several different displays. Note: To operate this function, please purchase ID remote controller sold separately.
Shipping condition This function allows you to reset the unit to the factory setting. 1 Display the menu screen. 2 Select “Setup”. 2 access 1 select 1 select 1 select 2 set 1 select 2 set Picture Setup Pos. /Size Sound 3 Select “OSD Language”.
Specifications TH-42BT300W Power Source Power Consumption Power on Stand-by condition Power off condition Plasma Display panel Screen size (No.
This product has software installed partially licensed under the Free BSD LICENSE. Free BSD LICENSE regulations under the above specifications are as follows: (These regulations are set by the third party; therefore the original (English) regulations are stated.) Copyright © 1980, 1986, 1993 The Regents of the University of California. All rights reserved.