
User Guide
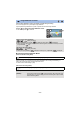
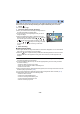
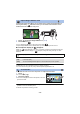


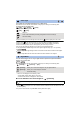
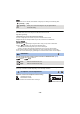

Table Of Contents
- Read this first
- Contents
- Preparation
- Basic
- Advanced (Recording)
- Advanced (Playback)
- Copy/Dubbing
- Wi-Fi
- Wireless Twin Camera
- With a PC
- Others

- 74 -
Select the operation icons to add different effects to the images to be recorded.
1 Touch (left side)/ (right side) of on the Touch Menu to display the
operation icons. (
l 20)
2 Touch an operation icon.
(e.g. PRE-REC)
≥ The operation icons that are displayed in the Touch Menu
can be changed. ([SELECT OPERATION ICONS]: l 36)
≥ Select the operation icon again to cancel the function.
Refer to the respective pages for canceling the following
functions.
j Self-timer (l 76)
j Guidelines (l 76)
j Video light (l 77)
j Night Mode (l 77)
≥ The icon is displayed when the operation icon is set.
Operation icons
*1 Not displayed in Still Picture Recording Mode.
*2 Not displayed in Motion Picture Recording Mode.
*3 It is displayed only when you set the Recording Mode to HDR Movie Mode. (l 59)
*4 It is displayed only when a headphone is connected to the headphone output terminal. [MIC
LEVEL] (l 88) is set to anything other than [AUTO], is displayed as the operation icon,
and adjustment of input level of the microphone is possible.
≥ If you turn off the unit or press the Recording/Playback button,
PRE-REC, Self-timer, Backlight Compensation and Night Mode functions are canceled.
≥ If you turn off the unit, the Fade function is canceled.
≥ It is possible to set from the menu.
(Except for the Headphone volume adjustment)
Advanced (Recording)
Recording functions of operation
icons
PRE-REC
Fade
*1
Intelligent Contrast Control
*1
PRE-REC
*1
Self-timer
*2
Intelligent Exposure
*2
Backlight Compensation
Guidelines
Video light
Night Mode
*1
HDR Effect
*1, 3
Headphone volume adjustment/
Microphone level adjustment
*4