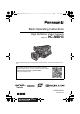
HC-MDH3EGCGW-DVQX1483XA_eng.book 1 ページ 2018年11月16日 金曜日 午後4時47分 Basic Operating Instructions High Definition Video Camera Model No. HC-MDH3 Please read these instructions carefully before using this product, and save this manual for future use. More detailed operating instructions are available in “Operating Instructions (PDF format)”. To read it, download it from the website. https://eww.pavc.panasonic.co.jp/hdw/oi/MDH3/ ≥ Click the desired language.
HC-MDH3EGCGW-DVQX1483XA_eng.book 2 ページ 2018年11月16日 金曜日 午後4時47分 Information for Your Safety For the AC mains plug of three pins ∫ Caution for AC mains lead For your safety, please read the following text carefully. This appliance is supplied with a moulded three pin mains plug for your safety and convenience. A 5-ampere fuse is fitted in this plug. Should the fuse need to be replaced please ensure that the replacement fuse has a rating of 5-ampere and that it is approved by ASTA or BSI to BS1362.
HC-MDH3EGCGW-DVQX1483XA_eng.book 3 ページ 2018年11月16日 金曜日 午後4時47分 ∫ Concerning the battery Warning Risk of fire, explosion and burns. Do not disassemble, heat above 60 oC or incinerate. CAUTION ≥ Danger of explosion if battery is incorrectly replaced. Replace only with the type recommended by the manufacturer. ≥ When disposing of the batteries, please contact your local authorities or dealer and ask for the correct method of disposal.
HC-MDH3EGCGW-DVQX1483XA_eng.book 4 ページ 2018年11月16日 [ For India only ] AC adaptor information IS 616/IEC 60065 R-41016268 For BIS registration details see website www.bis.gov.in This device is designed and manufactured for use at a broadcasting station and/or in a similar environment. This device is not equipped with a Power Management function or the Power Management function is set to OFF as it will prevent the device from fulfilling its intended purpose for the reasons below. 1.
HC-MDH3EGCGW-DVQX1483XA_eng.book 5 ページ 2018年11月16日 ∫ Cautions for use About this unit The unit and the SD card become warm during use. This is not a malfunction. Keep this unit as far away as possible from electromagnetic equipment (such as microwave ovens, TVs, video games etc.). ≥ If you use this unit on top of or near a TV, the pictures and/or sound on this unit may be disrupted by electromagnetic wave radiation.
HC-MDH3EGCGW-DVQX1483XA_eng.book 6 ページ 2018年11月16日 Do not lift up this unit by the handle with the tripod still attached ≥ When the tripod is attached, its weight will also affect the unit’s handle, possibly causing the handle to break and hurting the user. ≥ To carry the unit while the tripod is attached, take hold of the tripod. Do not swing the unit around, shake it by, or allow it hang from the handle ≥ Do not jar, swing, or shake the unit by its handle.
HC-MDH3EGCGW-DVQX1483XA_eng.book 7 ページ 2018年11月16日 Do not throw old battery into fire. ≥ Heating a battery or throwing it into a fire may result in an explosion. If the operating time is very short even after the battery has been recharged, the battery has worn out. Please purchase a new battery. About the AC adaptor ≥ If the temperature of the battery is extremely high or extremely low, charging may take time or the battery may not be charged.
HC-MDH3EGCGW-DVQX1483XA_eng.book 8 ページ 2018年11月16日 金曜日 午後4時47分 ≥ The customer is responsible for the management of the data in the SD card. ∫ About the recording method for recording motion pictures LCD monitor/viewfinder This unit can record motion pictures using three different recording methods, including MOV, MP4 and AVCHD*. * AVCHD Progressive (1080/50p) supported. ≥ When the LCD screen is dirty or condensation has occurred, please wipe it using a soft cloth such as a lens cloth.
HC-MDH3EGCGW-DVQX1483XA_eng.book 9 ページ 2018年11月16日 ∫ About security Be careful about the possibility of theft or loss of the unit, and be careful not to leave the unit unattended. Please note that Panasonic does not accept any responsibility for the compromise, manipulation, and loss of information caused by these events. ∫ Caution regarding laser beams The lens may suffer damage if struck by a laser beam.
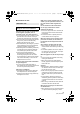
HC-MDH3EGCGW-DVQX1483XA_eng.book 10 ページ 2018年11月16日 金曜日 午後4時47分 Contents Information for Your Safety ..................... 2 Accessories ............................................ 11 Preparation What you can do with this unit ............. 12 Recording to the SD card................... 12 Linking to external devices.................12 Names and Functions of Main Parts .... 14 Power supply ..........................................19 Inserting/removing the battery............
HC-MDH3EGCGW-DVQX1483XA_eng.book 11 ページ 2018年11月16日 金曜日 午後4時47分 Accessories Check the accessories before using this unit. Keep the accessories out of reach of children to prevent swallowing. Product numbers correct as of Feb. 2018. These may be subject to change. Optional accessories Battery pack VW-VBD29 Some optional accessories may not be available in some countries. AC adaptor SAE0011 AC cable (HC-MDH3E/HC-MDH3GC) A K2CT2YY00095 B K2CQ2YY00117 ≥ In Saudi Arabia, always use A.
HC-MDH3EGCGW-DVQX1483XA_eng.book 12 ページ 2018年11月16日 金曜日 午後4時47分 Preparation What you can do with this unit Recording to the SD card It is possible to record motion pictures and still pictures to the SD card (SDHC Memory Card/SDXC Memory Card) using a variety of recording functions. ≥ This unit supports relay/simultaneous recording using double card slots.
HC-MDH3EGCGW-DVQX1483XA_eng.book 13 ページ 2018年11月16日 金曜日 午後4時47分 Importing data to a PC Image data can be imported to a PC for editing by inserting the SD card used for recording with the unit into that PC. ≥ A PC with an SD card slot or an SD card reader is required. A B SDHC Memory Card/SDXC Memory Card* PC * SD cards are optional and not supplied with this unit. Connecting to a TV Connect to a TV to output images.
HC-MDH3EGCGW-DVQX1483XA_eng.book 14 ページ 2018年11月16日 金曜日 午後4時47分 Preparation Names and Functions of Main Parts 2 3 4 5 6 1 7 8 9 11 12 10 13 14 15 16 17 ヤモヮチンユヮヰヵユ ヶヴャ ョヰヤヶヴチリンリヴ ・ヰヰヮチヴバヴ 1 Shoulder strap fixture 2 Handle 3 Sub zoom lever (l 30) ≥ This lever functions in the same manner as the zoom lever. ≥ The zoom speed is controlled with this lever in a way different from the way it is controlled with the zoom lever.
HC-MDH3EGCGW-DVQX1483XA_eng.book 15 ページ 18 19 20 21 22 23 2018年11月16日 27 ロユュチロリヨラヵ ヰワ ヰョョ 金曜日 午後4時47分 28 29 30 リンリヴ ヮモワヶモロ ヮユワヶ ョヰヤヶヴ ヴユロバヱヶヴラチヴユヵ ヱヶヴラチモョ ヒ 31 32 ヸラリヵユチャモロ ヶヴユン 33 ビ 34 24 25 26 35 36 18 19 20 21 22 23 24 25 26 Ring LED Shoulder strap fixture Built-in microphone Built-in LED light Recording lamp Lens Lens hood Multi-manual ring (l 31) Camera function button [CAMERA FUNCTION] (l 31) 27 LED LIGHT switch ≥ Turns on/off the built-in LED light.
HC-MDH3EGCGW-DVQX1483XA_eng.book 16 ページ 2018年11月16日 金曜日 午後4時47分 38 39 40 41 37 42 43 44 47 ヷリュユヰ ヰヶヵ ロ モヶュリヰ ヰヶヵ ン 48 45 ヤラヨ ュヤチリワチヒビヷ 46 37 LCD monitor (Touch screen) (l 24) 41 Viewfinder (l 25) ≥ Extend the viewfinder before use. ≥ It can open up to 90o. ≥ It can rotate up to 180o A towards the lens or 90o B towards the opposite direction.
HC-MDH3EGCGW-DVQX1483XA_eng.book 17 ページ 2018年11月16日 金曜日 ビ 午後4時47分 ヒ 50 51 52 53 49 49 SD Card slot cover (l 23) 50 Card slot 2 (l 23) 51 Access lamp (card 2) (l 23) 52 Card slot 1 (l 23) 53 Access lamp (card 1) (l 23) ∫ Attaching/removing the lens cap Protect the lens surface with the lens cap while the unit is not used. ≥ Place your fingers in the recesses on the lens cap to hold it when attaching or removing it.
HC-MDH3EGCGW-DVQX1483XA_eng.book 18 ページ 2018年11月16日 金曜日 午後4時47分 ∫ Attaching the eyecup Attach by aligning the notch of the eyecup attachment part with the protrusion at the inside of the eyecup. A B Notch Protrusion ∫ Using the diffusion filter (supplied) of the built-in LED light The supplied diffusion filter softens the light by reducing its glare. Use the diffusion filter when the built-in LED light is too bright.
HC-MDH3EGCGW-DVQX1483XA_eng.book 19 ページ 2018年11月16日 金曜日 午後4時47分 Preparation Power supply ∫ About batteries that you can use with this unit (as of February 2018) The battery that can be used with this unit is VW-VBD29/VW-VBD58/AG-VBR59/AG-VBR89. For quick charging of a battery (AG-VBR59/AG-VBR89: optional), use a battery charger (AGBRD50: optional). It has been found that counterfeit battery packs which look very similar to the genuine product are made available to purchase in some markets.
HC-MDH3EGCGW-DVQX1483XA_eng.book 20 ページ 2018年11月16日 金曜日 午後4時47分 Charging the battery When this unit is purchased, the battery is not charged. Charge the battery fully before using this unit for the first time. The unit is in the standby condition when the AC adaptor is connected. The primary circuit is always “live” as long as the AC adaptor is connected to an electrical outlet. Important: ≥ Use the supplied AC adaptor. Do not use the AC adaptor of another device.
HC-MDH3EGCGW-DVQX1483XA_eng.book 21 ページ 2018年11月16日 金曜日 午後4時47分 Charging and recording time Charging/Recording time ≥ The times given apply when the ambient operating temperature is 25 oC and the relative operating humidity is 60%. Charging time may be longer at other temperatures and humidity levels. ≥ These charging times are for when the unit is turned off. ≥ The maximum continuous recordable times and the actual recordable times are based on the conditions below.
HC-MDH3EGCGW-DVQX1483XA_eng.book 22 ページ 2018年11月16日 金曜日 午後4時47分 Preparation Preparation of SD cards The unit can record motion pictures or still pictures to an SD card. ≥ We recommend that you use a Panasonic Memory Card. This unit (an SDXC compatible device) is compatible with SDHC Memory Cards and SDXC Memory Cards. When using an SDHC Memory Card/SDXC Memory Card with other equipment, check the equipment is compatible with these Memory Cards.
HC-MDH3EGCGW-DVQX1483XA_eng.book 23 ページ 2018年11月16日 金曜日 午後4時47分 Inserting/removing an SD card When using an SD card for the first time, it is necessary to format the SD card. (l 27) When the SD card is formatted, all of the recorded data is deleted. Once the data is deleted, it cannot be restored. Caution: Check that the access lamp has gone off. Access lamp A ≥ When this unit is accessing the SD card, the access lamp lights up.
HC-MDH3EGCGW-DVQX1483XA_eng.book 24 ページ 2018年11月16日 金曜日 午後4時47分 Preparation Turning the unit on/off Set the power switch to ON while pressing the lock release button B to turn on the unit. To turn off the unit Set the power switch to OFF while pressing the lock release button. The status indicator goes off. A The status indicator lights on. ≥ To turn on the unit again after the [ECONOMY (BATT)] or [ECONOMY (AC)] is activated, set the power switch to OFF once, and then to ON again.
HC-MDH3EGCGW-DVQX1483XA_eng.book 25 ページ 2018年11月16日 金曜日 午後4時47分 ∫ About the operation icons / / / : Touch when changing a page or performing settings. ≥ Do not touch the LCD monitor with hard pointed tips, such as ball point pens. Viewfinder adjustment Adjusting the field of view This setting will not affect the images actually recorded. It adjusts the field of view to show the image on the viewfinder clearly.
HC-MDH3EGCGW-DVQX1483XA_eng.book 26 ページ 2018年11月16日 金曜日 午後4時47分 Preparation Setting date and time When this unit is turned on, the message [SET TIME ZONE AND DATE/TIME] may appear. To make these settings, select [YES], and follow the instructions from Step 2-3 of the time zone setting procedure. Time zone Time difference from the Greenwich Mean Time can be set. 1 Select the menu. (l 39) MENU 2 3 : [OTHER FUNCTION] # [TIME ZONE] Touch / and set the region to record.
HC-MDH3EGCGW-DVQX1483XA_eng.book 27 ページ 2018年11月16日 金曜日 午後4時47分 Recording Selecting a media to record [SD CARD 1] and [SD CARD 2] can be selected separately to record motion pictures or still pictures. 1 Select the menu. (l 39) MENU 2 : [RECORD SETUP] # [MEDIA SELECT] Touch the media to record motion pictures or still pictures. ≥ The media is selected separately for motion pictures or still pictures and is then highlighted in yellow. 3 Touch [EXIT] to complete the setting.
HC-MDH3EGCGW-DVQX1483XA_eng.book 28 ページ 2018年11月16日 Recording Recording motion pictures 1 Set the mode switch B to to switch to Recording Mode. REC ≥ Open the LCD monitor. 2 Press the recording start/stop button C to start recording. When you begin recording, REC (red) is displayed. ≥ Recording will stop when you press the recording start/stop button again. A Recording Recording still pictures ≥ Register to a USER button.
HC-MDH3EGCGW-DVQX1483XA_eng.book 29 ページ 2018年11月16日 金曜日 午後4時47分 Recording Intelligent Auto Mode/Manual Mode iA/MANUAL/FOCUS switch ヮモワヶモロ ョヰヤヶヴ Slide the switch to change the Intelligent Auto Mode/Manual Mode. ≥ When you slide the switch to FOCUS, the unit will switch between Auto Focus Mode and Manual Focus Mode. (l 31) ≥ appears on the screen in Intelligent Auto Mode.
HC-MDH3EGCGW-DVQX1483XA_eng.book 30 ページ 2018年11月16日 金曜日 午後4時47分 Recording Using the zoom It can be zoomed up to 20k. ≥ It can zoom up to approx. 40k when the [i.Zoom] is set to [ON]. ≥ Zoom magnification can be checked in the screen display of Z00 to Z99. The value gets larger when zoomed in, and the value gets smaller when zoomed out. If you set [i.Zoom] to [ON], the magnification level will be displayed as follows: j iZ00 to iZ99: optical zoom range j Z99: i.
HC-MDH3EGCGW-DVQX1483XA_eng.book 31 ページ 2018年11月16日 金曜日 午後4時47分 Recording Manual Recording Zoom, focus, and iris can be adjusted by operating the multi-manual ring. Gain, White Balance and shutter speed can be adjusted by operating the manual icon and the jog dial.
HC-MDH3EGCGW-DVQX1483XA_eng.book 32 ページ 2018年11月16日 金曜日 午後4時47分 Iris/Gain adjustment When recording a scene that is too dark (or bright) or a scene in a similar situation, manually adjust the iris and gain. Iris adjustment ≥ Switch to Manual Mode. (l 29) 1 Press the IRIS button to switch to Manual Iris Mode. ≥ disappears. ≥ The manual ring setting will change to [ 2 IRIS]. Rotate the multi-manual ring to adjust the setting. F4.
HC-MDH3EGCGW-DVQX1483XA_eng.book 33 ページ 2018年11月16日 金曜日 午後4時47分 White Balance Automatic White Balance function may not reproduce natural colors depending on the scenes or lighting conditions. If so, you can adjust the White Balance manually. ≥ Use the jog dial to change the settings. ≥ Switch to Manual Mode. (l 29) 1 Touch the LCD monitor in the recording screen. ≥ Operation icons are displayed. 2 WB Touch AUTO to switch to Manual White Balance Mode.
HC-MDH3EGCGW-DVQX1483XA_eng.book 34 ページ 2018年11月16日 金曜日 午後4時47分 Manual shutter speed Adjust the shutter speed when recording fast-moving subjects. ≥ Use the jog dial to change the settings. ≥ Switch to Manual Mode. (l 29) 1 Touch the LCD monitor in the recording screen. ≥ Operation icons are displayed. 2 Touch Mode. SHUTTER AUTO to switch to Manual Shutter SHUTTER AUTO A.SHTR 1/50 A [SHUTTER] B Auto Shutter display ≥ This is displayed in Auto Shutter Mode.
HC-MDH3EGCGW-DVQX1483XA_eng.book 35 ページ 2018年11月16日 金曜日 午後4時47分 Recording USER button Each of the USER button can register one function from the 30 available functions. ≥ There are 3 USER buttons (USER1 to 3) on the main body and 4 USER button icons (USER4 to USER7) displayed on the LCD monitor. Setting the USER button 1 Select the menu. (l 39) MENU : [USER SW] # [USER1] to [USER7] ≥ It is not possible to register functions to [USER4] to [USER7] in Playback Mode. 2 Touch the item to register.
HC-MDH3EGCGW-DVQX1483XA_eng.book 36 ページ 2018年11月16日 金曜日 午後4時47分 Functions of the USER button ∫ List of USER button functions ≥ Please refer to “Operating Instructions” (PDF format) for more information about the functions of the USER button. Item Icon Function [INH] Invalid [FA1] Focus Assist1* [FA2] Focus Assist2* [B.Light] Backlight Compensation [B.FD] Black Fade [W.
HC-MDH3EGCGW-DVQX1483XA_eng.book 37 ページ 2018年11月16日 金曜日 午後4時47分 Playback Motion picture/Still picture playback ヤモヮユンモ ョヶワヤヵリヰワ ロユュチロリヨラヵ ヰワハチハチヰョョ リンリヴ ㄊモ ヮモワヶモロ ョヰヤヶヴ ヴユロバヱヶヴラチヴユヵ ヮユワヶ ヱヶヴラチモョ ヒ 1 2 D Set the mode switch A to Playback Mode. ヸラリヵユチャモロ ヶヴユン ビ to switch to Touch the play mode select icon B. Media display The selected media is displayed in yellow. 3 Select the media E you wish to play back.
HC-MDH3EGCGW-DVQX1483XA_eng.book 38 ページ 2018年11月16日 金曜日 午後4時47分 ≥ (If you have touched the recording mode option [AVCHD]) After you have touched a recording format option, one of the following icons will be displayed on each thumbnail. j PS : Scenes recorded in [PS 1080/50.00p] j PH : Scenes recorded in [PH 1080/50.00i] j HA : Scenes recorded in [HA 1080/50.00i] j HE : Scenes recorded in [HE 1080/50.00i] j PM : Scenes recorded in [PM 720/50.00p] j SA : Scenes recorded in [SA 576/50.
HC-MDH3EGCGW-DVQX1483XA_eng.book 39 ページ 2018年11月16日 金曜日 午後4時47分 Menu Using the menu screen ヤモヮユンモ ョヶワヤヵリヰワ ロユュチロリヨラヵ ヰワハチハチヰョョ リンリヴ ㄊモ ヮモワヶモロ ョヰヤヶヴ ヴユロバヱヶヴラチヴユヵ ヮユワヶ ヱヶヴラチモョ ヒ ヸラリヵユチャモロ ヶヴユン ビ ヮユワヶ 1 2 3 Press the MENU button A. Touch the submenu C. ≥ Next (Previous) page can be displayed by touching 4 5 Touch the top menu B. / . Touch the desired item to enter the setting. Touch [EXIT] to exit the menu setting.
HC-MDH3EGCGW-DVQX1483XA_eng.book 40 ページ 2018年11月16日 金曜日 午後4時47分 Menu Menu structure Please refer to "Operating Instructions" (PDF format) for details. ∫ Menu structure in Recording mode [CAMERA SETUP] [PICTURE TONE]/[SCENE MODE]/[SHARPNESS]/[COLOR]/ [EXPOSURE]/[AWB Ach ADJUST]/[AWB Bch ADJUST]/ [BACKLIGHT COMPENS.
HC-MDH3EGCGW-DVQX1483XA_eng.book 41 ページ 2018年11月16日 金曜日 午後4時47分 ∫ Menu structure in Playback mode [VIDEO SETUP]*1 [REPEAT PLAY]/[RESUME PLAY]/[SCENE PROTECT]/[DELETE] [PICT. SETUP]*2 [SCENE PROTECT]/[DELETE] [COPY] [DIFFERENTIAL COPY]*3/[SELECT COPY] [USER SW] [USER1]/[USER2]/[USER3] [OUTPUT SETUP] [RESOLUTION]/[DOWN CONV.
HC-MDH3EGCGW-DVQX1483XA_eng.book 42 ページ 2018年11月16日 金曜日 午後4時47分 Others Troubleshooting ∫ It is not a malfunction in following cases The lens, the viewfinder or LCD monitor fog up. ≥ This is due to condensation. It is not a malfunction. Please refer to page 8. Object seems to be warped. ≥ Object seems to be warped slightly when the object moves across the image very fast, but this is because the unit is using MOS for the image sensor. This is not a malfunction.
HC-MDH3EGCGW-DVQX1483XA_eng.book 43 ページ 2018年11月16日 金曜日 午後4時47分 Playback Problem Scenes/still pictures cannot be played back. Check points ≥ Any scenes/still pictures where the thumbnails are displayed as cannot be played back. ≥ In most cases, is displayed for the following scenes: j Scenes recorded with another device or edited with editing software j Scenes with damaged data ≥ The thumbnails of scenes recorded on other devices with different system frequencies are indicated with .
HC-MDH3EGCGW-DVQX1483XA_eng.book 44 ページ 2018年11月16日 金曜日 午後4時47分 Others About copyright ∫ Carefully observe copyright laws Recording of pre-recorded tapes or discs or other published or broadcast material for purposes other than your own private use may infringe copyright laws. Even for the purpose of private use, recording of certain material may be restricted. ∫ Licenses ≥ SDXC Logo is a trademark of SD-3C, LLC.
HC-MDH3EGCGW-DVQX1483XA_eng.book 45 ページ 2018年11月16日 金曜日 午後4時47分 Others Specification High Definition Video Camera Power source: 7.2 V (When using battery) 12 V (When using AC adaptor) Power consumption: 27.4 W (During recording: 9.2 W; during charging: 27.4 W) indicates safety information Recording format: [MOV]/[MP4]/ AVCHD version 2.0 (AVCHD Progressive) Motion picture compression: MPEG-4 AVC/H.
HC-MDH3EGCGW-DVQX1483XA_eng.book 46 ページ Level Shot Function: [ON]/[OFF] Monitor: 7.5 cm (3z) wide LCD monitor (Approx. 460 K dots) Viewfinder: 0.6 cm (0.24z) wide EVF (Approx. 1555 K dots equivalent) Microphone: Stereo microphone Minimum required illumination: Approx. 1.2 lx (at a Super Gain value of 36 dB and a shutter speed of 1/25) Built-in LED light: Illumination level; Approx. 300 lx (1.0 m) With the diffusion filter; Approx. 70 lx (1.0 m) Illuminating angle; Approx. 30o Color temperature; Approx.
HC-MDH3EGCGW-DVQX1483XA_eng.book 47 ページ 2018年11月16日 金曜日 午後4時47分 [For_Australia] Panasonic Warranty 1. Subject to the conditions of this warranty Panasonic or its Authorised Service Centre will perform necessary service on the product, without charge for parts or labour, if in the opinion of Panasonic the product is found to have a manufacturing defect within one (1) year or (12 months) (the “warranty period”) from the date of purchase appearing on your purchase receipt. 2.
HC-MDH3EGCGW-DVQX1483XA_eng.book 48 ページ 2018年11月16日 金曜日 午後4時47分 EU Manufactured by: Panasonic Corporation Kadoma, Osaka, Japan Importer for Europe: Panasonic Marketing Europe GmbH Panasonic Testing Centre Winsbergring 15, 22525 Hamburg, Germany Panasonic Corporation Web site: http://www.panasonic.