APPENDIX A Operating Instructions CS-KS12NB41 & CZ-18BT1U + CU-KS12NK1A CS-KS18NB4UW & CZ-18BT1U + CU-KS18NKU CS-KS18NB4UW & CZ-18BT1U + CU-KS18NKUA (852-6-4181-211-00-1) A-1
Operating Instructions Split System Air Conditioner Model No. Indoor Units Outdoor Units (For Single use) CS-KS12NB41 CS-KS18NB4UW CU-KS12NK1A CU-KS18NKU CU-KS18NKUA (For Multiple use) CU-3KS19NBU CU-4KS24NBU CU-4KS31NBU Ceiling Panel CZ-18BT1U This air conditioner uses the refrigerant R410A. “Multiple use” is applied for the model CS-KS18NB4UW only. • “Single use” means that only one indoor unit is connected with one outdoor unit in a one-unit-to-oneunit configuration. • “Multiple use” (i.e.
FEATURES This air conditioner is an inverter type unit that automatically adjusts capability as appropriate. Details on these functions are provided below; refer to these descriptions when using the air conditioner. • Microprocessor Controlled Operation • Automatic and 3-step Fan Speed The interior compartment of the remote controller contains several features to facilitate automatic operation, easy logically displayed for easy use.
INSTALLATION LOCATION • We recommend that this air conditioner be installed properly by qualified installation technicians in accordance with the Installation Instructions provided with the unit. • Before installation, check that the voltage of the electric supply in your home or office is the same as the voltage shown on the nameplate. • Do not install this air conditioner where there are fumes or flammable gases, or in an extremely humid space such as a greenhouse.
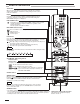
NAMES OF PARTS UNIT DISPLAY AND OPERATION BUTTON INDOOR UNIT INDOOR UNIT Air Intakes OPERATION button OPERATION lamp Air Outlet! (4 locations) TIMER lamp HIGH POWER lamp REMOTE CONTROL receiver Remote Controller IMPORTANT Refrigerant Tubes OUTDOOR UNIT Drain Hose Avoid using radio equipment such as mobile phone near (within 4 ft. (1.2 m)) the remote control receiver. Some radio equipment may cause malfunction of the unit.
REMOTE CONTROLLER (DISPLAY) Displayed when transmitting data Displayed when indoor unit sensor is in use Displayed when setting temperature Displayed when temperature is shown Displayed when setting timer Displayed when the time display is set to 12-hour time. Symbols (1) Operation mode (4) Timer MILD DRY .............................. 24-hour clock with ON/OFF program Timer ....................... COOL ..................................... ON Timer. .............................. FAN ..............
REMOTE CONTROLLER Transmitter When you press the buttons on the remote controller, the mark appears in the display to transmit the setting changes to the receiver in the air conditioner. Display Information on the operating conditions is displayed while the remote controller is switched on. If the unit is turned off, FLAP setting and FAN SPEED setting are not displayed.
Sensor A temperature sensor inside the remote controller senses the room temperature. ON/OFF operation button This button is for turning the air conditioner on and off. 1 HR. TIMER button (1-HOUR OFF TIMER) : When you press this button, regardless of whether the unit is operating or stopping, the unit operates for one hour and then shuts down. Temperature setting buttons (TEMP.) Press the button to increase the set temperature. Press the button to reduce the set temperature.
USING THE REMOTE CONTROLLER HOW TO INSTALL BATTERIES HOW TO USE THE REMOTE CONTROLLER When using the remote controller, always point the unit’s transmitter head directly at the air conditioner’s receiver. Air Conditioner (Indoor unit) Receiver Remote Controller ACL button 1. Slide the cover in the direction indicated by the arrow and remove it. 2. Install two AAA alkaline batteries. Make sure the batteries point in the direction marked in the battery compartment. 3.
OPERATION WITH THE REMOTE CONTROLLER 1. Operation 2. Adjusting the Fan Speed A. Automatic fan speed Simply set the FAN SPEED selector button to the position. This automatically sets the best fan speed for the room temperature. B. Manual fan speed STEP 2 STEP 3 If you want to adjust fan speed manually during operation, just set the FAN SPEED selector button as desired. [ , , or ] 3. Fan Only STEP 2 STEP 1 STEP 4 STEP 5 NOTE Check that the circuit breaker on the power panel is turned on.
4. Night Setback Mode HIGH POWER mode can be used to increase the output of the indoor unit for all operation modes. Press the HIGH POWER button while unit is operating. The mark appears in the display. To cancel, press HIGH POWER button again. • When the HIGH POWER button is pressed, the unit operates at maximum output for 30 minutes, regardless of the desired temperature. The fan speed is 1 step above “High”.
1. How to set the present time Operation (Example) To set to 10:30 pm. Indication 1. Press the ON TIME setting button once. 2. Press the Advance, Return ( , ) button until AM 7:10 is displayed. Operation 1. Press the CLOCK button once if the time indicator is not flashing. Indication The time indication alone flashes. 2. Press the Advance, Return The time can be set in 1-minute ( , ) button until PM 10:30 increments. Holding down the is displayed.
USING THE 1-HOUR OFF TIMER 1. 1-Hour OFF Timer This function causes the unit to operate for one hour and then stop, regardless of whether the unit is on or off when this button is pressed. The indicator in the display indicates that this function is operating. Setting procedure: Regardless of whether the unit is operating or stopped, press the 1 HR. TIMER button. appears in the display.
OPERATION WITHOUT THE REMOTE CONTROLLER CARE AND CLEANING • Cleaning and maintenance operations must be carried out by specially trained personnel. While working in high places, slipping or falling may result in serious injury. • For safety, be sure to turn the air conditioner off and also to disconnect the power before cleaning. • Do not pour water on the indoor unit to clean it. This will damage the internal components and cause an electric shock hazard.
Air filter The air filter collects dust and other particles from the air and should be cleaned once every 6 months. If the filter gets blocked, the efficiency of the air conditioner drops greatly. How to remove the air intake grille 1. Open the air intake grille. 2. Detach the safety cord from the frame (remember to attach it again after cleaning or maintenance). 3. Hold on the air intake grille and pull it towards you to detach the NOTE two air intake grille hinges.
TROUBLESHOOTING (BEFORE CALLING FOR SERVICE) If your air conditioner does not work properly, first check the following points before requesting service. If it still does not work properly, contact your dealer or service center. Trouble Air conditioner does not run at all. Possible Cause Remedy 1. Power failure. 1. Restore power. 2. Leakage circuit breaker tripped. 2. Contact service center. 3. Line voltage is too low. 3. Consult your electrician or dealer. 4.
SPECIFICATIONS • For Single use Model No. Power Source Cooling Capacity Heating Capacity Cooling Outdoor (Hi) Operation Operation Indoor(H/M/L) Sound Heating Outdoor (Hi) Operation Indoor(H/M/L) Unit Dimensions (H×W×D) Net Weight kW BTU/h kW BTU/h dB(A) dB(A) inch(mm) lbs.(kg) Indoor Unit Outdoor Unit CU-KS12NK1A CS-KS12NB41 Single-phase, 115 V, 60 Hz 3.50 [ 0.90 ~ 3.50 ] 11,900 [ 3,000 ~ 11,900 ] 47 34/32/31 21-9/16×28-11/32×10-7/16 11-5/32×22-5/8×22-5/8 (548×720×265) (283×575×575) 75.0(34.0) 35.3(16.
• For Multiple use kW BTU/h kW BTU/h Indoor Unit CS-KS18NB4UW Single-phase, 208-230 V, 60 Hz 5.15 17,500 - dB(A) 44/40/36 dB(A) - Model No. Power Source Cooling Capacity Heating Capacity Operation Sound Cooling Operation (H/M/L) Heating Operation (H/M/L) Unit Dimensions (H×W×D) Net Weight 11-5/32×22-5/8×22-5/8 (283×575×575) 35.3(16.0) inch(mm) lbs.(kg) • For Multiple use Model No.