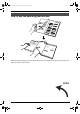
0519_FPG381PDF Page 1 Monday, May 19, 2003 6:46 PM 2.4 GHz Expandable Cordless Phone System and Fax Operating Instructions Model No. FOR FAX ADVANTAGE ASSISTANCE: — PHONE CALL 1-800-HELP-FAX (1-800-435-7329) — E-MAIL TO consumerproducts@panasonic.com for customers in the U.S.A. or Puerto Rico — REFER TO www.panasonic.com for customers in the U.S.A. or Puerto Rico KX-FPG381 Please read these Operating Instructions before using the unit and save for future reference.
0519_FPG381.book Page I Monday, May 19, 2003 6:46 PM Location of Controls How to use the operating instructions When following operating instructions, always keep the front cover page (next page) open so that you will find easy reference to the buttons.
0519_FPG381.book Page II Monday, May 19, 2003 6:46 PM Location of controls Please keep this page open when following operating instructions. For a description of each button, see page 10.
0519_FPG381.book Page 2 Monday, May 19, 2003 6:46 PM Thank you for purchasing a Panasonic fax machine. Things you should keep a record of Attach your sales receipt here.
0519_FPG381.book Page 3 Monday, May 19, 2003 6:46 PM Safety Instructions SafetyFax 1For Instructions Advantage assistance, call 1-800-435-7329. Important safety instructions When using this unit, basic safety precautions should always be followed to reduce the risk of fire, electric shock, or personal injury. 1. Read and understand all instructions. 2. Follow all warnings and instructions marked on this unit. 3. Unplug this unit from power outlets before cleaning. Do not use liquid or aerosol cleaners.
0519_FPG381.book Page 4 Monday, May 19, 2003 6:46 PM Safety Instructions L When you leave the unit unused for a long period of time, unplug this unit from power outlet. CAUTION: Battery To reduce the risk of fire or injury to persons, read and follow these instructions. L Use only the battery(ies) specified. L Do not dispose of the battery(ies) in a fire. They may explode. Check with local waste management codes for special disposal instructions. L Do not open or mutilate the battery(ies).
0519_FPG381.book Page 5 Monday, May 19, 2003 6:46 PM For Best Performance Operating distance and noise 1ForBest For Fax Performance Advantage assistance, call 1-800-435-7329. For best performance Battery charge Place the handset on the charger for about 15 hours before initial use. L For details, see page 20. Calls are transmitted between the base unit and the handset using wireless radio waves.
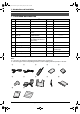
0519_FPG381.book Page 6 Monday, May 19, 2003 6:46 PM Table of Contents 1. Introduction and Installation 1. Table of Contents Accessories 1.1 Included accessories..........................8 1.2 Accessory information ........................9 Finding the Controls 1.3 Overview ............................................ 9 1.4 Description of base unit buttons ....... 10 1.5 Description of handset buttons......... 10 1.6 Description of base unit display........ 11 1.7 Description of handset display .........
0519_FPG381.book Page 7 Monday, May 19, 2003 6:46 PM Table of Contents Greeting 7.2 Recording your greeting message.... 61 Memo Message 7.3 Leaving a message for others or yourself ............................................. 62 Incoming Messages 7.4 Listening to recorded messages ...... 62 7.5 Remote operation with the handset.. 64 Remote Operation 7.6 Operating from a remote location..... 66 12.Index 12.1 Index.............................................. 102 8.
0519_FPG381.book Page 8 Monday, May 19, 2003 6:46 PM 1. Introduction and Installation 1 Introduction and Installation 1.
0519_FPG381.book Page 9 Monday, May 19, 2003 6:46 PM 1. Introduction and Installation Finding the Controls 1.2 Accessory information Accessories for this unit can be ordered online, by fax, or by telephone. Please note that only orders for replacement film and batteries can be accepted by fax and telephone. – Replacement film*1 (KX-FA92): 2 rolls - 216 mm × 35 m (81/2" × 114') (Each roll will print about 113 letter-sized pages.
0519_FPG381.book Page 10 Monday, May 19, 2003 6:46 PM 1. Introduction and Installation K {FAX/START}{SET} 1.3.2 Handset L To initiate fax transmission or reception. L To store a setting during programming. 1 L {STOP} L To stop an operation or programming. L To clear a digit (page 31). 2 4 M {HELP} L To print a quick reference (page 27). N {MEMO} L To record a memo message (page 62). O {NAVIGATOR}{VOLUME} 3 L To search for a stored item (page 38, page 51).
0519_FPG381.book Page 11 Monday, May 19, 2003 6:46 PM 1. Introduction and Installation displayed above the keys will change depending on the state of usage. Example: IN USE < PRIVACY MUTE 1 2 J {PAUSE/REDIAL} L To redial one of the last 5 numbers dialed from the handset (page 34). L To insert a pause during dialing. 1.6 Description of base unit display Example: 1 2 3 For example, “PRIVACY” is displayed above the left soft key (1) and “MUTE” is displayed above the right soft key (2).
0519_FPG381.book Page 12 Monday, May 19, 2003 6:46 PM 1. Introduction and Installation 2 Speakerphone icon L This icon will be displayed when you are using the handset speakerphone during an intercom call (page 45) or a conference call (page 47). L It will be displayed while listening to messages (page 64). L It will be displayed while in the 2-way radio mode using the handset speakerphone (page 49). L It will be displayed while monitoring a room from the speaker (page 48).
0519_FPG381.book Page 13 Monday, May 19, 2003 6:46 PM 1. Introduction and Installation 3 Installation (Base Unit) Open the back cover (1). 1.8 Ink film 1 1.8.1 Installing the ink film 1 Open the front cover (1) by pulling up the center part (2). 2 4 Insert the gear of the blue core (1) into the left slot of the unit (2). Insert the rear ink film roll (3). L The ink film is safe to touch, and will not rub off on your hands like carbon paper.
0519_FPG381.book Page 14 Monday, May 19, 2003 6:46 PM 1. Introduction and Installation L Make sure that the ink film is wrapped around the blue core (3) at least once. Correct 3 1 turn replacement film. See page 9 for accessory information. L We cannot be responsible for any damage to the unit or degradation of print quality which may occur from the use of non-Panasonic replacement film. 1 Open the covers (see steps 1 to 3 on page 13). 2 Pull out the blue gear (1) and remove the used ink film (2).
0519_FPG381.book Page 15 Monday, May 19, 2003 6:46 PM 1. Introduction and Installation Note: L Change the recording paper size to “A4” (feature #16 on page 69). 1.9 Paper tray Insert the tabs on the paper tray (1) into the slots on the back of the unit (2). 1.10 Recording paper The unit can hold: – Up to 30 sheets of 60 g/m2 to 80 g/m2 (16 lb. to 21 lb.) paper. – Up to 20 sheets of 90 g/m2 (24 lb.) paper. – No more than 20 sheets of legal paper.
0519_FPG381.book Page 16 Monday, May 19, 2003 6:46 PM 1. Introduction and Installation L If the paper is not inserted correctly, readjust the paper, or the paper may jam. Incorrect Correct 15HRS” and 68885 are displayed after just a few calls, the battery needs to be replaced. Please use only Panasonic batteries. See page 9 for accessory information. L Only use rechargeable batteries. If you install non-rechargeable batteries and start charging them, the batteries may leak electrolyte.
0519_FPG381.book Page 17 Monday, May 19, 2003 6:46 PM 1. Introduction and Installation To attach the belt clip To connect an optional headset to the handset To remove the belt clip While pressing the top of the clip (1), pull the right edge in the direction of the arrow (2). 1 2 L Model shown is KX-TCA88. To switch to the speakerphone while using the headset: Press {SP-PHONE}. To return to the headset, press {TALK}. 1.
0519_FPG381.book Page 18 Monday, May 19, 2003 6:46 PM 2. Preparation attach the filter to the telephone line cord of the fax machine. 2 Preparation 2For Connections Fax Advantage and Setup assistance, call 1-800-435-7329. 2.1 Connections Caution: L When you operate this product, the power outlet should be near the product and easily accessible. Telephone line cord 2.1.1 Base unit Filter To a single telephone line jack 2.1.
0519_FPG381.book Page 19 Monday, May 19, 2003 6:46 PM 2. Preparation 2.2 Wall mounting the charger The charger can be wall mounted. Install screws (1) using the wall template below. Mount the charger (2), slide it down (3), then slide down to the right (4) until it is secured. 2.45 cm (31/32") 1 2 3 4 Wall Template 2.45 cm (31/32") For Fax Advantage assistance, call 1-800-435-7329.
0519_FPG381.book Page 20 Monday, May 19, 2003 6:46 PM 2. Preparation 2.3 Battery charge Place the handset on the charger for about 15 hours before initial use. L The CHARGE indicator (1) will light, a beep will sound and “Charging” will be displayed. – it should last up to 4.5 hours while in use (in conversation). – it should last up to about 11 days while not in use (off the charger). – it should last up to 3.5 hours while using the reception booster feature (page 34).
0519_FPG381.book Page 21 Monday, May 19, 2003 6:46 PM 2. Preparation 2.4 Selecting the way to use your fax machine Depending on your situation, you can select the way you prefer to use your fax machine in Quick Setup feature #00. You can print out the Quick Setup Guide as a reference. – Case 1: TAM/FAX (page 22) – Case 2: Distinctive Ring (1 phone line with 2 or more phone numbers) (page 23) – Case 3: TEL ONLY (page 24) – Case 4: FAX ONLY (page 26) {STOP} {SET} 1 2 {MENU} {A}{B} Press {MENU}.
0519_FPG381.book Page 22 Monday, May 19, 2003 6:46 PM 2. Preparation L If a fax calling tone is detected, the unit will receive the fax automatically. 2.5 Case 1: TAM/FAX 2.5.1 Your situation You wish to use this unit as a fax and answering machine. 2.5.2 How to setup Note: L Do not connect an answering machine to the same telephone line. If one is connected, set the automatic answer feature to OFF. L Do not subscribe to voice mail service as it may disturb fax reception.
0519_FPG381.book Page 23 Monday, May 19, 2003 6:46 PM 2. Preparation 2.6 Case 2: Distinctive Ring (1 phone line with 2 or more phone numbers) 2.6.1 Your situation You wish to use this unit to receive faxes using one phone number and to handle phone calls using another phone number. You must get an additional phone number by subscribing to your telephone company’s Distinctive Ring service. L Distinctive Ring service may be called Identa Ring service.
0519_FPG381.book Page 24 Monday, May 19, 2003 6:46 PM 2. Preparation 5 2.7 Case 3: TEL ONLY 2.7.1 Your situation You wish to use the fax machine and an extension telephone in a different room. Most incoming calls are phone calls and the fax machine is seldom used for fax reception. 2.7.2 How to setup Press {A} or {B} repeatedly to display the following. SELECT A SETUP =TEL ONLY [±] 6 Press {SET}. L The AUTO ANSWER indicator turns OFF. 7 Press {MENU}. 2.7.
0519_FPG381.book Page 25 Monday, May 19, 2003 6:46 PM 2. Preparation L The fax machine will start fax reception. Note: L To receive fax documents using the extension telephone, you must set the remote fax activation to ON (feature #41 on page 71) beforehand. For Fax Advantage assistance, call 1-800-435-7329.
0519_FPG381.book Page 26 Monday, May 19, 2003 6:46 PM 2. Preparation 2.8 Case 4: FAX ONLY 2.8.1 Your situation You wish to use the fax machine only for fax reception/transmission. 2.8.2 How to setup ON {SET} {A}{B} {MENU} {STOP} 1 2 Press {MENU}. Press {#} then {0}{0}. QUICK SETUP PRESS SET 3 Press {SET} PRINT SETUP? YES:SET/NO:STOP 4 Press {SET} again to print the Quick Setup Guide. L If you do not wish to print it, press {STOP}. 5 Press {A} or {B} repeatedly to display the following.
0519_FPG381.book Page 27 Monday, May 19, 2003 6:46 PM 2. Preparation Help Button Volume 2.9 Base unit help function 2.10 Adjusting handset volume The unit contains helpful information which can be printed for quick reference. Send guide: How to send faxes. (The information is announced by a voice guide and is not printed out.) Basic settings: How to set the date, time, your logo and fax number. {SAVE} {>}{e}{v} Feature list: How to program the features.
0519_FPG381.book Page 28 Monday, May 19, 2003 6:46 PM 2. Preparation 2.11 Adjusting base unit volume {SET} 2.11.4 Answering machine volume 9 levels (high to off) are available. While listening to recorded messages, press {A} or {B}. {A}{B} 2.11.1 Ringer volume 4 levels (high/medium/low/off) are available. While the unit is idle, press {A} or {B}. L If any documents are in the document entrance, you cannot adjust the ringer volume. Confirm that there are no documents in the entrance.
0519_FPG381.book Page 29 Monday, May 19, 2003 6:46 PM 2. Preparation 2. Press {*} repeatedly to display “PM”. Initial Programming 2.12 Date and time Date and time can be set using either the handset or the base unit. 2.12.1 Using the handset {SAVE} {>}{e}{v} {OFF} 6 Press the right soft key ({SAVE}). L If 3 beeps sound, the setting is not correct. Start again from step 4. 7 Press {OFF} to exit the program. To check the date and time Repeat steps 1 to 3. L The date and time will be displayed.
0519_FPG381.book Page 30 Monday, May 19, 2003 6:46 PM 2. Preparation Example: 10:15 PM (12 hour clock entry) 1. Press {1}{0} {1}{5}. M:| 08/D:10/Y:03 TIME: 10:15AM 2.13 Your logo The logo can be your company, division or name. 2. Press {*} repeatedly to display “PM”. M:| 08/D:10/Y:03 TIME: 10:15PM 6 Press {SET}. L The next feature will be displayed. L If 3 beeps sound, the setting is not correct. Start again from step 4. 7 Press {MENU} to exit the program.
0519_FPG381.book Page 31 Monday, May 19, 2003 6:46 PM 2. Preparation Buttons Characters {6} m n o M N O 6 {7} p q r s P Q R S {8} t u v T U V 8 {9} w x y z W X Y {0} 0 (Space) {STOP} Delete button Display order of characters 7 Lower-case alphabet : Pressing {A} Z 9 Note: L To enter another character located on the same dialing button, press {>} to move the cursor to the next space. Number : Pressing {B} Symbol Capital alphabet To enter your logo Example: “BILL” 1.
0519_FPG381.book Page 32 Monday, May 19, 2003 6:46 PM 2. Preparation Option 2.14 Your fax number 2.15 Registration of additional handsets You can expand this unit by adding up to 7 additional handsets. A maximum of 8 handsets can be registered at the base unit. Generally a maximum of 3 extensions can operate at a time. If 3 other extensions are in use, such as conducting an external/internal call, you may not be able to use your unit. {STOP} {SET} 1 {MENU} {<}{>} Press {MENU}.
0519_FPG381.book Page 33 Monday, May 19, 2003 6:46 PM 2. Preparation being used. Registration must be completed within 1 minute. {MUTE} {OK} Example: Extension number 2 Note: L To stop registration, press {OFF} on the handset and press {MUTE} on the base unit. L To cancel a handset registration, see page 77. L To re-register a handset to a different base unit of the same model, see page 77.
0519_FPG381.book Page 34 Monday, May 19, 2003 6:46 PM 3. Telephone 3 Telephone Making and Answering Calls 3.1 Making phone calls 3.1.1 Using the handset {MUTE} {<}{>}{e}{v} {TALK} {OFF} {SP-PHONE} {HOLD/CLEAR} {PAUSE/REDIAL} 1 Lift the handset and press {TALK}. IN USE PRIVACY 2 3 MUTE Dial the telephone number. When finished talking, press {OFF} or place the handset on the charger. Note: L To use the “PRIVACY” (call privacy) feature using the soft key (page 10), see page 48.
0519_FPG381.book Page 35 Monday, May 19, 2003 6:46 PM 3. Telephone 2. Press {v} or {e} repeatedly to select the number. L You can also scroll through the list by pressing {PAUSE/REDIAL}. L To delete the displayed number, press {HOLD/CLEAR}. L To exit the list, press {OFF}. 3. Press {TALK} or {SP-PHONE}. 3.1.2 Using the base unit L “SP-PHONE MUTE” will be displayed. L To release the mute, press {MUTE}. To put a call on hold Press {HOLD}. L “HOLD” will be displayed.
0519_FPG381.book Page 36 Monday, May 19, 2003 6:46 PM 3. Telephone setting is OFF. To activate this feature, see page 74. 3.3.1 Using the handset 3.2.2 Using the base unit {SAVE} {<}{>}{v} {OFF} {HOLD/CLEAR} {CONF/FUNCTION} Make sure the handset is not being used. 1 2 Press {CONF/FUNCTION}. 3 Enter up to 16 characters for a name. See the character table on page 36 for details. 4 5 Press {v}. 6 7 Press {v}. 8 Press {OFF}. Press {>} at “Save directory”.
0519_FPG381.book Page 37 Monday, May 19, 2003 6:46 PM 3. Telephone Buttons Characters {0} 0 {HOLD/ CLEAR} Delete button (Space) Note: L To enter another character located on the same dialing button, press {>} to move the cursor to the next space. To correct a mistake 1. Press {<} or {>} to move the cursor to the incorrect character/number. 2. Press {HOLD/CLEAR}. L To erase all of the digits, press and hold {HOLD/CLEAR}. 3. Enter the correct character/number. 3.3.
0519_FPG381.book Page 38 Monday, May 19, 2003 6:46 PM 3. Telephone 3.4.2 Using the base unit 1 2 Press {<} or {>}. 3 Press {DIGITAL SP-PHONE}. L The unit will start dialing automatically. Press {A} or {B} repeatedly to display the desired item. To search for a name by initial Example: “LISA” 1. Press {<} or {>}. 2. Press {A} or {B} to initiate the directory. 3. Press {5} repeatedly to display any name with the initial “L” (see the character table, page 30).
0519_FPG381.book Page 39 Monday, May 19, 2003 6:46 PM 3. Telephone 8 3.7 Copying the directory You can copy one or all of the directory items between a handset and the base unit or between two handsets. Items copied to the destination unit are added to its directory (Phone directory sharing). L Keep the front cover page open for button locations. Important: L Make sure the base unit, your handset and the destination unit are not being used when copying directory items.
0519_FPG381.book Page 40 Monday, May 19, 2003 6:46 PM 3. Telephone L The destination handset display will show “Directory Receiving”, then “Directory Received”. L To copy another item, repeat steps 7 and 8. 9 Press {MENU}. Copying all the directory items 1 2 3 Press {MENU}. Press {#}, then {5}{9}. Press {A} or {B} repeatedly to display “ALL ITEMS”. 4 5 Press {SET}. 6 Press {SET}. L The base unit display will show the items being copied.
0519_FPG381.book Page 41 Monday, May 19, 2003 6:46 PM 3. Telephone 1 3.9 Viewing and calling back using caller information If the unit has received new calls, the following will be displayed while the unit is not in use: Press {v} or {e}. Example: 2 Handset display: (When on the charger) Press {v} to search from the most recent call. Press {e} to search from the oldest call.
0519_FPG381.book Page 42 Monday, May 19, 2003 6:46 PM 3. Telephone L After checking “×2” to “×9” will be replaced with a “,”. To stop viewing Press {OFF} after step 2 on page 41. To edit a telephone number You can edit a phone number into one of 3 patterns to call back or store it into the directory. Make sure the handset is not being used. Press the right soft key ({EDIT}) repeatedly after step 2 on page 41.
FPG381.book Page 43 Tuesday, May 20, 2003 4:58 PM 3. Telephone To edit a telephone number You can edit a phone number into one of 3 patterns to call back or store it into the directory. Press {*} repeatedly after step 2 on page 42.
0519_FPG381.book Page 44 Monday, May 19, 2003 6:46 PM 3. Telephone 1 Press {v} or {e}. – The caller information does not include a telephone number. 3.12.1 Into the handset 2 3 Press {HOLD/CLEAR}. L To cancel erasing, press {<}, then {OFF}. L Keep the front cover page open for button locations. Make sure the handset is not being used. 1 Press {v} or {e} repeatedly to display the desired item. L If the number requires editing, press the right soft key ({EDIT}) (page 42). 2 Press {>}.
0519_FPG381.book Page 45 Monday, May 19, 2003 6:46 PM 3. Telephone 3 4 Press {MENU}. 5 Press {SET}. L To edit a number, see page 38. 3 When the paged party answers, talk into the microphone. 6 Press {SET}. 4 To end the intercom, press {DIGITAL SPPHONE} or {LOCATOR/INTERCOM}. If a name is required, enter up to 16 digits for the name (page 30). Note: L To print the Caller ID list, see page 93. Other features 3.
0519_FPG381.book Page 46 Monday, May 19, 2003 6:46 PM 3. Telephone displayed. Press {TALK}, {SP-PHONE} or {INTERCOM/TRANSFER} to answer the page. Example: Handset 1 is calling 3.14 Transferring a call A telephone call can be transferred between two extensions using the intercom feature. L Keep the front cover page open for button locations. 3.14.1 To transfer a call from the handset 1 During a phone call, press {INTERCOM/TRANSFER}. L “IN USE” will flash on the display and the call will be put on hold.
0519_FPG381.book Page 47 Monday, May 19, 2003 6:46 PM 3. Telephone – If the paging party hangs up before you answer the page, “Incoming call” will be displayed. Press {TALK} or {SP-PHONE} to take the transferred call. During a transfer L If you do not announce the transfer and the paged party does not answer within 1 minute after you hang up, your extension will ring and the transferred call will be returned to you. If you still do not answer the call within 4 minutes, the call will be disconnected.
0519_FPG381.book Page 48 Monday, May 19, 2003 6:46 PM 3. Telephone 3.16.2 To prevent other users from joining your conversation (Call privacy feature) You can turn the feature ON during a call. Handset: Press the left soft key ({PRIVACY}) during a phone call. L “PRIVACY” will be displayed on the first line. L To turn the feature OFF, press the left soft key ({PRIVACY}) again. Base unit: Press {PRIVACY} during a phone call. L The PRIVACY indicator turns ON. L To turn the feature OFF, press {PRIVACY} again.
0519_FPG381.book Page 49 Monday, May 19, 2003 6:46 PM 3. Telephone 2. Press {v} or {e} repeatedly to select “Off”. Note: L If the room monitor feature of the destination unit is OFF, “DENIED” will be displayed and busy tone will sound. 3. Press the right soft key ({SAVE}). 3.18.2 To call another handset 3.
0519_FPG381.book Page 50 Monday, May 19, 2003 6:46 PM 4. Fax 4 Fax Sending Faxes 4.1 Sending a fax manually 1 2 – “PHOTO”: For originals containing photographs, shaded drawings, etc. L Using the “FINE”, “SUPER FINE” and “PHOTO” settings will increase transmission time. L If the resolution setting is changed during feeding, it will be effective from the next page. To redial the last number 1. Press {REDIAL/PAUSE}. 2. Press {FAX/START}.
0519_FPG381.book Page 51 Monday, May 19, 2003 6:46 PM 4. Fax Sending a fax with the voice guide You can send documents by following the voice guide. 1. Press {HELP} 2 times. 2. Press {SET}. 3. Follow the voice guide. L After transmission, the voice guide will turn OFF automatically. Sending report for confirmation A sending report provides you with a printed record of transmission results. To use this feature, activate feature #04 (page 68). For an explanation of error messages, see page 79.
0519_FPG381.book Page 52 Monday, May 19, 2003 6:46 PM 4. Fax 2 Insert the document (up to 10 pages) FACE DOWN until a single beep is heard and the unit grasps the document. 3 If necessary, press {A} or {B} repeatedly to select the desired resolution (page 50). 4 5 Press {>}. Press {A} or {B} repeatedly to display the desired item and press {FAX/START}. Fax auto redial If the line is busy or if there is no answer, the unit will automatically redial the number up to 2 times.
0519_FPG381.book Page 53 Monday, May 19, 2003 6:46 PM 4. Fax 4 Press {A} or {B} repeatedly to display “”. 5 Press {SET}. L The document will be fed into the unit and scanned into memory. The unit will then transmit the data to each party, calling each number sequentially. L After transmission, the stored document will be erased automatically, and the unit will automatically print a broadcast sending report. Receiving Faxes 4.5 Receiving a fax manually (AUTO ANSWER OFF) 4.5.
0519_FPG381.book Page 54 Monday, May 19, 2003 6:46 PM 4. Fax How to receive calls/faxes with the base unit 1. Press {DIGITAL SP-PHONE} to answer the call. 2. When: – document reception is required, – a fax calling tone (slow beep) is heard, or – no sound is heard, press {FAX/START}. CONNECTING..... L The unit will start fax reception. L If you do not answer the call within 15 rings, the unit will temporarily activate the answering machine.
0519_FPG381.book Page 55 Monday, May 19, 2003 6:46 PM 4. Fax press {A} or {B} repeatedly to display the desired setting, and press {SET}. L The AUTO ANSWER indicator turns ON. L The remaining time for recording messages will be displayed. Note: L The maximum recording time allowed for each message can be changed (feature #10 on page 69, or page 75). L While an incoming call is being recorded, you can monitor it through the speaker. If this feature is not required, set feature #67 to OFF (page 72).
0519_FPG381.book Page 56 Monday, May 19, 2003 6:46 PM 5. Distinctive Ring 5 Distinctive Distinctive Ring Ring 5.1 Distinctive Ring service from your phone company This service is convenient if you wish to have a different number for your fax machine and telephone, even when you use them on a single telephone line. Distinctive Ring is a service offered by your local telephone company which allows you to use several telephone numbers on one telephone line.
0519_FPG381.book Page 57 Monday, May 19, 2003 6:46 PM 5. Distinctive Ring Ring pattern Settings in feature #32 Other triple ring (short-shortlong rings) D 1st ring 2nd ring 5.4 Programming the ring pattern assigned for fax L Keep the front cover page open for button locations. 1 2 3 4 Set feature #31 to “ON” (page 56). 5 6 Press {SET}. Press {MENU}. Press {#}, then {3}{2}. Press {A} or {B} repeatedly to select the ring pattern assigned for fax.
0519_FPG381.book Page 58 Monday, May 19, 2003 6:46 PM 6. Copy 6 Copy Copying 6.1 Making a copy 1 2 Quick scan feature This feature is helpful when you want to copy a document, but do not want to wait for the unit to print the copy because you need the document for other uses. The unit can scan a document into memory, release the original document, then print the copy. To use this feature, activate feature #34 (page 70). L The document will be fed into the unit and scanned into memory.
0519_FPG381.book Page 59 Monday, May 19, 2003 6:46 PM 6. Copy Setting Recording paper size Original document size 100% (default) Letter Letter Legal Letter, A4, Legal A4 A4, Letter 92% Letter A4 86% Letter A4 72% Letter Legal A4 Legal becomes full while storing, the unit will only print out the stored pages. L After copying, the collating feature will turn OFF automatically.
0519_FPG381.book Page 60 Monday, May 19, 2003 6:46 PM 7. Answering Machine L If the caller does not enter a mailbox number, the message will be recorded in mailbox 1. 7 Answering Voice MailboxMachine 7.1 Mailbox features This unit provides 3 mailboxes (mailbox 1, 2, 3) for recording voice messages. Callers using a touch tone phone can leave a message in a specific mailbox by entering a mailbox number. Callers who use rotary phones or do not specify a mailbox can leave messages in mailbox 1.
0519_FPG381.book Page 61 Monday, May 19, 2003 6:46 PM 7. Answering Machine 7.2 Recording your greeting message You can record your own greeting message for TAM/FAX mode, for a maximum of 16 seconds (default) or 60 seconds in length. We recommend you record a message of less than 12 seconds to make it easier to receive faxes. If a greeting message is not recorded, one of two pre-recorded greetings will be played when a call is received (page 61). Suggested message: “This is (your name).
0519_FPG381.book Page 62 Monday, May 19, 2003 6:46 PM 7. Answering Machine Mailbox 3 has no messages. Memo Message 7.3 Leaving a message for others or yourself You can record a voice memo to leave a private message for yourself or someone else. L Keep the front cover page open for button locations. 1 Press {MEMO}. L The unit will announce “Please select mailbox.”. 2 Within 5 seconds, press a {MAILBOX} button ({MAILBOX 1}, {MAILBOX 2} or {MAILBOX 3}). L A long beep will sound.
0519_FPG381.book Page 63 Monday, May 19, 2003 6:46 PM 7. Answering Machine messages. All message playback”, and will play back all messages in the mailbox. When mailbox 2 or 3 has the password 1 2 Press {MAILBOX 2} or {MAILBOX 3}. L The unit will announce “Enter mailbox password” and “PASSWORD=” will be displayed. Enter the mailbox password (feature #51 on page 71, feature #52 on page 71, or page 76). L The unit will announce “Mailbox (no.
0519_FPG381.book Page 64 Monday, May 19, 2003 6:46 PM 7. Answering Machine L The mailboxes that have new messages will flash. the caller to press # and the intended mailbox number before the transfer. 1 Press {INTERCOM/TRANSFER} on the handset or press {TRANSFER} on the base unit. L The call will be put on hold. L “IN USE” will flash on the handset. 2 Press {9} to hang up the call. L After you press {9}, the caller can then access a mailbox and leave a message there (page 60).
0519_FPG381.book Page 65 Monday, May 19, 2003 6:46 PM 7. Answering Machine To switch to another mailbox Press {#} and the mailbox number ({1}, {2} or {3}) during the remote operation. 7.5.2 Remote operation using the direct commands {1} Repeat (During playback) L The current message is repeated. L If pressed within 5 seconds of playback, the previous message will be played. L You can also press {<} to repeat a message. {2} Skip (During playback) L The current message is skipped.
0519_FPG381.book Page 66 Monday, May 19, 2003 6:46 PM 7. Answering Machine Remote Operation 7.6 Operating from a remote location You can call your unit from a remote location and access the answering machine. Important: L Program the remote operation ID beforehand (feature #11 on page 69, or page 76). L Set the unit to TAM/FAX mode before going out (page 54). L Use a touch tone telephone for remote operations. Helpful hints: L When you press a button, press firmly.
0519_FPG381.book Page 67 Monday, May 19, 2003 6:46 PM 7. Answering Machine 7.6.2 Remote operations following voice menu During remote operation, the unit will provide voice prompts in the following order. 1 “Press 1 to play back all messages. Press 2 for other functions.” {1}: All recorded messages in the mailbox will be played back. {2}: Voice prompt 2 is announced. 2 “Press 1 to play back new messages. Press 2 for other functions.” {1}: Only new messages in the mailbox will be played back.
0519_FPG381.book Page 68 Monday, May 19, 2003 6:46 PM 8. Programmable Features 8 Programmable Features (Base Unit) Features 8.1 Base unit programming 5 Press {A} or {B} repeatedly to display the desired setting. L This step may be slightly different depending on the feature. 6 Press {SET}. L The setting you selected is set, and the next feature will be displayed. 7 To exit programming, press {MENU}. 8.1.
0519_FPG381.book Page 69 Monday, May 19, 2003 6:46 PM 8. Programmable Features “ERROR” (default): A sending report will be printed only when fax transmission fails. “ON”: A sending report will be printed out after every transmission. “OFF”: Sending reports will not be printed out. Code #06: Changing the ring setting in FAX ONLY mode FAX RING COUNT RINGS=3 [±] To change the number of rings before the unit answers a call in FAX ONLY mode. You can select “1”, “2”, “3” (default) or “4”.
0519_FPG381.book Page 70 Monday, May 19, 2003 6:46 PM 8. Programmable Features transmission, the unit will return to the previous setting. “ERROR” (default): When the previous fax transmission fails and you wish to re-send the document automatically. “OFF”: Deactivates this feature. Note: L This feature is not available for broadcast transmission. L The calling charge may be higher as the transmission speed is slowed down.
0519_FPG381.book Page 71 Monday, May 19, 2003 6:46 PM 8. Programmable Features “DARKER”: Used when the display contrast is too light. Note: L To change the handset display contrast, see page 74. Code #41: Changing the fax activation code FAX ACTIVATION MODE=ON [±] If you use an extension telephone and wish to use it to receive a fax, activate this feature and program the activation code. 1. Press {MENU}. 2. Press {#}, then {4}{1}. 3. Press {A} or {B} repeatedly to select “ON”. 4. Press {SET}. 5.
0519_FPG381.book Page 72 Monday, May 19, 2003 6:46 PM 8. Programmable Features L You will be able to access the mailbox without entering the password. Note: L You can also program this feature with the handset (page 76). Code #54: Changing the recording time for your TAM/FAX greeting message GREETING TIME MODE=16s [±] “16s” (default): Maximum recording time is 16 seconds. “60s”: Maximum recording time is 60 seconds. See page 61 for details.
0519_FPG381.book Page 73 Monday, May 19, 2003 6:46 PM 8.
0519_FPG381.book Page 74 Monday, May 19, 2003 6:46 PM 8. Programmable Features Helpful hints: L To exit programming, press {OFF} any time. Setting ringer tone for external calls To set the handset ringer tone from one of 6 patterns for external calls. You can select “1” (default), “2”, “3”, “4”, “5” or “6”. Make sure the handset is not being used. 1. Press {CONF/FUNCTION}. 2. Scroll to “Ringer setting” by pressing {v} or {e}, and press {>}. 3. Scroll to “Ringer tone” by pressing {v} or {e}, and press {>}.
0519_FPG381.book Page 75 Monday, May 19, 2003 6:46 PM 8. Programmable Features “Pulse”: For rotary pulse dial service. Make sure the base unit and the handset are not being used. 1. Press {CONF/FUNCTION}. 2. Scroll to “Initial setting” by pressing {v} or {e}, and press {>}. 3. Scroll to “Set tel line” by pressing {v} or {e}, and press {>}. 4. Press {>} at “Set dial mode”. 1. Press {CONF/FUNCTION}. 2. Scroll to “Initial setting” by pressing {v} or {e}, and press {>}. 3.
0519_FPG381.book Page 76 Monday, May 19, 2003 6:46 PM 8. Programmable Features 3. Scroll to “Set answering” by pressing {v} or {e}, and press {>}. 4. Scroll to “Recording time” by pressing {v} or {e}, and press {>}. 5. Select the mailbox by pressing {e} (“Mailbox2”) or {v} (“Mailbox3”). L If the password has previously been assigned to the mailbox, it is displayed. 5. Press {v} or {e} repeatedly to select the desired setting.
0519_FPG381.book Page 77 Monday, May 19, 2003 6:46 PM 9. Option 9 Option Multi - Units 9.1 Canceling the handset registration 9.2 Re-registering the handset If you no longer need to use the handset or if you need to register the handset to a different base unit of the same model, it may be necessary to cancel the registration. Only one handset can be canceled at a time near the base unit. Make sure the handset and the base unit are not being used. L Keep the front cover page open for button locations.
0519_FPG381.book Page 78 Monday, May 19, 2003 6:46 PM 9. Option Example: Extension number 2 Note: L To stop registration, press {OFF} on the handset and press {MUTE} on the base unit. L If you have not canceled the handset registration at the previous base unit (page 77), the handset number still remains on that base unit memory. To erase the handset number from the previous base unit, see the base unit operating instructions. For this base unit: 1. Press {MENU}. 2. Press {MUTE}. 3. Press {SET}. 4.
0519_FPG381.book Page 79 Monday, May 19, 2003 6:46 PM 10. Help 10 Help 10For Error Messages Fax Advantage assistance, call 1-800-435-7329. 10.1 Error messages – Reports If a problem occurs during fax transmission or reception, one of the following communication messages will be printed on the sending and journal reports (page 51). COMMUNICATION ERROR (Code: 40-42, 46-72, FF) L A transmission or reception error occurred. Try again or check with the other party.
0519_FPG381.book Page 80 Monday, May 19, 2003 6:46 PM 10. Help L The recording paper was not fed into the unit properly (page 89). Reinstall paper (page 15) and press {SET} to clear the message. L The recording paper has jammed near the recording paper entrance. Clear the jammed paper (page 89) and press {SET} to clear the message. COVER OPEN b CHECK FILM L The covers are open. Close them. L The film is empty. Replace the film with a new one (page 14). L The ink film is not installed.
0519_FPG381.book Page 81 Monday, May 19, 2003 6:46 PM 10. Help L You tried to copy your directory items to a handset, but your directory was empty. OPEN CABINET CHECK FILM SLACK L You tried to view caller information while a handset user is operating the answering machine remotely. TRANSMIT ERROR b OPEN CABINET CHECK FILM TYPE L The ink film is slack or creased. Tighten it (see step 5 on page 13).
0519_FPG381.book Page 82 Monday, May 19, 2003 6:46 PM 10. Help L There is no space to store new items in navigator directory. Erase unnecessary items (page 38). L You tried to copy your directory items to another extension, but your directory is empty. L When you tried to register or unregister the handset, the handset and the base unit could not link for some reason, such as interference from other electrical appliances.
0519_FPG381.book Page 83 Monday, May 19, 2003 6:46 PM 10. Help L When you tried to call another handset in the 2-way radio mode; – the handset was too far from your handset. Walk closer to the handset. – 2-way radio mode on the other handset is OFF (page 49). – The called handset was talking with another handset in the 2-way radio mode. I cannot make calls. L The dialing mode setting is wrong. Change the setting (feature #13 on page 69, or page 74). The unit does not work.
0519_FPG381.book Page 84 Monday, May 19, 2003 6:46 PM 10. Help – password for mailbox 2: feature #51 on page 71, or page 76, – password for mailbox 3: feature #52 on page 71, or page 76. L You entered a one-digit number for the password of mailbox 2 or 3. Enter 2-digit number (00–99) (feature #51 on page 71, feature #52 on page 71, or page 76). The ink film runs out quickly. L The help printing function, copy function, and reports also use ink film. The unit beeps.
0519_FPG381.book Page 85 Monday, May 19, 2003 6:46 PM 10. Help The handset stops working while being used. L Place the handset on the charger, and disconnect the power cord to reset the unit. Connect the power cord, and try again. I cannot store an item in the navigator directory. L You cannot store an item in the directory while the handset is in the talk, speakerphone, intercom or room monitor mode, 2-way radio mode or in the remote operation mode. L Do not pause for over 1 minute while storing.
0519_FPG381.book Page 86 Monday, May 19, 2003 6:46 PM 10. Help 10.3.4 Fax – sending I cannot send documents. L The other party’s fax machine is busy or has run out of recording paper. Try again. L The other party’s machine is not a fax machine. Check with the other party. L The other party’s fax machine rings too many times. Send the fax manually (page 50). I cannot send a fax overseas. L Use the overseas transmission mode (feature #23 on page 69).
0519_FPG381.book Page 87 Monday, May 19, 2003 6:46 PM 10. Help L The unit is not in TAM/FAX or FAX ONLY mode. Select the desired mode using feature #77 (page 73) and press {AUTO ANSWER} repeatedly until TAM/FAX or FAX ONLY mode is displayed. I cannot select the desired receiving mode. L If you want to set TAM/FAX or FAX ONLY mode: – select the desired mode using feature #77 (page 73), and – press {AUTO ANSWER} repeatedly until the desired mode is displayed.
0519_FPG381.book Page 88 Monday, May 19, 2003 6:46 PM 10. Help Release the back cover by pushing in the green lever (2) in the unit. – if a call is transferred to a mailbox, and the caller leaves a message (page 63), or – if the same caller calls again (page 40). 10.3.8 If a power failure occurs L The unit will not function. L The unit is not designed for making emergency telephone calls when the power fails. Alternative arrangements should be made for access to emergency services.
0519_FPG381.book Page 89 Monday, May 19, 2003 6:46 PM 10. Help 5 Turn the gear of the blue core (1) in the direction of the arrow until the white core (2) begins to turn. sides (2). Then close the front cover securely (3). 2 2 1 3 1 L Make sure that the ink film is wrapped around the blue core (3) at least once. 7 Remove the recording paper and straighten. Pull the tension plate forward (1) and insert the paper. Then push the tension plate back.
0519_FPG381.book Page 90 Monday, May 19, 2003 6:46 PM 10. Help paper. Push the tension plate back, then press {SET} to clear the message. 2 Close the front cover securely (1). 1 {SET} Note: L Do not pull out the jammed paper forcibly before opening the front cover. 1 10.5 Document jams – sending 1 Open the front cover (1) by pulling up the center part (2). Remove the jammed document carefully (3). 2 Cleaning 10.
0519_FPG381.book Page 91 Monday, May 19, 2003 6:46 PM 10. Help 2 Open the front cover (1) by pulling up the center part (2). 4 Close the front cover securely (1). 2 1 1 5 3 Clean the document feeder rollers (1) and rubber flap (2) with a cloth moistened with isopropyl rubbing alcohol, and let all parts dry thoroughly. Clean the glass (3) with a soft, dry cloth. Caution: L Do not use paper products, such as paper towels or tissues. 2 1 Connect the power cord and the telephone line cord. 10.
0519_FPG381.book Page 92 Monday, May 19, 2003 6:46 PM 10. Help Release the back cover by pushing in the green lever (2) in the unit. Caution: L To prevent a malfunction due to static electricity, do not use a dry cloth and do not touch the thermal head directly. 1 1 2 4 Open the back cover (1). Remove the ink film (2). 6 Reinstall the ink film and close the covers (see steps 4 to 6 on page 13). 7 Connect the power cord and the telephone line cord.
0519_FPG381.book Page 93 Monday, May 19, 2003 6:46 PM 11. General Information 11 General Printed Reports Information 11.1 Reference lists and reports (Base unit only) You can print out the following lists and reports for your reference. Setup list: Provides you with the current settings of the base unit programming features (page 68 to page 73). Telephone number list: Provides you with names and numbers which are stored in the navigator directory of the base unit.
0519_FPG381.book Page 94 Monday, May 19, 2003 6:46 PM 11. General Information 11.2 Technical data about this product 11.2.1 Base unit Applicable lines: Document size: Effective scanning width: Effective printing width: Public Switched Telephone Network Max. 216 mm (81/2") in width, Max. 600 mm (235/8") in length 208 mm (83/16") Letter/Legal: 208 mm (83/16") A4: 202 mm (715/16") *1 Transmission speed : Approx. 15 s/page (Original mode)*2 Scanning density: Horizontal: 8 pels/mm (203 pels/inch) Vertical: 3.
0519_FPG381.book Page 95 Monday, May 19, 2003 6:46 PM 11. General Information ITU-T No. 1 Test Chart Paper specifications Recording paper size: Recording paper weight: Letter: 216 mm × 279 mm (81/2" × 11") Legal: 216 mm × 356 mm (81/2" × 14") A4: 210 mm × 297 mm (81/4" × 1111/16") 60 g/m2 to 90 g/m2 (16 lb. to 24 lb.
0519_FPG381.book Page 96 Monday, May 19, 2003 6:46 PM 11. General Information 11.2.3 Charger unit Operating environment: Dimentions: Mass (Weight): Power consumption: Power supply: 5°C – 40°C (41°F – 104°F) Approx. height 60 mm × width 74 mm × depth 96 mm (211/32" × 229/32" × 225/32") Approx. 95 g (0.21 lb.) Standby: Approx. 0.8 W Maximum: Approx. 4.0 W AC adaptor (120 V AC, 60 Hz) Note: L Any details given in these instructions are subject to change without notice.
0519_FPG381.book Page 97 Monday, May 19, 2003 6:46 PM 11. General Information FCC and Other Information 11.3 FCC and Other Information This equipment complies with Part 68 of the FCC rules and the requirements adopted by the ACTA. On the rear of this equipment is a label that contains, among other information, a product identifier in the format US:ACJ----------. If requested, this number must be provided to the telephone company. • Registration No .....
0519_FPG381.book Page 98 Monday, May 19, 2003 6:46 PM 11. General Information CAUTION: Any changes or modifications not expressly approved by the party responsible for compliance could void the user’s authority to operate this device. NOTE: This equipment has been tested and found to comply with the limits for a Class B digital device, pursuant to Part 15 of the FCC Rules. These limits are designed to provide reasonable protection against harmful interference in a residential installation.
0519_FPG381.book Page 99 Monday, May 19, 2003 6:46 PM 11. General Information Limited Warranty 11.4 Limited Warranty PANASONIC CONSUMER ELECTRONICS COMPANY, DIVISION OF MATSUSHITA ELECTRIC CORPORATION OF AMERICA One Panasonic Way, Secaucus, New Jersey 07094 PANASONIC SALES COMPANY, DIVISION OF MATSUSHITA ELECTRIC OF PUERTO RICO, INC., Ave. 65 de Infantería, Km. 9.
0519_FPG381.book Page 100 Monday, May 19, 2003 6:46 PM 11. General Information Some states do not allow the exclusion or limitation of incidental or consequential damages, or limitations on how long an implied Limited Warranty lasts, so the exclusions may not apply to you. This Limited Warranty gives you specific legal rights and you may also have other rights which vary from state to state.
0519_FPG381.book Page 101 Monday, May 19, 2003 6:46 PM 11. General Information Customer Services 11.5 Customer Services directory To obtain service or technical assistance during the warranty period, please contact:1-800-HELP-FAX (1-800-435-7329), Monday-Friday 9am-8pm EST. To obtain support or service after the warranty has expired, please contact: 1-900-555-PANA (1-900-555-7262) for support on a fee basis. For hearing or speech impaired TTY users, TTY: 1-866-741-6422 Web Site: www.panasonic.
0519_FPG381.book Page 102 Monday, May 19, 2003 6:46 PM 12. Index 12. Index 12.
0519_FPG381.book Page 103 Monday, May 19, 2003 6:46 PM 12.
FPG381.book Page 104 Tuesday, May 20, 2003 4:58 PM KX-FPG381 Proof of Purchase Panasonic FAX ADVANTAGE PROGRAM Free peace of mind, direct from Panasonic NO EXTRA COST FAX ADVANTAGE PROGRAM ■ ■ 6-month limited warranty 1: parts, labor, and toll-free help line 2 Free replacement 3 and repair program The Panasonic Fax Advantage Consumer Service Program. Panasonic knows that if your fax machine is not up and running, neither is your business. That’s why we created the Panasonic Fax Advantage Program.