Operating Instructions Home Network System Keychain Remote Model No. KX-HNK102 Thank you for purchasing a Panasonic product. This document explains how to operate the keychain remote properly. For details about how to use the system, refer to the User’s Guide (page 12). Please read this document before using the unit and save it for future reference. For assistance, please contact us at 1-800-272-7033 or visit our Web site: http://shop.panasonic.com/support for customers in the U.S.A.
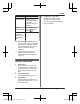
Table of Contents Important Information Accessory information ...............3 About this system ......................4 For your safety ...........................4 Important safety instructions ......5 For best performance ................5 Other information .......................6 Setup Part names and functions ..........8 LED indicator .............................8 Setup overview ..........................9 Inserting the battery .................10 Attaching the key ring ..............
Important Information Accessory information Supplied accessories No. Accessory item/Part number A Battery*1 1 B Key ring/PNGX1035Z 1 *1 Quantity When replacing the battery, refer to the battery specifications noted under “Power source” on page 13. B A Other information R Design and specifications are subject to change without notice. R The illustrations in these instructions may vary slightly from the actual product. Trademarks R iPhone and iPad are registered trademarks of Apple Inc.
Important Information About this system R This system is an auxiliary system; it is not designed to provide complete protection from property loss. Panasonic will not be held responsible in the event that property loss occurs while this system is in operation. R The system’s wireless features are subject to interference, therefore functionality in all situations cannot be guaranteed.
Important Information thoroughly with water, and then consult a doctor. CAUTION CR Lithium battery R Use only the battery noted on page 3. R Insert the battery correctly. R Do not leave the battery in an automobile exposed to direct sunlight for a long period of time with the doors and windows closed. R Remove the battery if you do not use the product for a long period of time. Keep it in a cool, dark area. R Do not replace a battery with wet hands. R Keep out of the reach of small children.
Important Information antennas of mobile phone cell stations. (Avoid putting the hub on a bay window or near a window.) R If the reception for a hub location is not satisfactory, move the hub to another location for better reception. Information on Disposal in other Countries outside the European Union Environment R Keep the product away from electrical noise generating devices, such as fluorescent lamps and motors.
Important Information Notice For assistance, please visit http://shop.panasonic.com/support HNK102_(en_en)_0120_ver.101.
Setup LED indicator Part names and functions (Arm: Away) button Arms the alarm system using the [Arm: Away] mode. n Front view (disarm) button A B Disarms the alarm system. (smart) button Used to turn on a smart plug, trigger the alarm system, etc. Battery cover lock Battery cover M N Used to register the keychain remote to the hub. Key ring eyelet Key ring C D LED indicator You can use the LED indicator to confirm the remote’s status.
Setup Indicator Status Red, blinking Remote is out of range of the hub, or could not communicate with the hub Green, blinking slowly Registration mode (you pressed and held M N) Repeating pattern of blinking green and blinking red Low battery *1 *2 4 Confirm the usage area Read the information in this document to confirm that the desired usage area is suitable to proper operation. The LED lights for about 2 seconds after a button is pressed, then turns off.
Setup Inserting the battery R USE ONLY a CR2 Lithium battery. R Confirm the polarities ( , ). R Using a metal object to open the lock may scratch the lock. 1 Remove the battery cover. R Insert a thin, flat object into the battery cover lock and rotate it to the “unlocked” position, as shown below. Locked 3 Attach and lock the battery cover. R After attaching the battery cover, rotate the lock to the “locked” position. Attaching the key ring Attach the key ring to the remote as shown.
Setup Registering the remote This procedure is not required for devices that were included as part of a bundle. Before you can use the remote, it must be registered to the hub. If you purchased devices separately (i.e., not as part of a bundle), you must register each device to the hub. You can register each device by using the registration buttons or the [Home Network] app. Using registration buttons 1 Hub: 2 OTHER Press and hold M DEVICEN until the LED indicator blinks slowly in green.
Appendix Using the remote Changing the arm mode Press the desired arm mode button. R The LED indicator lights for about 2 seconds according to the arm mode (page 8). R When the arm mode is changed with the keychain remote, the arm mode icons displayed on the app will not be automatically changed. The displayed arm mode icons will be updated when the app refreshes the home screen.
Appendix R You can also access the User’s Guide at the web page listed below. www.panasonic.net/pcc/support/tel/ homenetwork/manual/ Specifications R Standards DECT (Digital Enhanced Cordless Telecommunications) R Frequency range DECT: 1.92 GHz – 1.93 GHz R RF transmission power DECT: 115 mW (max.) R Power source Lithium battery CR2 (CR15H270) (1 ´ 3.0 V, 850 mAh) R Operating conditions 0 °C – 40 °C (32 °F – 104 °F) R Battery life Approx.
Appendix FCC and other information This device complies with Part 15 of the FCC Rules. Operation is subject to the following two conditions: (1) This device may not cause harmful interference, and (2) this device must accept any interference received, including interference that may cause undesired operation. Privacy of communications may not be ensured when using this device.
Appendix Customer services Shop Accessories! for all your Panasonic gear Go to h!p://shop.panasonic.com/support Get everything you need to get the most out of your Panasonic products Accessories & Parts for your Camera, Phone, A/V products, TV, Computers & Networking, Personal Care, Home Appliances, Headphones, Ba!eries, Backup Chargers & more… Customer Services Directory For Product Informa"on, Opera"ng Assistance, Parts, Owner’s Manuals, Dealer and Service info go to h!p://shop.panasonic.
Appendix Limited Warranty (ONLY FOR U.S.A.
Appendix Limited Warranty Limits and Exclusions This warranty ONLY COVERS failures due to defects in materials or workmanship, and DOES NOT COVER normal wear and tear or cosmetic damage.
Notes 18 HNK102_(en_en)_0120_ver.101.
Notes 19 HNK102_(en_en)_0120_ver.101.
IMPORTANT! If your product is not working properly. . . A Use CR2 Lithium battery. B Use the Home Network app to access the User’s Guide and refer to the Troubleshooting section. Visit our Web site: http://shop.panasonic.com/support LFAQ and troubleshooting hints are available. For your future reference We recommend keeping a record of the following information to assist with any repair under warranty. Serial No.
Manual de instrucciones Sistema de red doméstico Control remoto llavero Modelo n° KX-HNK102 Gracias por adquirir un producto Panasonic. Este documento explica cómo operar el control remoto llavero de forma correcta. Para obtener detalles sobre cómo usar el sistema, consulte la Guía del usuario (página 7). Lea este documento antes de usar la unidad, y guárdelo para consultarlo en el futuro. Para obtener ayuda, comuníquese con nosotros llamando al 1-800-272-7033 o visite nuestro sitio web: http://shop.
Tabla de Contenido Configuración Nombres de los componentes y funciones .........................................3 Led indicador ...................................4 Resumen de configuración ..............4 Insertar la batería ............................5 Sujetar el aro del llavero ..................5 Registrar el control remoto ..............6 Alcance de la comunicación inalámbrica ......................................6 Apéndice Usar el control remoto .....................
Configuración n Vista de la parte posterior Nombres de los componentes y funciones n Vista de la parte frontal E A B F G C D H I Led indicador Botón (Armar: Fuera) Arma el sistema de alarmas en el modo [Armar: Fuera]. Botón (desarmar) Desarma el sistema de alarmas. Botón (inteligente) Se utiliza para encender un enchufe inteligente, activar el sistema de alarmas, etc. Seguro de la cubierta de la batería Cubierta de la batería M N Se usa para registrar el control remoto llavero en el hub.
Configuración Led indicador Puede usar el Led indicador para confirmar el estado del control remoto.
Configuración 3 Insertar la batería R USE SOLO baterías de litio CR2. R Verifique las polaridades ( , ). R Uso de un objeto metálico para abrir el seguro puede rayar el seguro. 1 Elimine la tapa de la batería. R Inserte un objeto estrecho y plano dentro del seguro de la tapa de la batería y gírelo a la posición de “desbloqueo”, según se muestra a continuación. Bloqueado Sujete y bloquee la tapa de la batería. R Después de sujetar la tapa de la batería, gire el seguro a la posición de “bloqueo”.
Configuración Registrar el control remoto Este procedimiento no es necesario para unidades que son parte de un paquete. Antes de que pueda usar el control remoto, se debe registrar en el hub. Si compró los dispositivos por separado (es decir, no como parte de un paquete), debe registrar cada dispositivo en el hub. Puede registrar cada unidad mediante los botones de registro o la aplicación [Home Network].
Apéndice Usar el control remoto Modificación del modo de armado Oprima el botón del modo de armado que desee. R El Led indicador se enciende durante aproximadamente 2 segundos, dependiendo del modo de armado (página 4). R Cuando el modo de armado se cambia con el control remoto llavero, los iconos del modo de armado que aparecen en la aplicación no se cambiarán automáticamente. Los iconos del modo de armado que aparecen se actualizarán cuando la aplicación actualice la pantalla de inicio.
Notas 8