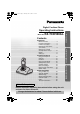
500AL_e.book Page 1 Monday, June 30, 2003 3:17 PM Digital Cordless Phone Operating Instructions KX-TCD500AL Contents Preparation Cordless Telephone 2 5 8 3 6 9 0 Useful Information Using the Belt Clip .....................59 Optional Headset .......................59 Wall Mounting ............................60 Before Requesting Help.............61 Character Table .........................63 Index ..........................................64 Technical Information.................
500AL_e.book Page 2 Monday, June 30, 2003 3:17 PM Before Initial Use Features 32-Polyphonic Ring Tones A variety of high-quality sounds can be reproduced for your ring tones. You can choose from 9 pre-set melodies and 6 ring tones. Hands-Free Speakerphone You can talk without holding the handset. Convenient for talking while doing something else. Headset Jack Plug in the optional headset and the hands-free facility provides total ease and freedom of use.
500AL_e.book Page 3 Monday, June 30, 2003 3:17 PM Before Initial Use Caller ID Service, where available, is a telephone company service. After subscribing to Caller ID, this phone will display the caller’s phone number. 3 Preparation Thank you for purchasing your new Panasonic digital cordless telephone. Dear purchaser, You have acquired a KX-TCD500AL, which is a product made in accordance with the Digital Enhanced Cordless Telecommunications (DECT).
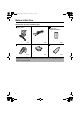
500AL_e.book Page 4 Monday, June 30, 2003 3:17 PM Before Initial Use Accessories (specific to product type) AC Adaptor PQLV19AL Telephone Line Cord one Belt Clip one Telephone Plug one Rechargeable Batteries (AAA size) HHR-4EPT/BA2 two Battery Cover one one Additional accessories are available for purchase. Contact your Panasonic Service Centre for further details.
00AL_e.book Page 5 Monday, June 30, 2003 3:17 PM Important Information Environment Do not use this unit near liquid–for example, near a bath tub, washbowl, sink, etc. Damp basements should also be avoided. The unit should be kept away from heat sources such as heaters, kitchen stoves, etc. It also should not be placed in rooms where the temperature is less than 5 °C or greater than 40 °C. The AC adaptor is used as the main disconnect device.
500AL_e.book Page 6 Monday, June 30, 2003 3:17 PM Important Information Instructions to customer Installation Attached to this telephone is an approval label. This label is evidence that it is a “Permitted Attachment” which has been authorised to be connected to your telephone service. Conditions relating to connection and operation of this Permitted Attachment are contained in Telecommunications General By-Law 220 (5).
500AL_e.book Page 7 Monday, June 30, 2003 3:17 PM Important Information If you are satisfied with the operation of your telephone service after plugging in your Permitted Attachment, your installation is completed. You will be unable to connect this Permitted Attachment if your telephone service consists only of a wall phone or an old style telephone which is not connected by means of a modern plug and socket. In such cases a new socket will need to be installed.
500AL_e.
500AL_e.
500AL_e.book Page 10 Monday, June 30, 2003 3:17 PM Meanings of Symbols and Operations of Keys Symbol Meaning Move the JOYSTICK up, down, left or right. e.g., Search the main menu. e.g., OK e.g., Display of menu items Press JOYSTICK directly in the centre. Press Directly In this example, the desired item is selected. e.g., Redial e.g., Standby Mode Display Press RIGHT SOFT KEY. In this example, the telephone number last dialled is displayed. e.g., Go Back e.g.
500AL_e.book Page 11 Monday, June 30, 2003 3:17 PM Display Display Icons Within range of a base unit Out of range/No registration/ No power on base unit Preparation Paging/Intercom/ While connecting with base unit Making or answering calls IN USE Call Bar ON H/set 1 Phonebook Mode Battery strength Direct Call ON Ringer Volume OFF H/set 1 Handset Name (e.g., Handset 1) New call (Caller ID only) IN USE The line is being used by another handset (for additional handset users).
500AL_e.book Page 12 Monday, June 30, 2003 3:17 PM Setting up Connection Battery Charge Plug in the AC adaptor and the telephone line cord in order 1, 2, 3, 4. Hooks Hook At the time of shipment, the batteries are not charged. To charge, place the handset on the base unit. Please charge the batteries for about 7 hours before initial use. LINE 1 2 Fasten the AC adaptor cord to prevent it from being disconnected. 4 3 • The AC adaptor must remain connected at all times.
500AL_e.book Page 13 Monday, June 30, 2003 3:17 PM Setting up Battery Information After your Panasonic battery is fully charged: Ni-MH Batteries (typical 700 mAh) Operating Time While in use (TALK) 10 hrs approx. While not in use (Standby) 120 hrs approx. Ni-Cd Batteries (typical 250 mAh) Operation Operating Time While in use (TALK) 4 hrs approx. While not in use (Standby) 40 hrs approx. • Times indicated are for peak performance.
500AL_e.book Page 14 Monday, June 30, 2003 3:17 PM Setting up Power ON/OFF Power ON Power OFF Press and hold POWER. When POWER is released, the display changes to the standby mode. Press and hold POWER. The display goes blank. Selecting the Display Language You can select one of 19 languages. The factory preset is English. To exit the operation, press JOYSTICK 1 Press (or move). at any time. “ 2 Select Display Option”. “Select 3 Select Language”. the desired 4 Select language.
500AL_e.book Page 15 Monday, June 30, 2003 3:17 PM Setting up Setting the Date and Time After a mains power failure, the clock needs to be adjusted. Ensure that the not flashing. To exit the operation, press at any time. “ 2 Select Handset”. the date 4 Enter (see below). the time 5 Enter (see below). Setting “Set 3 Select Time”. Date/ Preparation JOYSTICK 1 Press (or move). icon is 6 Press JOYSTICK. Example: To set 16 February, 2003, 7:15 pm.
500AL_e.book Page 16 Monday, June 30, 2003 3:17 PM Using the Telephone Making a Call Pre-Dialling Phone 1 Enter Number. Post-Dialling 2 Press TALK. 1 Press TALK. Phone 2 Enter Number. • If you need to make a correction while entering the phone number when using PreDialling, press . The digit is cleared to the left, then you can enter numbers. All digits are cleared if you press and hold . • You can also press to make a call. Answering a Call Terminating a Call Press TALK. Press TALK OFF.
500AL_e.book Page 17 Monday, June 30, 2003 3:17 PM Using the Telephone Receiver (or Headset Receiver)/Speaker Volume The choices for the receiver (or headset receiver) volume are 3 levels, and 6 levels for the speakerphone volume. (During a call) To increase volume, move the JOYSTICK up. To decrease volume, move the JOYSTICK down.
500AL_e.book Page 18 Monday, June 30, 2003 3:17 PM Using the Telephone Key Lock You can lock the handset dialling buttons. Only incoming calls are accepted while the key lock is ON. When the key lock is ON, the menu icon changes to . When the key lock is ON, emergency calls cannot be made until key lock is cancelled. Key Lock ON Key Lock OFF (Standby Mode Display) Press and hold JOYSTICK directly for more than 2 seconds. Press and hold JOYSTICK directly for more than 2 seconds once more.
500AL_e.book Page 19 Monday, June 30, 2003 3:17 PM Using the Telephone Redialling The last 10 numbers dialled are automatically stored in the redial list. Dialling with the Redial List 1 Press RIGHT SOFT KEY. for the desired 2 Search dialled item. 3 Press TALK. • If there are no items stored in the redial list when pressing , the display shows “Memory Empty”. • If the items are scrolled at the end when you search for the desired dialled item, an end tone sounds. • You can also press to make a call.
500AL_e.book Page 20 Monday, June 30, 2003 3:17 PM Using the Telephone Dialling Pause (for PBX line/long distance service users) A dialling pause is used when a pause in the dialling of a phone number is necessary using a PBX or accessing a long distance service. For example, when 0 (line access number) is dialled followed by a pause to access an outside line through a PBX: 1 Press 0. RIGHT SOFT 2 Press KEY. Phone 3 Enter Number. 4 Press TALK.
500AL_e.book Page 21 Monday, June 30, 2003 3:17 PM Caller ID Caller ID Service Caller ID is a service of your telephone company and will only operate if you have subscribed to this service. After subscribing to Caller ID, this phone will display the caller information. If your unit is connected to a PBX or a telephone line that does not support this service, you will not be able to use it. Standby Mode Display H/set 1 10 Calls 17.
500AL_e.book Page 22 Monday, June 30, 2003 3:17 PM List Menu Caller ID List Menu You can save the numbers from the Caller ID list into the phonebook, and you can edit (for calling) or delete item(s) in the Caller ID List. To exit the operation, press at any time. JOYSTICK 1 Press (or move). “ 2 Select ID”. Caller the desired 3 Select item. Go to step 4. • If the items are scrolled at the end when you search for the desired item, an end tone sounds.
500AL_e.book Page 23 Monday, June 30, 2003 3:17 PM List Menu Deleting One/All Caller ID Item(s) Follow steps 1 to 3 on the previous page, then: 4 Select “Delete” or “Delete All”. “Yes”, then “Deleted” is 5 Select displayed. Redial List Menu You can save the numbers from the redial list into the phonebook, and you can edit (for calling) or delete item(s) in the redial list. To exit the operation, press at any time. 1 Press RIGHT SOFT KEY. 2 Select the desired item.
500AL_e.book Page 24 Monday, June 30, 2003 3:17 PM List Menu Editing the Dialled Number for Calling Follow steps 1 and 2 on the previous page, then: “Edit for 3 Select Call”. Phone 4 Edit Number. TALK or press 5 Press JOYSTICK to call. (max. 24 digits) OR • You can also press to make a call. Deleting One/All Redial Item(s) Follow steps 1 and 2 on the previous page, then: 3 Select “Delete” or “Delete 24 All”. “Yes”, then “Deleted” is 4 Select displayed.
500AL_e.book Page 25 Monday, June 30, 2003 3:17 PM Using the Phonebook You can store up to 200 caller information in the phonebook. If you subscribed to Caller ID and you received a call from the same phone number you stored with name in the phonebook, the display will show the caller’s name. Private Category Feature You can categorise caller information in the phonebook. There are 9 categories available. For example, category 1 can be used to save friends’ numbers.
500AL_e.book Page 26 Monday, June 30, 2003 3:17 PM Using the Phonebook Storing Caller Information To exit the operation, press at any time. LEFT SOFT 1 Press KEY. JOYSTICK to enter, then the display shows 2 Press the number of empty phonebook entries. Name (p.27). 3 Enter (max. 16 characters) 4 Press JOYSTICK. Phone 5 Enter Number. (max. 24 digits) 6 Press JOYSTICK. the desired 7 Select category or “Off”. “Save”, then 8 Select “Saved” is displayed.
500AL_e.book Page 27 Monday, June 30, 2003 3:17 PM Using the Phonebook Entering Names/Characters Keys Operations Move the JOYSTICK up, down, left or right to move the cursor (a flashing digit). 0 to 9 Press to enter letters/numbers. (Items are added to the left of the cursor. If the cursor is at the beginning of a line, the item is added at the beginning.) Press to delete characters. (Character on the cursor is deleted. To delete all characters, press and hold.
500AL_e.book Page 28 Monday, June 30, 2003 3:17 PM Using the Phonebook Finding Items in the Phonebook All phonebook items are stored in the following order: Alphabet letter/Symbol/Number/ Telephone Number (when a name is not stored). To exit the operation, press at any time. 1 Press LEFT SOFT KEY. Move the JOYSTICK up or down to 2 search for the desired item. Searching for a Name by Initial Example: To find “Felix” LEFT SOFT 1 Press KEY. 3 repeatedly 2 Press until the first item under “F” is displayed.
500AL_e.book Page 29 Monday, June 30, 2003 3:17 PM Using the Phonebook Searching by Index Search Mode Example: To find “ΣΟΦΙΑ” (SOPHIA). 1 Press LEFT SOFT KEY. RIGHT SOFT 2 Press KEY. “Index 3 Select Search”. RIGHT SOFT KEY 4 Press repeatedly until the the desired 5 Select initial character “Σ”. the 6 Move JOYSTICK down desired input mode (Greek) appears. until “ΣΟΦΙΑ” is displayed. LEFT SOFT 1 Press KEY.
500AL_e.book Page 30 Monday, June 30, 2003 3:17 PM Using the Phonebook Deleting Caller Information To exit the operation, press LEFT SOFT 1 Press KEY. at any time. the desired 2 Select item. 3 Select “Delete”. “Yes”, then 4 Select “Deleted” is displayed. • To continue deleting other caller information, repeat from step 2. • If there are no items stored in the phonebook when searching for the desired item, the display shows “Memory Empty”.
500AL_e.book Page 31 Monday, June 30, 2003 3:17 PM Using the Phonebook Hot Keys You can assign the dialling buttons phone numbers from the phonebook. To exit the operation, press through as hot keys. You can choose 9 at any time. Registering a Phone Number as a Hot Key LEFT SOFT 1 Press KEY. the desired 2 Select item. the desired 4 Select dialling button “Save”, then 5 Select “Saved” is displayed. “Reg. 3 Select Hot Key”. to number.
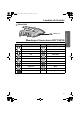
500AL_e.book Page 32 Monday, June 30, 2003 3:17 PM Settings Menu Chart Handset Settings Menu Chart 1st Menu Setting Handset 2nd Menu Set Date/Time Memo Alarm Ringer Option Tone Option Display Option Call Option Registration Ringer Volume EXT Ringer Type INT Ringer Type Paging Tone Private Ring Key Tone Standby Display Talk Display Select Language Private Colour Category Name Call Bar Direct Call No.
500AL_e.
500AL_e.book Page 34 Monday, June 30, 2003 3:17 PM Handset Settings Memo Alarm Set the date and time before setting the memo alarm (p.15). To exit the operation, press at any time. 1 Press JOYSTICK (or move). 2 Select “ 3 Select “Memo the desired alarm number 4 Select (1-3). Alarm”. Setting Handset”. Go to step 5. Setting the Alarm Mode “Once” or “Daily” Follow steps 1 to 4 shown above, then: “Once” or 5 Select “Daily”. Enter the 6 “Once”: date and time. 7 Press JOYSTICK.
500AL_e.book Page 35 Monday, June 30, 2003 3:17 PM Handset Settings Setting the Alarm “Off” Follow steps 1 to 4 on the previous page, then: 5 Select “Off”. 6 Select “Save”, then “Saved” is displayed. • The factory preset is “Off”. • To delete the displayed memo alarm, press previous page. then select “Yes” on step 4 on the To Stop the Alarm Press • You can also stop the alarm by pressing , . , to , , or . • If “Once” is selected, the setting is turned off.
500AL_e.book Page 36 Monday, June 30, 2003 3:17 PM Handset Settings Ringer Options There are 15 ringer patterns available on each ringer. “Ringer 1” to “Ringer 6” are the bell ringer patterns. “Ringer 7” to “Ringer 15” are the preset melody patterns as shown below. The music data in this product belongs to M-ZoNE Co., Ltd. To exit the operation, press at any time. Ringer No. 1-6 Ringer Pattern or Name Bell Patterns Ringer Pattern 7 to 15: Preset Melody Patterns 7 Symphony No.
500AL_e.book Page 37 Monday, June 30, 2003 3:17 PM Handset Settings Setting the Ringer Volume The choices are 6 levels and off. If you set the volume to OFF, “ however, the paging and intercom call volumes will be at level 1. JOYSTICK 1 Press (or move). “ 2 Select Option”. Ringer increase volume, move the JOYSTICK up. 4 To To decrease volume, move the JOYSTICK down. ” is displayed, “Ringer 3 Select Volume”. 5 Press JOYSTICK. • The factory preset is 6.
500AL_e.book Page 38 Monday, June 30, 2003 3:17 PM Handset Settings Setting the Handset Key Tone ON/OFF You can turn the key tone ON/OFF. To exit the operation, press at any time. JOYSTICK 1 Press (or move). “ 2 Select Handset”. JOYSTICK to 4 Press select “Key Tone”. 5 Select “On” or “Off”. Setting “Tone 3 Select Option”. • The factory preset is “On”. Display Options To exit the operation, press JOYSTICK 1 Press (or move). at any time. “ 2 Select Display Option”. Go to step 3.
500AL_e.book Page 39 Monday, June 30, 2003 3:17 PM Handset Settings Selecting the Talk Mode Display Follow steps 1 to 2 of Display Options on the previous page, then: 3 Select “Talk Display”. “Talk 4 Select Number”. Time” or “Phone • Even if you select “Phone Number”, the length of the call will appear on your display when you receive calls. • The factory preset is “Talk Time”. Setting the Private Colour Follow steps 1 to 2 of Display Options on the previous page, then: Colour”.
500AL_e.book Page 40 Monday, June 30, 2003 3:17 PM Handset Settings Call Options To exit the operation, press JOYSTICK 1 Press (or move). at any time. “ 2 Select Handset”. Setting “Call 3 Select Option”. Go to step 4. Call Bar ON/OFF When this feature is set to ON, outgoing calls cannot be made. Intercom calls and calls to numbers assigned as emergency numbers can be made (see Setting the Emergency Calls on page 45). Follow steps 1 to 3 shown above, then: 4 Select “Call Bar”.
500AL_e.book Page 41 Monday, June 30, 2003 3:17 PM Handset Settings Setting the Direct Call ON/OFF Follow steps 1 to 3 on the previous page, then: 4 Select “Direct 5 Select “On” or “Off”. On/Off”. • If the direct call mode is turned off, “ ” will disappear. • If you did not set the Direct Call Number and select “On” in step 5, “Enter Phone No” will be displayed. Enter the number, then press twice. Other Options To exit the operation, press “ 2 Select Handset”. Setting “Other 3 Select Option”.
500AL_e.book Page 42 Monday, June 30, 2003 3:17 PM Handset Settings Changing the Handset Name Follow steps 1 to 3 on the previous page, then: “Change 4 Select Name”. Handset Name. 5 Edit (max. 10 characters) H/S 6 Press JOYSTICK. Setting Auto Talk ON/OFF Follow steps 1 to 3 on the previous page, then: 4 Select “Auto 5 Select “On” or “Off”. Talk”. • The factory preset is “Off”. Setting the Battery Type Follow steps 1 to 3 on the previous page, then: 4 Select “Battery 5 Select “Ni-Cd” or “Ni-MH”.
500AL_e.
500AL_e.book Page 44 Monday, June 30, 2003 3:17 PM Base Unit Settings Setting the Base Unit Ringer Volume To exit the operation, press 1 Press JOYSTICK (or at any time. “ 2 Select Setting Base”. 4-digit Base Unit PIN. 3 Enter (Factory Preset 0000) move). “Ringer 4 Select Option”. “Ringer 5 Select Volume”. increase volume, move the JOYSTICK up. 6 To To decrease volume or set to OFF, move the 7 Press JOYSTICK. JOYSTICK down. (3 levels) • The factory preset is medium.
500AL_e.book Page 45 Monday, June 30, 2003 3:17 PM Base Unit Settings Selecting the Recall Time You can change the duration of the recall time depending on the requirements of your telephone company or PBX. Follow steps 1 to 4 of Call Options on the previous page, then: 5 Select “Recall”. “Type 1” (700 ms), “Type 6 Select “Type 3” (200 ms). 2” (100 ms) or • The factory preset is “Type 2” (100 ms).
500AL_e.book Page 46 Monday, June 30, 2003 3:17 PM Base Unit Settings Call Restriction You can restrict selected handset(s) from dialling selected phone numbers. You can assign up to 6 call restriction numbers (up to 8 digits). If you dial a restricted number, the call does not connect and the restricted number flashes. Follow steps 1 to 4 of Call Options on page 44, then: “Call 5 Select Restricted”. and press RIGHT 6 Search SOFT KEY to attach (or 7 Press JOYSTICK.
500AL_e.book Page 47 Monday, June 30, 2003 3:17 PM Base Unit Settings Other Options To exit the operation, press JOYSTICK 1 Press (or move). at any time. “ 2 Select Base”. Setting 4-digit Base 3 Enter Unit PIN. (Factory Preset 0000) 4 Select “Other Option”. Go to step 5. Changing the Base Unit PIN (Personal Identification Number) Once you have programmed the base unit PIN, you cannot confirm it. We recommend you write down the base unit PIN.
500AL_e.
500AL_e.book Page 49 Monday, June 30, 2003 3:17 PM Multi-Unit User Operations Operating Additional Handsets Additional KX-TCA151AZ handsets are available for purchase separately. Up to 6 handsets can be registered to a single base unit. Using additional handsets allows you to have an intercom call while simultaneously conducting a call to an outside line. Operating Additional Base Units You can register and operate your handset with up to 4 base units. Each base unit forms 1 radio cell.
0AL_e.book Page 50 Monday, June 30, 2003 3:17 PM Multi-Unit User Operations Handset Registration to a Base Unit The handset supplied with the base unit is already registered. If an optional handset is purchased, it must be registered as follows. Charge the optional handset batteries for 7 hours before initial use. Handset registration must be completed within 1 minute after pressing . If over 1 minute, press then start over again. To exit the operation, press at any time. JOYSTICK 1 Press (or move).
500AL_e.book Page 51 Monday, June 30, 2003 3:17 PM Multi-Unit User Operations Cancelling a Handset Each handset can cancel itself or another handset. This feature is usually used to cancel a link between Handset and Base Unit. To exit the operation, press at any time. 1 Press JOYSTICK (or move). 2 Select “ 4-digit Base Unit PIN. 3 Enter (Factory Preset 0000) 4 Select “Cancel and press RIGHT SOFT 5 Search KEY to attach “ ” to the 6 Press JOYSTICK. Setting Base”. Handset”.
500AL_e.book Page 52 Monday, June 30, 2003 3:17 PM Multi-Unit User Operations Base Unit Selection When “Auto” (Automatic Base Unit Selection) is selected, the handset automatically searches for other registered base units if you move outside of the radio range of the current base unit. When a specified base unit is selected, the handset will access that base unit only.
500AL_e.book Page 53 Monday, June 30, 2003 3:17 PM Multi-Unit User Operations Transferring a Call to Another Handset The intercom can be used during a call to transfer an external call between handsets that are registered to the same base unit. To exit the operation, press at any time. For example, when Handset 1 transfers a call to Handset 2: (During a call) 1 Press INTERCOM , then press the desired handset number . 2 Press TALK . 3 Press TALK OFF .
500AL_e.book Page 54 Monday, June 30, 2003 3:17 PM Multi-Unit User Operations Phonebook Copy You can copy phonebook information between handsets registered to the same base unit. The phonebook copy must be performed while in intercom mode (see Intercom Between Handsets on page 52). To exit the operation, press at any time. Copying an Item (During an intercom call) 1 Press JOYSTICK. 2 Select “Recv Phonebook”. “Start Copying” is displayed.
500AL_e.book Page 55 Monday, June 30, 2003 3:17 PM Multi-Unit User Operations Copying All Items To exit the operation, press at any time. Follow steps 1 to 4 on the previous page, then: 5 Press JOYSTICK. 6 Select “Copy All Items”. 55 Cordless Telephone • When copying is completed, a beep sounds and “Copy Complete” is displayed. After a few seconds, the display will return to the intercom call.
500AL_e.book Page 56 Monday, June 30, 2003 3:17 PM Walkie-Talkie The Walkie-Talkie feature allows handsets to communicate with each other outside the range of the base unit. When the handsets are in Walkie-Talkie mode, external calls cannot be received. Only KX-TCA151AZ with Walkie-Talkie feature can communicate with one another. Talk time in this mode is approximately 6 hours. Standby time in this mode is approximately max.15 hours. (It changes by the use conditions.
500AL_e.book Page 57 Monday, June 30, 2003 3:17 PM Walkie-Talkie To exit the operation, press at any time. JOYSTICK 1 Press (or move). 2 Select “ 3 Select “Setting”. 4 Select “Common” or “Group”. Walkie-Talkie”. When “Group” was selected; 6 Press JOYSTICK. Handset Number. 7 Enter (1-9: Factory Preset is 1.) 8 Press JOYSTICK twice. Cordless Telephone 3-digit Group Code.
500AL_e.book Page 58 Monday, June 30, 2003 3:17 PM Walkie-Talkie Turning the Walkie-Talkie Mode On/Off To use the Walkie-Talkie feature, all handsets in conversation must be in Walkie-Talkie mode. To exit the operation, press at any time. To Turn the Walkie-Talkie Mode On JOYSTICK 1 Press (or move). “ 2 Select Talkie”. 3 Select “On”. Walkie- • When the Walkie-Talkie mode is ON, the handset number is displayed after “Walkie-Talkie” appears on the display.
500AL_e.book Page 59 Monday, June 30, 2003 3:17 PM Using the Belt Clip You can hang the handset on your belt or pocket using the belt clip. To remove the belt clip. Optional Headset Plugging an optional headset into the handset allows hands-free phone conversations. Please use only the Panasonic KX-TCA88AL headset. While using the headset, speakerphone is not available. To switch to speakerphone, disconnect the headset.
500AL_e.book Page 60 Monday, June 30, 2003 3:17 PM Wall Mounting This unit can be mounted on a wall. - Insert screws into the wall. The centre of the screw holes should be 8 cm horizontally apart. - Connect the AC adaptor and the telephone line cord. - Arrange the wires as shown, then mount the unit. 8 cm Hooks Screws Fasten the AC adaptor cord to prevent it from being disconnected. • Make sure the screws are securely fastened to the wall.
500AL_e.book Page 61 Monday, June 30, 2003 3:17 PM Before Requesting Help If you experience any problems with the normal use of your apparatus, you should unplug it from the telephone outlet and connect a known working telephone in its place. If the known working telephone still has problems, then please contact the customer service department of your telephone company. If it operates correctly, then the problem is likely to be a fault in your apparatus. In this case, contact your supplier for advice.
500AL_e_05.fm Page 62 Wednesday, July 2, 2003 2:59 PM Before Requesting Help Problem No dial tone. Possible cause • Telephone line not connected. Solution Page • Insert telephone line cord p.12 to network. • Turn power OFF then p.14 • Call Bar mode ON. • Turn feature OFF. • Particular dialled number • Remove number from p.40 p.46 • Key lock mode ON. • Turn key lock OFF. p.18 Handset will not ring. • Ringer switched off. • Set ringer to one of 6 p.37 Last number redial does not work.
500AL_e.
500AL_e.book Page 64 Monday, June 30, 2003 3:17 PM Index AC Adaptor ........................................ 4, 12 Accessories.............................................. 4 Answering a Call .................................... 16 Any Key Talk .......................................... 16 Auto Talk .......................................... 16, 42 Base Unit Initial Settings.................................... 48 PIN .................................................... 47 Reset.............................
500AL_e.book Page 65 Monday, June 30, 2003 3:17 PM Technical Information Specifications Standard: Number of channels: Frequency range: Duplex procedure: Channel spacing: Bit rate: Modulation: RF Transmission power: Voice coding: Power source: Power consumption, base unit: Operating conditions: Dimensions and mass (weight): Base Unit: Handset: DECT=(Digital Enhanced Cordless Telecommunications) GAP=(Generic Access Profile) 120 Duplex Channels 1.88 GHz to 1.
500AL_e.
500AL_e.
500AL_e_06.fm Page 68 Monday, June 30, 2003 6:09 PM For your future reference Serial No. (found on the bottom of the base unit) Date of purchase Name and address of dealer Attach or keep original receipt to assist with any repair under warranty. Technical specifications are subject to change. N52 Sales Department: Panasonic Australia Pty Ltd. Austlink Corporate Park 1 Garigal Road Belrose NSW 2085 Australia Panasonic Communications Co., Ltd.